Làm thế nào để tạo ra Universal iOS Static libraries bằng XCFramework
Bài đăng này đã không được cập nhật trong 4 năm
Chắc hẳn các bạn làm dự án về iOS cũng sẽ hay sử dụng các bộ thư viện ngoài nhưng có lúc nào bạn phải tự làm một bộ thư viện để cung cấp cho các dự án khác sử dụng chưa?
Tức nhiên sẽ có nhiều giải pháp để làm việc này như CocoaPod. Nhưng nếu yêu cầu là static libraries thì như thế nào?
Vấn đề gặp phải
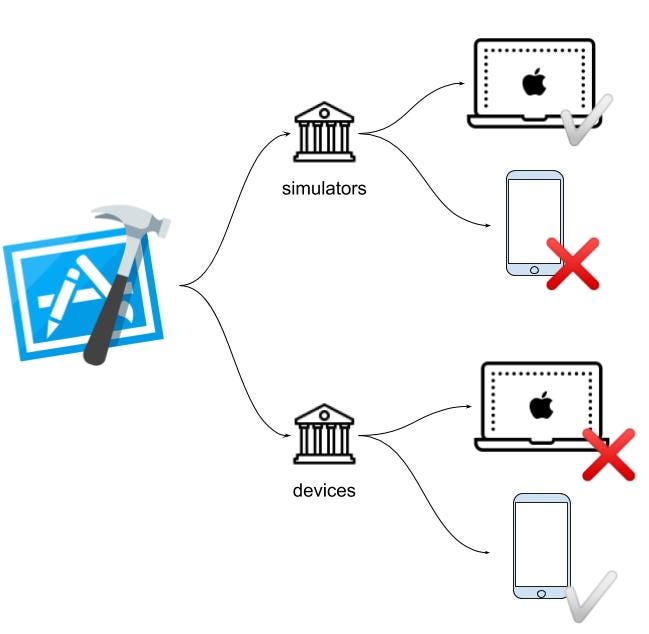
Để build một static libraires là một việc rất khó khăn rồi. Tuy nhiên bản build lại chỉ có sử dụng ở iOS simulator hay devices, không hỗ trợ cùng lúc cho cả 2.

Icons provided by icons8.com
Vì vậy hôm nay mình sẽ giới thiệu để giải quyết vấn đề đó bằng XCFrameworks.
XCFramework là gì?
XCFramework là một cấu trúc thư mục chứa các bản build variant của cùng một module.
A build variant là một module dùng để chuyển đổi mã nguồn thành các lệnh máy tính hay nhị phân cho kiến trúc CPU.
Ví dụ: iOS có thể chạy trong simulator của mac với x86_64, khác với iOS trên iPhone và iPad arm64.
Build variants có thể gồm:
- iOS simulators — x86_64
- iOS devices — arm64
- iOS devices — armv7
- tvOS simulator — x86_64
- tvOS devices — arm64
Tại sao sử dụng XCFramework
XCFramework kết hợp nhiều build variant của cùng một thư viện và interface. Nó giúp cho dự án dễ dàng sử dụng mà không cần phải chuyển đổi giữa Simulator và device.

Làm thế nào để build Universal Static Library bằng XCFramework
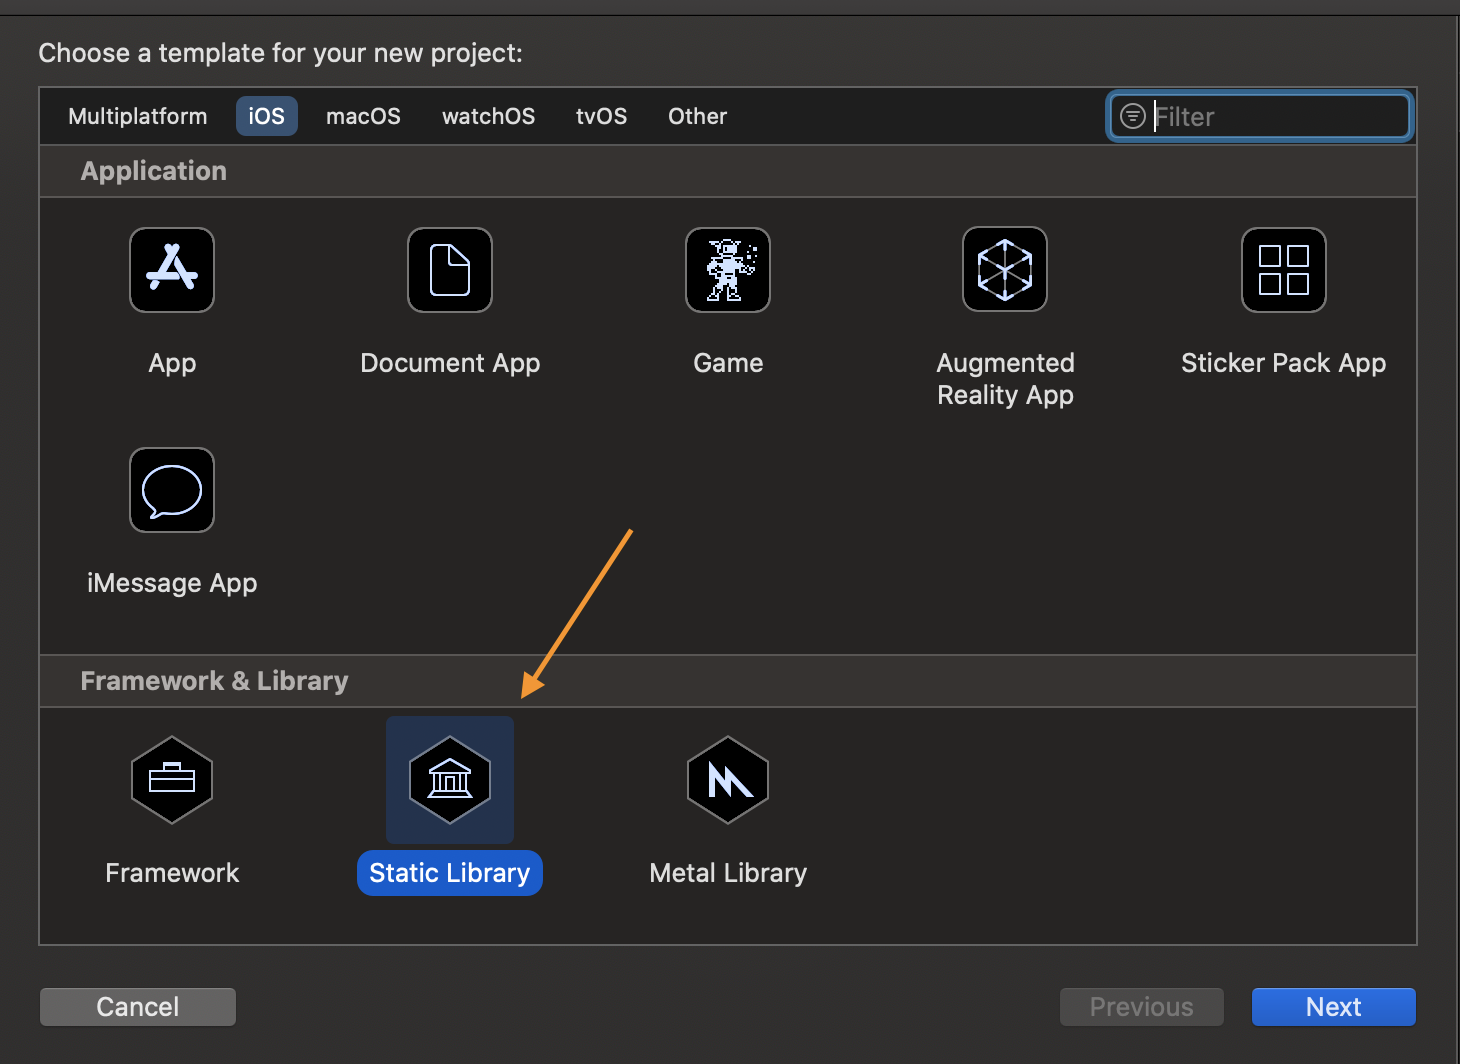
Tạo dự án static library
Khởi tạo dự án với static library

Mình có đoạn code như sau:
public func functionA() {
    print("Function A")
}

public func functionB() {
    print("Function B")
}
Các bạn cứ thoải mái build thử xem có lỗi không nhé.
Tạo static library cho Simulator và devices.
Mình sẽ sử dụng terminal để build nhé. (Giả sử dự án mình đặt là MyStatic)
- Bạn CD đến thư mục dự án
cd ~/MyStatic
mkdir build
- Build cho Simulator
xcodebuild build \
  -scheme MyStatic \
  -derivedDataPath derived_data \
  -arch x86_64 \
  -sdk iphonesimulator \
  BUILD_LIBRARY_FOR_DISTRIBUTION=YES
mkdir -p build/simulators
cp -r derived_data/Build/Products/Debug-iphonesimulator/ build/simulators
- Build cho Device
xcodebuild build \
  -scheme MyStatic \
  -derivedDataPath derived_data \
  -arch arm64 \
  -sdk iphoneos \
  BUILD_LIBRARY_FOR_DISTRIBUTION=YES
mkdir -p build/devices
cp -r derived_data/Build/Products/Debug-iphoneos/ build/devices
Đoạn command line #2 #3 sẽ generate ra bản build có chứa 2 folder dành simulators và devices.
Sau khi build bản mở folder build sẽ thấy cấu trúc như sau
build
├── devices
│   ├── MyStatic.swiftmodule
│   │   ├── Project
│   │   │   ├── arm64-apple-ios.swiftsourceinfo
│   │   │   └── arm64.swiftsourceinfo
│   │   ├── arm64-apple-ios.swiftdoc
│   │   ├── arm64-apple-ios.swiftinterface
│   │   ├── arm64-apple-ios.swiftmodule
│   │   ├── arm64.swiftdoc
│   │   ├── arm64.swiftinterface
│   │   └── arm64.swiftmodule
│   └── libMyStatic.a
└── simulator
    ├── MyStati.swiftmodule
    │   ├── Project
    │   │   ├── x86_64-apple-ios-simulator.swiftsourceinfo
    │   │   └── x86_64.swiftsourceinfo
    │   ├── x86_64-apple-ios-simulator.swiftdoc
    │   ├── x86_64-apple-ios-simulator.swiftinterface
    │   ├── x86_64-apple-ios-simulator.swiftmodule
    │   ├── x86_64.swiftdoc
    │   ├── x86_64.swiftinterface
    │   └── x86_64.swiftmodule
    └── libMyStatic.a
Tạo ra một XCFramework
xcodebuild -create-xcframework \
    -library build/simulators/libMyStatic.a \
    -library build/devices/libMyStatic.a \
    -output build/MyStatic.xcframework
Dòng lệnh trên sẽ yêu cầu tạo ra xcframework với 2 build variants. Dưới đây là kết quả
 MyStatic.xcframework
├── Info.plist
├── ios-arm64
│   ├── MyStatic.swiftmodule
│   │   ├── Project
│   │   │   ├── arm64-apple-ios.swiftsourceinfo
│   │   │   └── arm64.swiftsourceinfo
│   │   ├── arm64-apple-ios.swiftdoc
│   │   ├── arm64-apple-ios.swiftinterface
│   │   ├── arm64.swiftdoc
│   │   └── arm64.swiftinterface
│   └── libMyStaticLib.a
└── ios-x86_64-simulator
    ├── MyStatic.swiftmodule
    │   ├── Project
    │   │   ├── x86_64-apple-ios-simulator.swiftsourceinfo
    │   │   └── x86_64.swiftsourceinfo
    │   ├── x86_64-apple-ios-simulator.swiftdoc
    │   ├── x86_64-apple-ios-simulator.swiftinterface
    │   ├── x86_64.swiftdoc
    │   └── x86_64.swiftinterface
    └── libMyStatic.a
Kết quả là xcframework đã complie ios-arm64 và ios-x86_64 lại thành một. bây giờ bạn có thể sử dụng xcframework ở các dự án khác mà không cần phải quan tâm đến việc dùng simulator hay devices.
Kết
Hy vọng bài viết sẽ giúp các bạn đơn giản hoá việc tạo ra một bộ thư viện iOS.
All rights reserved