Intro to Keras The Python Deep Learning library
Bài đăng này đã không được cập nhật trong 4 năm
What/Why is Keras?
Keras is a python library which use to build a deep learning model with just a few short lines of code. It can run on top of TensorFlow, CNTK, or Theano which is the ideal for deep learning beginner to build and explore the power of deep learning with ease.
There are few resons why you should choose Keras for building your project:
- Allows for easy and fast prototyping (through user friendliness, modularity, and extensibility).
- Supports both convolutional networks and recurrent networks, as well as combinations of the two.
- Runs seamlessly on CPU and GPU.
Installation
Before installing Keras, you need to install one of its backend engines: TensorFlow, Theano, or CNTK. Where TensorFlow is the recommend backend engine.
Then you can install Keras into your machine via a command:
sudo pip install keras
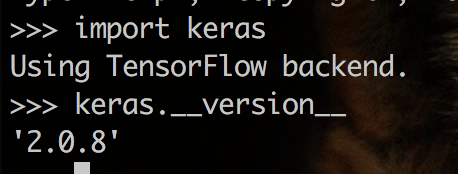
To verify Keras go into python console and type:
import keras
keras.__version__
Then you should see the version of Kerasthat installed on your machine.
Getting Start
With Keras, deep learning model are very easy to create, but there are 5 key steps you must follow. Therefore, in this post we are going to explore all of them. For this exploration, we crop the lines where we use to create CNN(Convolutional Neural Network) model in our previous post . So, you maybe not able to find some definition of some variables in this post. However, you can few the workable code from this post.
# https://github.com/RathanakSreang/MachineLearning/blob/master/FacialRecognition/train_model.py#L72
# create a Sequential model
model = Sequential()
# add layers
model.add(Conv2D(32, (3, 3), input_shape=input_shape, padding='same', activation='relu', kernel_constraint=maxnorm(3)))
model.add(Dropout(0.2))
model.add(Conv2D(32, (3, 3), activation='relu', padding='same', kernel_constraint=maxnorm(3)))
model.add(MaxPooling2D(pool_size=(2, 2)))
model.add(Flatten())
model.add(Dense(512, activation='relu', kernel_constraint=maxnorm(3)))
model.add(Dropout(0.5))
model.add(Dense(num_classes, activation='softmax'))
epochs = 25
lrate = 0.01
decay = lrate/epochs
sgd = SGD(lr=lrate, momentum=0.9, decay=decay, nesterov=False)
model.compile(loss='categorical_crossentropy', optimizer=sgd, metrics=['accuracy'])
model.fit(X_train, y_train, validation_data=(X_test, y_test), epochs=epochs, batch_size=32)
scores = model.evaluate(X_test, y_test, verbose=0)

# https://github.com/RathanakSreang/MachineLearning/blob/master/FacialRecognition/test_model.py#L57
loaded_model.predict(faceImage)
The 22 lines above are the core codes where we use to build our previous post Facial Recognition System. Now, let's learn more about them.
1. Define Model The Models in Keras are defined as a sequence of layers. So we need to create a Sequential model and add layers one at a time until we are happy with our network topology.
# create a Sequential model
model = Sequential()
Adding layers is as easy as .add() to our created model.
However, the first layer has to have the correct number of inputs which we can be specified when we create the layer with input_shape. In our case, input_shape is the shape of array pixel of an input image.
input_shape=img_data[0].shape
# add first layer
model.add(Conv2D(32, (3, 3), input_shape=input_shape, padding='same', activation='relu', kernel_constraint=maxnorm(3)))
Then we add more layers to structure our model:
Since the model is a classification model, so we need to set the number of output units to the last layer which it is 4 in our example.
num_classes = 4
model.add(Dense(num_classes, activation='softmax'))
Here the code for defining the model:
# create a Sequential model
model = Sequential()
# add layers
model.add(Conv2D(32, (3, 3), input_shape=input_shape, padding='same', activation='relu', kernel_constraint=maxnorm(3)))
model.add(Dropout(0.2))
model.add(Conv2D(32, (3, 3), activation='relu', padding='same', kernel_constraint=maxnorm(3)))
model.add(MaxPooling2D(pool_size=(2, 2)))
model.add(Flatten())
model.add(Dense(512, activation='relu', kernel_constraint=maxnorm(3)))
model.add(Dropout(0.5))
model.add(Dense(num_classes, activation='softmax'))
you can learn more about Keras model from here
2. Compile Model
After the model defined, we can compile it with .compile(). The model compilation is always required after defining a model. During the compilation, we need to specify the optimization algorithm, the loss function, and metrics.
In optimization, we tune the optimizer's configuration to produce a good learning model. In this case, we set:
- epochs = 25
- learning rate = 0.01
- SGD as optimizer
- momentum=0.9
We set loss functions to categorical_crossentropy since it is a classification model.
loss='categorical_crossentropy'
Because it is a classification problem, we will collect and report the classification accuracy as the metric.
metrics=['accuracy']
Here the code for the model compilation:
# Compile model
epochs = 25
lrate = 0.01
decay = lrate/epochs
sgd = SGD(lr=lrate, momentum=0.9, decay=decay, nesterov=False)
model.compile(loss='categorical_crossentropy', optimizer=sgd, metrics=['accuracy'])
you can learn more about Keras optimizer from here
3. Fit Model
After the model compiled, it can be fit with the prepared dataset by calling the .fit() method to the model. In our case:
We pass the people's face image as training data. Because we have only few trainning dataset, we also use training data as validation data.
Here the code for the model fitting:
# Fit the model
# X_train is array of faces.
# y_train is output of image faces.
epochs = 25
model.fit(X_train, y_train, validation_data=(X_test, y_test), epochs=epochs, batch_size=32)
you can learn more about model fitting from here
4. Evaluate Model
We can use evaluate() function to evaluate our trained model which it returns the loss value & metrics values for the model in test mode. For our case:
We keep some data for using in this evaluation(*We should not use training data for this evaluation the accuracy of our model).
# Final evaluation of the model
scores = model.evaluate(X_test, y_test, verbose=0)
print("Accuracy: %.2f%%" % (scores[1]*100))
you can learn more about model evaluation from here
Then you can save the model for later use.
5. Make Pridections
We can use predict() function to predict the new input data which it will return output predictions for the input samples. For our case:
We capture face from webcam, and process it into predictable format. Then we pass it into the predict() function.
loaded_model.predict(faceImage)
Resources
- https://viblo.asia/p/facial-recognition-system-face-recognition-Ljy5Vr6j5ra
- https://github.com/RathanakSreang/MachineLearning/blob/master/FacialRecognition/train_model.py#L72
- https://keras.io/
- https://machinelearningmastery.com/tutorial-first-neural-network-python-keras/
- https://machinelearningmastery.com/5-step-life-cycle-neural-network-models-keras/
Summary
This post, you learn about Keras and how we use it to build a deep learning APPs with ease. We discuss about Keras and how to set it up on our machine. Then we explain more detail about the step we use to build the Keras model by using our previous post as example.
All rights reserved
