Expanding TableviewCell trong Swift
Bài đăng này đã không được cập nhật trong 7 năm
1. Mở đầu
-
Xin chào các bạn, như tiêu đề thì ở bài viết này mình sẽ hướng dẫn các bạn cách tạo ra cell mở rộng trong UITableView. Như các bạn đã biết, có rất nhiều ứng dụng sử dụng phương pháp này, mục đích là để hiển thị thêm thông tin và làm cho ứng dụng trông gọn gàng hơn.
-
ví dụ:
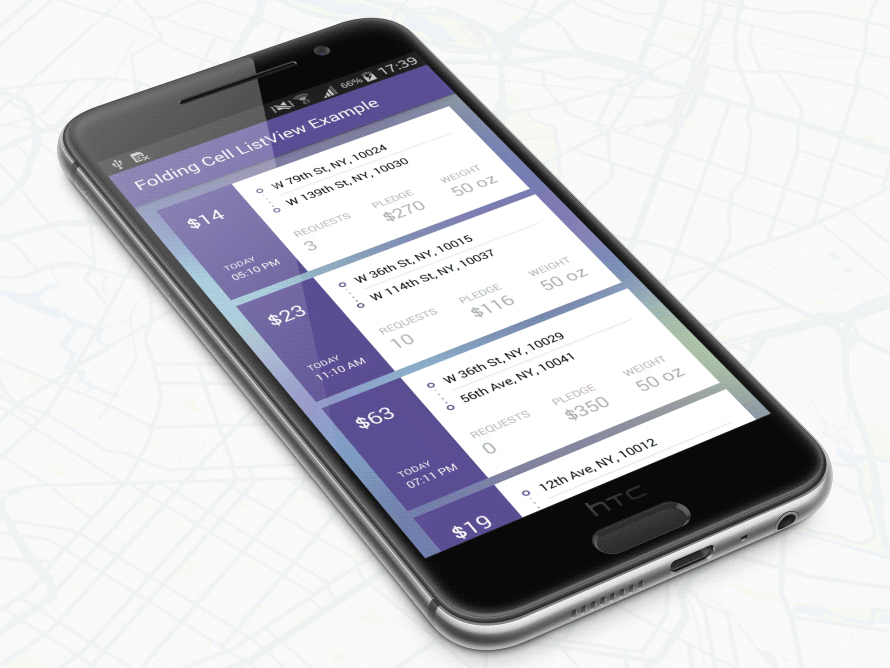
Nhìn trông rất bắt mắt đúng không?  Tạm bỏ qua amination các thứ, tiếp theo mình sẽ làm một demo đơn giản để cho các bạn xem. Let's go!
2. Cách thực hiện
2.1: Khởi tạo tạo UITableView
-
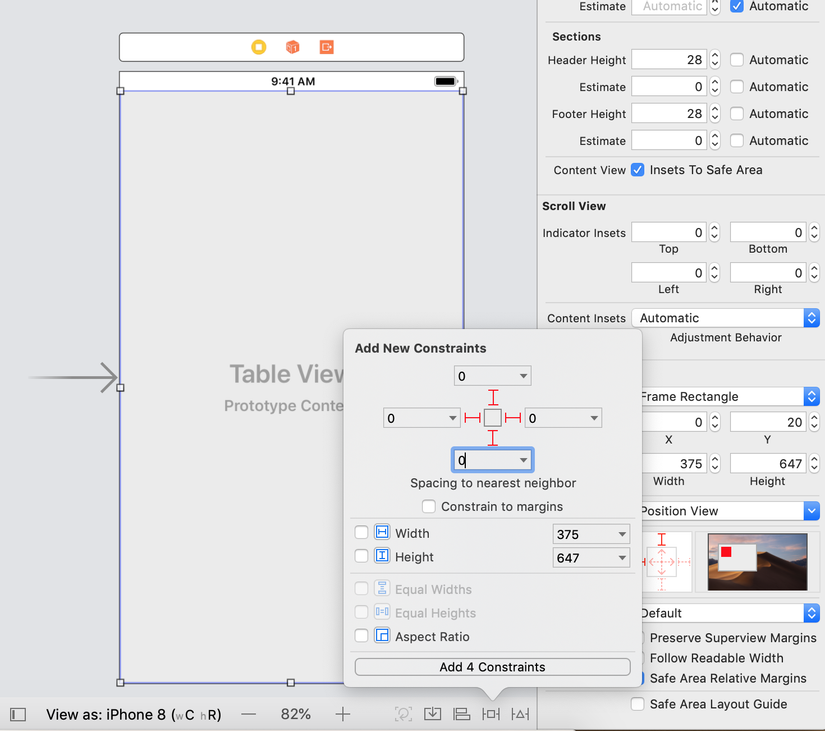
Đầu tiên các bạn hãy tạo UITableView bằng cách kéo thả ở trong Main.StoryBoard, update cả constraint và kéo outlet cho nó luôn nhé:
-
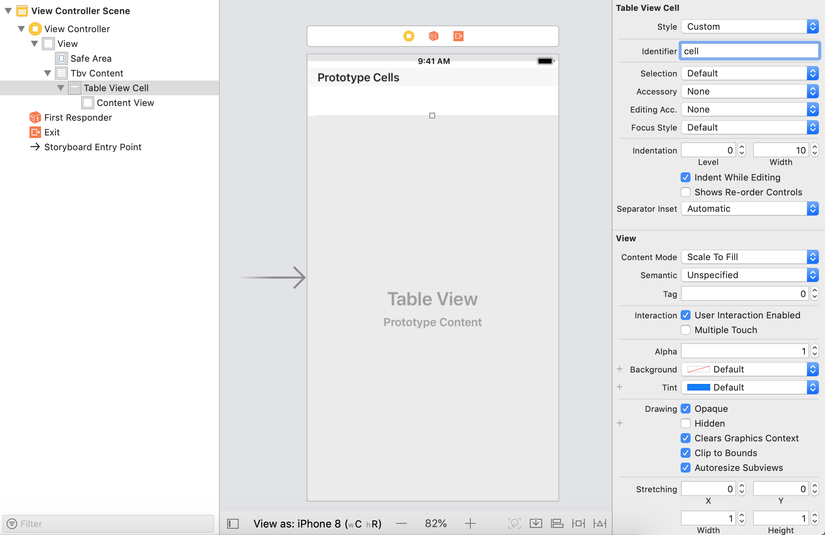
Vì đây là demo đơn gian nên mình sẽ sử dụng cell mặc định luôn nhé, các bạn kéo UITableViewCell vào trong UITableView và set identifier cho nó:
-
Vậy là tạo xong UI rồi đó
2.2: Khởi tạo model
- Giờ mình sẽ tạo một model đơn giản nhé, các bạn có thể viết ra file mới hoặc ngay trong file ViewController hiện tại cũng được:
struct cellData {
    var opened: Bool
    var title: String
    var sectionData: [String]
}
-
Giải thích một chút:
opened: Cái này quan trọng này, dùng để check xem cell có đang được mở rộng hay không (Quyết định để mở rộng cell)
title: là tên của sections?
sectionData: là tên của cell bên trong sections?
-
Bên trong class ViewController, ta sẽ tạo một danh sách model và tạo dữ liệu cho chúng:
var tableViewData: [cellData] = []

    override func viewDidLoad() {
        super.viewDidLoad()
        // Do any additional setup after loading the view, typically from a nib.
        tbvContent.delegate = self
        tbvContent.dataSource = self

        tableViewData = [cellData(opened: false, title: "Title1", sectionData: ["Cell1", "Cell2", "Cell3", "Cell4"]),
                         cellData(opened: false, title: "Title2", sectionData: ["Cell1", "Cell2"]),
                         cellData(opened: false, title: "Title3", sectionData: ["Cell1", "Cell2", "Cell3"])]

    }
- Ấu kề, thế là phần khởi tạo dữ liệu đã xong, giờ mình sẽ xử lý nó bên trong UITableViewDataSource nhé!
2.3: Xử lý dữ liệu
- Các bạn hãy làm theo như sau nhé:
extension ViewController: UITableViewDelegate, UITableViewDataSource {
    func numberOfSections(in tableView: UITableView) -> Int {
        return tableViewData.count
    }

    func tableView(_ tableView: UITableView, numberOfRowsInSection section: Int) -> Int {
        if tableViewData[section].opened {
            return tableViewData[section].sectionData.count
        } else {
            return 1
        }
    }

    func tableView(_ tableView: UITableView, cellForRowAt indexPath: IndexPath) -> UITableViewCell {
        if indexPath.row == 0 {
        //Cell này coi là section này!
            guard let cell = tableView.dequeueReusableCell(withIdentifier: "cell") else { return UITableViewCell() }
            cell.textLabel?.text = tableViewData[indexPath.section].title
            cell.backgroundColor = .yellow
            return cell
        } else {
        //Cell tuỳ biến, đây là cell nhỏ sau khi mở rộng ra nhé!
            guard let cell = tableView.dequeueReusableCell(withIdentifier: "cell") else { return UITableViewCell() }
            cell.textLabel?.text = tableViewData[indexPath.section].sectionData[indexPath.row]
            cell.backgroundColor = .white
            return cell
        }
    }

    func tableView(_ tableView: UITableView, didSelectRowAt indexPath: IndexPath) {
        if tableViewData[indexPath.section].opened {
            tableViewData[indexPath.section].opened = false
            let sections = IndexSet.init(integer: indexPath.section)
            tableView.reloadSections(sections, with: .automatic)
        } else {
            tableViewData[indexPath.section].opened = true
            let sections = IndexSet.init(integer: indexPath.section)
            tableView.reloadSections(sections, with: .automatic)
        }
    }
}
- Giải thích: Ở func numberOfRowsInSection khi tableViewData[section].opened là false mọi người sẽ nghĩ nó phải return về 0 vì lúc đấy section có được mở đâu mà có cell nào xuất hiện được, nhưng ở đây mình không làm thế
 section ở đây mình không có hiển thị lên đâu nhé, cái row đầu tiên mình coi là section rồi đó, vì vậy nên khi không có cell mở rộng thì phải return về 1 để tượng trưng cho section. Các bạn có thể xem func cellForRowAt để hiểu hơn. Ở func didSelectRowAt mình sẽ thay đổi status của cell, đoạn này thì đơn giản rồi mình không giải thích thêm nhé!
  Run thử nào!
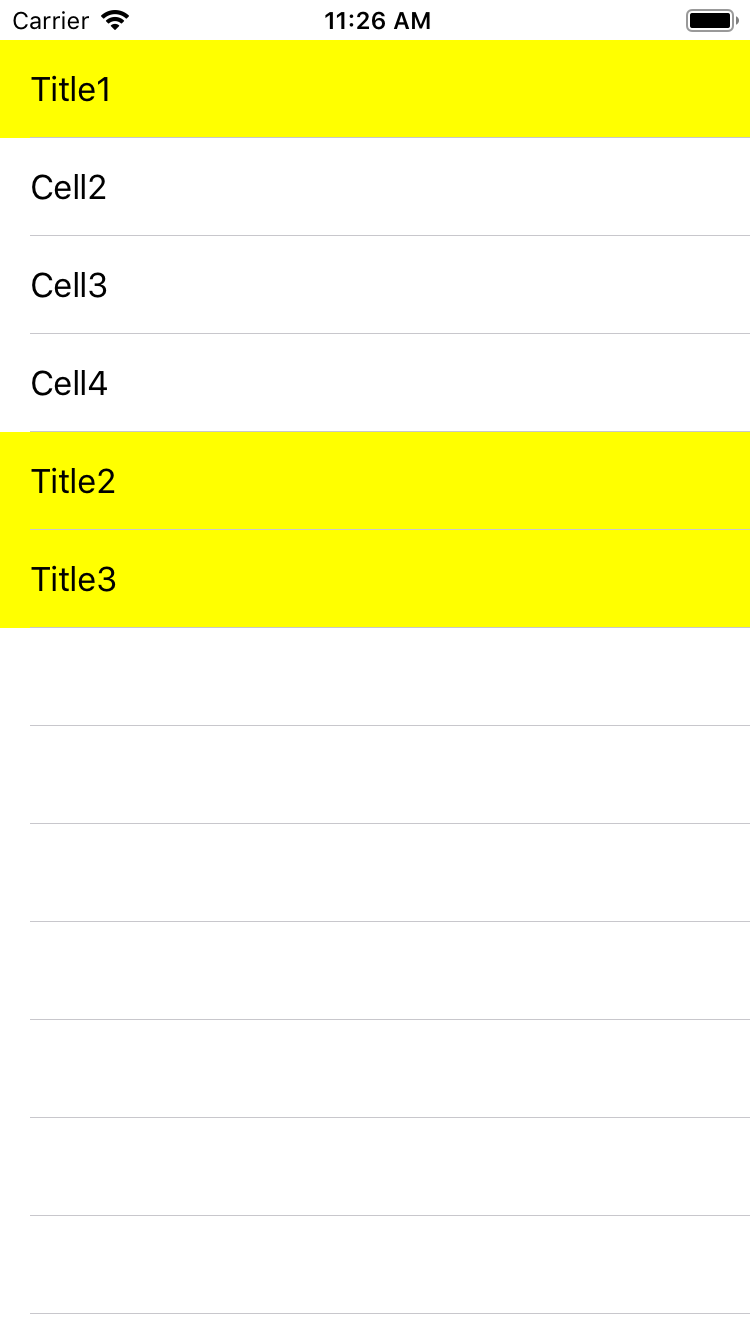
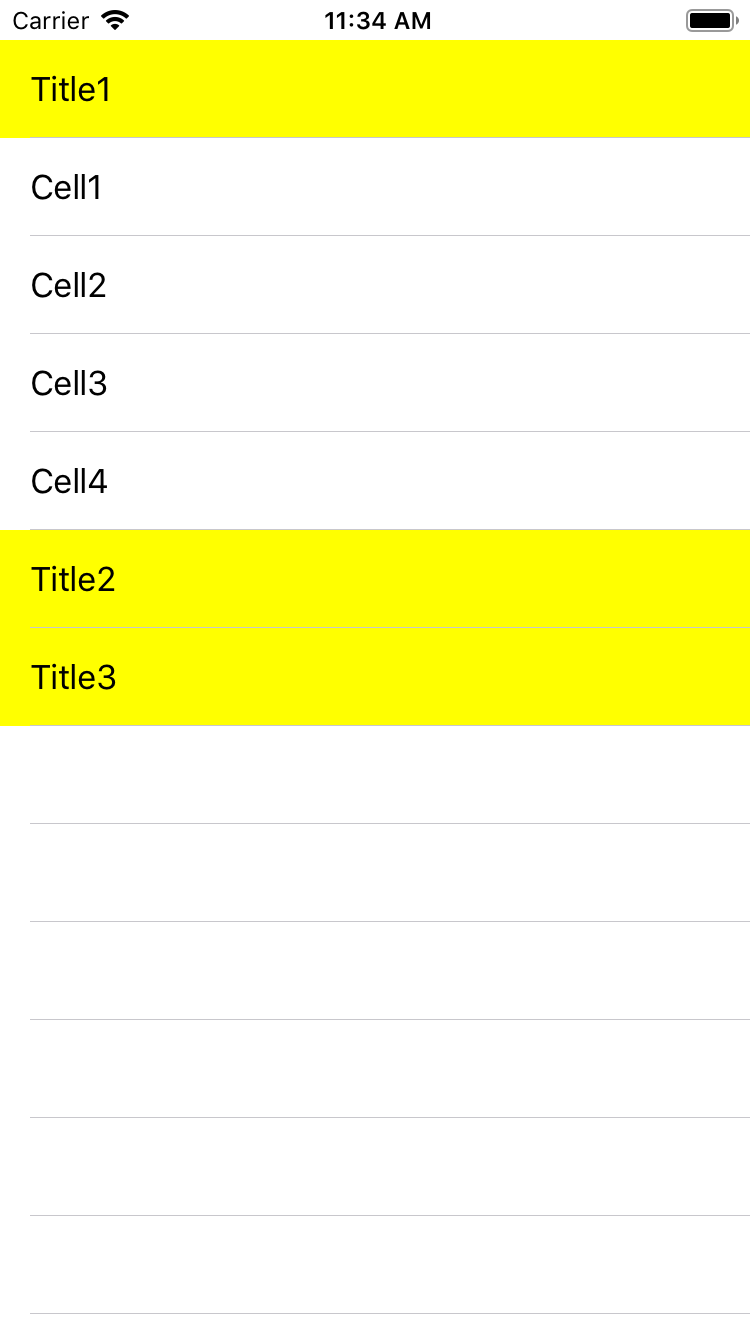
Ngon, lên rồi này  ơ mà khoan hình như có gì sai sai, thiếu mất 1 cell khi mở rộng rồi kìa. Ở đây mình sửa lại một chút nhé, vì không có section nên mình coi row 0 là thay thế cho section vì vậy khi mở rộng ra mình phải thêm 1 row để thay thế cho section nhé:
func tableView(_ tableView: UITableView, numberOfRowsInSection section: Int) -> Int {
        if tableViewData[section].opened {
            return tableViewData[section].sectionData.count + 1
        } else {
            return 1
        }
    }
Khi ấy thì dưới cell mở rộng phải lùi đi 1 đơn vị, hiện tại đang tính index.row = 1 chứ không phải là 0 nên mình phải trừ đi 1 đơn vị nhé:
//Cell tuỳ biến, đây là cell nhỏ sau khi mở rộng ra nhé!
guard let cell = tableView.dequeueReusableCell(withIdentifier: "cell") else { return UITableViewCell() }
cell.textLabel?.text = tableViewData[indexPath.section].sectionData[indexPath.row - 1]
cell.backgroundColor = .white
return cell
Run lại nào!
Excellent! 
3. Lời kết
Qua đây mong rằng đã giúp các bạn hiểu được các tạo ra expanding cell, để mượt và đẹp hơn nữa thì còn phải tuỳ biến nhiều thứ lắm, nhưng không sao chúng ta có nhiều thời gian mà Try hard mỗi ngày để lên level các bạn nhé! 
Tài liệu được tham khảo từ kênh youtube của bạn: Jared Davidson
https://www.youtube.com/watch?v=ClrSpJ3txAs
All rights reserved
