Deploy "mô hình học máy" với Django Part 2
Bài đăng này đã không được cập nhật trong 5 năm
Lời mở đầu
Tiếp nối phần 1 ở đây -> (https://viblo.asia/p/deploy-mo-hinh-hoc-may-voi-django-part-1-6J3ZgPkWlmB) Hôm nay nhân trời đẹp, như tiêu đề, tôi làm tiếp phần 2 của series 2 phần này, các task chủ yếu ở đây là:
- Thêm inference vào Django app.
- Giới thiệu các bạn về A/B testing trong ML.
- Đóng gói project bằng Docker.
Dự đoán kết quả
Tóm tắt nội dung trong bài viết trước:
- Tạo 2 model:
- Tạo Django app có kết nối với Database và trên hết có REST API.
- Đẩy code lên GIT, tạo ML registry
Nội dung trong phần này:
- Tạo view nhận request từ người dùng.
- Thêm API URL cho view.
- Viết test dự đoán kết quả.
Tạo view cho prediction
Nếu các bạn quen thuộc với Django thì biết khi tạo app Django sẽ có thêm file view.py, trong file này ta sẽ code để nhận request từ phương thức POST của REST API với dữ liệu dưới dạng JSON format, rồi đẩy request tới hàm dự đoán.
Trong file backend/server/app/views.py, các bạn thêm class PredictView kế thừa từ view.APIView nhằm tạo API cho class này.
import json
from numpy.random import rand
from rest_framework import views, status
from rest_framework.response import Response
from server.wsgi import registry


class PredictView(views.APIView):
    def post(self, request, endpoint_name, format=None):

        algorithm_status = self.request.query_params.get("status", "production")
        algorithm_version = self.request.query_params.get("version")

        algs = MLModel.objects.filter(parent_endpoint__name = endpoint_name, status__status = algorithm_status, status__active=True)

        if algorithm_version is not None:
            algs = algs.filter(version = algorithm_version)

        if len(algs) == 0:
            return Response(
                {"status": "Error", "message": "ML algorithm is not available"},
                status=status.HTTP_400_BAD_REQUEST,
            )
        if len(algs) != 1 and algorithm_status != "ab_testing":
            return Response(
                {"status": "Error", "message": "ML algorithm selection is ambiguous. Please specify algorithm version."},
                status=status.HTTP_400_BAD_REQUEST,
            )

        alg_index = 0
        if algorithm_status == "ab_testing":
            alg_index = 0 if rand() < 0.5 else 1

        algorithm_object = registry.endpoints[algs[alg_index].id]
        prediction = algorithm_object.compute_prediction(request.data)

        label = prediction["label"] if "label" in prediction else "error"
        ml_request = MLRequest(
            input_data=json.dumps(request.data),
            full_response=prediction,
            response=label,
            feedback="",
            parent_mlmodel=algs[alg_index],
        )
        ml_request.save()

        prediction["request_id"] = ml_request.id

        return Response(prediction)
Code bên trên khá dài nên tôi sẽ giải thích từng dòng.
Chắc không cần giải thích import đâu nhỉ  , dựa vào 2 dòng code bên dưới, tôi sẽ chỉ định cụ thể mô hình nào dự đoán kết quả, ở đây xét theo trạng thái và phiên bản mô hình. Bởi vì những thông số này là hyperparameters có thể thay đổi nên tôi khuyến khích các bạn để biến ở file config hoặc file .env rồi call vào file cho dễ quản lý.
algorithm_status = self.request.query_params.get("status", "production")
algorithm_version = self.request.query_params.get("version")
Call instance object của MLModel dựa trên param truyền vào.
algs = MLModel.objects.filter(parent_endpoint__name = endpoint_name, status__status = algorithm_status, status__active=True)
if algorithm_version is not None:
    algs = algs.filter(version = algorithm_version)
Ở đây chúng ta chỉ lựa chọn 1 mô hình để dự đoán nên phải có câu lệnh if...else kiểm tra lỗi nếu phát sinh, xét 2 trường hợp: không có mô hình và có nhiều hơn 1 mô hình.
if len(algs) == 0:
    return Response(
        {"status": "Error", "message": "ML algorithm is not available"},
        status=status.HTTP_400_BAD_REQUEST,
    )
if len(algs) != 1 and algorithm_status != "ab_testing":
    return Response(
        {"status": "Error", "message": "ML algorithm selection is ambiguous. Please specify algorithm version."},
        status=status.HTTP_400_BAD_REQUEST,
    )
Đoạn code về a/b testing này sẽ giải thích sau.
alg_index = 0
if algorithm_status == "ab_testing":
    alg_index = 0 if rand() < 0.5 else 1
Load mô hình để predict dựa trên id. Sau khi có kết quả dự đoán thì thêm thông tin request vào bảng MLRequest.
algorithm_object = registry.endpoints[algs[alg_index].id]
prediction = algorithm_object.compute_prediction(request.data)

label = prediction["label"] if "label" in prediction else "error"
ml_request = MLRequest(
    input_data=json.dumps(request.data),
    full_response=prediction,
    response=label,
    feedback="",
    parent_mlmodel=algs[alg_index],
)
ml_request.save()
Giải thích xong, nhưng chỉ viết class ở file view sẽ không tạo ra ngay API được nên chúng ta phải có thêm bước tạo route cho API view này.
Import class vào file backend/server/server/urls.py.
from app.views import PredictView
Thêm url, với param endpoint_name là thông tin của model có thể lấy từ api endpoint.
url(r"^api/v1/(?P<endpoint_name>.+)/predict$", PredictView.as_view(), name="predict")
Cả đoạn code có dạng sau:
from django.contrib import admin
from django.urls import path
from django.conf.urls import url, include
from rest_framework.routers import DefaultRouter
from app.views import EndpointViewSet
from app.views import MLModelViewSet
from app.views import MLModelStatusViewSet
from app.views import MLRequestViewSet
from app.views import PredictView

router = DefaultRouter(trailing_slash=False)
router.register(r"endpoints", EndpointViewSet, basename="endpoints")
router.register(r"mlmodels", MLModelViewSet, basename="mlmodels")
router.register(r"mlmodelstatuses", MLModelStatusViewSet,
                basename="mlmodelstatuses")
router.register(r"mlrequests", MLRequestViewSet, basename="mlrequests")

urlpatterns = [
    url(r"^api/v1/", include(router.urls)),
    url(r"^api/v1/(?P<endpoint_name>.+)/predict$", PredictView.as_view(), name="predict"),
    path('admin/', admin.site.urls),
]
Ví dụ:
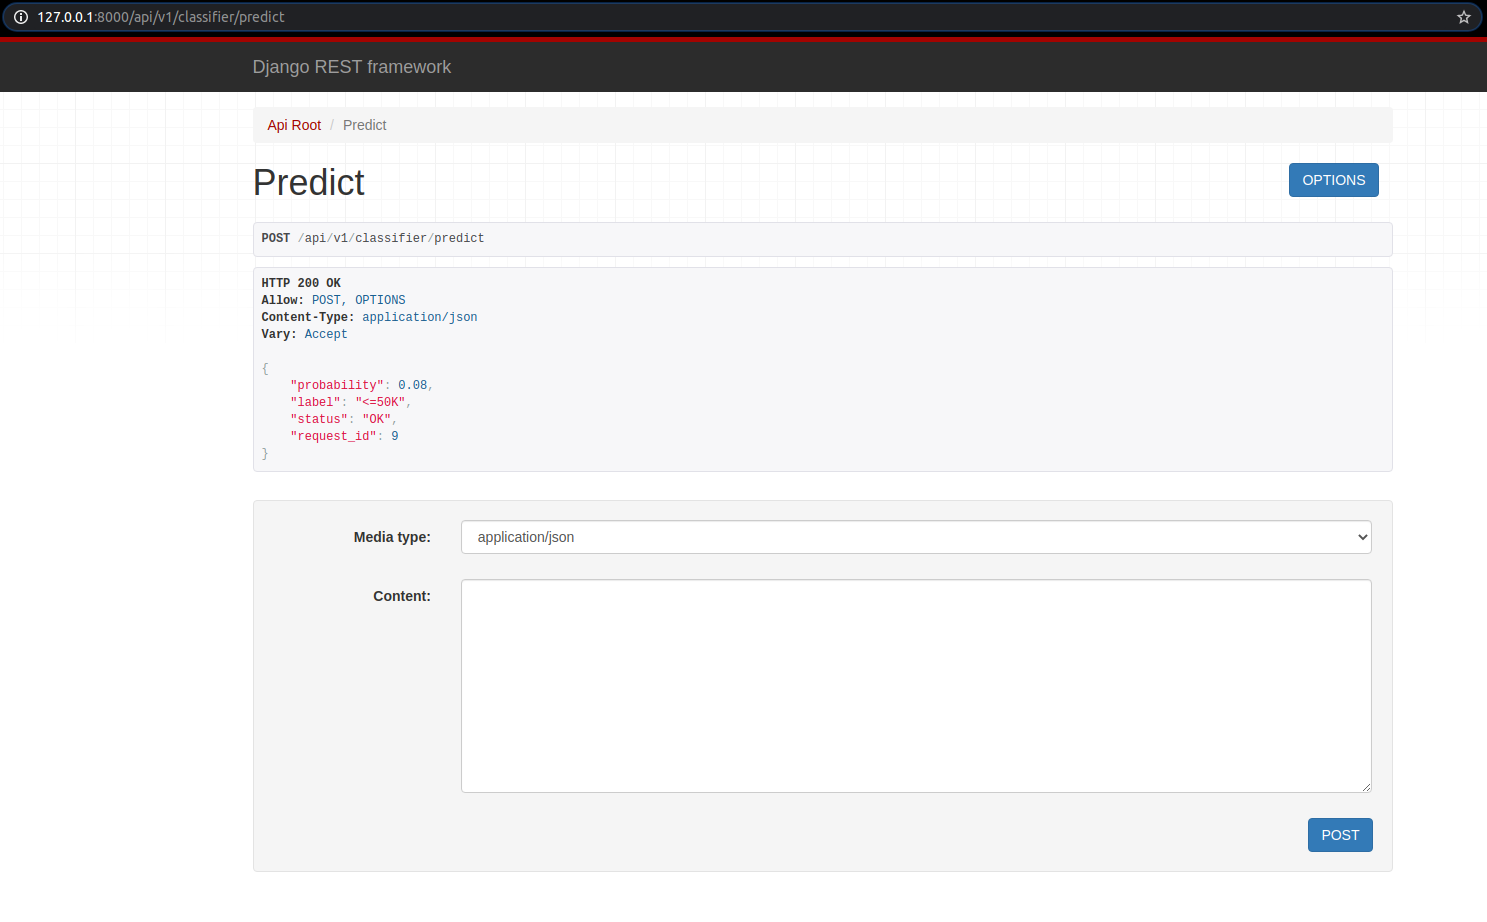
Tôi có endpoint_name là classifier. Vậy, url API để predict là:
http://127.0.0.1:8000/api/v1/classifier/predict
 Chuẩn bị dữ liệu để test:
{
    "age": 37,
    "workclass": "Private",
    "fnlwgt": 34146,
    "education": "HS-grad",
    "education-num": 9,
    "marital-status": "Married-civ-spouse",
    "occupation": "Craft-repair",
    "relationship": "Husband",
    "race": "White",
    "sex": "Male",
    "capital-gain": 0,
    "capital-loss": 0,
    "hours-per-week": 68,
    "native-country": "United-States"
}
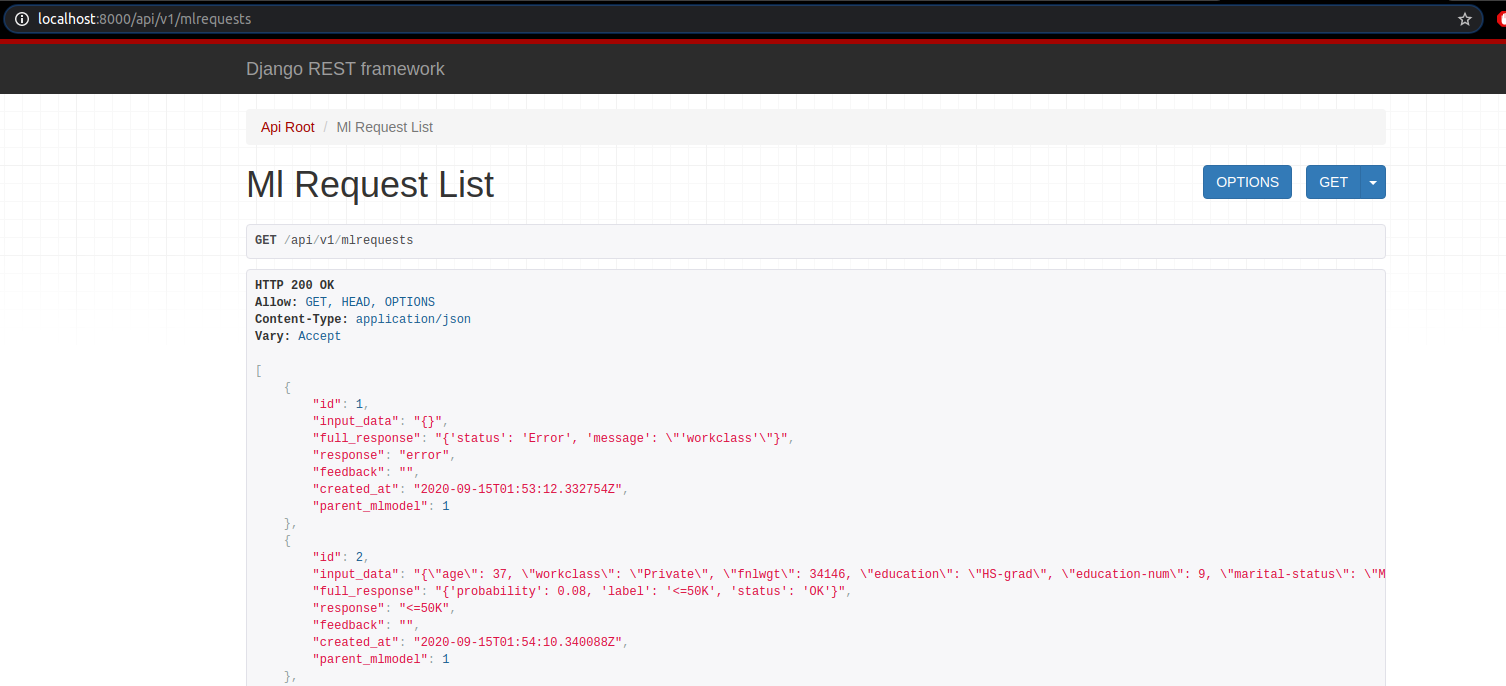
Kết quả:
Tương ứng, thông tin về request cũng được cập nhật trong db.
Test Predict View
Tôi viết 1 test case đơn giản để test cái API này phát. Trong file backend/server/app/tests.py tôi thêm class APITests kế thừa từ TestCase.
class APITests(TestCase):
    def test_predict_view(self):
        client = APIClient()
        input_data = {
            "age": 37,
            "workclass": "Private",
            "fnlwgt": 34146,
            "education": "HS-grad",
            "education-num": 9,
            "marital-status": "Married-civ-spouse",
            "occupation": "Craft-repair",
            "relationship": "Husband",
            "race": "White",
            "sex": "Male",
            "capital-gain": 0,
            "capital-loss": 0,
            "hours-per-week": 68,
            "native-country": "United-States"
        }
        classifier_url = "/api/v1/classifier/predict"
        response = client.post(classifier_url, input_data, format='json')
        self.assertEqual(response.status_code, 200)
        self.assertEqual(response.data["label"], "<=50K")
        self.assertTrue("request_id" in response.data)
        self.assertTrue("status" in response.data)
Chạy file test
python manage.py test app.tests or python manage.py test app
A/B testing
Nói sơ qua về A/B testing nhé, bạn có 1 sản phẩm A cần feedback từ người dùng, nhưng nếu chỉ có 1 sản phẩm thì cũng khó để mà biết thị hiếu người dùng nên bạn cần thêm 1 sản phẩm B nữa. Thông qua so sánh 2 sản phẩm, ta có thể biết % người dùng thích sản phẩm nào hơn.
Trong phần này, tôi sẽ làm các task sau:
- Thêm 1 ML Model vào web service
- Tạo db và api view cho A/B tests
Thêm 1 ML Model
Ở các phần trên tôi đã và đang dùng model RandomForest, vì vậy tôi sẽ thêm model ExtraTree. Tạo một file tên extra_trees.py trong thư mục backend/server/ml/classifier. Code thì khá giống với random_forest.py nên tôi không giải thích thêm.
import joblib
import pandas as pd


class ExtraTreesClassifier:
    def __init__(self):
        path_to_artifacts = "../../research/"
        self.values_fill_missing = joblib.load(
            path_to_artifacts + "train_mode.joblib")
        self.encoders = joblib.load(path_to_artifacts + "encoders.joblib")
        self.model = joblib.load(path_to_artifacts + "extra_trees.joblib")

    def preprocessing(self, input_data):
        # JSON to pandas DataFrame
        input_data = pd.DataFrame(input_data, index=[0])
        # fill missing values
        input_data.fillna(self.values_fill_missing)
        # convert categoricals
        categories = ["workclass", "education", "marital-status", "occupation",
                      "relationship", "race", "sex", "native-country"]
        for column in categories:
            enc = self.encoders[column]
            input_data[column] = enc.transform(input_data[column])

        return input_data

    def predict(self, input_data):
        return self.model.predict_proba(input_data)

    def postprocessing(self, input_data):
        label = "<=50K"
        if input_data[1] > 0.5:
            label = ">50K"
        return {"probability": input_data[1], "label": label, "status": "OK"}

    def compute_prediction(self, input_data):
        try:
            input_data = self.preprocessing(input_data)
            prediction = self.predict(input_data)[0]  # only one sample
            prediction = self.postprocessing(prediction)
        except Exception as e:
            return {"status": "Error", "message": str(e)}

        return prediction
Thêm testcase cho mô hình extra trees: hàm test_et_algorithm nằm trong class MLTests thuộc file backend/server/app/tests.py.
def test_et_algorithm(self):
    input_data = {
        "age": 37,
        "workclass": "Private",
        "fnlwgt": 34146,
        "education": "HS-grad",
        "education-num": 9,
        "marital-status": "Married-civ-spouse",
        "occupation": "Craft-repair",
        "relationship": "Husband",
        "race": "White",
        "sex": "Male",
        "capital-gain": 0,
        "capital-loss": 0,
        "hours-per-week": 68,
        "native-country": "United-States"
    }
    my_alg = ExtraTreesClassifier()
    response = my_alg.compute_prediction(input_data)
    self.assertEqual('OK', response['status'])
    self.assertTrue('label' in response)
    self.assertEqual('<=50K', response['label'])
Nhét model vào ML registry trong file backend/server/server/wsgi.py
from ml.classifier.extra_trees import ExtraTreesClassifier

# Extra Trees classifier
et = ExtraTreesClassifier()
# add to ML registry
registry.add_algorithm(endpoint_name="classifier",
                        algorithm_object=et,
                        algorithm_name="extra trees",
                        algorithm_status="testing",
                        algorithm_version="0.0.1",
                        owner="Kami",
                        algorithm_description="Extra Trees with simple pre- and post-processing")
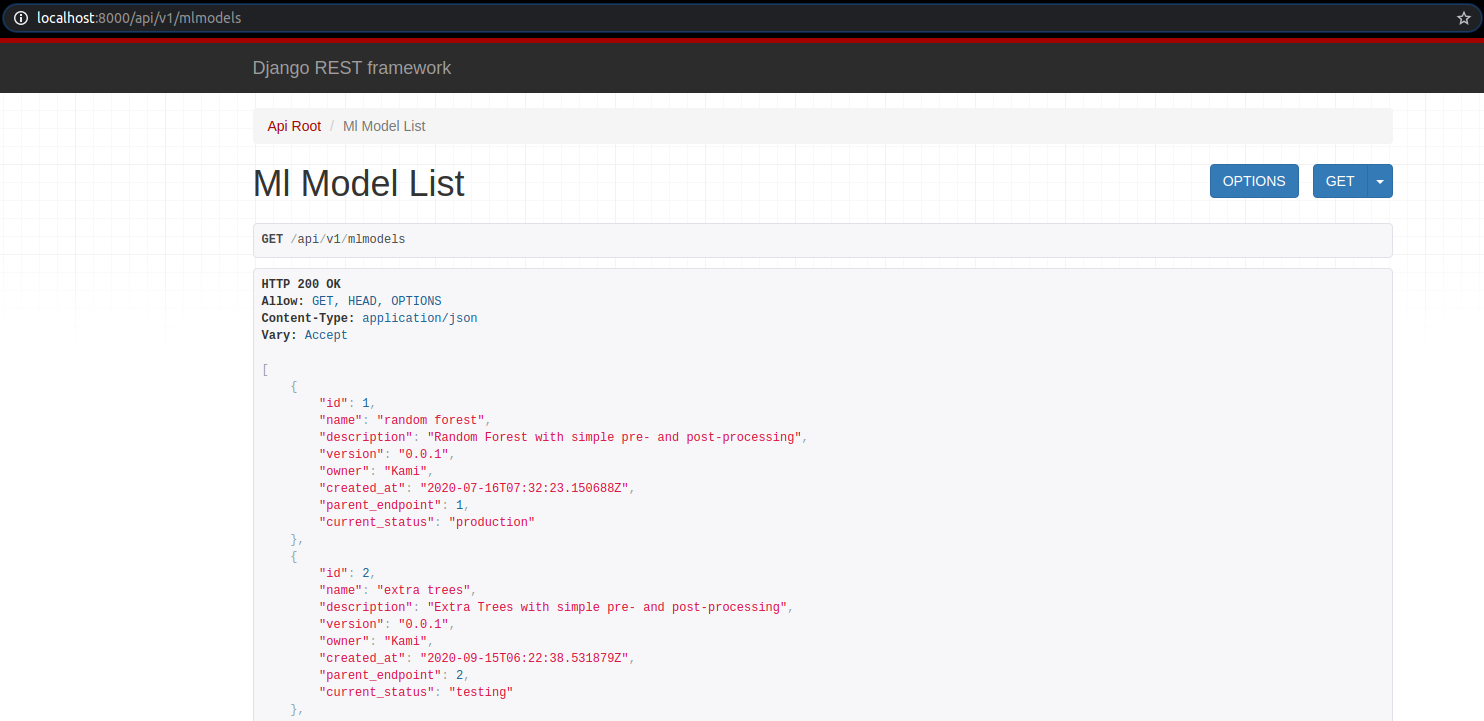
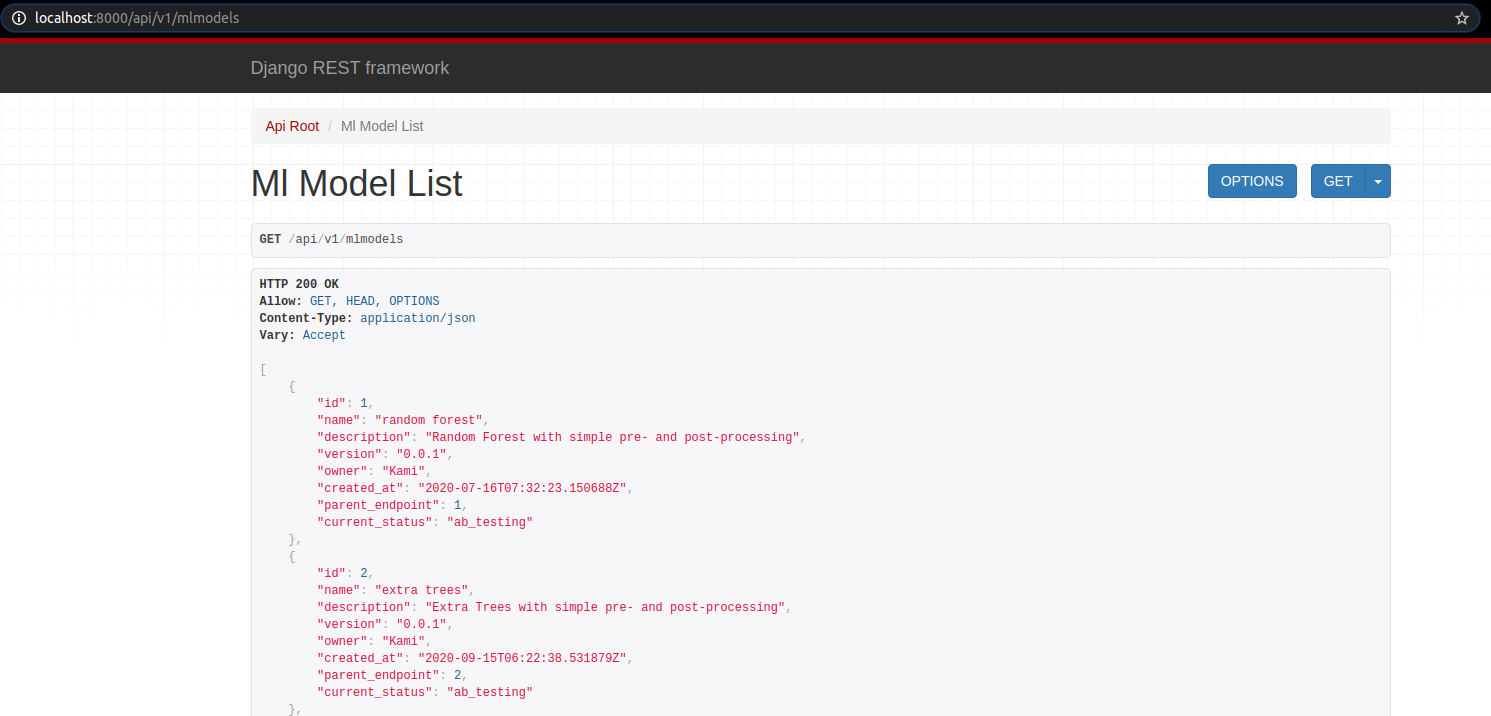
Các bạn có thể kiểm tra qua http://localhost:8000/api/v1/mlmodels
Tạo bảng A/B trong db
Thêm bảng ABTest
Trong file backend/server/app/models.py, thêm class model ABTest.
class ABTest(models.Model):
    '''
    ABTest sẽ lưu lại thông tin của A/B tests.
    Attributes:
        title: tên test.
        created_by: tạo bởi ai.
        created_at: ngày khởi tạo.
        ended_at: test stop lúc nào.
        summary: mô tả test.
        parent_mlmodel_1: khóa ngoại của Model 1.
        parent_mlmodel_2: khóa ngoại của Model 2.
    '''
    title = models.CharField(max_length=10000)
    created_by = models.CharField(max_length=128)
    created_at = models.DateTimeField(auto_now_add=True, blank=True)
    ended_at = models.DateTimeField(blank=True, null=True)
    summary = models.CharField(max_length=10000, blank=True, null=True)

    parent_mlmodel_1 = models.ForeignKey(MLModel, on_delete=models.CASCADE, related_name="parent_mlmodel_1")
    parent_mlmodel_2 = models.ForeignKey(MLModel, on_delete=models.CASCADE, related_name="parent_mlmodel_2")
ABTest có nhiệm vụ:
- Model nào sẽ được test
- Ai là người tạo và tạo khi nào
- Khi nào test dừng
- Kết quả test nằm trong trường summary
Tạo serializer
Cũng như các model khác sau khi tạo bảng còn phải thêm serializer nữa. Thêm code sau vào file backend/server/app/serializers.py.
class ABTestSerializer(serializers.ModelSerializer):
    class Meta:
        model = ABTest
        read_only_fields = (
            "id",
            "ended_at",
            "created_at",
            "summary",
        )
        fields = (
            "id",
            "title",
            "created_by",
            "created_at",
            "ended_at",
            "summary",
            "parent_mlmodel_1",
            "parent_mlmodel_2",
            )
Tạo view
Cũng cần có cái UI cho dễ nhìn tí. Nhưng khác biệt ở đây là cần có 2 view: ABTestView và StopABTestView. Cả 2 view đều được thêm vào file backend/server/app/views.py.
Class ABTestViewSet cho phép người dùng thêm mới objects, cụ thể là hàm perform_create tạo ABTest object và 2 trạng thái cho ML Model, trạng thái ab_testing.
class ABTestViewSet(
    mixins.RetrieveModelMixin, mixins.ListModelMixin, viewsets.GenericViewSet,
    mixins.CreateModelMixin, mixins.UpdateModelMixin
):
    serializer_class = ABTestSerializer
    queryset = ABTest.objects.all()

    def perform_create(self, serializer):
        try:
            with transaction.atomic():
                instance = serializer.save()
                # update status for first algorithm

                status_1 = MLModel(status = "ab_testing",
                                created_by=instance.created_by,
                                parent_mlmodel = instance.parent_mlmodel_1,
                                active=True)
                status_1.save()
                deactivate_other_statuses(status_1)
                # update status for second algorithm
                status_2 = MLModel(status = "ab_testing",
                                created_by=instance.created_by,
                                parent_mlmodel = instance.parent_mlmodel_2,
                                active=True)
                status_2.save()
                deactivate_other_statuses(status_2)

        except Exception as e:
            raise APIException(str(e))
Class StopABTestView tạm dừng A/B test và tính độ chính xác của mỗi model. Model nào có độ chính xác cao hơn thì trạng thái chuyển thành production, model còn lại sẽ chuyển trạng thái về testing.
from django.db.models import F
import datetime


class StopABTestView(views.APIView):
    def post(self, request, ab_test_id, format=None):

        try:
            ab_test = ABTest.objects.get(pk=ab_test_id)

            if ab_test.ended_at is not None:
                return Response({"message": "AB Test already finished."})

            date_now = datetime.datetime.now()
            # alg #1 accuracy
            all_responses_1 = MLRequest.objects.filter(parent_mlmodel=ab_test.parent_mlmodel_1, created_at__gt = ab_test.created_at, created_at__lt = date_now).count()
            correct_responses_1 = MLRequest.objects.filter(parent_mlmodel=ab_test.parent_mlmodel_1, created_at__gt = ab_test.created_at, created_at__lt = date_now, response=F('feedback')).count()
            accuracy_1 = correct_responses_1 / float(all_responses_1)
            print(all_responses_1, correct_responses_1, accuracy_1)

            # alg #2 accuracy
            all_responses_2 = MLRequest.objects.filter(parent_mlmodel=ab_test.parent_mlmodel_2, created_at__gt = ab_test.created_at, created_at__lt = date_now).count()
            correct_responses_2 = MLRequest.objects.filter(parent_mlmodel=ab_test.parent_mlmodel_2, created_at__gt = ab_test.created_at, created_at__lt = date_now, response=F('feedback')).count()
            accuracy_2 = correct_responses_2 / float(all_responses_2)
            print(all_responses_2, correct_responses_2, accuracy_2)

            # select algorithm with higher accuracy
            alg_id_1, alg_id_2 = ab_test.parent_mlmodel_1, ab_test.parent_mlmodel_2
            # swap
            if accuracy_1 < accuracy_2:
                alg_id_1, alg_id_2 = alg_id_2, alg_id_1

            status_1 = MLModelStatus(status = "production",
                            created_by=ab_test.created_by,
                            parent_mlmodel = alg_id_1,
                            active=True)
            status_1.save()
            deactivate_other_statuses(status_1)
            # update status for second algorithm
            status_2 = MLModelStatus(status = "testing",
                            created_by=ab_test.created_by,
                            parent_mlmodel = alg_id_2,
                            active=True)
            status_2.save()
            deactivate_other_statuses(status_2)


            summary = "Model #1 accuracy: {}, Model #2 accuracy: {}".format(accuracy_1, accuracy_2)
            ab_test.ended_at = date_now
            ab_test.summary = summary
            ab_test.save()

        except Exception as e:
            return Response({"status": "Error", "message": str(e)},
                            status=status.HTTP_400_BAD_REQUEST
            )
        return Response({"message": "AB Test finished.", "summary": summary})
Thêm URL router cho ABTest
Đơn giản như các phần ở trên. Thêm vào file backend/server/server/urls.py.
from app.views import ABTestViewSet
from app.views import StopABTestView


urlpatterns = [
    url(r"^api/v1/stop_ab_test/(?P<ab_test_id>.+)", StopABTestView.as_view(), name="stop_ab")
]
Do bạn thêm 1 bảng là ABTest nên cần migrate lại để db cập nhật.
python manage.py makemigrations
python manage.py migrate
Kiểm tra xem thành qủa.
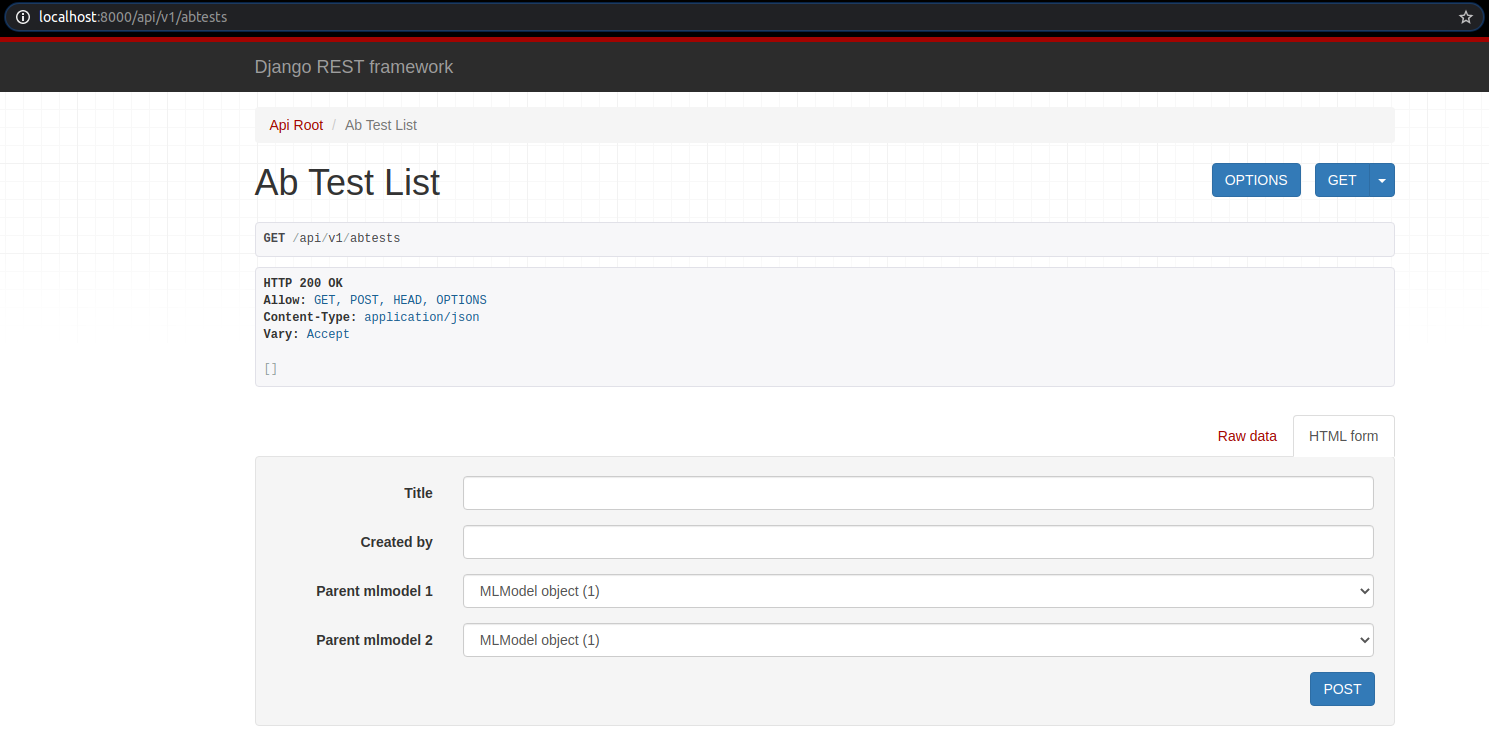
Setup form, chọn random forest và extra tree model.
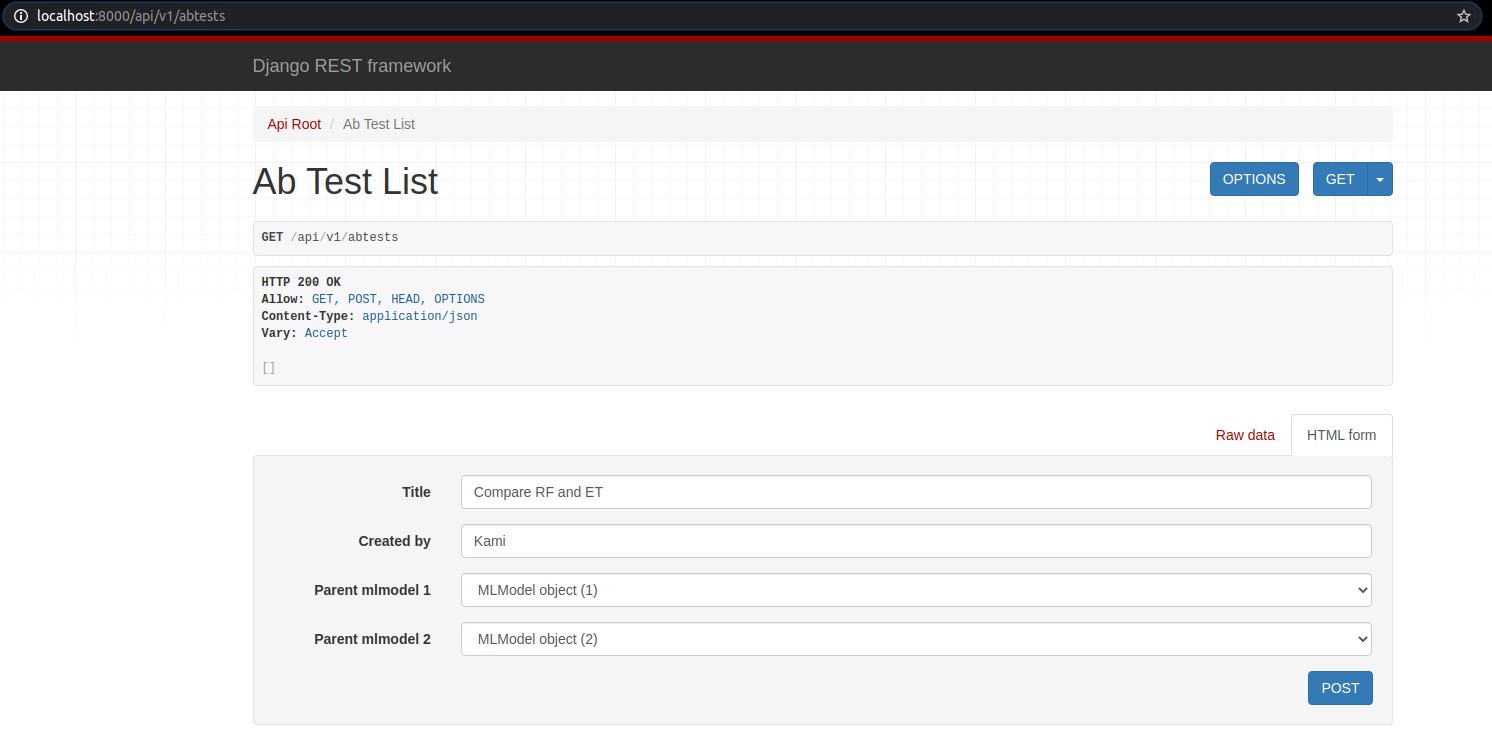
Sau khi post data, ta được

Kiểm tra api http://localhost:8000/api/v1/mlmodels, ta sẽ thấy 2 mô hình đã chuyển trạng thái thành ab_testing.
Chạy thử A/B test
Trước hết tôi cần viết 1 file python để gửi request chạy A/B testing, tương tự việc người dùng gửi feedback xem sản phẩm nào tốt hơn trong 2 sản phẩm A, B ý.
Đầu tiên, tôi cần thư viện requests
pip3 install requests
Sau đó tôi cần 1 file python để đẩy requests lên API. Tạo file ab_test.py. Tôi cho lặp đi lặp lại khoảng 100 lần request post lên model có status ab_testing để dự đoán, tiện thể thêm cái feedback mỗi request, feedback có giá trị là label của dữ liệu huấn luyện.
from sklearn.model_selection import train_test_split
import pandas as pd
import requests


features = ["age", "workclass", "fnlwgt", "education", "education-num", "marital-status",
            "occupation", "relationship", "race", "sex", "capital-gain", "capital-loss",
            "hours-per-week", "native-country", "income"]

dt = pd.read_csv("research/adult.data", sep=", ", header=None, engine='python')
dt.columns = features
X = dt[features[:-1]]
y = dt["income"]

# fillna with high frequency value
train_mode = dict(X.mode().iloc[0])
X = X.fillna(train_mode)

# data split train / test
X_train, X_test, y_train, y_test = train_test_split(X, y, test_size = 0.3, random_state=1234)

for i in range(100):
    input_data = dict(X_test.iloc[i])
    target = y_test.iloc[i]
    r = requests.post("http://127.0.0.1:8000/api/v1/classifier/predict?status=ab_testing", input_data)
    response = r.json()
    requests.put("http://127.0.0.1:8000/api/v1/mlrequests/{}".format(response["request_id"]), {"feedback": target})
Và kết quả thì kiểu kiểu này
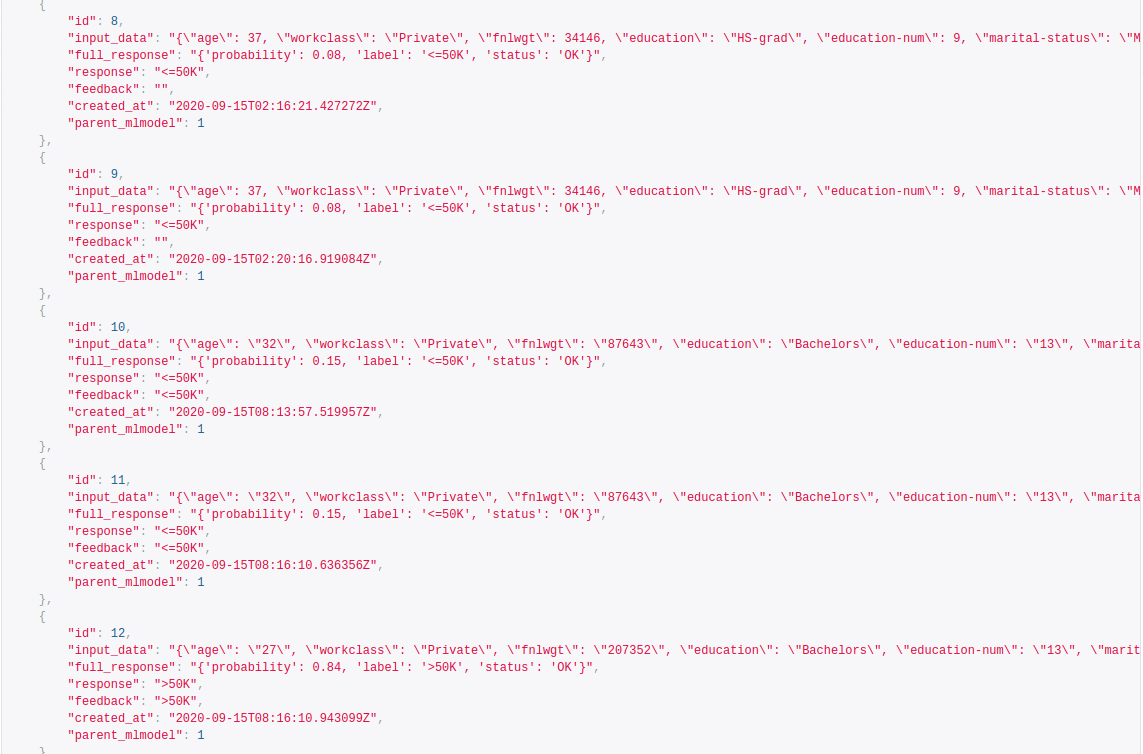
Để tạm dừng A/B test, bạn nhập địa chỉ url http://127.0.0.1:8000/api/v1/stop_ab_test/{ab_test_id} và nhận được kết quả mô hình nào có độ chính xác cao hơn.
Containers
Sau khi đã code một đống thứ xong, tôi chợt nhận ra mình không thể ném cho khách hàng một đống code thế này, tôi cần đóng gói server code thành 1 sản phẩm. Ở đây tôi dùng Docker.
Đầu tiên, tôi phải chỉnh lại host của Django sao cho chạy được ở mọi IP. Trong file backend/server/server/settings.py, chỉnh lại biến ALLOWED_HOSTS.
ALLOWED_HOSTS = ['0.0.0.0']
Điều chỉnh 2 biến STATIC_ROOT, STATIC_URL để lưu file.
STATIC_ROOT = os.path.join(BASE_DIR, 'static')
STATIC_URL = '/static/'
Thêm 1 file requirements.txt chứa các thư viện cần thiết của project.
Django==2.2.4
django-filter==2.2.0
djangorestframework==3.10.3
joblib==0.14.0
Markdown==3.1.1
numpy==1.17.3
pandas==0.25.2
requests==2.22.0
scikit-learn==0.21.3
Dockerfile
Trong thư mục chính chứa file README.md, tạo folder docker, folder này chứa 2 folder nữa là nginx và backend. Ở mỗi folder con kia, chúng ta sẽ đặt 2 file Dockerfile để setup container.
mkdir docker
mkdir docker/nginx
mkdir docker/backend
Trong thư mục docker/nginx, thêm file Dockerfile.
FROM nginx:1.13.12-alpine
CMD ["nginx", "-g", "daemon off;"]
Trong thư mục docker/nginx, thêm file default.conf. Nginx là 1 reverse proxy, tôi cần để kết nối với bên ngoài.
server {
    listen 8000 default_server;
    listen [::]:8000;

    client_max_body_size 20M;

    location / {
        try_files $uri @proxy_api;
    }

    location @proxy_api {
        proxy_set_header X-Forwarded-Proto https;
        proxy_set_header X-Url-Scheme $scheme;
        proxy_set_header X-Forwarded-For $proxy_add_x_forwarded_for;
        proxy_set_header Host $http_host;
        proxy_redirect off;
        proxy_pass   http://wsgiserver:8000;
    }

    location /static/ {
        autoindex on;
        alias /app/backend/server/static/;
    }
}
Trong thư mục docker/backend, thêm file Dockerfile.
FROM ubuntu:xenial

RUN apt-get update && \
    apt-get install -y software-properties-common && \
    add-apt-repository ppa:deadsnakes/ppa && \
    apt-get update && \
    apt-get install -y python3.6 python3.6-dev python3-pip

WORKDIR /app
COPY requirements.txt .
RUN rm -f /usr/bin/python && ln -s /usr/bin/python3.6 /usr/bin/python
RUN rm -f /usr/bin/python3 && ln -s /usr/bin/python3.6 /usr/bin/python3

RUN pip3 install -r requirements.txt
RUN pip3 install gunicorn==19.9.0

ADD ./backend /app/backend
ADD ./docker /app/docker
ADD ./research /app/research

RUN mkdir -p /app/backend/server/static
Để chạy các câu lệnh của Django trong container, tôi viết thêm 1 file shell nữa. File sh này chạy các câu lệnh migrate database và run server.
#!/usr/bin/env bash

echo "Start backend server"
until cd /app/backend/server
do
    echo "Waiting for server volume..."
done

until ./manage.py migrate
do
    echo "Waiting for database to be ready..."
    sleep 2
done

./manage.py collectstatic --noinput

gunicorn server.wsgi --bind 0.0.0.0:8000 --workers 4 --threads 4
Để tiện quản lý trong container tôi thêm 1 file docker-compose.yml.
version: '2'

services:
    nginx:
        restart: always
        image: nginx:1.12-alpine
        ports:
            - "8000:8000"
        volumes:
            - ./docker/nginx/default.conf:/etc/nginx/conf.d/default.conf
            - static_volume:/app/backend/server/static
    wsgiserver:
        build:
            context: .
            dockerfile: ./docker/backend/Dockerfile
        entrypoint: /app/docker/backend/wsgi-entrypoint.sh
        volumes:
            - static_volume:/app/backend/server/static
        expose:
            - "8000"
volumes:
    static_volume: {}
Ok xong, sau đó bạn chỉ cần chạy 2 câu lệnh này là được.
sudo docker-compose build
sudo docker-compose up
Kết luận
Nói thật code và test cả hệ thống này vừa tốn công vừa phí sức nên tôi chân thành khuyên các bạn dùng framework nào đó để quản lý ML Model. Cám ơn đã xem tới phần cuối (bow).
Tham khảo
Viết theo ý hiểu dựa trên: https://www.deploymachinelearning.com/#add-ml-algorithms-to-the-registry
Thank author Piotr Płoński !!!
All rights reserved
