AWS EC2 Managed Host Using Docker Machine
Bài đăng này đã không được cập nhật trong 8 năm
I've been playing around with docker for while now and have been impressed by how easy it was to manage, deploy my application for both development and production. Just last month that I found out how to use docker-machine to create, manage and deploy my rails application to Amazon EC2 instance. Configuring docker can be overwhelm at first, but I guarantee you will feel rewarded afterward. Lets get started.
Requirement
- Working rails app
- Amazone Account & Credentials
- Docker Engine & Docker Machine on your local machine
Dockerfile for Rails App
The first step is to build a docker image for your rails app. I used ruby version 2.4.1 as a base image and from there I installed necessary dependencies needed to get a rails app up and runing and the rest is just a typical rails commands.
# Dockerfile
FROM ruby:2.4.1

RUN mkdir -p /app
WORKDIR /app

RUN apt-get update && apt-get install -y libpq-dev nodejs apt-transport-https --no-install-recommends && rm -rf /var/lib/apt/lists/* && \
    curl -sS https://dl.yarnpkg.com/debian/pubkey.gpg | apt-key add - && \
    echo "deb https://dl.yarnpkg.com/debian/ stable main" | tee /etc/apt/sources.list.d/yarn.list && \
    apt-get update && apt-get install -y yarn

ENV RAILS_ENV=production
ENV RAILS_SERVE_STATIC_FILES true
ENV RAILS_LOG_TO_STDOUT true
ENV SECRET_KEY_BASE=44dabb1d3fd9f65fa5e6040827a34eda5495b36b3d9a43c3d7e7eff73b2b55e832552f8da7c814e6ea6969128c67bb77020276dc06761ec42d04213c8f0bde5c

COPY ./Gemfile /app
COPY ./Gemfile.lock /app
RUN bundle install --without development test

COPY . /app
RUN bundle exec rake assets:precompile

EXPOSE 3000
CMD ["bundle", "exec", "rails", "server", "-b", "0.0.0.0"]
Dockerfile for Nginx
Next is to build nginx image to act as reverse proxy to rails app. I'll show you content of nginx.conf later.
# Dockerfile.nginx
FROM nginx

RUN apt-get update -qq && apt-get -y install apache2-utils

ENV RAILS_ROOT /app

WORKDIR $RAILS_ROOT

RUN mkdir log

COPY public public/

COPY config/nginx.conf /tmp/nginx.conf

COPY config/nginx.conf /etc/nginx/conf.d/default.conf

EXPOSE 80

CMD ["nginx", "-g", "daemon off;"]
Nginx configuration
And here is the content of nginx config file. Notice that I've refered to rails app using container name blog, which we will config later in docker-compose.yml file.
# config/nginx.conf
upstream blog_app {
  server blog:3000;
}

server {
  listen 80;
  server_name blog_app;
  root /app/public;

  try_files $uri/index.html $uri @blog_app;

  location / {
    proxy_set_header X-Forwarded-For $proxy_add_x_forwarded_for;
    proxy_set_header Host $http_host;
    proxy_redirect off;

    proxy_pass http://blog_app;
    access_log /app/log/nginx.access.log;
    error_log /app/log/nginx.error.log;
  }

  location ^~ /assets/ {
    gzip_static on;
    expires max;
    add_header Cache-Control public;
  }
}
Wire Up Docker Compose
Ok now that we have everything up and running it's time to write a docker compose file. In this file I've create three services: blog, web and db which correspond to rails app, nginx server and database server respectively. As you can see I created a volume for a database server which will mount on data directory inside rails app. This is important because without this your application data won't survive after you rebuild your image.
# docker-compose.yml
version: '3'
services:
  blog:
    build: .
    command: bundle exec puma -C config/puma.rb
    depends_on:
      - db
    environment:
      - RAILS_ENV=production
    ports:
      - '3000'
  web:
    build:
      context: .
      dockerfile: Dockerfile.nginx
    links:
      - blog
    ports:
      - '80:80'
  db:
    image: postgres:9.5
    environment:
      - POSTGRES_USER=blog
      - POSTGRES_DB=blog_production
      - POSTGRES_PASSWORD=secret
    volumes:
      - './data:/var/lib/postgresql/data'
Create & Deploy Application to AWS EC2
Now it's time to deploy our app. First we need to setup an amazon ec2 instance and we do that by using docker machine. But first thing first you need aws access_key_id and secret_access_key. Put your access key in ~/.aws/credentials like this
[default]
aws_access_key_id=your-access-key
aws_secret_access_key=your-secret-key
Run the following command to create an ec2 instance. Each option is self explanatory so I don't need to tell you what it does.
$ docker-machine create --driver amazonec2 --amazonec2-instance-type "t2.micro" \
--amazonec2-region "us-east-1"  --amazonec2-open-port 80 blog
After it completed. Confirm that it is acitve by issue the following command and you'll get something like this
$ dokcer-machine ls
NAME   ACTIVE   DRIVER      STATE     URL                        SWARM   DOCKER        ERRORS
blog   *        amazonec2   Running   tcp://35.171.89.210:2376           v18.03.0-ce
If you see a dash sign in ACTIVE column then that means your machine is not an active machine. If so then you can run the following command to make your machine an active one. Follow the instruction and verify it again using docker-machine ls command
$ docker-machine env blog
export DOCKER_TLS_VERIFY="1"
export DOCKER_HOST="tcp://35.171.89.210:2376"
export DOCKER_CERT_PATH="/Users/norin/.docker/machine/machines/blog"
export DOCKER_MACHINE_NAME="blog"
# Run this command to configure your shell:
# eval $(docker-machine env blog)
Once it is active every command that you'll run from now on will be executed on your EC2 instance instead. You can now start build & run docker-compose like you did on your local machine. So to bring our application to life issued to following command and wait for it to finished. The -d flag used to tell compose to run in background instead of foreground process and that is what we want.
$ docker-compose up -d
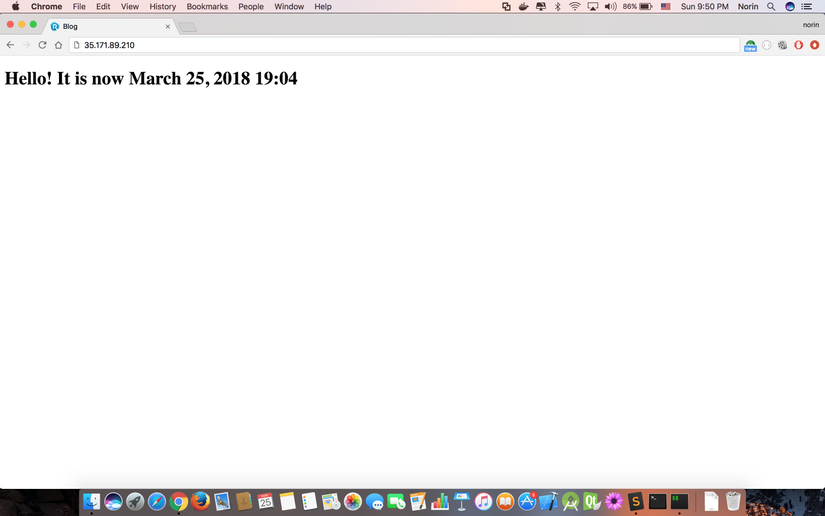
Now go and verify that the application is working by visiting the IP address of the server. You can get the ip address by issuing the following command
$ docker-machine ip blog
35.171.89.210
Congratulation! Now you have your app up and runing on a cloud server that is managed by docker.
All rights reserved
