Xây dựng 1 ứng dung CRUD đơn giản với rails và react-js (phần 3)
Bài đăng này đã không được cập nhật trong 6 năm
Xóa events
Bây giờ nếu các bạn nhỡ có tạo một loạt các event ngớ ngẩn ở trong ứng dụng thì hãy thêm nút xóa để chúng ta có thể loại bỏ chúng
Cũng như việc thêm mới một event, ta sẽ thêm một phương thức xóa một event ở trong component <Editor> và chuyển nó đến component <Event> dưới dạng prop.
Đầu tiên là phương thức:
class Editor extends React.Component {
  constructor(props) {
    ...
    this.deleteEvent = this.deleteEvent.bind(this);
  }
  ...
  deleteEvent(eventId) {
    const sure = window.confirm('Are you sure?');
    if (sure) {
      axios
        .delete(`/api/events/${eventId}.json`)
        .then((response) => {
          if (response.status === 204) {
            alert('Event deleted');
            const { history } = this.props;
            history.push('/events');

            const { events } = this.state;
            this.setState({ events: events.filter(event => event.id !== eventId) });
          }
        })
        .catch((error) => {
          console.log(error);
        });
    }
  }
}
Trong phương thức deleteEvent, chúng ta yêu cầu người dùng xác nhận xem thực sự họ có muốn xóa event mà họ đã chọn hay không. Nếu người dùng chắc chắn, sẽ gửi yêu cầu xóa đến API của chúng ta và khi xóa thành công, sẽ phản hồi rằng người dùng đã xóa thành công, chuyển hướng đến trang hiển thị tất cả các events và xóa bỏ event đã được xóa. Như với phương thức addEvent, nếu phản hổi từ API là xóa lỗi, chúng ta sẽ ghi lại lỗi vào trong console.
Tiếp theo, chuyển lại callback deleteEvent cho component <Event>
<PropsRoute
  path="/events/:id"
  component={Event}
  event={event}
  onDelete={this.deleteEvent}
/>
Bây giờ ở trong component <Event> chúng ta sẽ tạo một nút xóa để xóa event:
const Event = ({ event, onDelete }) => (
  <div className="eventContainer">
    <h2>
      {event.event_date}
      {' - '}
      {event.event_type}
      {' '}
      <button className="delete" type="button" onClick={() => onDelete(event.id)}>
        Delete
      </button>
    </h2>
    ...
  </div>
);


Event.propTypes = {
  event: PropTypes.shape(),
  onDelete: PropTypes.func.isRequired,
};
Và giờ chúng ta đã có thể xóa một event.
Thêm message cảnh báo người dùng
Việc hiện lên 1 popup cảnh báo là cần thiết để cho người dùng biết điều gì đã xảy ra sau khi thực hiện thao tác. Để thêm chức năng này, sử dụng thư viện react-s-alert
yarn add react-s-alert
Chúng ta sẽ tạo chức năng này trong file riêng:
touch app/javascript/helpers/notifications.js
Và sau đó thêm
import Alert from 'react-s-alert';
import 'react-s-alert/dist/s-alert-default.css';
import 'react-s-alert/dist/s-alert-css-effects/scale.css';

// Uncomment as needed
// import 'react-s-alert/dist/s-alert-css-effects/slide.css';
// import 'react-s-alert/dist/s-alert-css-effects/bouncyflip.css';
// import 'react-s-alert/dist/s-alert-css-effects/flip.css';
// import 'react-s-alert/dist/s-alert-css-effects/genie.css';
// import 'react-s-alert/dist/s-alert-css-effects/jelly.css';
// import 'react-s-alert/dist/s-alert-css-effects/stackslide.css';

const defaults = {
  position: 'top-right',
  effect: 'scale',
  timeout: 3500,
  offset: 45,
};

export { Alert };

export const success = (message, options = {}) => {
  Alert.success(message, Object.assign(defaults, options));
};

export const info = (message, options = {}) => {
  Alert.info(message, Object.assign(defaults, options));
};

export const warning = (message, options = {}) => {
  Alert.warning(message, Object.assign(defaults, options));
};

export const error = (message, options = {}) => {
  Alert.error(message, Object.assign(defaults, options));
};
Sau đó hãy bao gồm thư viện này trong component <App>
import React from 'react';
import { Route } from 'react-router-dom';
import { Alert } from '../helpers/notifications';
import Editor from './Editor';
import './App.css';

const App = () => (
  <div>
    <Route path="/events/:id?" component={Editor} />
    <Alert stack={ { limit: 3 } } />
  </div>
);

export default App;
Và sau đó dùng nó ở trong component <Editor> thay cho alert
import { success } from '../helpers/notifications';
...
addEvent(newEvent) {
  axios
    .post('/api/events.json', newEvent)
    .then((response) => {
      success('Event Added!');
      ...
}

deleteEvent(eventId) {
  const sure = window.confirm('Are you sure?');
  if (sure) {
    axios
      .delete(`/api/events/${eventId}.json`)
      .then((response) => {
        if (response.status === 204) {
          success('Event deleted');
          ...
  }
}
Ở trong app/javascript/helpers/helpers.js :
import { error } from './notifications';
...
export const handleAjaxError = (err) => {
  error('Something went wrong');
  console.warn(err);
};
Và ở trong <Editor> component:
import { handleAjaxError } from '../helpers/helpers';
Thay 3 dòng code bắt lỗi:
.catch((error) => {
  console.log(error);
});
Bởi:
.catch(handleAjaxError);
Bây giờ, khi bạn tạo hoặc xóa một event, bạn sẽ nhận được một tin nhắn kiểu flash ở phía trên:

Update một event
Phấn cuối cùng trong chức năng CRUD là thêm chức năng sửa một event. Hãy bắt đầu bằng cách thêm liên kết trong component <Event>:
import { Link } from 'react-router-dom';
...
<h2>
  {event.event_date}
  {' - '}
  {event.event_type}
  {' '}
  <Link to={`/events/${event.id}/edit`}>Edit</Link>
  <button className="delete" type="button" onClick={() => onDelete(event.id)}>
    Delete
  </button>
</h2>
Ở trong component <Editor>, hãy thêm phương thức updateEvent, liên kết nó với thể hiện của component thông qua props:
class Editor extends React.Component {
  constructor(props) {
    ...
    this.updateEvent = this.updateEvent.bind(this);
  }
  ...
  updateEvent(updatedEvent) {
    axios
      .put(`/api/events/${updatedEvent.id}.json`, updatedEvent)
      .then(() => {
        success('Event updated');
        const { events } = this.state;
        const idx = events.findIndex(event => event.id === updatedEvent.id);
        events[idx] = updatedEvent;
        const { history } = this.props;
        history.push(`/events/${updatedEvent.id}`);
        this.setState({ events });
      })
      .catch(handleAjaxError);
  }
  ...
  render() {
    ...
    return (
      <div>
        ...
          <Switch>
            <PropsRoute path="/events/new" component={EventForm} onSubmit={this.addEvent} />
            <PropsRoute
              exact
              path="/events/:id/edit"
              component={EventForm}
              event={event}
              onSubmit={this.updateEvent}
            />
            <PropsRoute
              path="/events/:id"
              component={Event}
              event={event}
              onDelete={this.deleteEvent}
            />
          </Switch>
        ...
      </div>
    );
  }
}
Hãy lưu ý thứ tự route rất quan trọng, vì nếu không thì path="/events/:id" sẽ được match trước và form sẽ không hiển thị ra cho chúng ra. Cuối cùng, ở trong component <EventForm>, chúng ta cần kéo sự kiện ra khỏi state và đặt giá trị tương ứng cho nó.
render() {
  const { event } = this.state;

  return (
    <div>
      <h2>New Event</h2>
      {this.renderErrors()}
      <form className="eventForm" onSubmit={this.handleSubmit}>
        <div>
          <label htmlFor="event_type">
            <strong>Type:</strong>
            <input
              type="text"
              id="event_type"
              name="event_type"
              onChange={this.handleInputChange}
              value={event.event_type}
            />
          </label>
        </div>
        <div>
          <label htmlFor="event_date">
            <strong>Date:</strong>
            <input
              type="text"
              id="event_date"
              name="event_date"
              ref={this.dateInput}
              autoComplete="off"
              value={event.event_date}
              onChange={this.handleInputChange}
            />
          </label>
        </div>
        <div>
          <label htmlFor="title">
            <strong>Title:</strong>
            <textarea
              cols="30"
              rows="10"
              id="title"
              name="title"
              onChange={this.handleInputChange}
              value={event.title}
            />
          </label>
        </div>
        <div>
          <label htmlFor="speaker">
            <strong>Speakers:</strong>
            <input
              type="text"
              id="speaker"
              name="speaker"
              onChange={this.handleInputChange}
              value={event.speaker}
            />
          </label>
        </div>
        <div>
          <label htmlFor="host">
            <strong>Hosts:</strong>
            <input
              type="text"
              id="host"
              name="host"
              onChange={this.handleInputChange}
              value={event.host}
            />
          </label>
        </div>
        <div>
          <label htmlFor="published">
            <strong>Publish:</strong>
            <input
              type="checkbox"
              id="published"
              name="published"
              onChange={this.handleInputChange}
              checked={event.published}
            />
          </label>
        </div>
        <div className="form-actions">
          <button type="submit">Save</button>
        </div>
      </form>
    </div>
  );
}
Chúng ra cũng cần truyền ngày dưới dạng string và xử lí nó, để có được định dạng ngày đúng khi event từ form được truyền lên api
componentDidMount() {
  new Pikaday({
    field: this.dateInput.current,
    toString: date => formatDate(date),
    onSelect: (date) => {
      const formattedDate = formatDate(date);
      this.dateInput.current.value = formattedDate;
      this.updateEvent('event_date', formattedDate);
    },
  });
}
Và cuối cùng, chúng ta cần cho phương thức vào componentWillReceiveProps để đảm bảo rằng các fields được xóa trắng khi chúng ta chỉnh sửa 1 sự kiện, sau đó nhấp vào sự kiện mới
componentWillReceiveProps({ event }) {
  this.setState({ event });
}
Thêm một số Tweaks mẫu
Tiếp theo, hãy thêm một nút Cancel vào form (trong trường hợp người dùng thay đổi ý định không muốn sửa hoặc tạo mới event). Chúng ta cũng cần thay đổi title của form để người dùng biết hoặt động nào đang được thực hiện. Trong <EventForm> component:
import { Link } from 'react-router-dom';

render() {
  const { event } = this.state;
  const cancelURL = event.id ? `/events/${event.id}` : '/events';
  const title = event.id ? `${event.event_date} - ${event.event_type}` : 'New Event';

  return (
    <div>
      <h2>{title}</h2>

      {this.renderErrors()}

      <form className="eventForm" onSubmit={this.handleSubmit}>
        ...
        <div className="form-actions">
          <button type="submit">Save</button>
          <Link to={cancelURL}>Cancel</Link>
        </div>
      </form>
    </div>
  );
}
Và hãy validate ngày tháng ở trong helper.js:
const isValidDate = dateObj => !Number.isNaN(Date.parse(dateObj));

export const validateEvent = (event) => {
  ...

  if (!isValidDate(event.event_date)) {
    errors.event_date = 'You must enter a valid date';
  }

 ...

  return errors;
};
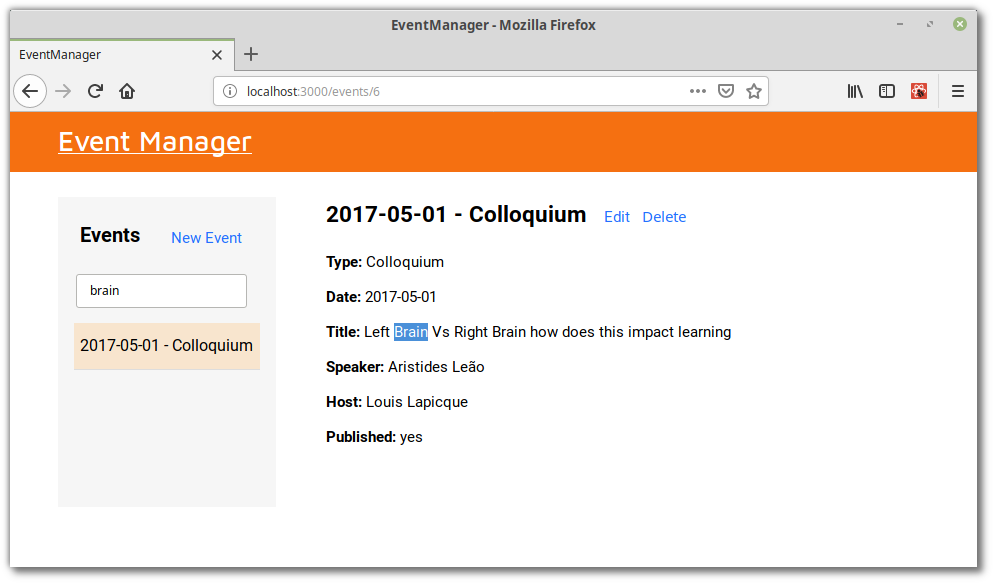
Thêm ô tìm kiếm
Nó sẽ trông có vẻ chuyên nghiệp hơn khi chúng ta thêm chức năng tìm kiếm event. May mắn là điều này sẽ không quá phức tạp khi chúng ta đang đặt tất cả events vào trong state.
Hãy bắt đầu bằng cách thêm ô search vào trong component <EventList>:
render() {
  return (
    <section className="eventList">
      <h2>
        Events
        <Link to="/events/new">New Event</Link>
      </h2>

      <input
        className="search"
        placeholder="Search"
        type="text"
        ref={this.searchInput}
        onKeyUp={this.updateSearchTerm}
      />

      <ul>{this.renderEvents()}</ul>
    </section>
  );
}
Lưu ý rằng chúng ta đã thêm thuộc tính ref và thành phần input, để chúng ta có thể tham chiếu nó trong component. Bật giờ hãy tạo ra ref và khai báo searchItem ở state.
class EventList extends React.Component {
  constructor(props) {
    super(props);
    this.state = {
      searchTerm: '',
    };

    this.searchInput = React.createRef();
    this.updateSearchTerm = this.updateSearchTerm.bind(this);
  }

  updateSearchTerm() {
    this.setState({ searchTerm: this.searchInput.current.value });
  }
  ...
}
Chúng ta sẽ tạo ra phương thức updateSearchTerm sẽ được gọi mỗi lần khi nhấn phím sau khi nhập vào ô input search
Danh sách events sẽ được hiển thị ra trong phương thức renderEvents. Hãy áp dụng nó cho bộ lọc của chúng ta, để các sự kiện được hiển thị ra phú hợp với tiêu chí tìm kiếm:
renderEvents() {
  const { activeId, events } = this.props;
  const filteredEvents = events
    .filter(el => this.matchSearchTerm(el))
    .sort((a, b) => new Date(b.event_date) - new Date(a.event_date));

  return filteredEvents.map(event => (
    ...
  ));
}
Cuối cùng, chúng ta cần định nghĩa phương thức matchSearchTerm:
matchSearchTerm(obj) {
  const {
    id, published, created_at, updated_at, ...rest
  } = obj;
  const { searchTerm } = this.state;

  return Object.values(rest).some(
    value => value.toLowerCase().indexOf(searchTerm.toLowerCase()) > -1,
  );
}
Ở đây, chúng ta đã loại trừ một số dữ liệu được trả về bởi lệnh gọi ajax ban đầu.
Thêm component 404
Điều cuối cùng mà chúng ta sẽ làm là thêm một liên kết khi không có sự kiện nào thỏa mãn tìm kiếm. Điều này rất hữu ích. Đầu tiên, tạo một compoent mới:
touch app/javascript/components/EventNotFound.js
Và thêm nội dung cho nó:
import React from 'react';

const EventNotFound = () => <p>Event not found!</p>;

export default EventNotFound;
Và sau đó sửa component <Event>:
import EventNotFound from './EventNotFound';

const Event = ({ event, onDelete }) => {
  if (!event) return <EventNotFound />;

  return ( ... );
};
Ở trong <EventForm>:
import EventNotFound from './EventNotFound';

class EventForm extends React.Component {
  ...
  render() {
    const { event } = this.state;
    const { path } = this.props;

    if (!event.id && path === '/events/:id/edit') return <EventNotFound />;

    const cancelURL = event.id ? `/events/${event.id}` : '/events';
    const title = event.id ? `${event.event_date} - ${event.event_type}` : 'New Event';

    return ( ... );
  }
}

EventForm.propTypes = {
  event: PropTypes.shape(),
  onSubmit: PropTypes.func.isRequired,
  path: PropTypes.string.isRequired,
};
Bây giờ nếu người dùng cố xem hoặc chỉnh sửa một event không tồn tại, component 404 sẽ được hiển thị ra
Tổng kết
Và đó là tất cả mọi thứ, bạn đã có một ứng dụng được viết bằng React, api Rails hoạt động đầy đủ chức năng CRUD.
Cảm ơn các bạn đã theo dõi cả 3 phần của mình 
All rights reserved
