Tổng hợp các phần mềm nên cài đặt trên Ubuntu
Bài đăng này đã không được cập nhật trong 7 năm
Lời nói đầu
Chào các bạn.
Thông thường các bạn mới làm quen thường gặp nhiều khó khăn khi cài đặt môi trường cũng như các phần mềm trên Ubuntu. Hôm nay mình xin tổng hợp và hướng dẫn các bạn cách cài đặt các phần mềm cần thiết, giúp các bạn tiết kiệm thời gian hơn 
Cài đặt
1. Git
sudo apt-get install git
2. Terminator
Về cơ bản thì Terminal gốc của Ubuntu và Terminator không khác nhau nhiều.
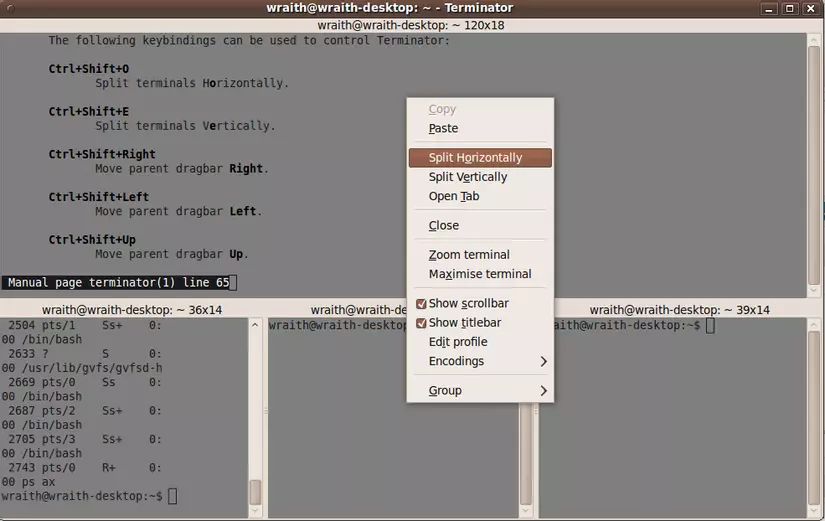
Ưu điểm của Terminator so với Terminal theo mình thấy là có thể split được nhiều màn hình và bật / tắt một cách dễ dàng:
sudo apt-get install terminator
Chúng ta có thể thay đổi một số phím tắt trong Terminator bằng cách chọn Preferences -> Keybindings -> Sửa nút Copy từ Ctrl + Shift + C thành Ctrl + C chẳng hạn.
Ngoài ra, nếu muốn "thay áo" cho Terminator như trong hình:
 Chúng ta làm theo các bước sau:
Cài đặt zsh
Cài đặt:
sudo apt-get install zsh
Về cơ bản, chúng ta cài zsh để thay thế cho bash (trình thông dịch gốc của Ubuntu, gọi là "shell").
zsh là shell được đánh giá là mạnh nhất trong thời gian gần đây. zsh hỗ trợ rất nhiều những tính năng cực mạnh, nhưng việc cài đặt lại rất đơn giản.
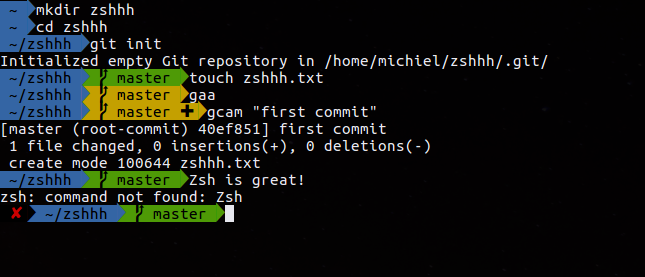
So sánh thử 2 cách hiển thị của zsh và bash:

Ví dụ, có thể thấy là đối với zsh, gần như chúng ta không phải dùng
git branch
nữa.
Nếu bạn không thích zsh, có thể thay đổi về lại bash bằng lệnh:
exec bash
Cài đặt plugin Oh My Zsh
sh -c "$(wget https://raw.githubusercontent.com/robbyrussell/oh-my-zsh/master/tools/install.sh -O -)"
Cài đặt theme Agnoster
Cài đặt Powerline Font
cd
wget https://github.com/powerline/powerline/raw/develop/font/PowerlineSymbols.otf
wget https://github.com/powerline/powerline/raw/develop/font/10-powerline-symbols.conf
mkdir ~/.fonts/
mv PowerlineSymbols.otf ~/.fonts/
mkdir -p .config/fontconfig/conf.d #nếu chưa có thư mục
Xóa fonts cache
fc-cache -vf ~/.fonts/
Di chuyển file config
mv 10-powerline-symbols.conf ~/.config/fontconfig/conf.d/
Config zsh
sudo gedit ~/.zshrc
Thay đổi dòng ZSH_THEME="robbyrussell" thành ZSH_THEME="agnoster".
Cuối cùng, restart Terminator rồi check kết quả nhé
3. Google Chrome
wget -q -O - https://dl-ssl.google.com/linux/linux_signing_key.pub | sudo apt-key add -
echo 'deb [arch=amd64] http://dl.google.com/linux/chrome/deb/ stable main' | sudo tee /etc/apt/sources.list.d/google-chrome.list
sudo apt-get update
sudo apt-get install google-chrome-stable
4. Node.js
Vì liên quan đến cài đặt các package sau này (VD: để quản lý thư viện cần package npm hoặc bower, gulp chẳng hạn, etc.) => Node.js rất quan trọng.
Mình lấy ví dụ khi sử dụng npm, nếu cài đặt Node.js phiên bản không phù hợp sẽ khiến cho việc sử dụng
npm install
mất hàng giờ đồng hồ (bình thường mất khoảng 1 phút là căng :v).
Mình khuyến khích dùng version 8.x, ổn định hơn so với 10.x (bản mới nhất) và các bản khác:
curl -sL https://deb.nodesource.com/setup_8.x | sudo -E bash -
sudo apt-get install -y nodejs
5. LAMP
Cài đặt môi trường cho dev nào
PHP
sudo apt-get install python-software-properties
sudo add-apt-repository ppa:ondrej/php
sudo apt update
sudo apt install -y php7.2
Cài đặt các modules hay dùng của php7.2:
sudo apt-get install php7.2-curl php7.2-gd php7.2-json php7.2-mbstring php7.2-intl php7.2-mysql php7.2-xml php7.2-zip
Kiểm tra php được cài đặt thành công hay chưa:
php -v
Kết quả:

Apache2
sudo apt install apache2 libapache2-mod-php7.2
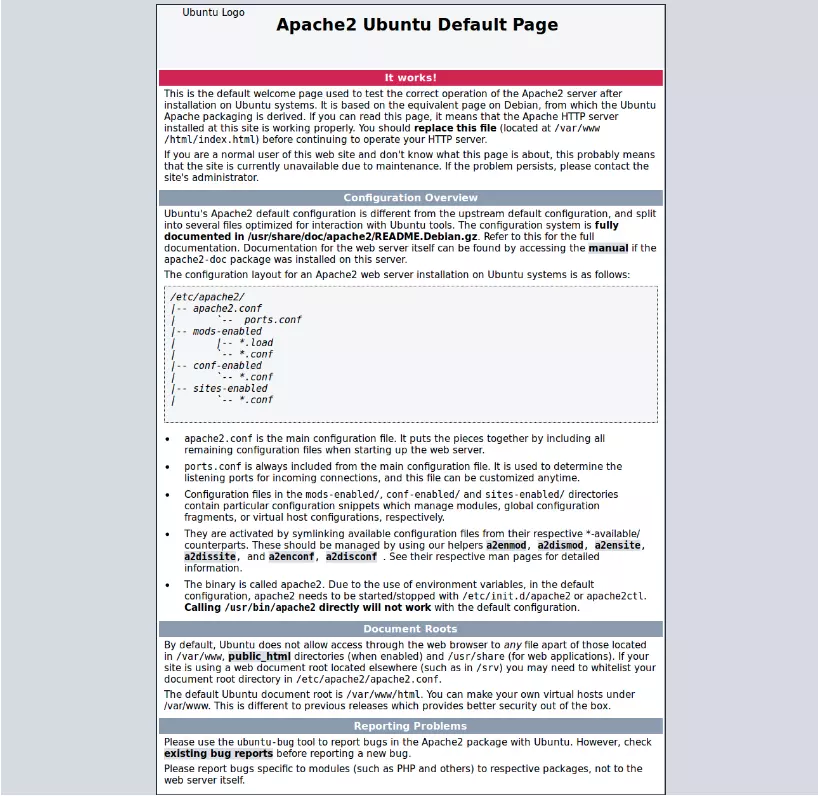
Đăng nhập vào chrome, gõ "localhost" nếu ra được như hình dưới là thành công:
MySQL
sudo apt install mysql-server php7.2-mysql
Thiết lập mật khẩu root cho MySQL:
sudo mysql_secure_installation
Kiểm tra:
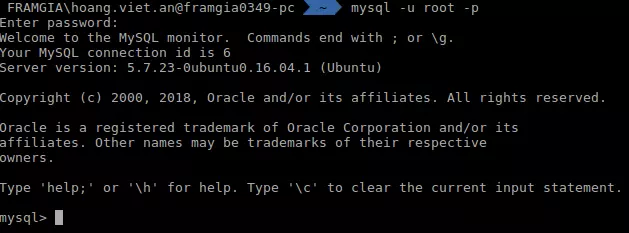
mysql -u root -p
sau khi nhập mật khẩu, nếu ra được kết quả như hình dưới là thành công:
Kiểm tra version của MySQL:
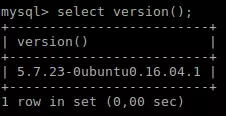
phpMyAdmin
sudo apt install phpmyadmin
Các bạn nhớ cấu hình password của root khi cài đặt phpMyAdmin trùng với khi cài đặt MySQL nhé
Mở file /etc/apache2/apache2.conf thêm dòng này vào cuối file:
Include /etc/phpmyadmin/apache.conf
Cuối cùng, khởi động lại Apache bằng lệnh:
sudo service apache2 restart
Nhập "localhost/phpmyadmin" vào url của trình duyệt web, nếu ra được kết quả như dưới là thành công:
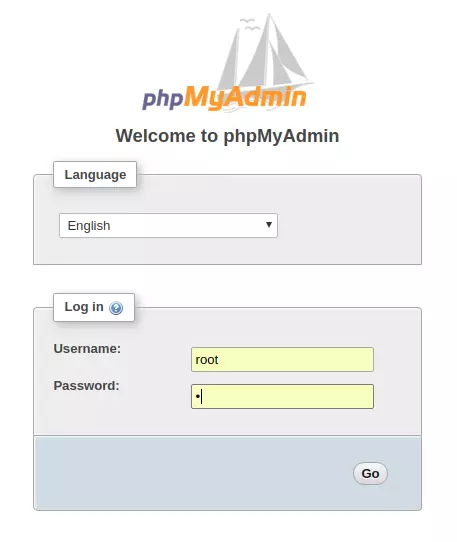
Hiện tại phpMyAdmin đang có chút conflicts với php7.2, cụ thể khi show tables thì sẽ xuất hiện thông báo (ignore đi thì mọi thứ vẫn chạy bình thường, có điều mỗi lần show table là một lần ignore thì cũng không hay):
phpmyadmin - count(): Parameter must be an array or an object that implements countable...
Giải pháp:
Mở file /usr/share/phpmyadmin/libraries/sql.lib.php:
sudo nano /usr/share/phpmyadmin/libraries/sql.lib.php
Thay thế đoạn code
count($analyzed_sql_results['select_expr'] == 1)
bằng
(count($analyzed_sql_results['select_expr']) == 1)
Restart Services
Restart các thứ các thứ để chốt lần cuối cho chắc chắn
sudo systemctl restart apache2.service
sudo systemctl restart mysql.service
Ngoài ra, mình xin hướng dẫn thêm các thao tác khi làm việc với những local web cần cấu hình tên miền hoặc host (code với Magento chẳng hạn):
Cấu hình tên miền 1 local web
sudo gedit /etc/apache2/sites-available/mywebsite.local.conf
<VirtualHost *:80>
# The ServerName directive sets the request scheme, hostname and port that
# the server uses to identify itself. This is used when creating
# redirection URLs. In the context of virtual hosts, the ServerName
# specifies what hostname must appear in the request's Host: header to
# match this virtual host. For the default virtual host (this file) this
# value is not decisive as it is used as a last resort host regardless.
# However, you must set it for any further virtual host explicitly.
#ServerName www.example.com

ServerAdmin webmaster@localhost
ServerName mywebsite.local
DocumentRoot /var/www/html/mywebsite/public
SetEnv FUEL_ENV “development”

<Directory /var/www/html/mywebsite/public>
    DirectoryIndex index.php
    AllowOverride All
    Order allow,deny
    Allow from all
</Directory>

# Available loglevels: trace8, ..., trace1, debug, info, notice, warn,
# error, crit, alert, emerg.
# It is also possible to configure the loglevel for particular
# modules, e.g.
#LogLevel info ssl:warn

ErrorLog ${APACHE_LOG_DIR}/error.log
CustomLog ${APACHE_LOG_DIR}/access.log combined

# For most configuration files from conf-available/, which are
# enabled or disabled at a global level, it is possible to
# include a line for only one particular virtual host. For example the
# following line enables the CGI configuration for this host only
# after it has been globally disabled with "a2disconf".
#Include conf-available/serve-cgi-bin.conf
</VirtualHost>

# vim: syntax=apache ts=4 sw=4 sts=4 sr noet
Cấu hình hosts
sudo gedit /etc/hosts
Thêm:
127.0.0.1 mywebsite.local
Enable local web
sudo a2enmod rewrite
sudo a2ensite mywebsite.local.config
6. IDE
Có rất nhiều IDE để chọn, mình xin lấy ví dụ tải và cài đặt:
PhpStorm
Tải PhpStorm:
https://www.jetbrains.com/phpstorm/download/
Cài đặt:
tar xvf PhpStorm-2017.2.4.tar.gz
sudo mv PhpStorm-172.4155.41/ /opt/phpstorm/
sudo ln -s /opt/phpstorm/bin/phpstorm.sh /usr/local/bin/phpstorm
Run:
phpstorm
Android Studio
Cài đặt Java:
sudo add-apt-repository ppa:webupd8team/java
sudo apt-get update
sudo apt-get install oracle-java8-installer
sudo apt-get install oracle-java8-set-default
Tải Android Studio:
https://developer.android.com/sdk/index.html
Giải nén:
sudo unzip android-studio-ide-141.2178183-linux.zip -d /opt
Tạo desktop file:
sudo gedit nano ~/.local/share/applications/androidstudio.desktop
Thêm:
[Desktop Entry]
Version=1.0
Type=Application
Name=Android Studio
Exec="/opt/android-studio/bin/studio.sh" %f
Icon=/opt/android-studio/bin/studio.png
Categories=Development;IDE;
Terminal=false
StartupNotify=true
StartupWMClass=android-studio
Chạy thôi
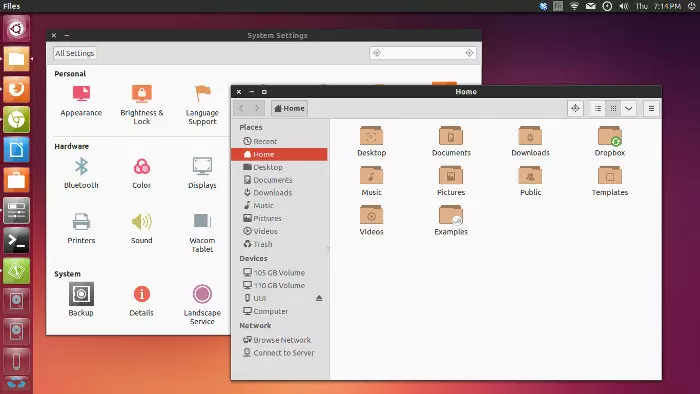
7. Theme
Có rất nhiều theme đẹp cho Ubuntu thay vì sử dụng màn hình gốc nửa hồng nửa tím sida như bản gốc, các bạn tham khảo tại https://www.omgubuntu.co.uk/2017/11/best-gtk-themes-for-ubuntu nhé.
sudo apt-get install unity-tweak-tool
Mình lấy ví dụ Numix theme chẳng hạn:
sudo apt-add-repository ppa:numix/ppa
sudo apt-get update
sudo apt-get install numix-icon-theme numix-folders
sudo apt-get install numix-icon-theme-circle
sudo apt-get install numix-icon-theme-square
Sau đó bạn vào app Unity Tweak Tool vừa cài, chọn tab Appearance:
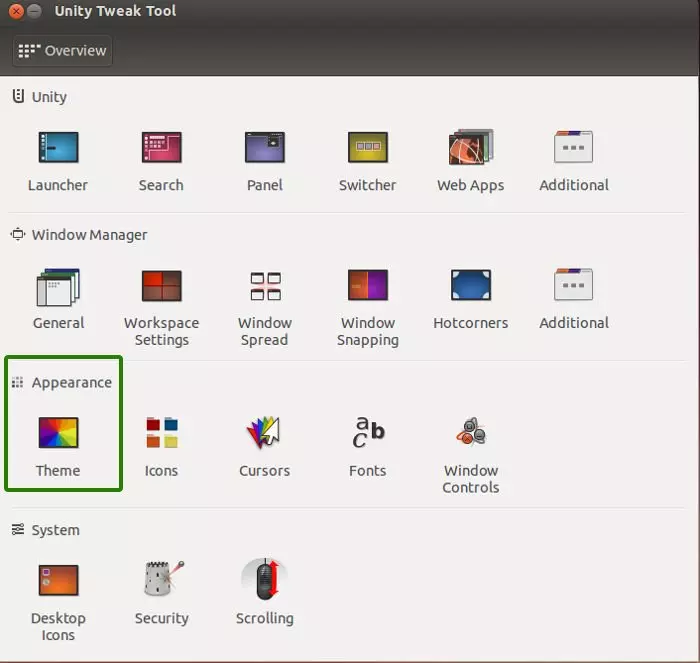
Chọn Numix theme:
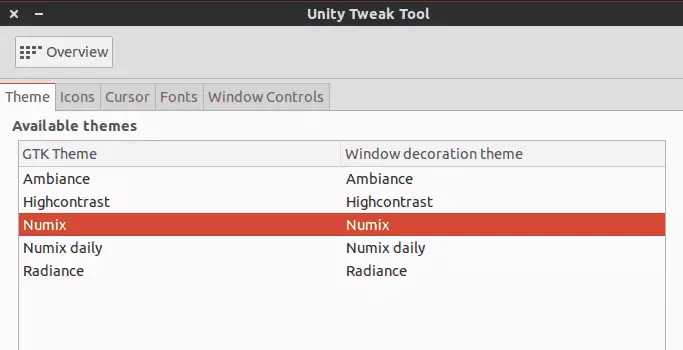
Kết quả:
Tổng kết
Mình đã hướng dẫn cách cài một số phần mềm cần thiết trên Ubuntu. Hi vọng bài viết giúp ích cho các bạn! Hẹn gặp lại các bạn trong những bài viết sau
Tham khảo
https://github.com/robbyrussell/oh-my-zsh
https://viblo.asia/p/hieu-ro-hon-toi-uu-va-su-dung-phim-tat-cho-terminal-ORNZqowM50n
https://stackoverflow.com/questions/41524903/why-is-npm-install-really-slow"
https://tecadmin.net/install-apache-mysql-php-lamp-stack-on-ubuntu-16-04/
https://askubuntu.com/questions/634082/how-to-install-android-studio-on-ubuntu
https://itsfoss.com/how-to-install-themes-in-ubuntu-13-10/
https://www.noobslab.com/2017/08/install-numix-theme-and-icons-in.html
All rights reserved
