Tạo Material Design Tab trong ứng dụng Android
Bài đăng này đã không được cập nhật trong 4 năm
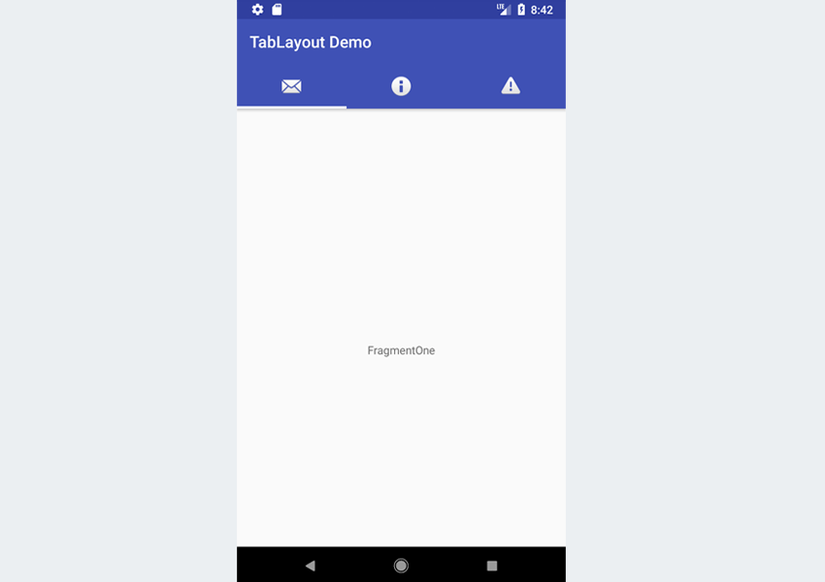
Trong bài viết này, bạn sẽ tìm hiểu cách hiển thị các tab bằng cách sử dụng TabLayout và ViewPager. Chúng ta sẽ đề cập đến những vấn đề sau:
- Các thành phần TabLayout và ViewPager.
- Các chế độ tab khác nhau: có thể cuộn và cố định.
- Làm thế nào để hiển thị các icon thay vì text cho các tiêu đề tab.
Chuẩn bị
Để có thể làm theo hướng dẫn này, bạn sẽ cần:
- Android Studio 3.0 hoặc phiên bản cao hơn.
- Kotlin plugin 1.1.51 hoặc phiên bản cao hơn.
Giới thiệu TabLayout
Thành phần TabLayout là một trong những thành phần thuộc material design. Hơn nữa, nó cũng nằm trong trong thư viện hỗ trợ thiết kế. Trong TabLayout, khi một tab được chọn, một trang khác (hoặc fragment) sẽ được hiển thị tới người dùng.
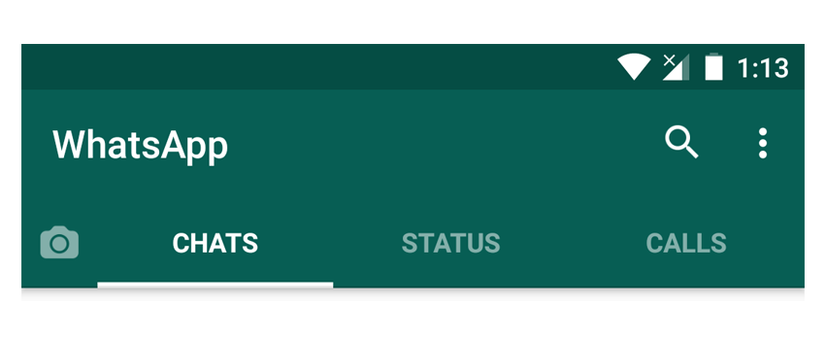
Thành phần TabLayout có thể có các tab được hiển thị theo một trong hai cách: cố định và cuộn. Nếu các tab được cố định, tất cả các tab sẽ được hiển thị trên màn hình cùng một lúc.
Ảnh chụp màn hình dưới đây là ứng dụng Android WhatsApp Android chính thức mới nhất (như của bài viết này), sử dụng TabLayout với chế độ cố định.
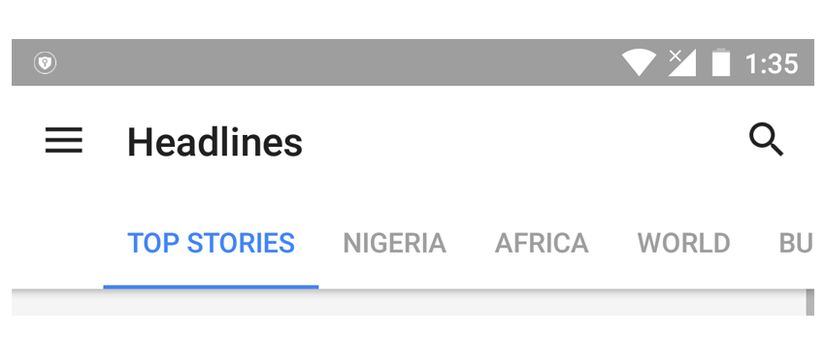
Trong các tab ở chế độ cuộn, nếu số lượng các tab trở nên quá rộng cho màn hình, người dùng có thể vuốt sang trái hoặc phải để xem nhiều tab hơn.
Dưới đây là ví dụ về TabLayout với chế độ tab cuộn - được trình bày trong phiên bản mới nhất của ứng dụng News & Weather trên Android của Google.
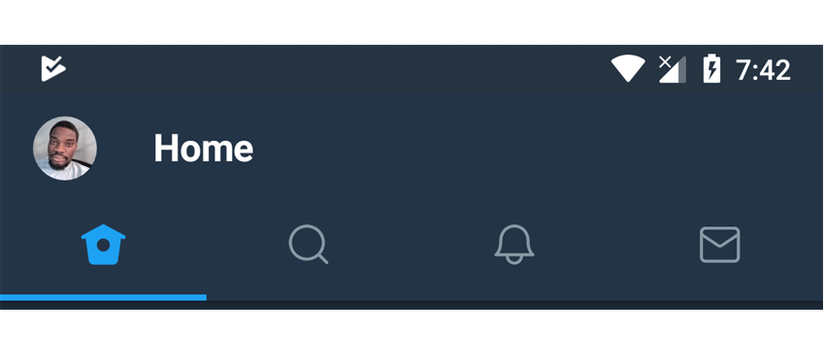
Hơn nữa, thông tin được hiển thị trên một tab có thể là text, icon, hoặc kết hợp giữa cả text và icon. Ví dụ: ứng dụng Twitter mới nhất dành cho Android sử dụng icon thay vì text trên mỗi tab.
Trong các phần sau, chúng ta sẽ xây dựng một ứng dụng đơn giản sử dụng TabLayout với ViewPager.
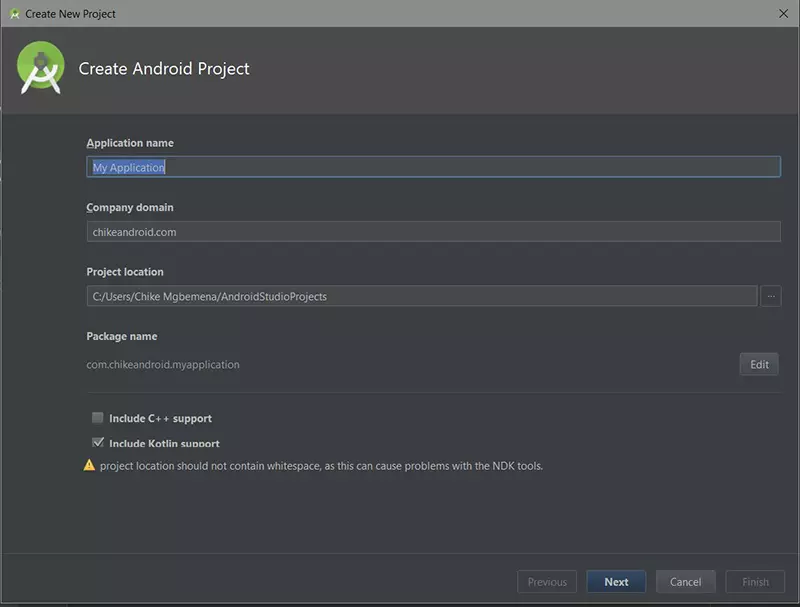
1. Tạo Android Studio Projetc
2. Tạo các Fragment
Chúng ta sẽ tạo một TabLayout với 3 tab. Khi mỗi tab được chọn, nó sẽ hiển thị Fragment tương ứng. Chúng ta sẽ bắt đầu với Fragment đầu tiên và bạn hãy làm tương tự cho hai Fragment còn lại - FragmentTwo.kt và FragmentThree.kt.
FragmentOne.kt:
import android.os.Bundle
import android.support.v4.app.Fragment
import android.view.LayoutInflater
import android.view.View
import android.view.ViewGroup

class FragmentOne : Fragment() {

    override fun onCreateView(inflater: LayoutInflater?, container: ViewGroup?,
                              savedInstanceState: Bundle?): View? =
            inflater!!.inflate(R.layout.fragment_one, container, false)

    companion object {
        fun newInstance(): FragmentOne = FragmentOne()
    }
}
R.layout.fragment_one
<LinearLayout xmlns:android="http://schemas.android.com/apk/res/android"
             xmlns:tools="http://schemas.android.com/tools"
             android:layout_width="match_parent"
             android:layout_height="match_parent"
             android:orientation="vertical">

    <TextView
            android:layout_width="match_parent"
            android:layout_height="match_parent"
            android:text="FragmentOne"
            android:gravity="center_vertical|center_horizontal"/>

</LinearLayout>
3. Thêm TabLayout và ViewPager
Để sử dụng TabLayout và ViewPager, bạn phải import thự viện support trong build.gradle :
dependencies {
    implementation 'com.android.support:design:26.1.0'
    implementation 'com.android.support:support-v4:26.1.0'
}
res/layout/activlty_main.xml
<?xml version="1.0" encoding="utf-8"?>
<android.support.design.widget.CoordinatorLayout
        xmlns:android="http://schemas.android.com/apk/res/android"
        xmlns:app="http://schemas.android.com/apk/res-auto"
        android:id="@+id/main_content"
        android:layout_width="match_parent"
        android:layout_height="match_parent"
        android:fitsSystemWindows="true">

    <android.support.design.widget.AppBarLayout
            android:id="@+id/appbar"
            android:layout_width="match_parent"
            android:layout_height="wrap_content"
            android:theme="@style/AppTheme.AppBarOverlay">

        <android.support.v7.widget.Toolbar
                android:id="@+id/toolbar"
                android:layout_width="match_parent"
                android:layout_height="?attr/actionBarSize"
                android:background="?attr/colorPrimary"
                app:contentInsetStartWithNavigation="0dp"
                app:layout_scrollFlags="scroll|enterAlways"
                app:popupTheme="@style/AppTheme.PopupOverlay"/>

        <android.support.design.widget.TabLayout
                android:id="@+id/tab_layout"
                style="@style/CustomTabLayout"
                android:layout_width="match_parent"
                android:layout_height="?attr/actionBarSize"
                android:layout_gravity="left"
                android:background="@color/colorPrimary"
                app:tabGravity="fill"
                app:tabMode="fixed"/>

    </android.support.design.widget.AppBarLayout>

    <android.support.v4.view.ViewPager
            android:id="@+id/view_pager"
            android:layout_width="match_parent"
            android:layout_height="match_parent"
            app:layout_behavior="@string/appbar_scrolling_view_behavior"/>

</android.support.design.widget.CoordinatorLayout>
4. Tạo PagerAdapter
Chúng ta cần phải tạo ra một lớp SampleAdapter.kt kế thừa từ FragmentPagerAdapter. Lớp này có trách nhiệm quản lý các Fragment khác nhau sẽ được hiển thị trên các tab.
import android.support.v4.app.Fragment
import android.support.v4.app.FragmentManager
import android.support.v4.app.FragmentPagerAdapter

class SampleAdapter(fm: FragmentManager) : FragmentPagerAdapter(fm) {

    override fun getItem(position: Int): Fragment? = when (position) {
        0 -> FragmentOne.newInstance()
        1 -> FragmentTwo.newInstance()
        2 -> FragmentThree.newInstance()
        else -> null
    }

    override fun getPageTitle(position: Int): CharSequence = when (position) {
        0 -> "Tab 1 Item"
        1 -> "Tab 2 Item"
        2 -> "Tab 3 Item"
        else -> ""
    }

    override fun getCount(): Int = 3
}
5. Khởi tạo các thành phần
Tiếp theo, chúng ta sẽ khởi tạo các thành phần TabLayout, ViewPager và SampleAdapter. Việc này được thực hiện bên trong onCreate () trong MainActivity.kt.
import android.os.Bundle
import android.support.design.widget.TabLayout
import android.support.v4.view.ViewPager
import android.support.v7.app.AppCompatActivity
import android.support.v7.widget.Toolbar

class MainActivity : AppCompatActivity() {

    override fun onCreate(savedInstanceState: Bundle?) {
        super.onCreate(savedInstanceState)
        setContentView(R.layout.activity_main)

        initToolbar()

        val tabLayout: TabLayout = findViewById(R.id.tab_layout)

        val viewPager: ViewPager = findViewById(R.id.view_pager)

        val adapter = SampleAdapter(supportFragmentManager)

        viewPager.adapter = adapter
        tabLayout.setupWithViewPager(viewPager)

        tabLayout.addTab(tabLayout.newTab().setText("TAB 1 ITEM"))
        tabLayout.addTab(tabLayout.newTab().setText("TAB 2 ITEM"))
        tabLayout.addTab(tabLayout.newTab().setText("TAB 3 ITEM"))

        tabLayout.addOnTabSelectedListener(object : TabLayout.OnTabSelectedListener {
            override fun onTabSelected(tab: TabLayout.Tab) {

            }

            override fun onTabUnselected(tab: TabLayout.Tab) {

            }

            override fun onTabReselected(tab: TabLayout.Tab) {

            }
        })
    }

    private fun initToolbar() {
        val toolbar: Toolbar = findViewById(R.id.toolbar)
        setSupportActionBar(toolbar)
        supportActionBar!!.title = "TabLayout Demo"
    }
}
6. Test ứng dụng
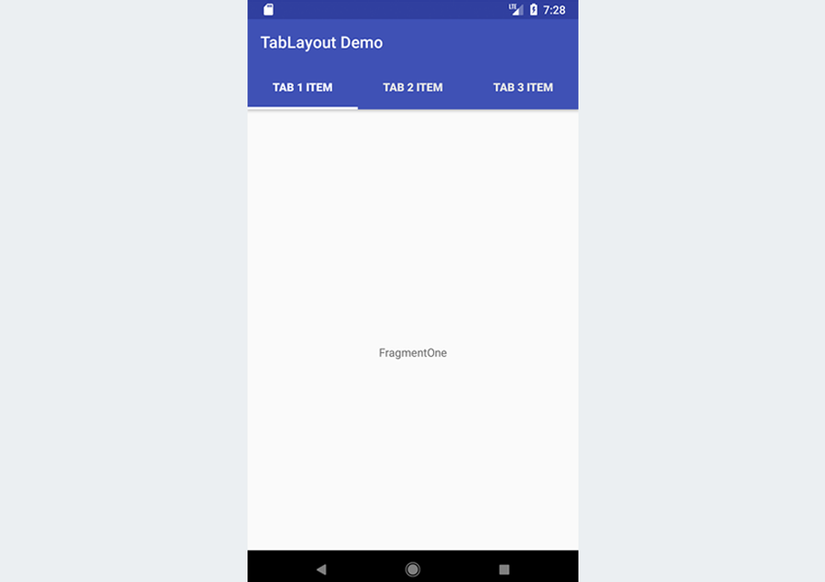
Cuối cùng, bạn hãy chạy app kết quả như sau :
All rights reserved