Tạo custom notification cho ứng dụng Android
Bài đăng này đã không được cập nhật trong 7 năm
Để đảm bảo notification trong ứng dụng của bạn hiển thị tốt nhất và đồng nhất giữa các version của Android, bạn nên sử dụng các template chuẩn cho notification. Tuy nhiên nếu các templates đó không đáp ứng nhu cầu của bạn, bạn có thể tạo layout riêng cho notification.
Notification Channel
Bắt đầu từ android 8.0 tất cả các notificaiton đều phải được gán vào một channel. Với mỗi channel bạn có thể cài đặt cho nó như hiển thị, âm thanh, rung ... Người dùng có thể thay đổi cài đặt và quyết định rằng channel nào từ ứng dụng của bạn sẽ được chấp nhận hoặc tắt đi.
Vì vậy trước hết để hiển thị notification bạn cần tạo một notification channel cho nó.
private static final String CHANNEL_ID = "TEST_CHANNEL";

private void createNotificationChannel() {
    // Create the NotificationChannel, but only on API 26+ because
    // the NotificationChannel class is new and not in the support library
    if (Build.VERSION.SDK_INT >= Build.VERSION_CODES.O) {
        CharSequence name = getString(R.string.channel_name);
        String description = getString(R.string.channel_description);
        int importance = NotificationManager.IMPORTANCE_DEFAULT;
        NotificationChannel channel = new NotificationChannel(CHANNEL_ID, name, importance);
        channel.setDescription(description);
        // Register the channel with the system; you can't change the importance
        // or other notification behaviors after this
        NotificationManager notificationManager = getSystemService(NotificationManager.class);
        notificationManager.createNotificationChannel(channel);
    }
}
Mặc định các notification gửi tới channel này sẽ sử dụng cài đặt hiển thị, âm thanh được định nghĩa bới importance level từ NotificationManagerCompat class như IMPORTANCE_DEFAULT hoặc IMPORTANCE_HIGH.
Nếu bạn muốn custom sâu hơn nữa bạn có thể sử dụng các method như
- enableLights() để enable việc hiển thị đèn nháy báo notification
- setLightColor() để đặt màu đèn báo
- setVibrationPattern() để cài đặt pattern rung khi nhận notification
Custom layout notification
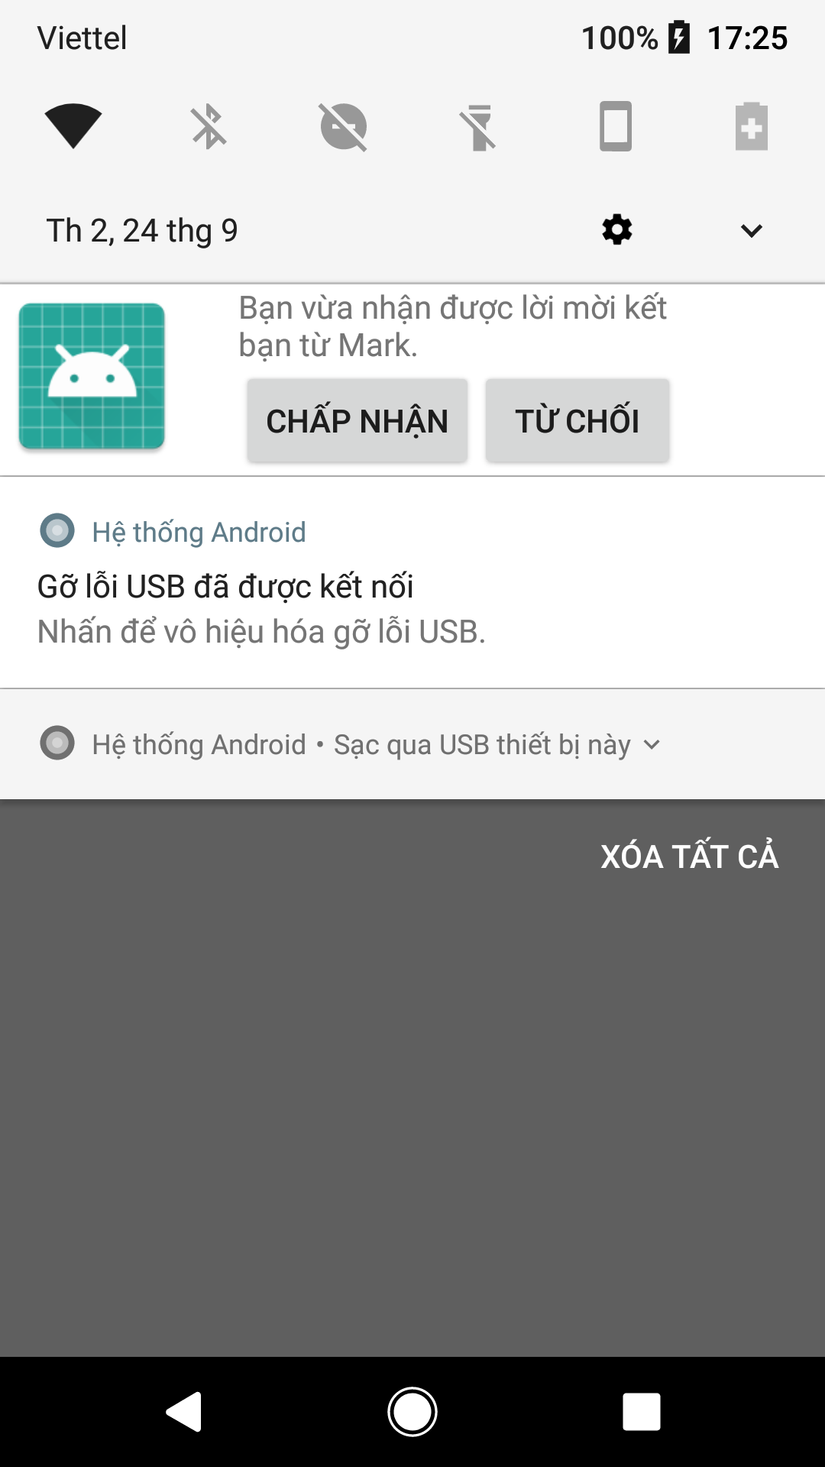
Giả sử bạn muốn hiển thị notification với 2 button như sau
<?xml version="1.0" encoding="utf-8"?>
<RelativeLayout
    xmlns:android="http://schemas.android.com/apk/res/android"
    android:layout_width="match_parent"
    android:layout_height="wrap_content"
    android:gravity="center_vertical"
    android:orientation="horizontal">

  <ImageView
      android:id="@+id/imgLogo"
      android:layout_width="80dp"
      android:layout_height="80dp"
      android:layout_marginEnd="24dp"
      android:src="@mipmap/ic_launcher"/>

  <TextView
      android:id="@+id/message"
      android:layout_width="wrap_content"
      android:layout_height="wrap_content"
      android:layout_toEndOf="@+id/imgLogo"
      android:text="Bạn vừa nhận được lời mời kết bạn từ Mark."/>

  <LinearLayout
      android:layout_width="match_parent"
      android:layout_height="wrap_content"
      android:layout_below="@+id/message"
      android:layout_toEndOf="@+id/imgLogo">

    <Button
        android:id="@+id/btnAccept"
        android:layout_width="wrap_content"
        android:layout_height="wrap_content"
        android:text="Chấp nhận"/>

    <Button
        android:id="@+id/btnDenied"
        android:layout_width="wrap_content"
        android:layout_height="wrap_content"
        android:text="Từ chối"/>
  </LinearLayout>
</RelativeLayout>
Để bắt click vào button ta dùng PendingIntent cùng với BroadcastReceiver như sau.
private PendingIntent onButtonNotificationClick(@IdRes int id) {
    Intent intent = new Intent(ACTION_NOTIFICATION_BUTTON_CLICK);
    intent.putExtra(EXTRA_BUTTON_CLICKED, id);
    return PendingIntent.getBroadcast(this, id, intent, 0);
  }

  private void showNotification() {

    RemoteViews notificationLayout =
        new RemoteViews(getPackageName(), R.layout.notification_custom);

    notificationLayout.setOnClickPendingIntent(R.id.btnAccept,
        onButtonNotificationClick(R.id.btnAccept));
    notificationLayout.setOnClickPendingIntent(R.id.btnDenied,
        onButtonNotificationClick(R.id.btnDenied));

    Notification
        notification = new NotificationCompat.Builder(this, CHANNEL_ID)
        .setVisibility(NotificationCompat.VISIBILITY_PUBLIC)
        .setSmallIcon(R.mipmap.ic_launcher)
        .setCustomContentView(notificationLayout)
        .build();
    NotificationManager notificationManager =
        (android.app.NotificationManager) getSystemService(NOTIFICATION_SERVICE);
    notificationManager.notify(1, notification);
  }
Khi nhận được receiver có nghĩa là buttond được click, bạn có thể xử lý sự kiện.
  private BroadcastReceiver receiver = new BroadcastReceiver() {
    @Override public void onReceive(Context context, Intent intent) {
      int id = intent.getIntExtra(EXTRA_BUTTON_CLICKED, -1);
      switch (id) {
        case R.id.btnAccept:
          Toast.makeText(context, "Accepted", Toast.LENGTH_SHORT).show();
          break;
        case R.id.btnDenied:
          Toast.makeText(context, "Denied", Toast.LENGTH_SHORT).show();
          break;
      }
    }
  };
HẾT.
All rights reserved
