Tạo bản đồ có mini map với Google Map API
Bài đăng này đã không được cập nhật trong 5 năm
Giới thiệu
Mình đang thực hiện chức năng sử dụng Google Map API để vẽ bản đồ trong dự án, trong đó có một số yêu cầu của Khách cần thực hiện, nên mình viết bài này để chia sẻ lại cách thức thực hiện những yêu cầu đó. Tóm tắt lại yêu cầu của Khách như sau
- Tạo bản đồ có mini map để đổi chế độ view thay cho button mặc định, khi di chuyển map chính thì mini map cũng sẽ di chuyển theo
- Tạo bản đồ với nhiều marker, thay icon marker
- Ẩn Google logo, footer của Google Map
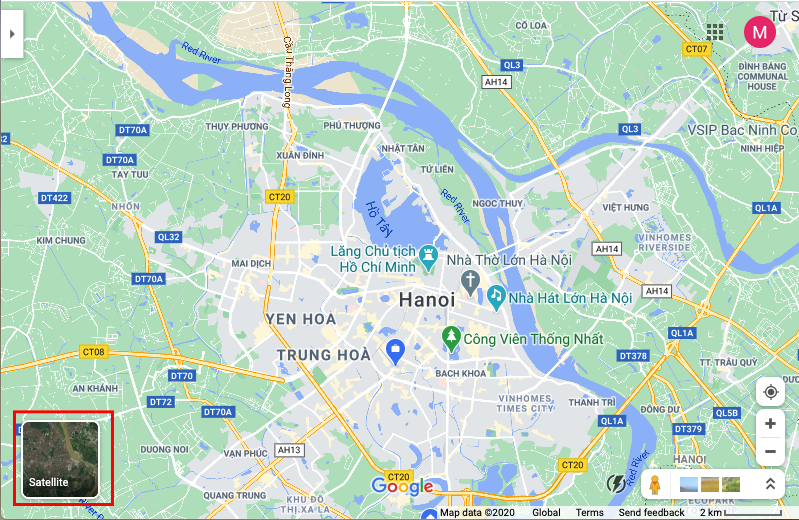
Mini map chính là phần map nhỏ của bản đồ Google Map mà chúng ta hay dùng, nó giống như hình sau đây:

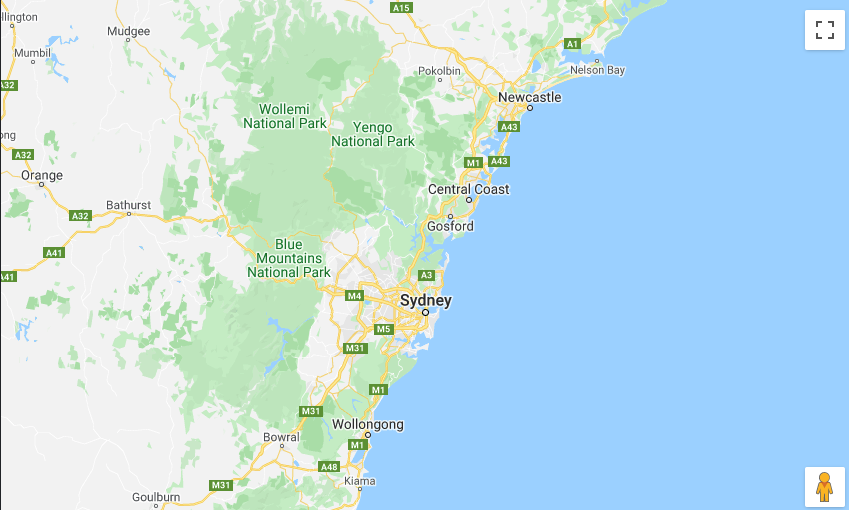
Tạo Map từ Google Map API
Đầu tiên chúng ta cần viết mã HTML như sau
<!DOCTYPE html>
<html>
  <head>
    <title>Mini Google Map</title>
    <!-- Include Google Map API -->
    <script
      src="https://maps.googleapis.com/maps/api/js?key=AIzaSyBIwzALxUPNbatRBj3Xi1Uhp0fFzwWNBkE&callback=initMap"
      defer
    ></script>
  </head>
  <body>
    <!-- Element tạo map chính -->
    <div id="map"></div>
    <script>
        // Function initMap được gọi sau khi tải xong Google Map API, nó sẽ tạo một bản đồ mới
    	function initMap() {
        const map = new google.maps.Map(document.getElementById("map"), {
          center: { -33.91721, 151.2263 }, // xác định vị trí trung tâm của map
          zoom: 8, // set zoom default là 8 (maximum là 20)
          mapTypeControl: false, // Ẩn button thay đổi mapType mặc định
        });
      }
    </script>
    <style>
    #map {
      height: 100%;
    }

    html,
    body {
      height: 100%;
      margin: 0;
      padding: 0;
      position: relative;
    }
    </style>
  </body>
</html>

Tạo markers
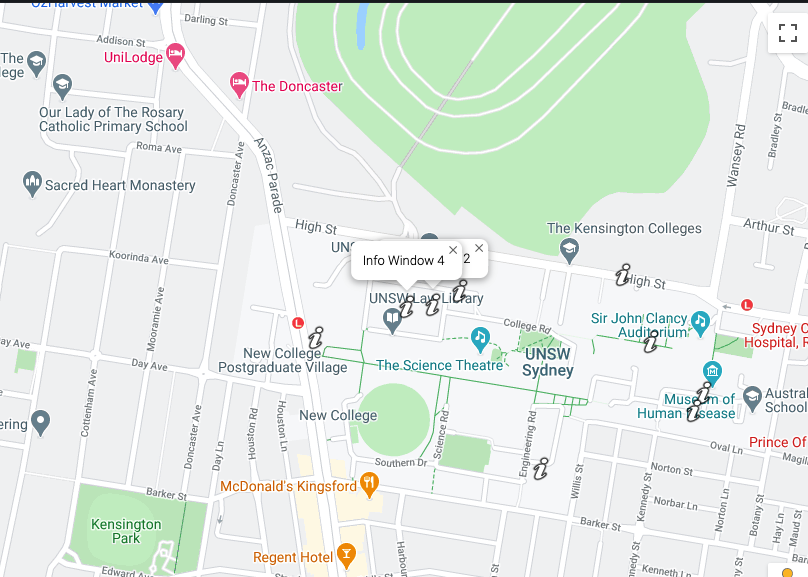
Tiếp theo chúng ta cần tạo ra một danh sách marker bằng cách tao 1 mảng fakeMarkers, sau đó chạy vòng lặp để tạo marker và info window như sau:
    <script>
        ...
    	function initMap() {
        const map = new google.maps.Map(document.getElementById("map"), {
          center: { -33.91721, 151.2263 }, // xác định vị trí trung tâm của map
          zoom: 8, // set zoom default là 8 (maximum là 20)
          mapTypeControl: false, // Ẩn button thay đổi mapType mặc định
        });

        const fakeMarkers = [
            {
              position: new google.maps.LatLng(-33.91721, 151.2263),
              title: 'Info Window 1'
            },
            {
              position: new google.maps.LatLng(-33.91662347903106, 151.22879464019775),
              title: 'Info Window 2'
            },
            {
              position: new google.maps.LatLng(-33.916365282092855, 151.22937399734496),
              title: 'Info Window 3'
            },
            {
              position: new google.maps.LatLng(-33.91665018901448, 151.2282474695587),
              title: 'Info Window 4'
            },
            {
              position: new google.maps.LatLng(-33.919543720969806, 151.23112279762267),
              title: 'Info Window 5'
            },
            {
              position: new google.maps.LatLng(-33.91608037421864, 151.23288232673644),
              title: 'Info Window 6'
            },
            {
              position: new google.maps.LatLng(-33.91851096391805, 151.2344058214569),
              title: 'Info Window 7'
            },
            {
              position: new google.maps.LatLng(-33.91818154739766, 151.2346203981781),
              title: 'Info Window 8'
            },
            {
              position: new google.maps.LatLng(-33.91727341958453, 151.23348314155578),
              title: 'Info Window 9'
            }
         ];

         // Tạo mảng markers và mảng infoWindow
         const markers = [];
         const infoWindow = [];

          // Duyệt vòng lặp fakeMarkers
          for (let i = 0; i < fakeMarkers.length; i++) {
              markers[i] = new google.maps.Marker({ // Tạo item markeer
                position: fakeMarkers[i].position,
                icon: 'https://developers.google.com/maps/documentation/javascript/examples/full/images/info-i_maps.png', // Thay icon marker default
                map: map,
              });

              // Tạo HTML cho content info window
              const dom = document.createElement('div');
              dom.className = 'gmap-info-window';
              dom.innerHTML = `<div class="gmap-info-title">${fakeMarkers[i].title}</div>`;
              // Tạo các info
              infoWindow[i] = new window.google.maps.InfoWindow({
                content: dom
              });

              // Thêm event khi click vào marker sẽ hiển thị lên info window tương ứng marker đó
              markers[i].addListener("click", () => {
                infoWindow[i].open(map, markers[i]);
              });
          }
      }
    </script>
    ...

Tạo mini map
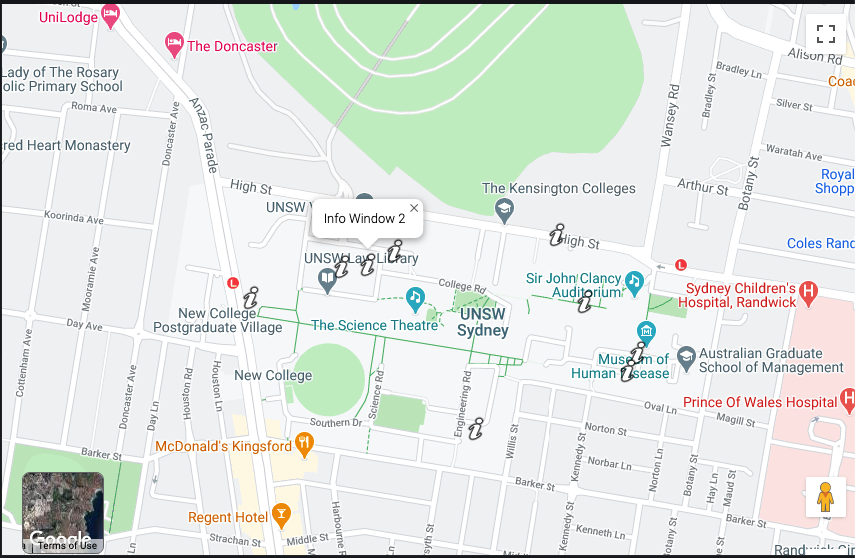
Để tạo được mini map thì mình sẽ tạo ra một map mới neo ở một element HTML có id="mini-map" với typeMap của minimap sẽ là dạng satellite (mặc định ở map chính đang là dạng roadmap). Tiếp theo sẽ thêm event khi click vào minimap sẽ thay đổi map chính về satellite và ở mini map sẽ thay đổi typeMap về roadmap, cụ thể code như sau
 <!-- Element tạo mini map -->
<div id="mini-map"></div>

// JS tạo mini map mà thêm event
<script>
...
  // Tạo mini map
   const mapMini = new google.maps.Map(document.getElementById("mini-map"), {
      zoomControl: false,
      mapTypeControl: false,
      fullscreenControl: false,
      draggable: false,
      zoom: 10,
      mapTypeId: 'satellite'
   });

   // Đặt giá trị center của mini map lấy center của map lớn
   mapMini.setCenter(map.getCenter());

   // Thêm event khi click mini map thì đổi mapType của 2 map cho nhau
   mapMini.addListener('click', () => {
      const miniType = mapMini.getMapTypeId();
      const newMiniType = miniType === 'satellite' ? 'roadmap' : 'satellite';
      map.setMapTypeId(miniType);
      mapMini.setMapTypeId(newMiniType);
   });

    // Đặt lại giá trị center của mini map khi map lớn thay đổi vị trí
    map.addListener('center_changed', () => {
      mapMini.setCenter(map.getCenter());
    });
</script>
Kết quả sẽ được như hình dứoi đây

Thêm CSS ẩn footer và logo Google
Để ẩn thì chúng ta cần override lại CSS mặc định của Google Map, đoạn code như sau
...
<style>
a[href^="http://maps.google.com/maps"],
a[href^="https://maps.google.com/maps"]{
  display:none !important
}

.gmnoprint a,
.gmnoprint span,
.gm-style-cc {
    display:none;
}

.gmnoprint div {
    background:none !important;
}
</style>
Các bạn có thể xem kết quả ở link sau đây
Kết luận
Mong rằng bài viết có thể giúp ích được cho các bạn đang tìm hiểu về Google Map API, nếu có câu hỏi hoặc góp ý nào hãy viết dưới comment nhé, thanks!
All rights reserved