Sử dụng Spring Boot kết hợp Thymeleaf cho new Dev
Bài đăng này đã không được cập nhật trong 7 năm
-
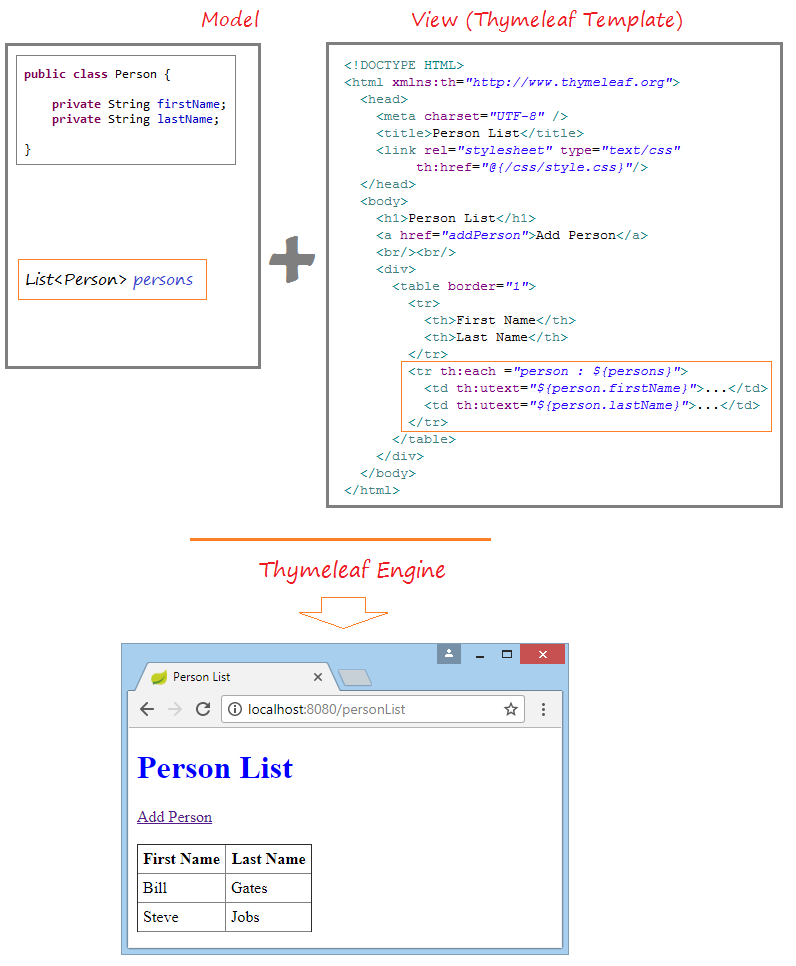
Thymeleaf là gì?
- Thymeleaf là một Java XML/XHTML/HTML5 Template Engine nó có thể làm việc với cả hai môi trường Web và môi trường không phải Web. Nó phù hợp hơn khi được sử dụng để phục vụ XHTML/HTML5 trên tầng View (View Layer) của ứng dụng Web dựa trên kiến trúc MVC. Nó có thể xử lý bất kỳ một file XML nào, thậm trí trên các môi trường offline (Không trực tuyến). Nó hỗ trợ đầy đủ để tương tác với Spring Framework.Các file mẫu (Template file) của Thymeleaf bản chất chỉ là một file văn bản thông thường, có định dạng XML/XHTML/HTML5. Thymeleaf Engine (Bộ máy Thymeleaf) sẽ đọc một file mẫu (template file) và kết hợp với các đối tượng Java để tạo ra (generate) một tài liệu khác. Giống như file html.erb trong rails.
-
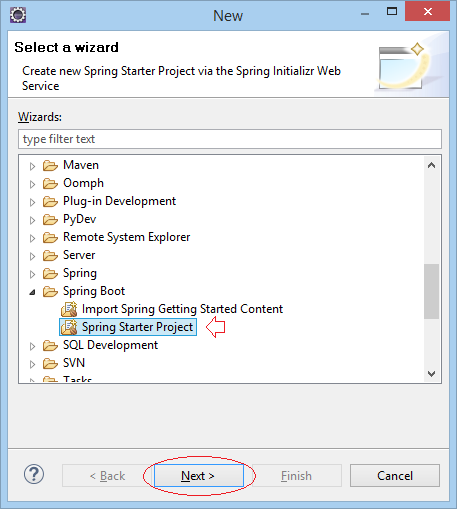
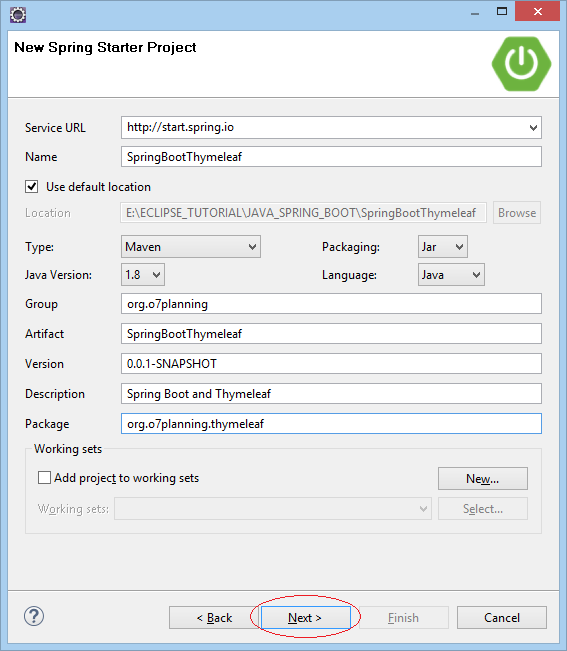
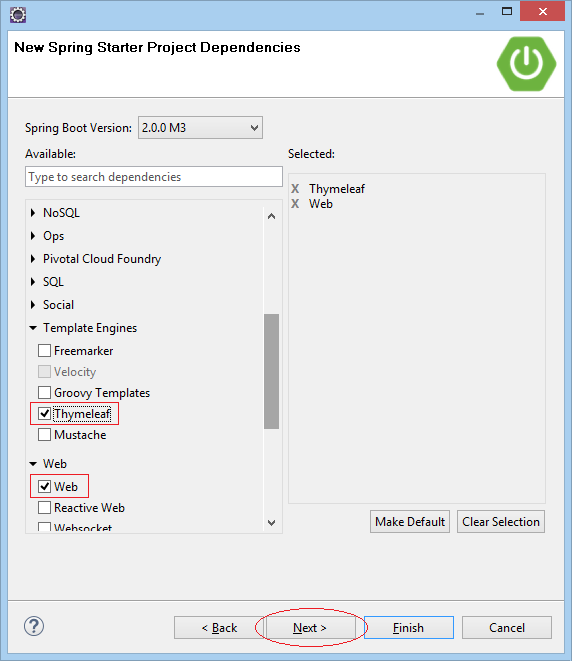
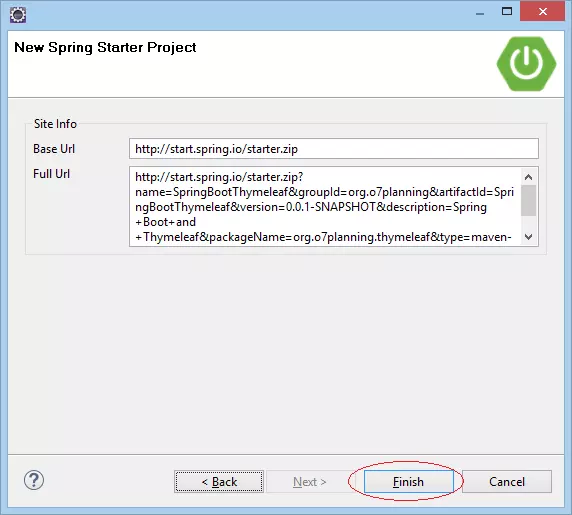
Tạo project.
- Cách nhanh nhất để học và tìm hiểu 1 thứ đó là lấy ví dụ và thực hành với nó.
- ở đây mình sẽ tạo 1 project cơ bản thao tác giữa spring và thymeleaf
-
Thymeleaf Template
-
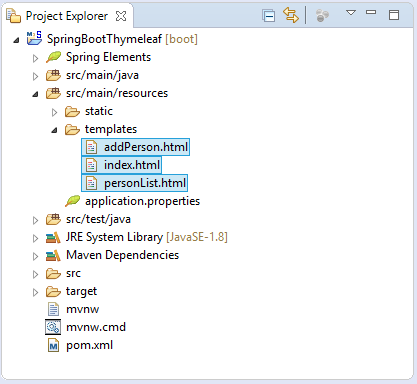
File html của chúng ta sẽ đặt tại thư mục src/main/resources/templates
-
-
ở đây mình tạo ra 3 file thymeleaf
<!DOCTYPE HTML> <html xmlns:th="http://www.thymeleaf.org"> <head> <meta charset="UTF-8" /> <title>Welcome</title> <link rel="stylesheet" type="text/css" th:href="@{/css/style.css}"/> </head> <body> <h1>Welcome</h1> <h2 th:utext="${message}">..!..</h2> <!-- In Thymeleaf the equivalent of JSP's ${pageContext.request.contextPath}/edit.html would be @{/edit.html} --> <a th:href="@{/personList}">Person List</a> </body> </html><!DOCTYPE HTML> <html xmlns:th="http://www.thymeleaf.org"> <head> <meta charset="UTF-8" /> <title>Person List</title> <link rel="stylesheet" type="text/css" th:href="@{/css/style.css}"/> </head> <body> <h1>Person List</h1> <a href="addPerson">Add Person</a> <br/><br/> <div> <table border="1"> <tr> <th>First Name</th> <th>Last Name</th> </tr> <tr th:each ="person : ${persons}"> <td th:utext="${person.firstName}">...</td> <td th:utext="${person.lastName}">...</td> </tr> </table> </div> </body> </html>
-
        <!DOCTYPE HTML>
        <html xmlns:th="http://www.thymeleaf.org">
           <head>
              <meta charset="UTF-8" />
              <title>Add Person</title>
              <link rel="stylesheet" type="text/css" th:href="@{/css/style.css}"/>
           </head>
           <body>
              <h1>Create a Person:</h1>

              <!--
                 In Thymeleaf the equivalent of
                 JSP's ${pageContext.request.contextPath}/edit.html
                 would be @{/edit.html}
                 -->

              <form th:action="@{/addPerson}"
                 th:object="${personForm}" method="POST">
                 First Name:
                 <input type="text" th:field="*{firstName}" />
                 <br/>
                 Last Name:
                 <input type="text" th:field="*{lastName}" />
                 <br/>
                 <input type="submit" value="Create" />
              </form>

              <br/>

              <!-- Check if errorMessage is not null and not empty -->

              <div th:if="${errorMessage}" th:utext="${errorMessage}"
                 style="color:red;font-style:italic;">
                 ...
              </div>

           </body>
        </html>
+ Tất cả các file HTML cần phải khai báo sử dụng Thymeleaf Namespace:
             <!-- Thymeleaf Namespace -->

            <html xmlns:th="http://www.thymeleaf.org">
+ Trong các file mẫu (Template file) có các Thymeleaf Marker (Các đánh dấu của Thymeleaf), chúng là các chỉ dẫn giúp Thymeleaf Engine chế biến dữ liệu.
Thymeleaf Engine phân tích file mẫu (Template file), và kết hợp với các dữ liệu Java để tạo ra (generate) một tài liệu mới
+ Biểu thức biến: $ {...}
+ Lựa chọn biểu thức biến: * {...}
+ Biểu thức tin nhắn: # {...}
+ Biểu thức URL liên kết: @ {...}
+ Biểu thức phân đoạn: ~ {...}
-
Static Resource & Properties File
- Với các nguồn dữ liệu tĩnh (Static Resource), chẳng hạn các file css, javascript, image,.. bạn cần đặt chúng vào thư mục src/main/resources/static hoặc các thư mục con của nó.
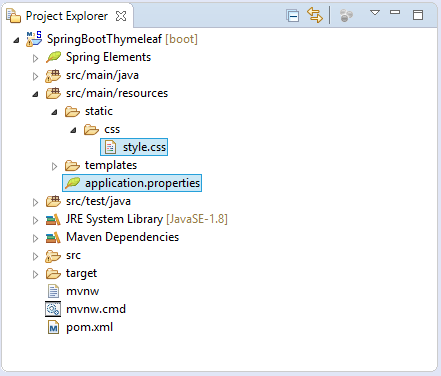
- File style.css:
h1 { color:#0000FF; } h2 { color:#FF0000; } table { border-collapse: collapse; } table th, table td { padding: 5px; } - File application.properties
spring.thymeleaf.cache=false
welcome.message=Hello Thymeleaf
error.message=First Name & Last Name is required!
-
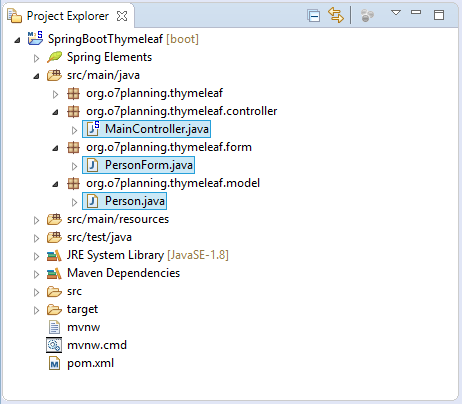
Các lớp Model, Form, Controller
-
-
Trong model: Person.java
package org.o7planning.thymeleaf.model; public class Person { private String firstName; private String lastName; public Person() { } public Person(String firstName, String lastName) { this.firstName = firstName; this.lastName = lastName; } public String getFirstName() { return firstName; } public void setFirstName(String firstName) { this.firstName = firstName; } public String getLastName() { return lastName; } public void setLastName(String lastName) { this.lastName = lastName; } } -
Lớp PersonForm đại diện cho dữ liệu của FORM khi bạn tạo mới một Person trên trang addPerson.
package org.o7planning.thymeleaf.form; public class PersonForm { private String firstName; private String lastName; public String getFirstName() { return firstName; } public void setFirstName(String firstName) { this.firstName = firstName; } public String getLastName() { return lastName; } public void setLastName(String lastName) { this.lastName = lastName; } } -
MainController là một lớp Controller, nó xử lý yêu cầu của người dùng và điều khiển luồng đi (flow) của ứng dụng.
    package org.o7planning.thymeleaf.controller;

import java.util.ArrayList;
import java.util.List;

import org.o7planning.thymeleaf.form.PersonForm;
import org.o7planning.thymeleaf.model.Person;
import org.springframework.beans.factory.annotation.Value;
import org.springframework.stereotype.Controller;
import org.springframework.ui.Model;
import org.springframework.web.bind.annotation.ModelAttribute;
import org.springframework.web.bind.annotation.RequestMapping;
import org.springframework.web.bind.annotation.RequestMethod;

@Controller
public class MainController {

    private static List<Person> persons = new ArrayList<Person>();

    static {
        persons.add(new Person("Bill", "Gates"));
        persons.add(new Person("Steve", "Jobs"));
    }

    // Được tiêm vào (inject) từ application.properties.
    @Value("${welcome.message}")
    private String message;

    @Value("${error.message}")
    private String errorMessage;

    @RequestMapping(value = { "/", "/index" }, method = RequestMethod.GET)
    public String index(Model model) {

        model.addAttribute("message", message);

        return "index";
    }

    @RequestMapping(value = { "/personList" }, method = RequestMethod.GET)
    public String personList(Model model) {

        model.addAttribute("persons", persons);

        return "personList";
    }

    @RequestMapping(value = { "/addPerson" }, method = RequestMethod.GET)
    public String showAddPersonPage(Model model) {

        PersonForm personForm = new PersonForm();
        model.addAttribute("personForm", personForm);

        return "addPerson";
    }

    @RequestMapping(value = { "/addPerson" }, method = RequestMethod.POST)
    public String savePerson(Model model, //
            @ModelAttribute("personForm") PersonForm personForm) {

        String firstName = personForm.getFirstName();
        String lastName = personForm.getLastName();

        if (firstName != null && firstName.length() > 0 //
                && lastName != null && lastName.length() > 0) {
            Person newPerson = new Person(firstName, lastName);
            persons.add(newPerson);

            return "redirect:/personList";
        }

        model.addAttribute("errorMessage", errorMessage);
        return "addPerson";
    }

}
-
-
Tổng kết
- Như vậy chúng ta đã có 1 ứng dụng đơn giản có thể thêm mới và xem được trang index, và biết cách cài đặt cơ bản thymeleaf, sử dụng css, js vào springboot trong ứng dụng cho những bạn mới bắt đầu. Lần sau mình sẽ viết về cách sử dụng bootstrap và I18N nhé

- Tài liệu tham khảo : https://o7planning.org/vi/11545/huong-dan-spring-boot-va-thymeleaf
- Như vậy chúng ta đã có 1 ứng dụng đơn giản có thể thêm mới và xem được trang index, và biết cách cài đặt cơ bản thymeleaf, sử dụng css, js vào springboot trong ứng dụng cho những bạn mới bắt đầu. Lần sau mình sẽ viết về cách sử dụng bootstrap và I18N nhé
All rights reserved
