Sử dụng Fabric Crashlytics khắc phục kịp thời khi ứng dụng của bạn gặp rủi ro
Bài đăng này đã không được cập nhật trong 4 năm
I. Giới thiệu
Đối với mỗi developer trong quá trình phát triển ứng dụng thường có 2 thời điểm đặc biệt chú trọng nhất :
- Build apps cho QA test
- Release production
Khi ở thời điểm
1. Build apps cho QA testthì chúng ta chỉ mong muốn sản phẩm của mình không quá nhiều bug mặc dù đã cố gắng hạn chế hết mức có thể rồi, nhưng dù khi có nhiều bug đi nữa thì tất cả đều được QA log lại và thông báo trực tiếp để fix. Nhưng ở giai đoạn2. Release productionthì không dễ dàng như vậy, lúc này sản phẩm đã đến tay người dùng rồi và bạn không thể kiểm soát được bug - hay force crash trong apps. Xuất phát từ mong muốn được thông báo những trường hợp force crash apps gây ra phản ứng khó chịu cho người dùng, Fabric Crashlytics cho phép theo dõi apps của bạn ngay cả khi nó đã nằm trên AppStore/Google Play. Chúng ta sẽ bắt tay vào tìm hiểu cách sử dụng nhé!
II. Setup Fabric Crashlytics
Install Crashlytics cho ứng dụng bạn có thể thực hiện theo 2 cách : setting trong build.gradle hoặc add Fabric Plugin
Dĩ nhiên việc dùng Plugin sẽ nhanh hơn rất nhiều, ngoài việc sử dụng được Crashlytics thì bạn có thể sử dụng thêm nhiều tools khác của Fabric nữa : Digits, Twitter, .... Từng bước hướng dẫn chi tiết tại đây! Install Fabric Plugin
Sau khi đã setup thành công chúng ta cần có 1 tài khoản và 1 Organization. Nếu bạn chưa có thì hãy Đăng kí ở đây.
Hoàn tất việc đăng kí bước đầu , chúng ta cần có 1 project dùng để theo dõi xem Crashlytics làm được những gì. ^^
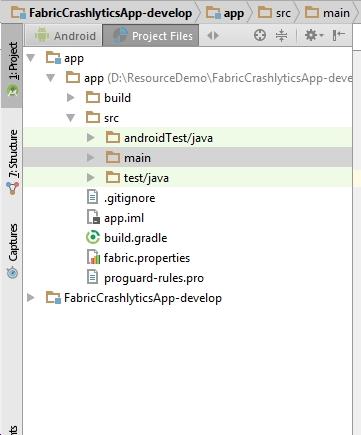
Bạn chỉ việc New Project trên Android Studio như bình thường, (Hình ảnh Project của mình)
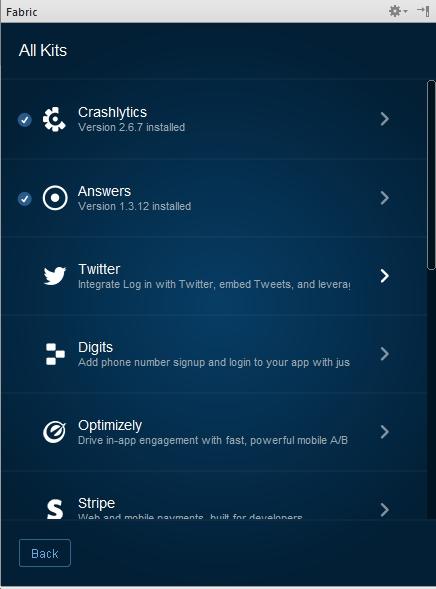
 Tiếp theo, mở Fabric Plugin > Đăng nhập account đã có ở trên > Chọn Organization đã tạo > Crashlytics
 Sau bước Integrate Crashlytics thành công cho project, bạn sẽ thấy trong
 build.gradle code bị thay đổi 1 chút và kiểm tra thêm trong AndroidManifest.xml đã có API key chưa nhé.
Ví dụ :
<meta-data
            android:name="io.fabric.ApiKey"
            android:value="25f3929fc50c8934hjg41d9664414b9b905bcd25" />
Chỉnh sửa lại activity_main.xml để có một giao diện đep hơn theo ý thích. Mục đích của mình là để ra 1 button mà khi click vào sẽ sinh ra 1 record crash apps trên Crashlytics. 
<?xml version="1.0" encoding="utf-8"?>
<LinearLayout
    xmlns:android="http://schemas.android.com/apk/res/android"
    android:layout_width="match_parent"
    android:layout_height="match_parent"
    android:gravity="center_horizontal"
    android:orientation="vertical"
    android:padding="16dp"
    >

    <TextView
        android:layout_width="wrap_content"
        android:layout_height="wrap_content"
        android:text="Fabric Crashlytics Application"
        android:textColor="@android:color/black"
        android:textSize="20sp"
        />

    <android.support.design.widget.TextInputLayout
        android:layout_width="match_parent"
        android:layout_height="wrap_content"
        android:layout_marginTop="16dp"
        >

        <EditText
            android:id="@+id/edit_email"
            android:layout_width="match_parent"
            android:layout_height="wrap_content"
            android:hint="Email"
            />
    </android.support.design.widget.TextInputLayout>

    <android.support.design.widget.TextInputLayout
        android:layout_width="match_parent"
        android:layout_height="wrap_content"
        >

        <EditText
            android:id="@+id/edit_user_name"
            android:layout_width="match_parent"
            android:layout_height="wrap_content"
            android:hint="Password"
            />
    </android.support.design.widget.TextInputLayout>
    <Button
        android:id="@+id/button_login"
        android:layout_width="match_parent"
        android:layout_height="wrap_content"
        android:text="Login"
        />
</LinearLayout>
Tạo thêm FabApplication.java
public class FabApplication extends Application {

    @Override
    public void onCreate() {
        super.onCreate();
        Fabric.with(this, new Crashlytics());
    }
}
Đừng quên setting trong AndroidManifest.xml :
 <application
        ............
        android:name=".FabApplication"
        android:theme="@style/AppTheme">
        ............
 </application>
Chỉnh sửa MainActivity.java để tạo ra trường hợp app bị crash khi click vào Login button
public class MainActivity extends AppCompatActivity implements View.OnClickListener {
    private Button mLoginButton;
    private EditText mEmailInput;
    private EditText mPassInput;

    @Override
    protected void onCreate(Bundle savedInstanceState) {
        super.onCreate(savedInstanceState);
        setContentView(R.layout.activity_main);
        mLoginButton = (Button) findViewById(R.id.button_login);
        mEmailInput = (EditText) findViewById(R.id.edit_email);
        mPassInput = (EditText) findViewById(R.id.edit_user_name);
        mLoginButton.setOnClickListener(this);
    }

    @Override
    public void onClick(View view) {
        if (view.getId() == R.id.button_login) {
            // handle action login click
            logUserInformation(mEmailInput.getText().toString(), mPassInput.getText().toString());
        }
    }

    /**
     * Log data input and create crash report
     * @param email
     * @param password
     */
    private void logUserInformation(String email, String password) {
        Crashlytics.setUserEmail(email);
        Crashlytics.setString("password", password);
        Crashlytics.log(email);
        throw new NullPointerException("Apps have been stopped! Force crash.");
    }
}
III. Kết quả
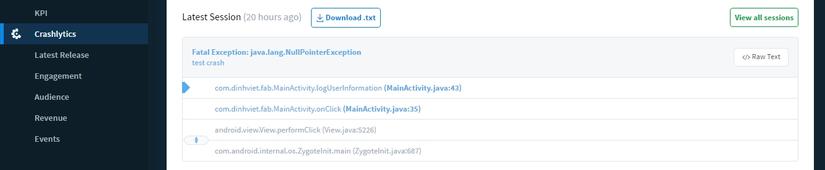
Sau khi bạn Run app thành công và click vào Login button thì ngay lập tức app bị crash do chúng ta đã tạo ra 1 exception throw new NullPointerException("Apps have been stopped! Force crash.");
Ngay khi đó bạn nhìn thấy project trên Fabric Crashlytics thông báo 1 report.
(Hình ảnh)
Không chỉ dừng tại đây, khi bạn đã phát hiện ra bug này rồi. Sau khi tiến hành fix bug xong bạn build lại 1 bản cho QA test. QA thấy không còn bug này nữa sẽ close bug này trực tiếp trên report luôn. Một tính năng rất tiện dụng cho cả bên Develop và QA.

Tổng kết :
Với những chia sẻ trên đây của mình hy vọng rằng sẽ mang lại sự hữu ích cho các Developer trong quá trình theo dõi tình trạng của Apps được tốt nhất. Dựa trên đó sẽ có những biện pháp bảo trì kịp thời ngay khi có sự cố xảy ra!
All rights reserved
