Sử dụng Colab train YOLOv5 với custom dataset phát hiện các đối tượng đặc thù
Bài đăng này đã không được cập nhật trong 4 năm
1. Giới thiệu
YOLO trong object detection có nghĩa là “You only look once”. Đây là một trong những model phát hiện vật thể rất tốt, nó có thể đạt được tốc độ gần như real time mà độ chính xác không quá giảm so với các model thuộc top đầu. Qua thời gian, YOLO được nâng cấp dần dần đến version 5 với các điểm ưu việt hơn so với trước. Các model YOLO mặc định chỉ phát hiện 80 đối tượng, là các object phổ biến thông thường, nếu đối tượng chúng ta cần detect không có trong 80 đối tượng có sẵn kia thì chúng ta cần train model YOLO để phát hiện được chúng. Bài viết này sẽ hướng dẫn train model YOLOv5 để phát hiện các đối tượng đặc thù (custom object)
2. Dataset
Để phát hiện đối tượng nào đó, bước đầu tiên chúng ta cần thu thập thật nhiều ảnh của chúng, sau đó gán nhãn cho chúng rồi chia thành các tập train/val hoặc train/val/test. Tool gán nhãn phổ biến nhất chắc là LabelImg: https://github.com/tzutalin/labelImg. Để cho nhanh, dưới đây mình sẽ sử dụng bộ dataset được gán nhãn sẵn.
2.1 Military and Civilian Vehicles Dataset
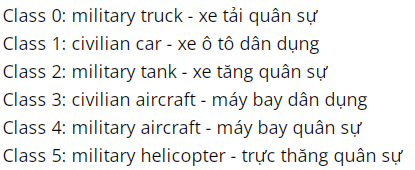
Ở đây mình sử dụng bộ dữ liệu Military and Civilian Vehicles (Xe quân sự và dân sự) gồm 6 đối tượng là các loại xe quân sự và dân sự:
- Class 0: military truck - xe tải quân sự
- Class 1: civilian car - xe ô tô dân dụng
- Class 2: military tank - xe tăng quân sự
- Class 3: civilian aircraft - máy bay dân dụng
- Class 4: military aircraft - máy bay quân sự
- Class 5: military helicopter - trực thăng quân sự
Download Military and Civilian Vehicles dataset: https://data.mendeley.com/datasets/njdjkbxdpn/1
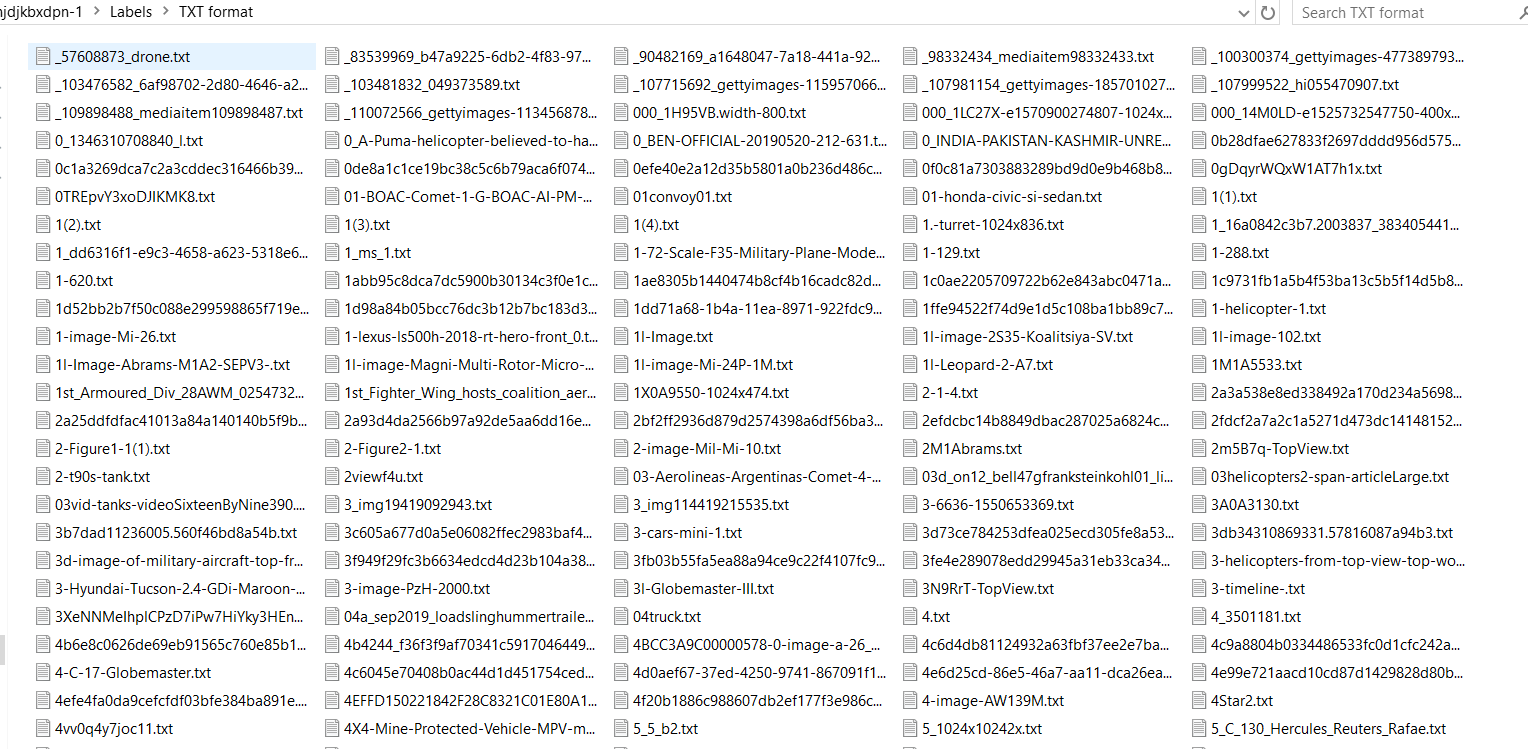
Dataset khi tải về sẽ có 2 thư mục lớn là Images và Labels. Thư mục Images sẽ chứa tất cả các ảnh của 6 loại xe kể trên. Còn thư mục Labels sẽ chứa 4 thư mục con chứa nhãn của các ảnh đó dưới 4 dạng file: csv, tf record, txt và xml. Và model yolov5 nhận dữ liệu label để train dưới dạng file txt. Mở thư mục TXT Format, ta sẽ thấy các file txt với đánh dấu nhãn ảnh:![image.png]()
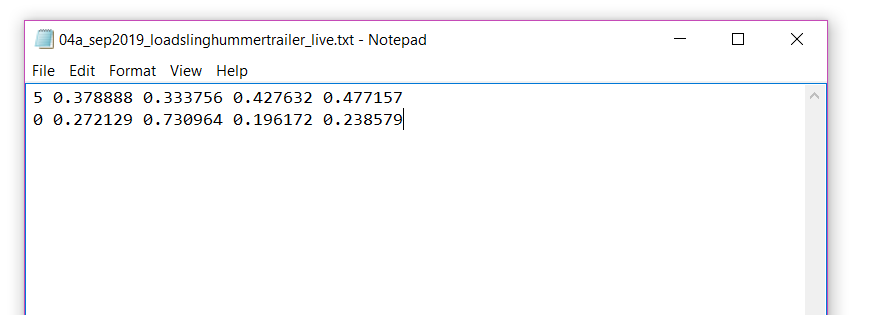
Mở 1 file .txt sẽ thấy có 5 số mỗi dòng. Mỗi một dòng là một đối tượng; số đầu tiên (0,1,2...) là loại đối tượng, 4 số tiếp theo là bounding box :
2.1 Chia thư mục train/val
Chúng ta cần chia dataset ra thành 2 tập train/val phù hợp với model YOLOv5 như sau:
 Với bộ dữ liệu Military and Civilian Vehicles thì chưa chia folder train/val, tuy nhiên ở phần file csv đã chia train/test rồi. Ta sẽ dựa vào file train.csv và test.csv để chia thư mục. Tạo file cùng cấp với các thư mục trước split_dataset.py:
import pandas as pd
import os
from shutil import copyfile
df_label_train = pd.read_csv('./Labels/CSV Format/train_labels.csv')
df_label_test = pd.read_csv('./Labels/CSV Format/test_labels.csv')

filename_train = df_label_train ['filename']
filename_test = df_label_test ['filename']

#tạo các thư mục
try:
    os.mkdir('./train_data')
    os.mkdir('./train_data/images')
    os.mkdir('./train_data/labels')
    os.mkdir('./train_data/images/train')
    os.mkdir('./train_data/images/val')
    os.mkdir('./train_data/labels/train')
    os.mkdir('./train_data/labels/val')
except OSError:
    pass

def split_train(SOURCE, DESTINATION_TRAIN,  DESTINATION_TEST):
    for filename in filename_train:
        this_file = SOURCE + filename
        destination = DESTINATION_TRAIN + filename
        copyfile(this_file, destination)

    for filename in filename_test:
        this_file = SOURCE + filename
        destination = DESTINATION_TEST + filename
        copyfile(this_file, destination)

def split_test(SOURCE, DESTINATION_TRAIN,  DESTINATION_TEST):
    for filename in filename_train:
        this_file = SOURCE + filename.replace(".jpg",".txt")
        destination = DESTINATION_TRAIN + filename.replace(".jpg",".txt")
        copyfile(this_file, destination)

    for filename in filename_test:
        this_file = SOURCE + filename.replace(".jpg",".txt")
        destination = DESTINATION_TEST + filename.replace(".jpg",".txt")
        copyfile(this_file, destination)

# #folder images
source_images = './Images/'
destination_images_train = './train_data/images/train/'
destination_images_val = './train_data/images/val/'
split_train(source_images, destination_images_train, destination_images_val)

#folder labels
source_labels = './Labels/TXT format/'
destination_labels_train = './train_data/labels/train/'
destination_labels_val = './train_data/labels/val/'
split_test(source_labels, destination_labels_train, destination_labels_val)
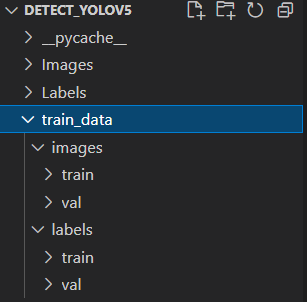
Sau khi chạy file code, ta sẽ được thư mục train_data với các tập train/val đánh nhãn .txt sẵn sàng cho việc train model. Các bạn có thể tải luôn train_data.rar mình đã nén ngay tại đây: https://drive.google.com/file/d/1-DK8qrbyFyoz8SXohA_Msso6SWwTpSSj/view?usp=sharing
3. Train YOLOv5
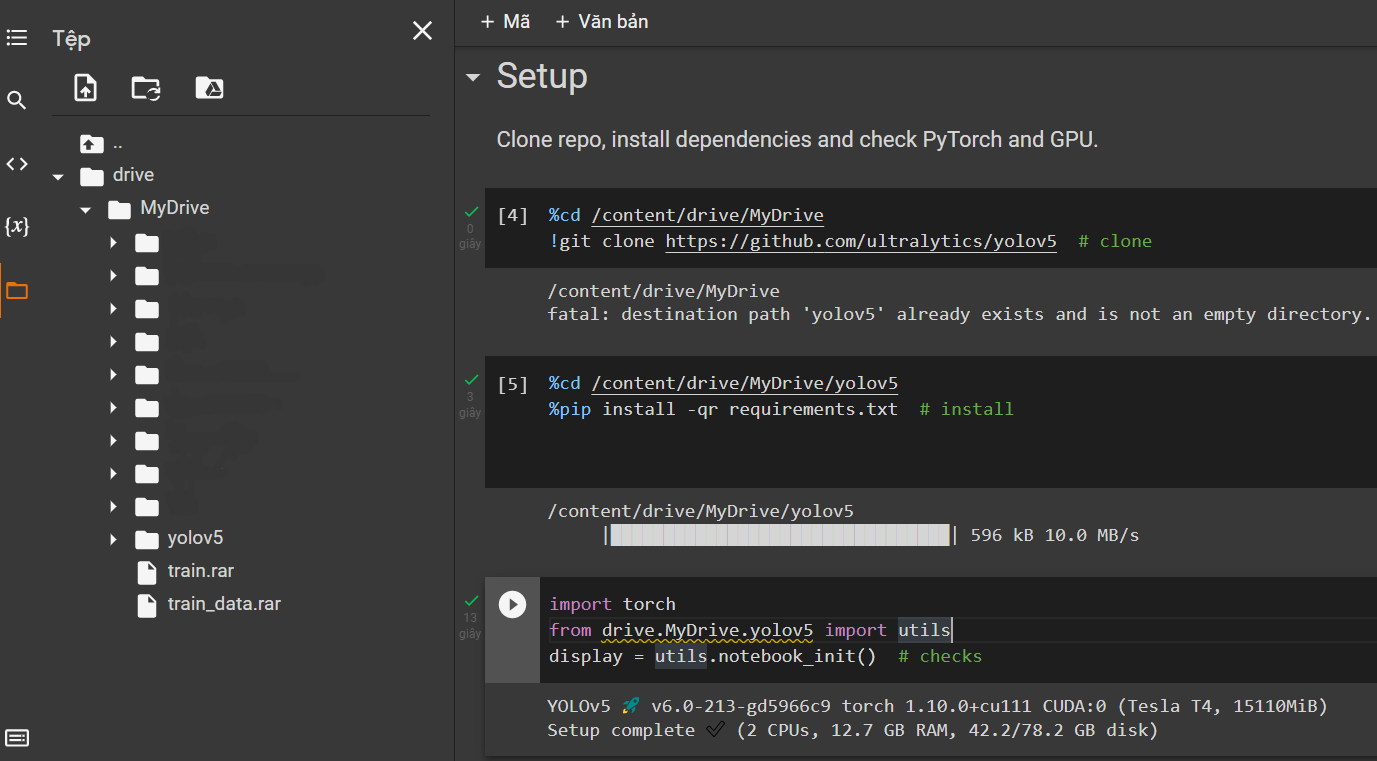
- Đầu tiên, chúng ta kết nối với Google Driver:
from google.colab import drive
drive.mount('/content/drive/', force_remount=True)
from google.colab import drive
drive.mount('/content/drive')
- Clone model và cài đặt các requirements:
%cd /content/drive/MyDrive
!git clone https://github.com/ultralytics/yolov5  # clone
%cd /content/drive/MyDrive/yolov5
%pip install -qr requirements.txt  # install
import torch
from drive.MyDrive.yolov5 import utils
display = utils.notebook_init()  # checks
Sau đó tải lên file dataset: train_data.rar. Thư mục driver:

- Giải nén train_data vào yolov5/data:
!unrar x "/content/drive/MyDrive/train_data.rar" "./data"
- Tải file /yolov5/data/coco128.yaml về và sửa lại thành file custom_data.yaml:
train: ../yolov5/data/train_data/images/train/  # train images (relative to 'path') 128 images
val: ../yolov5/data/train_data/images/val/ # val images (relative to 'path') 128 images


# Classes
nc:  6 # number of classes
names: ['military truck', 'civilian car', 'military tank',
'civilian aircraft','military aircraft', 'military helicopter']  # class names
Lưu ý: phần list name của đối tượng phải để lần lượt theo đúng số thứ tự class 0,1,2,3...trong nhãn txt, nếu sai thì khi phát hiện các vật thể gán tên nhãn sẽ bị nhầm với nhau.
- Sau đó tải file custom_data.yaml lên thư mục data:
![image.png]()
- Tiến hành train model với custom dataset. Ta chọn pretrained yolov5 với các thông số phù hợp:
![image.png]()


# Train YOLOv5
!python train.py --img 640 --batch 16 --epochs 60 --data custom_data.yaml --weights yolov5s.pt
Với epochs=100 có thể thời gian train sẽ khá lâu, các bạn muốn thấy ngay kết quả (độ chính xác sẽ thấp) có thể giảm số lượng epochs nhỏ xuống còn 3, 5, 10...
- Các bạn có thể xem toàn bộ file code trên Colab ở đây: https://colab.research.google.com/drive/17_wFdnY1tvmEKm0X5SFKQckNPvy8i-ax?usp=sharing
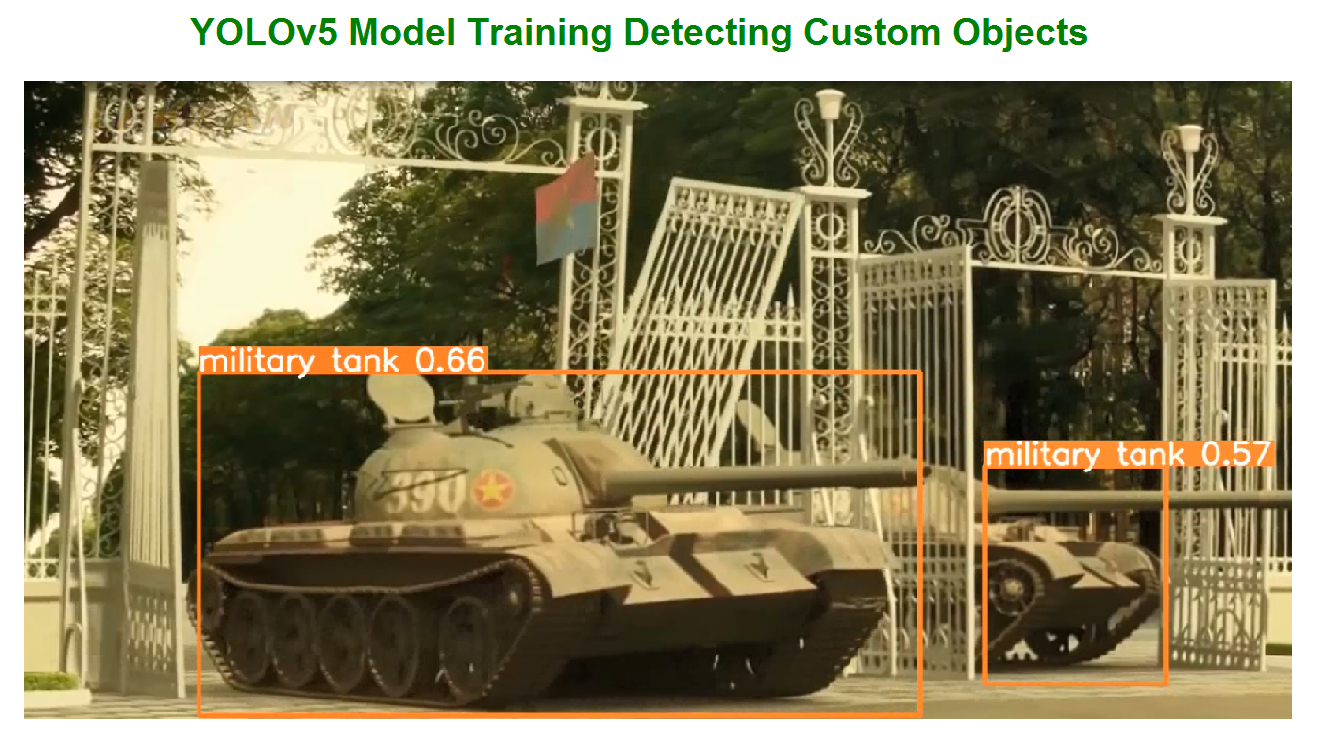
4. Kết quả
Sau khi train, kết quả train sẽ được lưu vào các thư mục runs/train/exp:
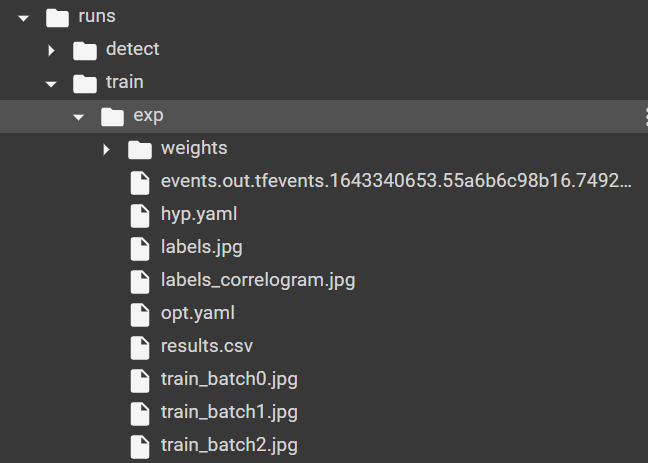
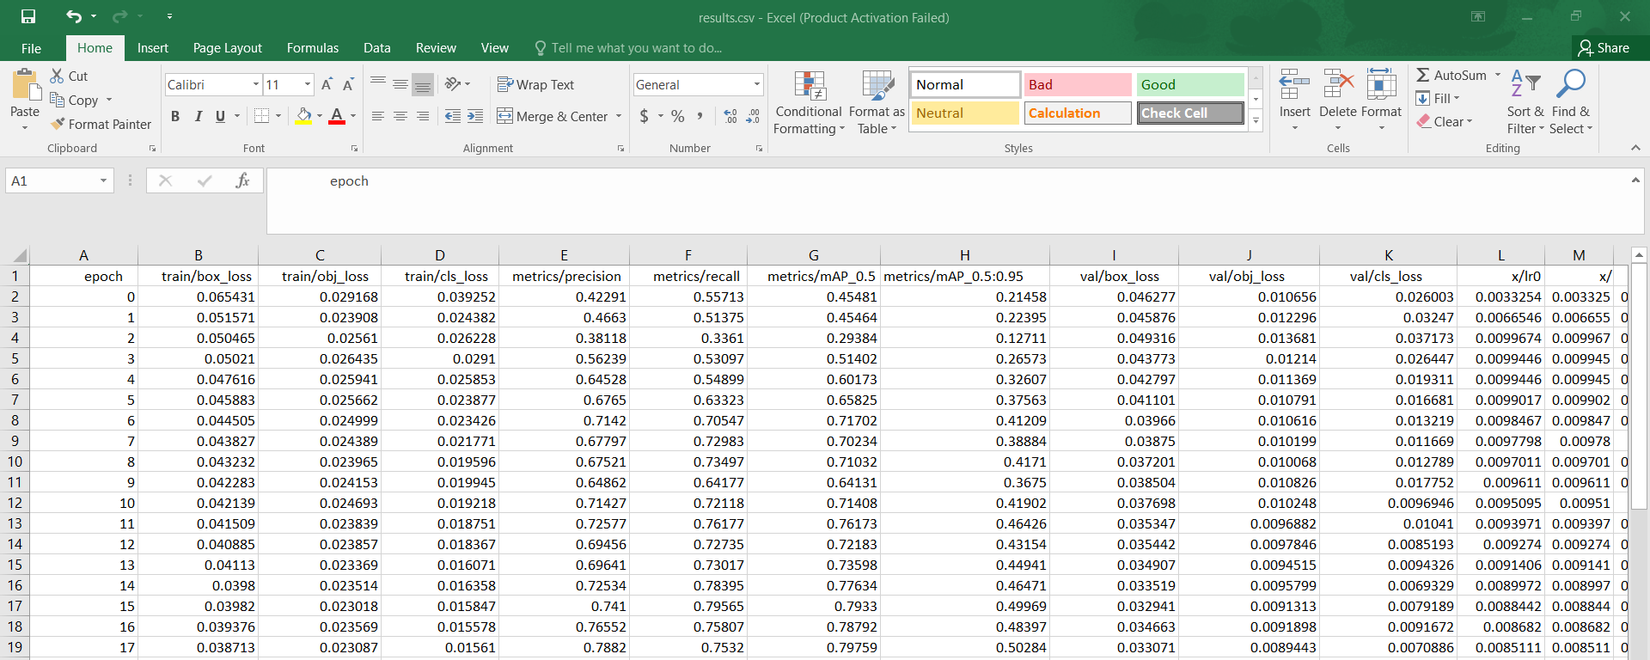
Kết quả các train từng epoch được lưu lại ở file results.csv:
Trọng số (weights) của model Yolov5 sẽ được lưu trong thư mục weights:

Đó là weights của của epoch tốt nhất và best.pt và epoch cuối cùng last.pt
- Tải ảnh cho vào thư mục yolov5/data/images
Phát hiện đối tượng trên ảnh bằng lệnh:
!python detect.py --weights path weights model (best.pt/last.pt) --source path image/video/...
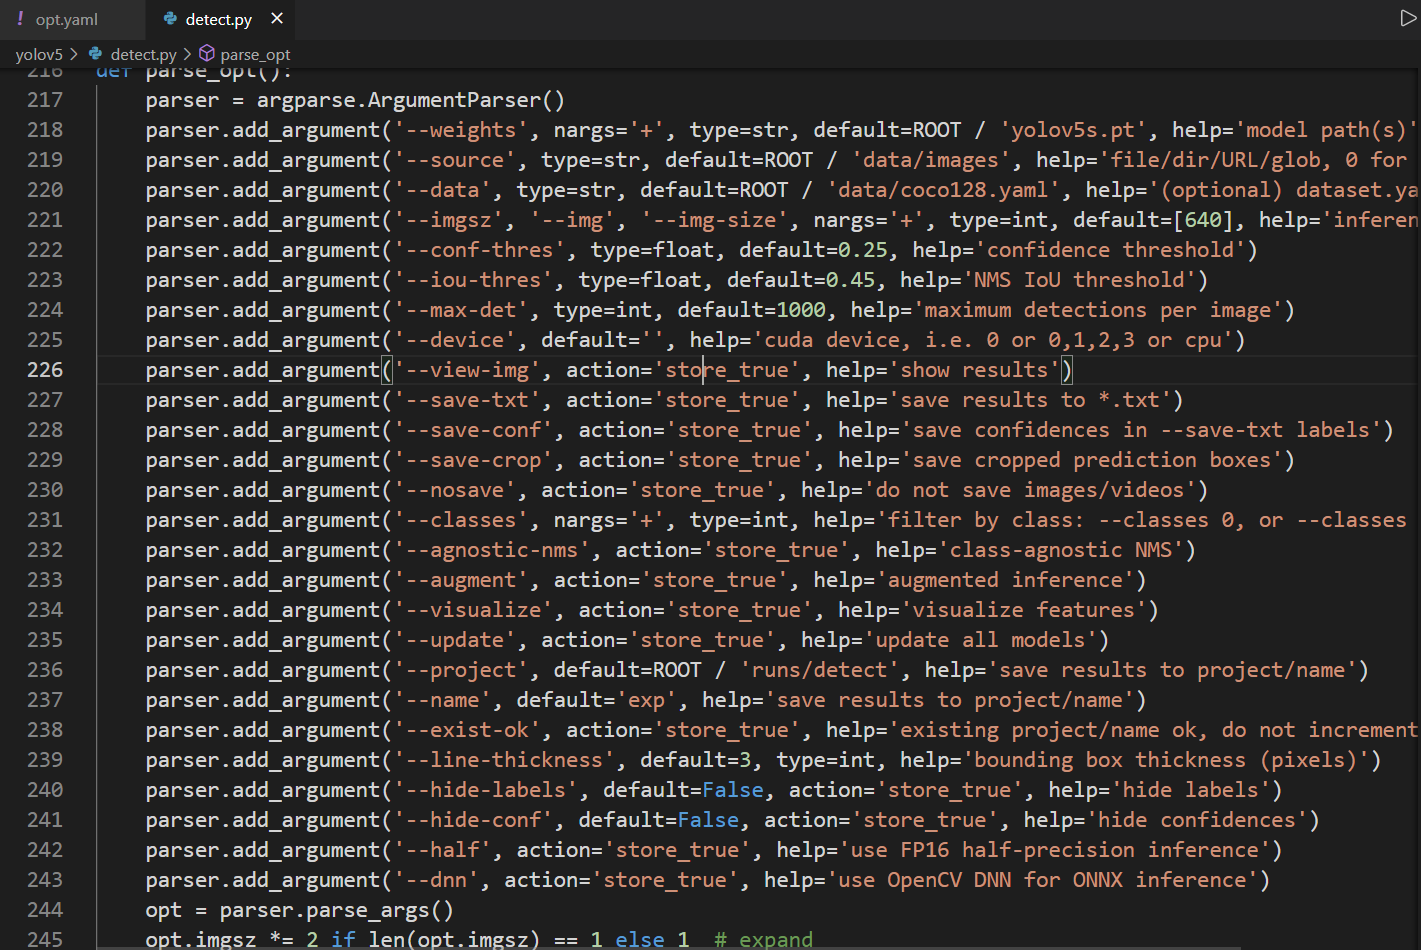
Mở file detect.py ta có thể thấy các thông số điều chỉnh thêm:
Ví dụ:
!python detect.py --weights /content/drive/MyDrive/yolov5/runs/train/exp/weights/best.pt --img 640 --conf 0.25 --source data/images/8.jpg
Kết quả sẽ được lưu vào các thư mục runs/detect/exp


 Chúng ta có thể tải thư mục yolov5 từ ggdrive về project và chạy trên vs code (bỏ dấu ! đi và chạy trên terminal)
5. Tài liệu tham khảo
https://github.com/ultralytics/yolov5
https://www.youtube.com/watch?v=GRtgLlwxpc4&t=1065s
All rights reserved
