RECYCLERVIEW AND CARDVIEW TRONG ANDROID
Bài đăng này đã không được cập nhật trong 4 năm
Thư viện hỗ trợ mới trong Android L (Lollipop) đã giới thiệu hai UI Widget mới là : RecyclerView và CardView. RecyclerView có nhiều tiện lợi và linh động hơn rất nhiều so với ListView. Component mới này là một bước tiến lớn mới bởi vì ListView là một trong những thành phần được dùng rất phổ biến . CardView là một thành phần mới hoàn toàn, không kế thừa từ bất kỳ thành phần nào đã tồn tại. Trong bài hướng dẫn tôi sẽ hướng dẫn làm thế nào để sử dụng các thành phần này.
RecyclerView:
Chúng ta thực sự đã biết rằng ListView để tăng hiệu suất chúng ta sử dụng Pattern **ViewHolder **. Sử dụng Pattern này, Chúng ta tránh được gọi nhiều lần phương thức findById để nhận về những thành phần UI Widget hiển thi trong mỗi Row làm cho ListView scroll mượt hơn. Trong RecyclerView vân tiếp tục thực thi pattern này làm nó trở thành nhân của UI này. Để trình bày cách sử dụng RecyclerView , Tôi giả sử rằng, Chúng ta tạo một ứng dụng đơn giản để hiển thị một danh sách các Contact. Đầu tiên chúng ta tạo một file layout . **RecyclerView **tương tự như ListView Chúng ta sẽ khai báo nó trong file layout :
<RelativeLayout xmlns:android="http://schemas.android.com/apk/res/android"
    xmlns:tools="http://schemas.android.com/tools"
    android:layout_width="match_parent"
    android:layout_height="match_parent"
    android:paddingBottom="@dimen/activity_vertical_margin"
    android:paddingLeft="@dimen/activity_horizontal_margin"
    android:paddingRight="@dimen/activity_horizontal_margin"
    android:paddingTop="@dimen/activity_vertical_margin"
    tools:context=".MainActivity">

    <android.support.v7.widget.RecyclerView
        android:id="@+id/cardList"
        android:layout_width="match_parent"
        android:layout_height="match_parent" />

</RelativeLayout>
Bạn chú ý file layout hiển thị ở trên , RecyclerView là sẵn sàng hiển thị trong thư viện support của Android, do đó chúng ta phải điểu chỉnh lại file build.gradle để bao gồm những dependency này:
apply plugin: 'com.android.application'

android {
    compileSdkVersion 22
    buildToolsVersion "21.1.2"

    defaultConfig {
        applicationId "com.technet.apps.recyclerview_cardview"
        minSdkVersion 16
        targetSdkVersion 22
        versionCode 1
        versionName "1.0"
    }
    buildTypes {
        release {
            minifyEnabled false
            proguardFiles getDefaultProguardFile('proguard-android.txt'), 'proguard-rules.pro'
        }
    }
}

dependencies {
    compile fileTree(dir: 'libs', include: ['*.jar'])
    compile 'com.android.support:appcompat-v7:22.0.0'
    compile 'com.android.support:recyclerview-v7:22.0.0'
    compile 'com.android.support:cardview-v7:22.0.0'
}
Bây giờ trong phương thức onCreate() của Activity chứa file layout trên, Chúng ta tham chiếu đên RecyclerView đã khai báo và cấu hình nó.
@Override
    protected void onCreate(Bundle savedInstanceState) {
        super.onCreate(savedInstanceState);
        setContentView(R.layout.activity_main);

        RecyclerView recyclerView = (RecyclerView) findViewById(R.id.cardList);
        recyclerView.setHasFixedSize(true);

        LinearLayoutManager linearLayoutManager = new LinearLayoutManager(this);
        linearLayoutManager.setOrientation(LinearLayoutManager.VERTICAL);
        recyclerView.setLayoutManager(linearLayoutManager);

    }
Nếu bạn nhìn đoạn code trên, bạn sẽ chú thấy một vài điểm khách nhau giữa RecyclerView và ListView. RecyclerView yêu cầu một Layout Manager(cụ thể ở đây là LinearLayoutManager ) . Layout Manager này dùng để xác định vị trí những row khi nó tạo lại các View. Thư viện đã cũng cấp sẵn Layout Manager mặc định là LinearlayoutManager. CardView là một thành phần UI dùng để hiển thị thông tin trong mỗi row của RecyclerView. Chúng ta có thể custom các góc , độ cao v..v.Bây giờ chúng ta sẽ định nghĩa layout của CardView như bên dưới:
<?xml version="1.0" encoding="utf-8"?>
<android.support.v7.widget.CardView xmlns:android="http://schemas.android.com/apk/res/android"
xmlns:card_view="http://schemas.android.com/apk/res-auto"
android:id="@+id/card_view"
android:layout_width="match_parent"
android:layout_height="match_parent"
android:layout_margin="5dp"
card_view:cardCornerRadius="4dp">

<RelativeLayout
    android:layout_width="match_parent"
    android:layout_height="match_parent">

    <TextView
        android:id="@+id/title_textview"
        android:layout_width="match_parent"
        android:layout_height="20dp"
        android:background="@color/bkg_card"
        android:gravity="center_vertical"
        android:text="contact det"
        android:textColor="@android:color/white"
        android:textSize="14sp" />

    <TextView
        android:id="@+id/name_textview"
        android:layout_width="wrap_content"
        android:layout_height="wrap_content"
        android:layout_below="@id/title_textview"
        android:layout_marginLeft="5dp"
        android:layout_marginTop="10dp"
        android:gravity="center_vertical"
        android:text="Name"
        android:textSize="10sp" />

    <TextView
        android:id="@+id/surname_textview"
        android:layout_width="wrap_content"
        android:layout_height="wrap_content"
        android:layout_below="@id/name_textview"
        android:layout_marginLeft="5dp"
        android:layout_marginTop="10dp"
        android:gravity="center_vertical"
        android:text="Surname"
        android:textSize="10sp" />

    <TextView
        android:id="@+id/email_textview"
        android:layout_width="wrap_content"
        android:layout_height="wrap_content"
        android:layout_alignBaseline="@id/name_textview"
        android:layout_alignParentRight="true"
        android:layout_marginLeft="5dp"
        android:layout_marginRight="150dp"
        android:layout_marginTop="10dp"
        android:gravity="center_vertical"
        android:text="Email"
        android:textSize="10sp" />

</RelativeLayout>

</android.support.v7.widget.CardView>
Như bạn đã nhìn thấy, CardView là rất dễ sử dụng. Thành phần này sẵn sàng trong thư viện hỗ trợ :
compile 'com.android.support:cardview-v7:22.0.0'
Adapter :
Adapter là thành phần đứng giữ mô hình dữ liệu chúng ta muốn hiển thị và những UI để hiển thị dữ liệu đó. Hay nó cách khác Adapter là một cách để hiển thị thông tin vào bên trong UI. Vậy chúng ta muốn hiển thị danh sách các Contact chúng ta cần một Adapter cho RecyclerView. Adapter này phải được mở rộng từ class **RecyclerView.Adapter ** Trước khi tạo Adapter chúng tôi tạo một mô hình dữ liệu đơn giản như bên đưới:
public class ContactInfo {
    protected String name;
    protected String suername;
    protected String email;

    protected static final String NAME_PREFIX = "Name_";
    protected static final String SUERNAME_PREFIX = "Surname_";
    protected static final String EMAIL_PREFIX = "Email_";
}
Nếu bạn nhớ những gì tôi đã nói ở trên về pattern ViewHolder, Chúng tôi sẽ tạo 1 iner class trong Adapter như bên dưới:
public static class ContactViewHolder extends RecyclerView.ViewHolder {

        protected TextView vName;
        protected TextView vSurname;
        protected TextView vEmail;
        protected TextView vTitle;

        public ContactViewHolder(View itemView) {
            super(itemView);
            vName = (TextView) itemView.findViewById(R.id.name_textview);
            vSurname = (TextView) itemView.findViewById(R.id.surname_textview);
            vEmail = (TextView) itemView.findViewById(R.id.email_textview);
            vTitle = (TextView) itemView.findViewById(R.id.title_textview);
        }
    }
Trong Constructor của class trên, chúng ta đã tham chiếu đến những thành phần view chúng ta đã định nghĩa trước trong layout của row sẽ được hiển thị trong RecyclerView. Bây giờ là lúc chúng ta sẽ tạo Adapter cho RecyclerView
public class ContactAdapter extends RecyclerView.Adapter<ContactAdapter.ContactViewHolder> {

    private List<ContactInfo> contactInfoList;

    public ContactAdapter(List<ContactInfo> contactList) {
        this.contactInfoList = contactList;
    }

    @Override
    public ContactViewHolder onCreateViewHolder(ViewGroup parent, int viewType) {
        View itemView = LayoutInflater.from(parent.getContext()).inflate(R.layout.card_layout, parent, false);
        return new ContactViewHolder(itemView);
    }

    @Override
    public void onBindViewHolder(ContactViewHolder holder, int position) {
        ContactInfo contact = contactInfoList.get(position);
        holder.vName.setText(contact.name);
        holder.vSurname.setText(contact.suername);
        holder.vEmail.setText(contact.email);
        holder.vTitle.setText(contact.name + " " + contact.suername);

    }

    @Override
    public int getItemCount() {
        return contactInfoList.size();
    }

}
Như trên chúng ta lưu ý đến 2 method chúng ta cần override là
-
onCreateViewHolder : được gọi khi 1 ViewHolder mới được tạo
-
**onBindViewHolder : **được gọi khi OS gắn kết các view trong ViewHolder với data Adapter đã giúp chúng ta kết hợp giữa RecyclerView và CardView.
Việc cuối cùng chúng ta cần phải làm là thiết lập **Adapter **vừa mới tạo cho RecyclerView:
ContactAdapter contactAdapter = new ContactAdapter(createList(50));
        recyclerView.setAdapter(contactAdapter);
Chạy ứng dụng và bạn sẽ nhìn thấy kết quả hiển thị như bên dưới.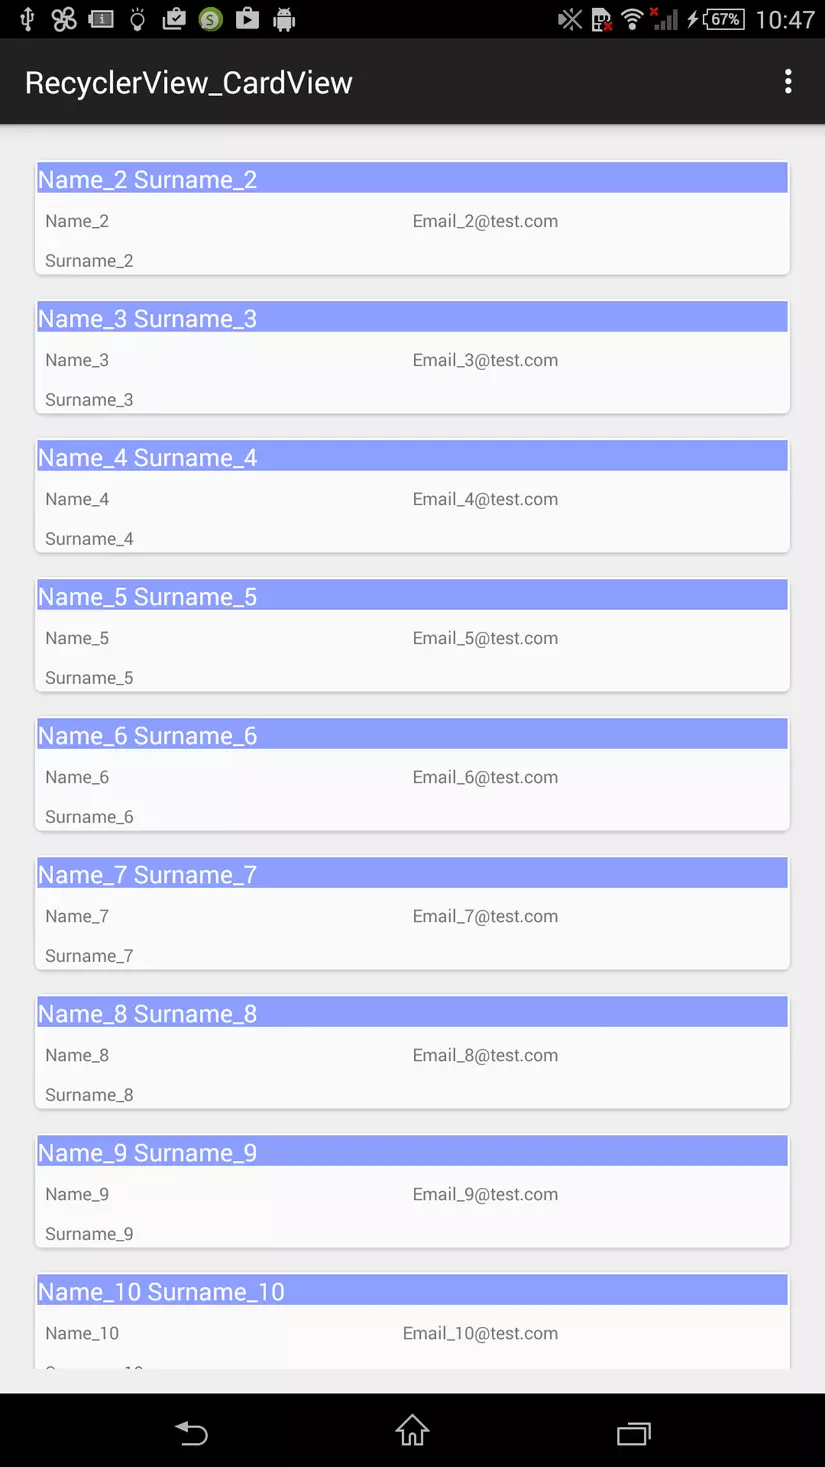
Bạn có thể tham khảo đầy đủ source code tại đây:
Trang tài liệu tham khảo: http://www.survivingwithandroid.com/2014/07/android-recyclerview.html
All rights reserved
