Implementing Google Analytics
Bài đăng này đã không được cập nhật trong 4 năm
Introduction It is important to keep track on your app after release therefore google have provided its Analytics service for developers to keep track of their app. Be it the number of users you have or the most visit activity, Google Analytics provides an interface for you to monitor and manage the sessions related to your app. To set up this service simply follow this simple tutorial and in few minutes u will have Analytics implemented in your app.
Here are the steps taken to successfully add Analytics to your android application: Step 1- Add permissions to your Manifest If you havent added these permissions already then start by adding it
  <uses-permission android:name="android.permission.INTERNET"/>
  <uses-permission android:name="android.permission.ACCESS_NETWORK_STATE"/>
Step 2- Add the necessary dependency to your gradle file
- Add to project-level
classpath 'com.google.gms:google-services:3.0.0' - Add the plugin to the bottom of your app-level build.gradle
apply plugin: 'com.google.gms.google-services' - Lastly you need to add a dependency for Google Play Services. Inside your app's build.gradle add:
compile 'com.google.android.gms:play-services-analytics:10.0.1'
Step 3- Get the Configuration file
Do not that after and each time you add a service to your application an updated json file is generated by Google. Simply update or add this json into the app/ or mobile/ directory of your Android Studio project after inputing the details such as the App's name and package name.
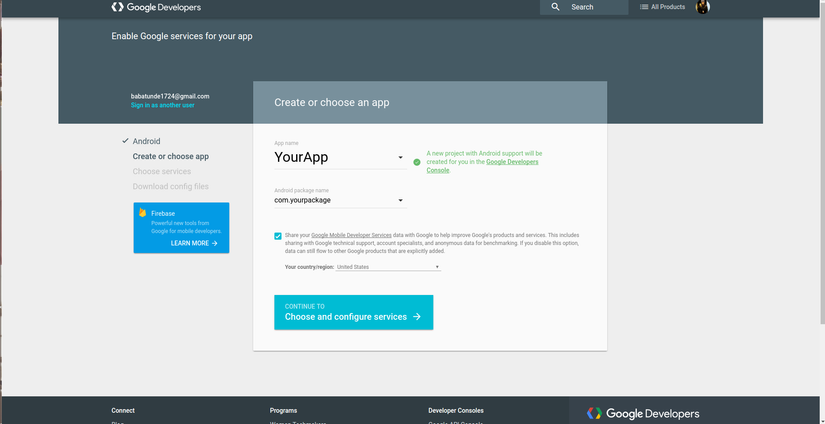 After which you can select the button "CONTINUE TO ...." to get the file.
Step 4- Add screen tracking Here we will get a Tracker that will basically send the name of the screen and execute tracking. To do this we need to provide the shared tracker via an Application subclass. Add the below class as a subclass of your Application class.
public class AnalyticsApplication extends Application {
  private Tracker mTracker;

  synchronized public Tracker getDefaultTracker() {
    if (mTracker == null) {
      GoogleAnalytics analytics = GoogleAnalytics.getInstance(this);
      mTracker = analytics.newTracker(R.xml.global_tracker);
    }
    return mTracker;
  }
}
Dont forget to import the neccessary libaries :
import com.google.android.gms.analytics.GoogleAnalytics;
import com.google.android.gms.analytics.Tracker;
Step 5- Start tracking your Activities
Now that we have a tracker class we can simply call this whenever we want to tract an activity/fragment. This can be done by overriding the onCreate method of the Activity or Fragment to track to obtain the shared Tracker instance. For example if i would like to track ActivityOne all i need to do is simply add the below code to my Activity.
AnalyticsApplication application = (AnalyticsApplication) getApplication();
mTracker = application.getDefaultTracker();
Next overide the appropraite method such as onResume when the screen changes
mTracker.setScreenName(this.getClass().getSimpleName());
mTracker.send(new HitBuilders.ScreenViewBuilder().build());
This will send "ActivityOne" to the analytics server and thus is tracked. To track other calsses simply apply the same code to the acticity/fragment and check your app on analytics web to view all session and users acticities.
For more info and research please refer https://developers.google.com/analytics/devguides/collection/android/v4/mobile-implementation-guide
All rights reserved
