DevOps phần 2 - Tích hợp CI/CD vào project Laravel đơn giản
Bài đăng này đã không được cập nhật trong 5 năm
CI là gì? CD là gì?
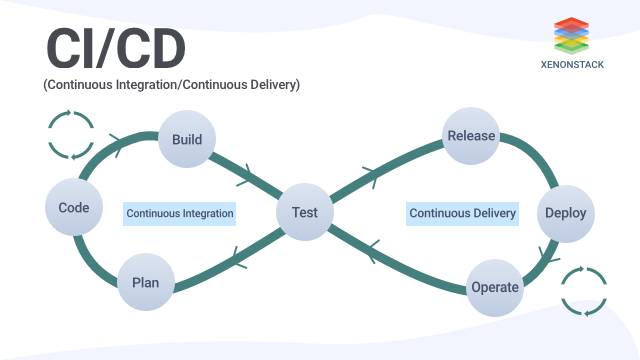
CI - Continuous Integration - Tích hợp liên tục
Tích hợp liên tục (CI) là phương pháp phát triển phần mềm đòi hỏi các thành viên trong nhóm tích hợp công việc thường xuyên. Mỗi ngày, các thành viên đều phải theo dõi và phát triển công việc của họ ít nhất một lần. Việc này sẽ được một nhóm khác kiểm tra tự động, nhóm này sẽ tiến hành kiểm thử truy hồi để phát hiện lỗi nhanh nhất có thể. Cả nhóm thấy rằng phương pháp tiếp cận này giúp giảm bớt vấn đề về tích hợp hơn và cho phép phát triển phần mềm gắn kết nhanh hơn.
CD - Continuous Delivery - Chuyển giao Liên tục
Chuyển giao liên tục là 1 tập hợp các kỹ thuật để triển khai tích hợp souce code trên môi trường staging ( một môi trường rất giống với môi trường production).
Config CI (phpcs, phpunit) cho 1 project Laravel đơn giản
1. Tạo API Laravel
1. Tạo project laravel
Chúng ta chỉ cần vào terminal và chạy lệnh sau
composer create-project --prefer-dist laravel/laravel demo-ci
Tiếp theo init project vừa tạo vào lên git
cd demo-ci-laravel
git init
git remote add origin git@github.com:lethu96/demo-ci.git
git add .
git commit -m "Init commit"
git push -u origin master
2. Config database
Trong bài naỳ SQLite sẽ được sử dụng cho testing và cơ sở dữ liệu chính của chúng ta. Thông thường, cơ sở dữ liệu chính là một DBMS phức tạp hơn như MySQL hoặc MSSQL nhưng để cho đơn giản với mục đích minh họa. Chúng ta sẽ giữ cấu hình cho cơ sở dữ liệu chính trong file .env , và sau đó tạo một file .env.testing để giữ cấu hình cơ sở dữ liệu cho việc test.
Trong file nv.testing chúng ta sẽ config như sau :
DB_CONNECTION=sqlite
DB_HOST=null
DB_PORT=null
DB_DATABASE=database/database.sqlite
DB_USERNAME=null
DB_PASSWORD=null
Để có thể trỏ đến file cơ sở dữ liệu SQLite của chúng ta như chúng ta đã config trong file.env.testing thì bên trong config/database.php cũng phải thay thế cấu hình SQLite trong connections array bằng config bên dưới:
'sqlite' => [
            'driver' => 'sqlite',
            'database' => database_path('database.sqlite'),
            'prefix' => '',
        ]
Sau đó chạy lệnh migrate để kiểm tra config của chúng ta vừa rồi đã đúng chưa
php artisan migrate
Cài đặt token-based authentication với Passport
Để xác thực authen mình sẽ sử dụng package laravel/passport của Laravel
composer require laravel/passport v7.5.1
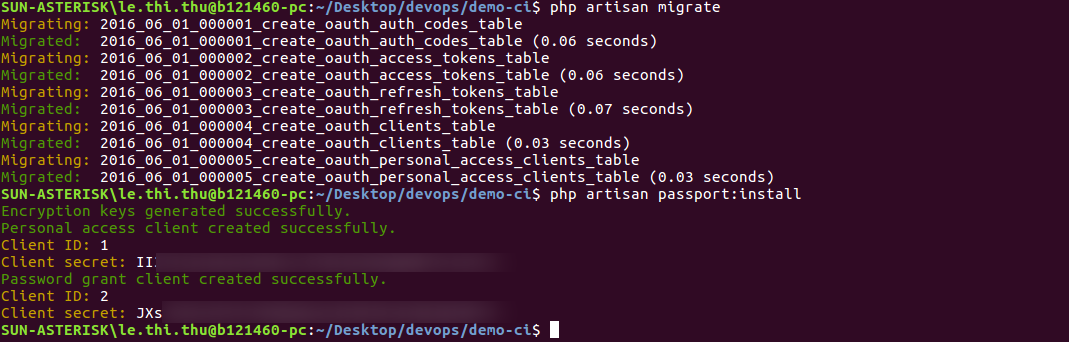
Sau khi cài đặt xong, chạy lại lệnh migrate đểmigrations các bảng liên quan đến laravel/passport:
php artisan migrate
Passport yêu cầu các keys mã hóa để tạo tokens , các keys này cần được tạo và lưu trong cơ sở dữ liệu. Để tạo các keys này, chúng ta chạy lệnh
php artisan passport:install
Sau khi chạy command thành công, bạn sẽ nhìn thấy các Client secret của mình
Bước tiếp theo là thêm Laravel\Passport\HasApiToken trait vào model App\User . Chúng ta sẽ sử dụng được các method helper từ package laravel/passport vào app để giúp kiểm tra user’s token và scopes. Mở file app/User.php và thay thế nội dung của nó bằng code bên dưới:
<?php

namespace App;

use Illuminate\Notifications\Notifiable;
use Illuminate\Foundation\Auth\User as Authenticatable;
use Laravel\Passport\HasApiTokens;

class User extends Authenticatable
{
    use Notifiable, HasApiTokens;


    protected $fillable = [
        'name', 'email', 'password',
    ];


    protected $hidden = [
        'password', 'remember_token',
    ];
}
Tiếp theo ccần gọi method Passport::routes trong hàm booth của file app/Providers/AuthServiceProvider.php
<?php

namespace App\Providers;

use Laravel\Passport\Passport;
use Illuminate\Support\Facades\Gate;
use Illuminate\Foundation\Support\Providers\AuthServiceProvider as ServiceProvider;

class AuthServiceProvider extends ServiceProvider
{

    protected $policies = [
        'App\Model' => 'App\Policies\ModelPolicy',
    ];


    public function boot()
    {
        $this->registerPolicies();

        Passport::routes();
    }
}
Cấu hình cuối cùng mà Passport requires setting nó làm driver option trong bộ bảo vệ xác thực API bên trong config/auth.php.
'guards' => [
   'web' => [
       'driver' => 'session',
       'provider' => 'users',
   ],
   'api' => [
       'driver' => 'passport',
       'provider' => 'users',
   ],
],
4. Tạo API endpoints
Chúng ta sẽ build API đơn giản quản lí suser. User sẽ có những chức năng sau :
Đăng ký một tài khoản mới
Đăng nhập vào tài khoản của họ bằng thông tin đăng nhập của user
Tìm nạp thông tin của user
Đăng xuất khỏi ứng dụng
- Trước tiên chúng ta cần khai báo routes trong file
routes/api.php:
<?php

use Illuminate\Http\Request;

Route::group([
    'prefix' => 'auth'
], function () {
    Route::post('login', 'AuthController@login');
    Route::post('signup', 'AuthController@signup');

    Route::group([
      'middleware' => 'auth:api'
    ], function() {
        Route::get('logout', 'AuthController@logout');
        Route::get('user', 'AuthController@user');
    });
});
- Tiếp đến tạo Controller
php artisan make:controller AuthController
Trong AuthController chúng ta code các function signup, login, logout, user
<?php
namespace App\Http\Controllers;

use Illuminate\Http\Request;
use Illuminate\Support\Facades\Auth;
use Carbon\Carbon;
use App\User;

class AuthController extends Controller
{
    /**
     * Create user
     *
     * @param  [string] name
     * @param  [string] email
     * @param  [string] password
     * @param  [string] password_confirmation
     * @return [string] message
     */
    public function signup(Request $request)
    {
        $request->validate([
            'name' => 'required|string',
            'email' => 'required|string|email|unique:users',
            'password' => 'required|string|confirmed'
        ]);

        $user = new User([
            'name' => $request->name,
            'email' => $request->email,
            'password' => bcrypt($request->password)
        ]);

        $user->save();

        return response()->json([
            'message' => 'Successfully created user!'
        ], 201);
    }

    /**
     * Login user and create token
     *
     * @param  [string] email
     * @param  [string] password
     * @param  [boolean] remember_me
     * @return [string] access_token
     * @return [string] token_type
     * @return [string] expires_at
     */
    public function login(Request $request)
    {
        $request->validate([
            'email' => 'required|string|email',
            'password' => 'required|string',
            'remember_me' => 'boolean'
        ]);

        $credentials = request(['email', 'password']);
        if(!Auth::attempt($credentials)){
            return response()->json([
                'message' => 'Unauthorized'
            ], 401);
        }

        $user = $request->user();
        $tokenResult = $user->createToken('Personal Access Token');
        $token = $tokenResult->token;

        if ($request->remember_me){
            $token->expires_at = Carbon::now()->addWeeks(1);
        }

        $token->save();

        return response()->json([
            'access_token' => $tokenResult->accessToken,
            'token_type' => 'Bearer',
            'expires_at' => Carbon::parse(
                $tokenResult->token->expires_at
            )->toDateTimeString()
        ]);
    }

    /**
     * Logout user (Revoke the token)
     *
     * @return [string] message
     */
    public function logout(Request $request)
    {
        $request->user()->token()->revoke();

        return response()->json([
            'message' => 'Successfully logged out'
        ]);
    }

    /**
     * Get the authenticated User
     *
     * @return [json] user object
     */
    public function user(Request $request)
    {
        return response()->json($request->user());
    }
}
- Tiếp đến tạo 1 Unit test để test API chúng ta vừa tạo
php artisan make:test UserTest
Trong file UserTest của chúng ta sẽ như sau :
<?php

namespace Tests\Feature;

use Tests\TestCase;
use Illuminate\Foundation\Testing\WithFaker;
use Illuminate\Foundation\Testing\RefreshDatabase;

use App\User;

class UserTest extends TestCase
{

    use WithFaker;

    private $password = "mypassword";

    public function testUserCreation()
    {

       	$name = $this->faker->name();
       	$email = $this->faker->email();

        $response = $this->postJson('/api/auth/signup', [
            'name' => $name,
            'email' => $email,
            'password' => $this->password,
            'password_confirmation' => $this->password
        ]);


        $response
            ->assertStatus(201)
            ->assertExactJson([
                'message' => "Successfully created user!",
            ]);
    }//testUserCreation

}
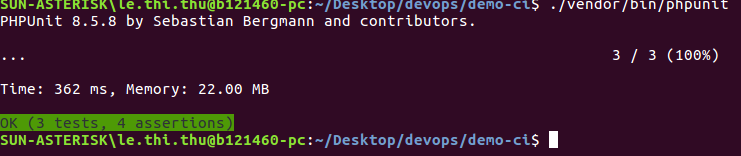
Sau đó chúng ta tiến hành chạy test
./vendor/bin/phpunit
2. Tự đông hóa test với CircleCI
Đã đến lúc giới thiệu sức mạnh của CI / CD vào API Laravel của chúng ta. Mình sẽ tạo một pipeline để đảm bảo rằng khi chúng ta đẩy code mới, các test của chúng ta sẽ tự động chạy và chúng ta nhận được pipeline status CI / CD successful hoặc failed. (go)
1.CircleCI
Giới thiệu về CircleCI một chút :
CircleCI là 1 tool để giúp ta hiện thực hóa CI. Có nhiều tool CI khác cũng nổi tiếng nữa (Travis CI, Jenkins...), lý do mình chọn Circle CI chỉ vì nó khá đơn giản và đầy đủ các chức năng mà mình cần.
CircleCI sử dụng docker, trong cấu hình Circle CI ta sẽ chỉ định các docker image sẽ sử dụng và các job, trong các job lại có các step, trong các step là cụ thể các command. Ngoài ra còn có cấu hình filter giúp ta linh hoạt điều chỉnh sao cho chỉ run các job khi có merge/push vào 1 số branch nhất định vân vân.
Mô tả quá trình run 1 job trên Circle CI:
Developer chỉ cần push hoặc merge vào 1 branch, Circle CI tự động biết event đó và khởi động lên job đã được cài đặt tương ứng. Ban đầu Circle CI pull docker image về và run lên trên môi trường cloud của nó.
Tiếp theo nó chạy các step đã được cài đặt trong docker container, thông thường step đầu tiên luôn là checkout tức là git checkout lấy source về (mặc định lưu trong thư mục ~/project)
Các step tiếp theo được chạy tùy vào độ sáng tạo của bạn, ví dụ job để build thì thường là npm install rồi npm run abcxyz hay job để deploy thì có thể là aws s3 sync hay serverless deploy...
Sau khi tất cả các step đã chạy xong, job kết thúc. Nếu exit code của job là error thì mặc định ta sẽ nhận được mail thông báo failed nữa.
Nói tóm lại, sau khi cài đặt và cấu hình ta chỉ việc dev còn các công việc như build, chạy test, deploy vân vân được tự động hóa hoàn toàn và chạy tức thì trên môi trường cloud mạnh mẽ miễn phí của Circle CI.
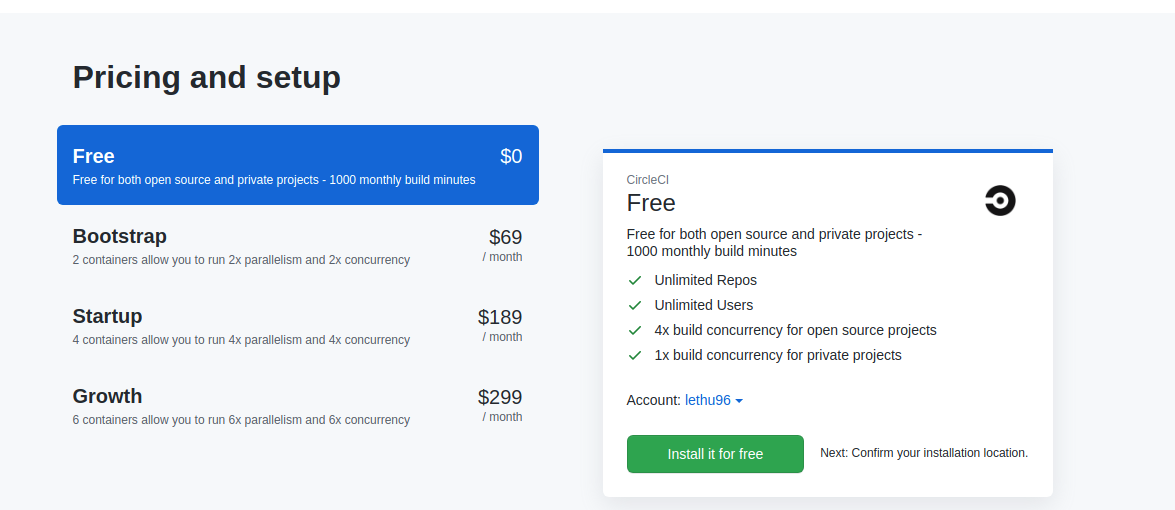
1. Đăng kí plan
CircleCI cung cấp cho người dùng 4 gói, ở đây mình sẽ đăng kí gói free (vì mình hổng có xiên) các bạn có thể thấy ở gói free chúng ta có :
1500 phút build
Không giới hạn repository và user
4x project build cùng lúc với public repository và 1x với private repository
Sau khi install xong thì sẽ chuyển đến dashboard như sau :
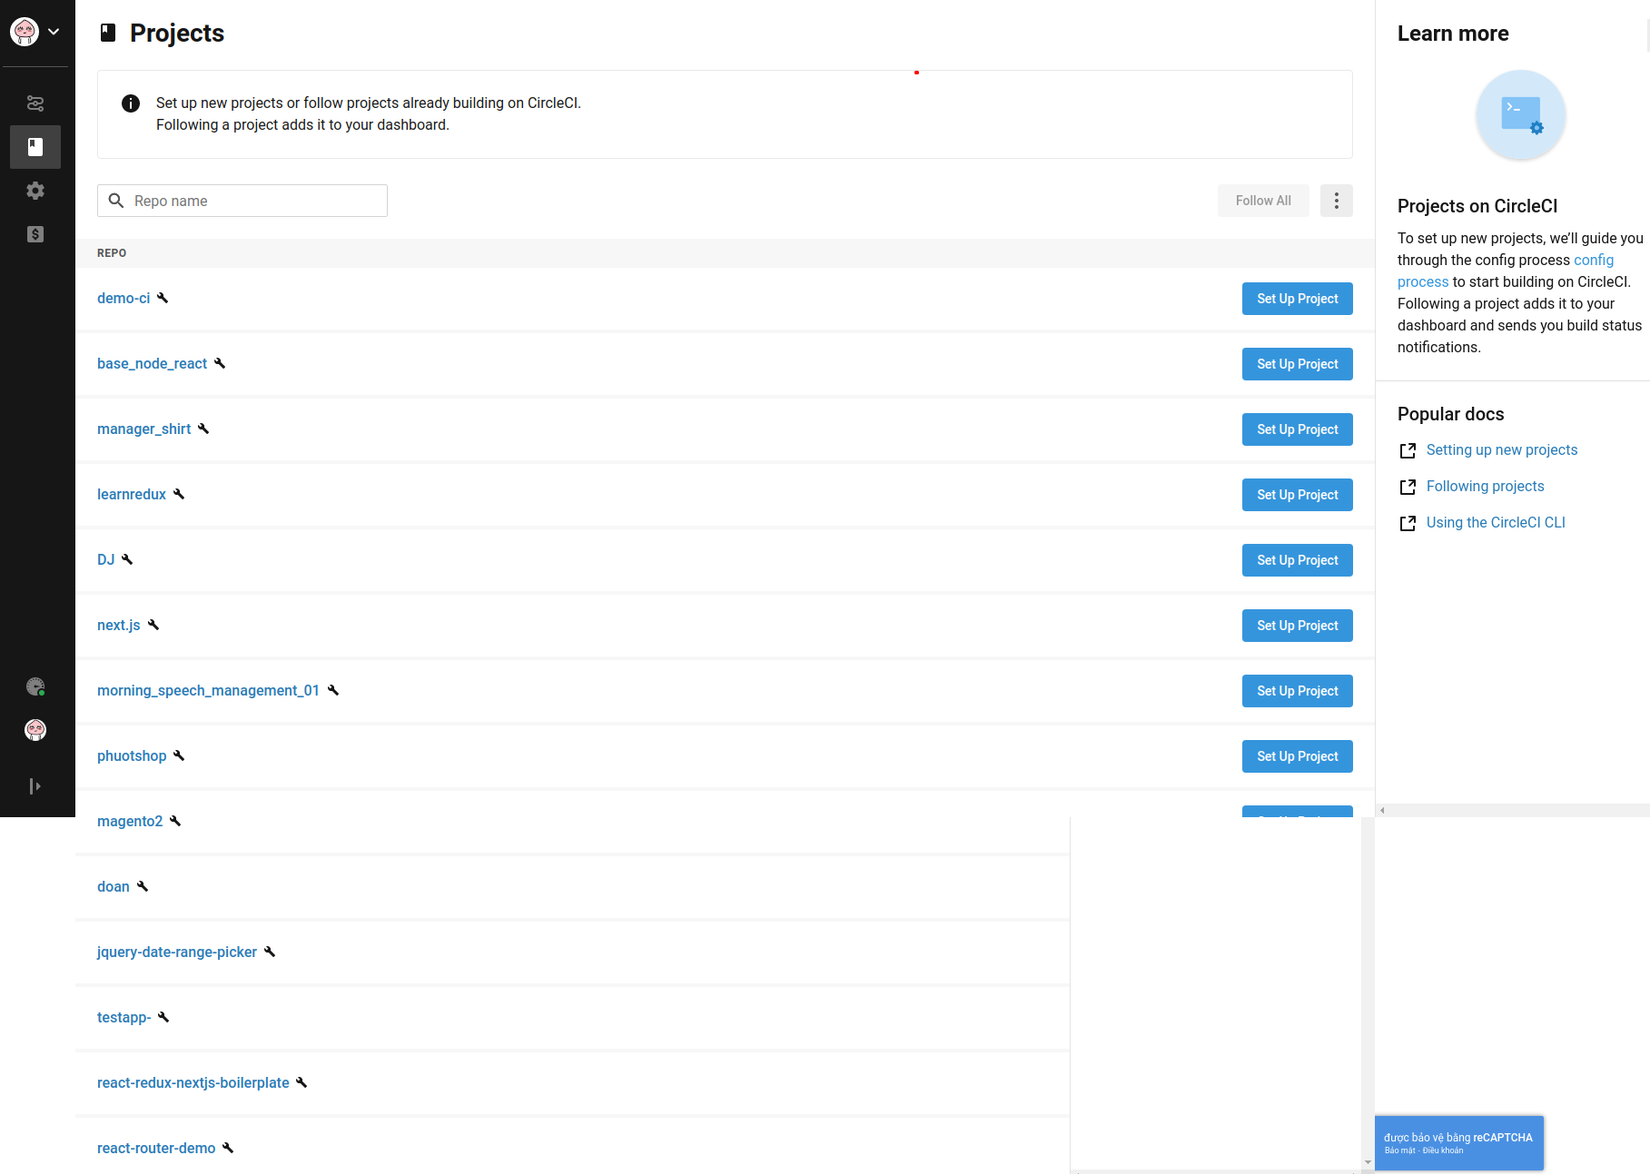
2. Tích hợp vào project
Mình sẽ lựa chọn project đã tạo phía trên demo-ci sau đó click setup project
 Circleci hỗ trợ chúng ta rất nhiều ngôn ngữ như PHP, Java, .NET, Go, IOS, Android, Python.... ở đây mình sẽ sử dụng PHP
1. TÍch hợp vào project laravel của mình
Tạo thư mục .circleci trong project
Trong thư mục .circleci Tạo file có tên làconfig.yml
# PHP CircleCI 2.0 configuration file
#
# Check https://circleci.com/docs/2.0/language-php/ for more details
#
version: 2
jobs:
  build:
    docker:
      # Specify the version you desire here
      - image: circleci/php:7.1-node-browsers

      # Specify service dependencies here if necessary
      # CircleCI maintains a library of pre-built images
      # documented at https://circleci.com/docs/2.0/circleci-images/
      # Using the RAM variation mitigates I/O contention
      # for database intensive operations.
      # - image: circleci/mysql:5.7-ram
      #
      # - image: redis:2.8.19

    steps:
      - checkout

      - run: sudo apt update # PHP CircleCI 2.0 Configuration File# PHP CircleCI 2.0 Configuration File sudo apt install zlib1g-dev libsqlite3-dev
      - run: sudo docker-php-ext-install zip

      # Download and cache dependencies
      - restore_cache:
          keys:
            # "composer.lock" can be used if it is committed to the repo
            - v1-dependencies-{{ checksum "composer.json" }}
            # fallback to using the latest cache if no exact match is found
            - v1-dependencies-

      - run:
           name: "Install Dependencies"
           command: composer install -n --prefer-dist

      - save_cache:
          key: v1-dependencies-{{ checksum "composer.json" }}
          paths:
            - ./vendor
      - restore_cache:
          keys:
            - node-v1-{{ checksum "package.json" }}
            - node-v1-
      - run: yarn install
      - save_cache:
          key: node-v1-{{ checksum "package.json" }}
          paths:
            - node_modules
    - run:
          name: "Create Environment file and generate app key"
          command: |
            mv .env.testing .env
            php artisan key:generate

      # prepare the database
      - run: touch storage/testing.sqlite
      - run: php artisan migrate --env=testing --database=sqlite_testing --force

      - run:
          name: "Generate Passport encryption keys"
          command: php artisan passport:install

      # run tests with phpunit
      - run:
          name: "Run Tests"
          command: ./vendor/bin/phpunit
Sau đo chúng ta lên github click Start building để bắt đầu build project . CircleCI sẽ bắt đầu chạy cấu hình pipeline . Nếu bạn đã làm theo đúng hướng dẫn, bạn sẽ có một bản build thành công được chỉ ra bởi màn hình bên dưới.

Perfect . Chúng ta đã có thể cấp nguồn thành công API Laravel của mình bằng một pipeline CI /CD tự động chạy test sử dụng CircleCI.
Chúng ta sẽ thêm 1 method test fucntion login vào file UserTest.php và push code để quan sát cách CircleCI tự động chạy thử nghiệm mới được thêm của chúng ta.
public function testUserLogin()
{
    $name = $this->faker->name();
   	$email = $this->faker->email();

    $user = new User([
        'name' => $name,
        'email' => $email,
        'password' => bcrypt($this->password)
    ]);

    $user->save();

    $response = $this->postJson('/api/auth/login', [
        'email' => $email,
        'password' => $this->password
    ]);


    $response->assertStatus(200);
    $this->assertAuthenticated();
}
Bây giờ save file , commit và push lên GitHub. CircleCI sẽ một lần nữa chạy pipeline với các test, bao gồm cả testcase mà chúng ta vừa thêm vào.

Kết luận
Nguồn tham khảo
https://circleci.com/blog/build-a-ci-powered-restful-api-with-laravel/
All rights reserved
