Deploy rails app with unicorn and nginx with Capistrano
Bài đăng này đã không được cập nhật trong 4 năm
Hôm nay mình sẽ hướng dẫn các bạn từng bước autodeploy rails app với capistrano bắt đầu từ con số 0.
Trước hết, các bạn cần hiểu rõ vai trò của từng thành phần trong bài viết này:
- Rails app: là một app được viết bằng ruby on rails
- Unicorn: là một app server hỗ trợ rails - tương tự puma hay passenger. nó nằm giữa rails app và web server.
- Nginx: là web server
- Mysql: database cho rails app
- Capistrano: tool tự động deploy từ local tới server remote
Để làm được thì trước hết chúng ta phải cần 2 server: 1 local và 1 remote.
Chuẩn bị server local:
- user: deploy
- environment: ruby on rails, unicorn, nginx, mysql, capistrano
server remote:
- user: deploy
- environment: ruby on rails, unicorn, nginx, mysql
1. Đầu tiên mình sẽ đi cấu hình trên server local
Về việc tạo user thì chắc không cần thiết phải viết ở đây vì nó quá đơn giản rồi phải không nào. Chỉ lưu ý với các bạn là phải tạo ssh-key cho user deploy để ta thực hiện các bước ở phía sau nhé.
$ ssh-keygen -t rsa
1.1 Cài ruby on rails
-
Cài các lib cần:
$ sudo apt-get update$ sudo apt-get install git-core curl zlib1g-dev build-essential libssl-dev libreadline-dev libyaml-dev libsqlite3-dev sqlite3 libxml2-dev libxslt1-dev libcurl4-openssl-dev python-software-properties libffi-dev nodejs -
Sử dụng rbenv để cài ruby (các bạn có thể cài bằng rvm hoặc từ source)
$ git clone https://github.com/rbenv/rbenv.git ~/.rbenv

#add environment
$ echo 'export PATH="$HOME/.rbenv/bin:$PATH"' >> ~/.bashrc

$ echo 'eval "$(rbenv init -)"' >> ~/.bashrc
$ exec $SHELL
$ git clone https://github.com/rbenv/ruby-build.git ~/.rbenv/plugins/ruby-build

#add environment
$ echo 'export PATH="$HOME/.rbenv/plugins/ruby-build/bin:$PATH"' >> ~/.bashrc
$ exec $SHELL

#install ruby 2.3.3
$ rbenv install 2.3.3
$ rbenv global 2.3.3
$ ruby –v

#install bundler
$ gem install bundler

$ rbenv rehash
- Cài Rails:
#install nodejs
$ curl -sL https://deb.nodesource.com/setup_4.x | sudo -E bash –
$ sudo apt-get install -y nodejs

#install rail 5.0.0.1
$ gem install rails -v 5.0.0.1
$ rbenv rehash
1.2 Cài Mysql
`$ sudo apt-get install mysql-server mysql-client libmysqlclient-dev`
-
Khởi tạo 1 rails app “cap_test” mới sử dụng mysql:
$ rails new cap_test –d mysql -
Tạo db cho rail: Ở đây mình cho hết code của rails vào folder current:
$ cd cap_test$ mkdir –p current$ mv * current$ cd current$ vim config/database.yml
default: &default
  adapter: mysql2
  encoding: utf8
  pool: 5
  username: root
  password: ******
  socket: /var/run/mysqld/mysqld.sock

#  database: cap_test

development:
  <<: *default
  database: cap_test_development
ở bước này, ta điền username: root và password khi cài mysql lúc nãy. Sau đó tạo db.
    $ rake db:create
    Created database 'cap_test_development'
1.3 Cài unicorn và capistrano
Ta sử dụng Gemfile vừa mới sinh ra cùng rails app để cài unicorn:
`$ vim Gemfile`
Thêm 2 gem vào cuối cùng:
gem 'unicorn'
group :development do
  gem 'capistrano-rails', require: false
  gem 'capistrano-bundler', require: false
  gem 'capistrano-rbenv'
  gem 'capistrano', '~> 3.4.0'
end
Lưu ý: khi chạy với rails 5.0.0.1, trong gemfile mặc định mở thêm puma, vì thế ta cần bỏ dòng này đi#gem 'puma', '~> 3.0'
Và tiến hành cài đặt:
$ Bundle install
Using spring-watcher-listen 2.0.1
Using actionview 5.0.1
Using capistrano-bundler 1.2.0
Using capistrano-rbenv 2.1.0
Using actionpack 5.0.1
Using capistrano-rails 1.2.1
Using actioncable 5.0.1
Using actionmailer 5.0.1
Using railties 5.0.1
Using sprockets-rails 3.2.0
Using coffee-rails 4.2.1
Using jquery-rails 4.2.1
Using web-console 3.4.0
Using rails 5.0.1
Using sass-rails 5.0.6
Bundle complete! 19 Gemfile dependencies, 71 gems now installed.
Use `bundle show [gemname]` to see where a bundled gem is installed.
Sau khi cài xong unicorn, ta cấu hình:
$ vim config/unicorn.rb
#đây là thư mực app của bạn
root = "/home/deploy/cap_test/current"
working_directory root
#pid của unicorn khi chạy
pid "#{root}/tmp/pids/unicorn.pid"
#log
stderr_path "#{root}/log/unicorn.error.log"
stdout_path "#{root}/log/unicorn.access.log"

#chạy với sock
listen "#{root}/shared/sockets/unicorn.sock"
worker_processes 2
timeout 30
và tạo script start/stop unicorn
$ sudo vim /etc/init.d/unicorn
#!/bin/sh
### BEGIN INIT INFO
# Provides:          unicorn
# Required-Start:    $remote_fs $syslog
# Required-Stop:     $remote_fs $syslog
# Default-Start:     2 3 4 5
# Default-Stop:      0 1 6
# Short-Description: Manage unicorn server
# Description:       Start, stop, restart unicorn server for a specific application.
### END INIT INFO
set -e

TIMEOUT=${TIMEOUT-60}
APP_ROOT=/home/deploy/cap_test/current
PID=$APP_ROOT/tmp/pids/unicorn.pid
CMD="cd $APP_ROOT; ~/.rbenv/bin/rbenv exec bundle exec unicorn -D -c $APP_ROOT/config/unicorn.rb -E development"
AS_USER=deploy
set -u

OLD_PIN="$PID.oldbin"

sig () {
  test -s "$PID" && kill -$1 `cat $PID`
}

oldsig () {
  test -s $OLD_PIN && kill -$1 `cat $OLD_PIN`
}

run () {
  if [ "$(id -un)" = "$AS_USER" ]; then
    eval $1
  else
    su -c "$1" - $AS_USER
  fi
}

case "$1" in
start)
  sig 0 && echo >&2 "Already running" && exit 0
  run "$CMD"
  ;;
stop)
  sig QUIT && exit 0
  echo >&2 "Not running"
  ;;
force-stop)
  sig TERM && exit 0
  echo >&2 "Not running"
  ;;
restart|reload)
  sig HUP && echo reloaded OK && exit 0
  echo >&2 "Couldn't reload, starting '$CMD' instead"
  run "$CMD"
  ;;
upgrade)
  if sig USR2 && sleep 2 && sig 0 && oldsig QUIT
  then
    n=$TIMEOUT
    while test -s $OLD_PIN && test $n -ge 0
    do
      printf '.' && sleep 1 && n=$(( $n - 1 ))
    done
    echo

    if test $n -lt 0 && test -s $OLD_PIN
    then
      echo >&2 "$OLD_PIN still exists after $TIMEOUT seconds"
      exit 1
    fi
    exit 0
  fi
  echo >&2 "Couldn't upgrade, starting '$CMD' instead"
  run "$CMD"
  ;;
reopen-logs)
  sig USR1
  ;;
*)
  echo >&2 "Usage: $0 <start |stop|restart|upgrade|force-stop|reopen-logs>"
  exit 1
  ;;
Esac
Các bạn chỉ cần quan tâm tới các thông tin:
#đường dẫn root của app
APP_ROOT=/home/deploy/cap_test/current

#pid unicorn (như  trong file unicorn.rb vừa thiết lập)
PID=$APP_ROOT/tmp/pids/unicorn.pid

#lệnh chạy unicorn với môi trường development
CMD="cd $APP_ROOT; ~/.rbenv/bin/rbenv exec bundle exec unicorn -D -c $APP_ROOT/config/unicorn.rb -E development"

#chạy với user nào
AS_USER=deploy
Và cuối cùng là phân quyền chạy cho script
$ sudo chmod 755 /etc/init.d/unicorn
1.4 Tiếp theo ta sẽ cài và cấu hình nginx
- cài nginx
$ sudo apt-get install nginx
- tạo file cấu hình để nginx gọi tới unicorn
$ sudo vim /etc/nginx/sites-available/cap_test
  upstream unicorn {
  server unix:/home/deploy/cap_test/current/shared/sockets/unicorn.sock fail_timeout=0;
}

server {
  listen 80 default deferred;
  server_name _;
  root /home/deploy/cap_test/current/public;

  location ^~ /assets/ {
    gzip_static on;
    expires max;
    add_header Cache-Control public;
  }

  try_files $uri/index.html $uri @unicorn;
  location @unicorn {
    proxy_set_header X-Forwarded-For $proxy_add_x_forwarded_for;
    proxy_set_header Host $http_host;
    proxy_redirect off;
    proxy_pass http://unicorn;
  }

  error_page 500 502 503 504 /500.html;
  client_max_body_size 4G;
  keepalive_timeout 10;
}
Trong này cần chú ý tới:
server unix:/home/deploy/cap_test/current/shared/sockets/unicorn.sock fail_timeout=0;
Là dòng nginx kết nối tới unicorn thong qua file .sock

root /home/deploy/cap_test/current/public;
là folder public của rails app
và enable file này:
$ sudo ln -s /etc/nginx/sites-available/cap_test /etc/nginx/sites-enabled/cap_test
$ sudo rm –rf /etc/nginx/sites-enabled/default
- Vậy là đã xong cấu hình trên local. Chúng ta có thể test thử:
$ sudo /etc/init.d/nginx restart
$ sudo /etc/init.d/unicorn start
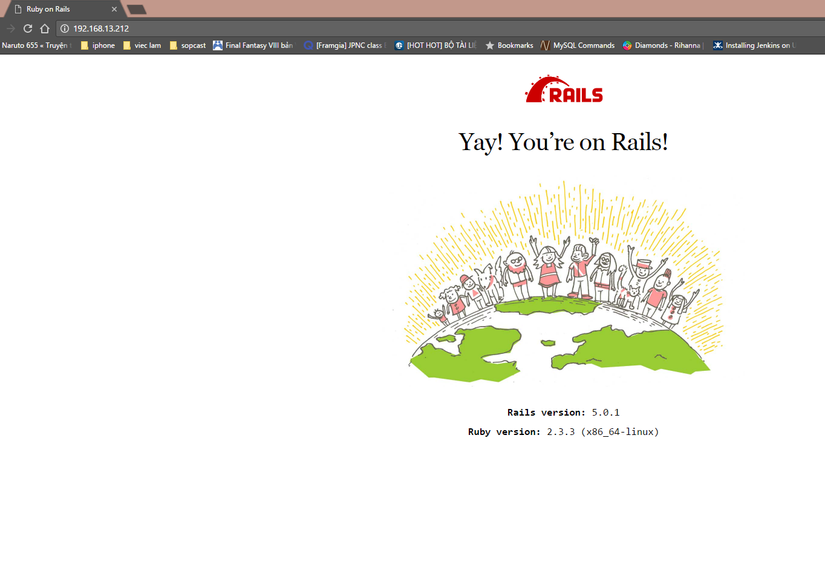
và check bằng web: http://<ip_server_local> . Cụ thể ở đây là: http://192.168.13.212/
1.5 Capistrano
Vậy là chúng ta đã deploy cơ bản 1 server với rails, unicorn, mysql và nginx. Giờ chúng ta sẽ đi tiếp tới Capistrano.
Như bước ở trên mình đã hướng dẫn add thêm gem Capistrano vào Gemfile cùng với unicorn. Sau khi cài Capistrano bằng bundle install , ta khởi tạo các file cấu hình cho việc deploy:
`$ Bundle exec cap install`
├── Capfile
├── config
│   ├── deploy
│   │   ├── production.rb
│   │   └── staging.rb
│   └── deploy.rb
└── lib
    └── capistrano
            └── tasks
Capistrano sẽ tạo ra các file với cấu trúc trên
- Capfile: Đây là file định nghĩa các thư viện con của capistrano mà nó sẽ dùng trong việc deploy.
# Load DSL and set up stages
require 'capistrano/setup'

# Include default deployment tasks
require 'capistrano/deploy'

# Include tasks from other gems included in your Gemfile
#
# For documentation on these, see for example:
#
#   https://github.com/capistrano/rvm
#   https://github.com/capistrano/rbenv
#   https://github.com/capistrano/chruby
#   https://github.com/capistrano/bundler
#   https://github.com/capistrano/rails
#   https://github.com/capistrano/passenger
#
# require 'capistrano/rvm'
 require 'capistrano/rbenv'
# require 'capistrano/chruby'
 require 'capistrano/bundler'
 require 'capistrano/rails/assets'
 require 'capistrano/rails/migrations'
# require 'capistrano/passenger'

# Load custom tasks from `lib/capistrano/tasks` if you have any defined
Dir.glob('lib/capistrano/tasks/*.rake').each { |r| import r }
- config/deploy.rb Là file cấu hình chung cho việc deploy
# config valid only for current version of Capistrano
lock '3.4.1'

#tên application
set :application, "cap_test"

set :scm, :git

#set repo trên git
set :repo_url, "git@github.com:cuongtv2004/cap_test.git"

#deploy tới folder nào trên server remote
set :deploy_to, "/home/deploy/cap_test"

#branch trên github. Mặc định là master
set :branch, "master"

set :pty, false
set :format, :pretty

# Default branch is :master
# ask :branch, `git rev-parse --abbrev-ref HEAD`.chomp

# Default deploy_to directory is /var/www/my_app_name
# set :deploy_to, '/var/www/my_app_name'

# Default value for :scm is :git
# set :scm, :git

# Default value for :format is :pretty
# set :format, :pretty

# Default value for :log_level is :debug
# set :log_level, :debug

# Default value for :pty is false
# set :pty, true

# Default value for :linked_files is []
# set :linked_files, fetch(:linked_files, []).push('config/database.yml', 'config/secrets.yml')

# Default value for linked_dirs is []
set :linked_dirs, fetch(:linked_dirs, []).push('log', 'tmp/pids', 'tmp/cache', 'tmp/sockets', 'vendor/bundle', 'public/system', 'shared/sockets')

# Default value for default_env is {}
# set :default_env, { path: "/opt/ruby/bin:$PATH" }

# Default value for keep_releases is 5
# set :keep_releases, 5

namespace :deploy do

  after :restart, :clear_cache do
    on roles(:web), in: :groups, limit: 3, wait: 10 do
      # Here we can do anything such as:
      # within release_path do
      #   execute :rake, 'cache:clear'
      # end
    end
  end

end
- ok. Tiếp theo là tới thư mục config/deploy:
Là thư mục chứa các cấu hình cụ thể cho từng môi trường deploy, mặc định lệnh trên sẽ tạo cho mình 2 môi trường là production và staging. Trong phạm vi loạt bài này, mình chỉ cần môi trường production thôi. Đây là file
config/deploy/production.rbcủa mình
#set phương thức ssh = public key (đây là lý do mà mình cần gen ssh-key cho deploy ngoại trừ việc up lên github)
set :ssh_options, {
  keys: %w(~/.ssh/id_rsa),
  forward_agent: true,
  port: 22,
  user: 'deploy',
}

# role :name, %{[user]@[IP adde.]}
role :app, %w{deploy@192.168.13.216}
role :web, %w{deploy@192.168.13.216}
role :db,  %w{deploy@192.168.13.216}

# Define server(s)
server '192.168.13.216', user: 'deploy', roles: %w{web}
Thư mục lib/capistrano/tasks/ Chứa các custom task của mình. Phần này mình sẽ giới thiệu tới các bạn sau. OK. Vậy là đã setup xong cơ bản phía local server
2. Server remote
Đối với server remote thì cũng cần cấu hình môi trường gần giống với server local: environment: ruby on rails, unicorn, nginx, mysql. Vậy nên các bạn vẫn cứ theo các bước trên tiến hành nhé. Bỏ setup Capistrano đi là được 
3. Deploy
Giờ đến việc dễ dàng nhất. deploy nào. Các bạn chỉ việc lên server local vào folder app và gõ:
$ cap production deploy
và đợi cho đến khi chạy xong thôi.
Kết quả nó sẽ như này
DEBUG [6afb78dd] Running if test ! -d /home/deploy/cap_test/releases/20161227181903; then echo "Directory does not exist '/home/deploy/cap_test/releases/20161227181903'" 1>&2; false; fi as deploy@192.168.13.216
 DEBUG [6afb78dd] Command: if test ! -d /home/deploy/cap_test/releases/20161227181903; then echo "Directory does not exist '/home/deploy/cap_test/releases/20161227181903'" 1>&2; false; fi
 DEBUG [6afb78dd] Finished in 0.003 seconds with exit status 0 (successful).
  INFO [9834a434] Running $HOME/.rbenv/bin/rbenv exec bundle exec rake db:migrate as deploy@192.168.13.216
 DEBUG [9834a434] Command: cd /home/deploy/cap_test/releases/20161227181903 && ( export RBENV_ROOT="$HOME/.rbenv" RBENV_VERSION="" RAILS_ENV="production" ; $HOME/.rbenv/bin/rbenv exec bundle exec rake db:migrate )
  INFO [9834a434] Finished in 1.056 seconds with exit status 0 (successful).
** Invoke deploy:publishing (first_time)
** Execute deploy:publishing
** Invoke deploy:symlink:release (first_time)
** Execute deploy:symlink:release
  INFO [166e21c3] Running /usr/bin/env ln -s /home/deploy/cap_test/releases/20161227181903 /home/deploy/cap_test/releases/current as deploy@192.168.13.216
 DEBUG [166e21c3] Command: ( export RBENV_ROOT="$HOME/.rbenv" RBENV_VERSION="" ; /usr/bin/env ln -s /home/deploy/cap_test/releases/20161227181903 /home/deploy/cap_test/releases/current )
  INFO [166e21c3] Finished in 0.004 seconds with exit status 0 (successful).
  INFO [86215012] Running /usr/bin/env mv /home/deploy/cap_test/releases/current /home/deploy/cap_test as deploy@192.168.13.216
 DEBUG [86215012] Command: ( export RBENV_ROOT="$HOME/.rbenv" RBENV_VERSION="" ; /usr/bin/env mv /home/deploy/cap_test/releases/current /home/deploy/cap_test )
  INFO [86215012] Finished in 0.004 seconds with exit status 0 (successful).
** Invoke deploy:published (first_time)
** Execute deploy:published
** Invoke deploy:finishing (first_time)
** Execute deploy:finishing
** Invoke deploy:cleanup (first_time)
** Execute deploy:cleanup
 DEBUG [4307f4ee] Running /usr/bin/env ls -xtr /home/deploy/cap_test/releases as deploy@192.168.13.216
 DEBUG [4307f4ee] Command: ( export RBENV_ROOT="$HOME/.rbenv" RBENV_VERSION="" ; /usr/bin/env ls -xtr /home/deploy/cap_test/releases )
 DEBUG [4307f4ee] 	20161227171259	20161227172059	20161227172447	20161227173049	20161227173634
20161227181903
 DEBUG [4307f4ee] Finished in 0.004 seconds with exit status 0 (successful).
  INFO Keeping 5 of 6 deployed releases on 192.168.13.216
  INFO [12a57544] Running /usr/bin/env rm -rf /home/deploy/cap_test/releases/20161227171259 as deploy@192.168.13.216
 DEBUG [12a57544] Command: ( export RBENV_ROOT="$HOME/.rbenv" RBENV_VERSION="" ; /usr/bin/env rm -rf /home/deploy/cap_test/releases/20161227171259 )
  INFO [12a57544] Finished in 0.007 seconds with exit status 0 (successful).
** Invoke deploy:finished (first_time)
** Execute deploy:finished
** Invoke deploy:log_revision (first_time)
** Execute deploy:log_revision
 DEBUG [54b6e2ba] Running if test ! -d /home/deploy/cap_test/releases; then echo "Directory does not exist '/home/deploy/cap_test/releases'" 1>&2; false; fi as deploy@192.168.13.216
 DEBUG [54b6e2ba] Command: if test ! -d /home/deploy/cap_test/releases; then echo "Directory does not exist '/home/deploy/cap_test/releases'" 1>&2; false; fi
 DEBUG [54b6e2ba] Finished in 0.003 seconds with exit status 0 (successful).
  INFO [abd5abba] Running echo "Branch master (at 64c964f) deployed as release 20161227181903 by cuongtv" >> /home/deploy/cap_test/revisions.log as deploy@192.168.13.216
 DEBUG [abd5abba] Command: echo "Branch master (at 64c964f) deployed as release 20161227181903 by cuongtv" >> /home/deploy/cap_test/revisions.log
  INFO [abd5abba] Finished in 0.003 seconds with exit status 0 (successful).
deploy@cap:~/cap_test/current$
Vâng. Chúng ta có thể qua server remote xem nhé:
├── current -> /home/deploy/cap_test/releases/20161227181903
├── releases
│   ├── 20161227172059
│   ├── 20161227172447
│   ├── 20161227173049
│   ├── 20161227173634
│   └── 20161227181903
├── repo
│   ├── branches
│   ├── config
│   ├── description
│   ├── FETCH_HEAD
│   ├── HEAD
│   ├── hooks
│   ├── info
│   ├── objects
│   ├── packed-refs
│   └── refs
├── revisions.log
└── shared
    ├── bundle
    └── public
Với các thành phần:
- Thư mục release sẽ chứa những phiên bản code cũ, dùng để rollback nếu cần, các thư mục này được đặt tên theo thời gian nó được deploy.
- Thư mục current sẽ trỏ đến thư mục hiện tại bên releases
- Thư mục repo sẽ chứa thông tin về VCS repo của mình (trong bài viết này thì là github á)
- Thư mục shared sẽ chứa các file được chia sẻ giữa các bản releases như database.yml,logs…
Vậy là done. Các bạn có thể ngó qua web xem đã deploy thành công hay chưa http://192.168.13.216/
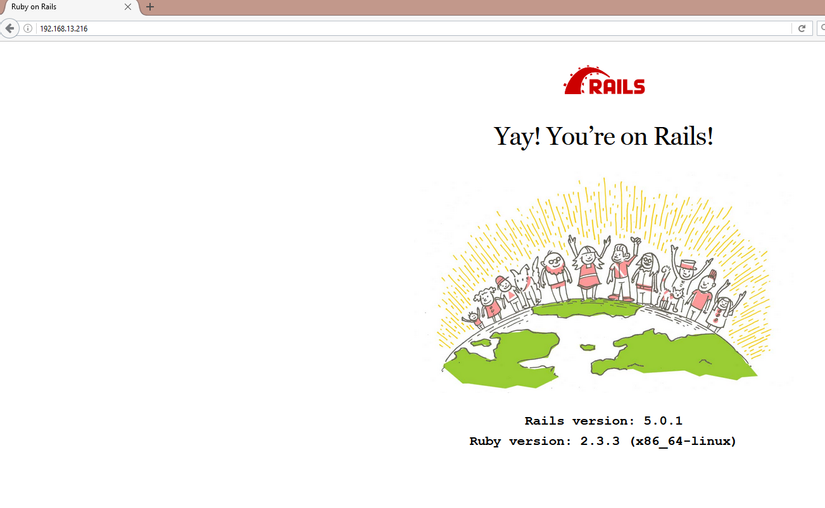
whew lên rồi, may quá.
Và nếu chẳng may deploy fail, chúng ta cũng có thể dễ dàng roll back lại version ngay trước đó với câu lệnh:
$ cap production deploy:rollback
và check lại với remote server
├── current -> /home/deploy/cap_test/releases/20161227173634
├── releases
├── repo
├── revisions.log
├── rolled-back-release-20161227181903.tar.gz
└── shared
Hoặc rollback về version cũ hơn với: $ cap production deploy:rollback ROLLBACK_RELEASE=20161227172059
Hẹn gặp lại các bạn ở bài viết sau
All rights reserved
