Đăng nhập với tài khoản Facebook và Google trong Rails
Bài đăng này đã không được cập nhật trong 6 năm
Giới thiệu vấn đề
Đối với một website thì ngoài việc cho phép khách hàng của mình đăng nhập trên chính website thì còn cho phép khách hàng đăng nhập bằng tài khoản mạng xã hội như Facebook hoặc Google là điều cần thiết.
Bài viết này mình xin hướng dẫn các bạn mới tìm hiểu về Rails cách cài đặt chức năng đăng nhập trên website bằng các tài khoản mạng xã hội phổ biến.
Sản phẩm minh họa
Để thực hiện việc giới thiệu các bạn cách cài đặt chức năng này mình đã tạo một project để minh họa các bước thực hiện.
Tạo project mới
rails new login_demo
Cài một số gem cần thiết cho demo
// Gemfile
gem "devise"
gem "omniauth"
gem "omniauth-google-oauth2"
gem "omniauth-facebook"
Để thêm sự sinh động cho web, mình đã ghép theme Sb Admin2 vào project.
Ghép giao diện
Để tìm hiểu cách tích hợp một theme bất kì vào project Rails bạn hãy theo dõi bài viết
Tích hợp theme vào project Rails
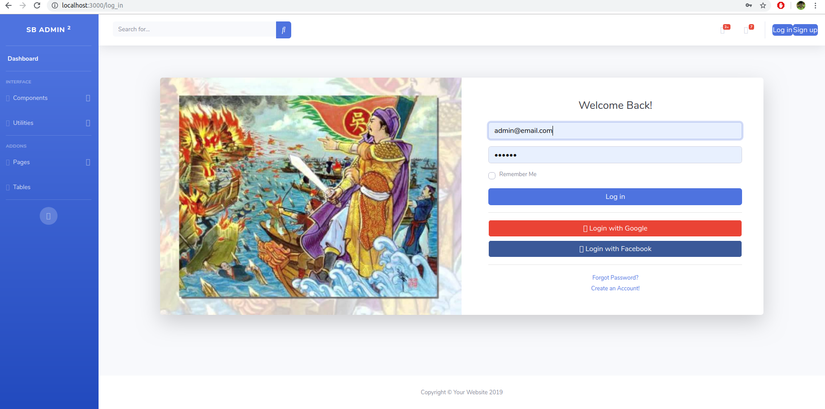
Sau khi ghép mình được giao diện như sau
Thiết lập controller, views
Để tập trung vào việc giới thiệu đăng nhập với tài khoản Google và Facebook nên mình không trình bày kĩ về cách thiết lập gem "devise" để xác thực người dùng. Các bạn có thể theo dõi hai bài viết dưới đây để tìm hiểu về cách sử dụng nó.
Cách sử dụng gem "devise"
Đăng nhập bằng user_name với gem"devise"
Mình đã thiết lập devise để có thể đăng nhập bằng username và email
Bắt đầu cấu hình việc đăng nhập bằng Facebook, Google
Sau đây, mình sẽ thêm một số thiết đặt chung cho việc đăng nhập bằng tài khoản mạng xã hội
Ứng dụng của bạn có nhiều cách đăng nhâp Facebook, Google, Gmail, Github để xác định 1 user đăng nhập bằng gì thì mình tạo một cột trong database tên provider, thêm image và uid để lấy avatar id của Facebook, Google....
rails g migration AddFieldsToUser provider:string uid:string image:string
Chạy migrate nha : rails db:migrate
Mở app/models/user.rb thêm code sau vào trong nó
def self.from_omniauth(auth)
    result = User.where(email: auth.info.email).first
    if result
      return result
    else
      where(provider: auth.provider, uid: auth.uid).first_or_create do |user|
        user.email = auth.info.email
        user.password = Devise.friendly_token[0,20]
        user.fullname = auth.info.name
        user.image = auth.info.image
        user.uid = auth.uid
        user.provider = auth.provider

        #  If you are using confirmable and the provider(s) you use validate emails
        user.skip_confirmation!
      end
    end
  end
Tạo tập tin trong app/controllers/omniauth_callbacks_controller.rb và thêm các đoạn mã nguồn sau:
class OmniauthCallbacksController < Devise::OmniauthCallbacksController
  def facebook
    generic_callback("facebook")
  end

  def google_oauth2
    generic_callback( "google_oauth2" )
  end

  def generic_callback(provider)
    @user = User.from_omniauth(request.env["omniauth.auth"])
    if @user.persisted?
      sign_in_and_redirect @user, event: :authentication
      set_flash_message(:notice, :success, kind: provider.capitalize) if is_navigational_format?
    else
      session["devise.#{provider}_data"] = request.env["omniauth.auth"].except("extra")
      redirect_to new_user_registration_url
    end
  end

  def failure
    redirect_to root_path
  end
end
Vào app/models/user.rb thêm code sau vào devise code được update lúc này sẽ như sau
devise :database_authenticatable, :registerable,
         :recoverable, :rememberable, :trackable, :validatable,
         :omniauthable , omniauth_providers: [:facebook, :google_oauth2]
Xác thực với Facebook
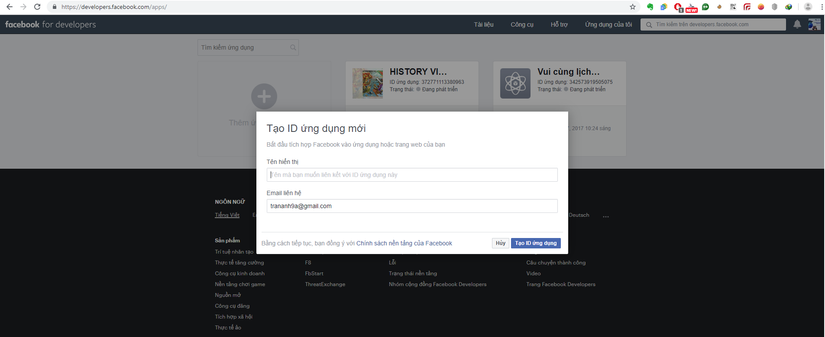
Truy cập https://developers.facebook.com/apps/ và bấm vô myapp và tạo một app mới với tên tùy ý
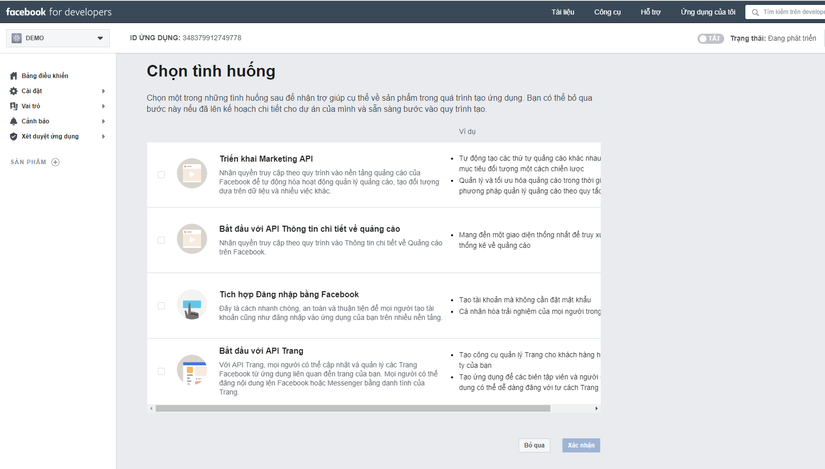
Chọn bỏ qua
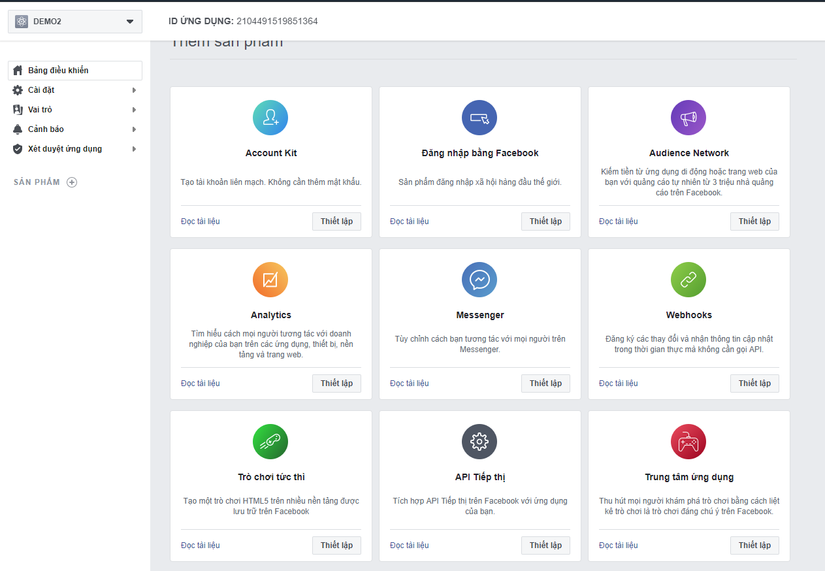
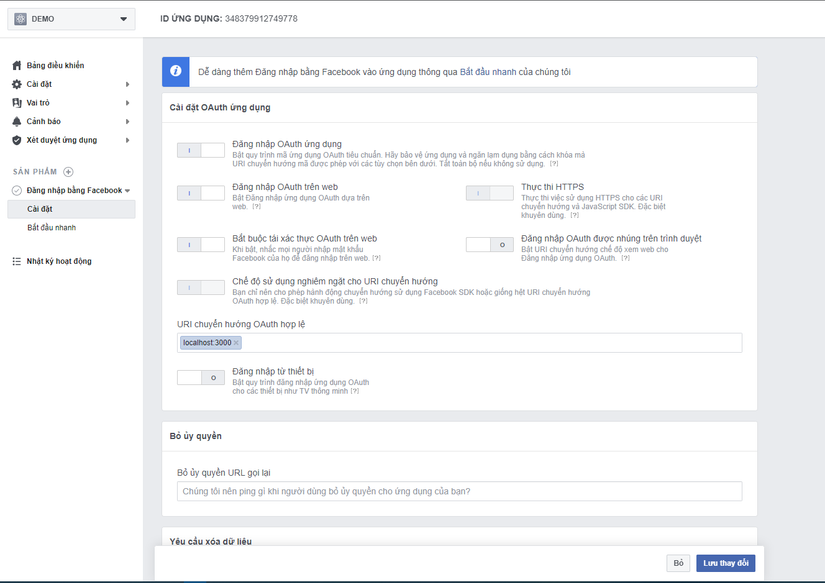
Chọn vào Đăng nhập tài khoản Facebook => OK và bấm next nhé
Trong phần Site URL ta điền localhost:3000, nếu là ở môi trường product thì điền tên miền mà mình mua.
Cứ tiếp tục Next ....hoặc Ok cho đến hết nhé nhìn bên Widget thấy Facebook Login để tiếp tục cài đặt như sau :
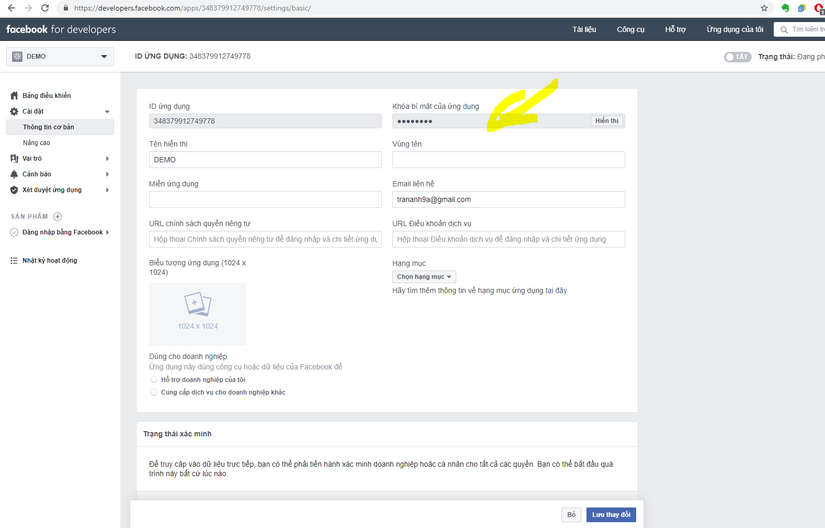
Mở config/initializers/devise.rb, thêm code sau, thay APP_ID và APP_SECRET tương ứng với ứng dụng bạn vừa tạo nhé:
config.omniauth :facebook, "APP_ID", "APP_SECRET", scope: 'email', info_fields: 'email,name'
Tiếp tục chỉnh routes để đăng nhập chính xác vào config/routes.rb thêm code sau, code bên dưới mình sẽ điều chỉnh routes lại đăng nhâp bằng đường dẫn localhost:3000/user/sign_up => localhost:3000/resgistration phù hợp với Facebook, Google.
  devise_for :users,
              path: '',
              path_names: {sign_in: 'login' ,sign_out: 'logout' ,edit: 'profile',sign_up: 'resgistration'},
              controllers: {omniauth_callbacks: 'omniauth_callbacks' }
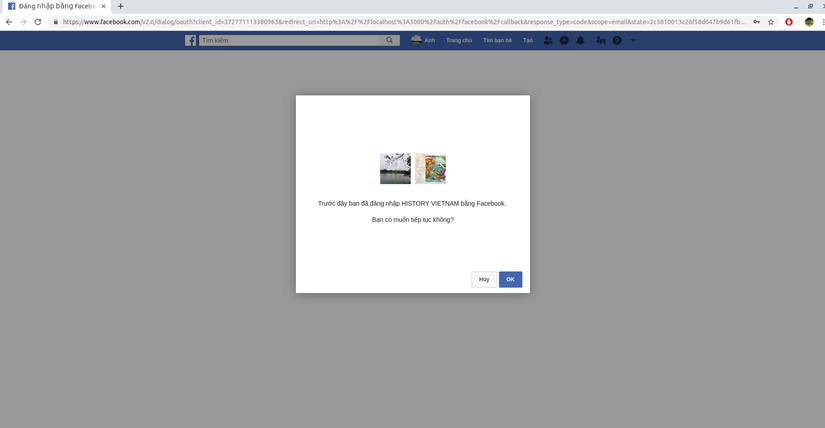
Chạy rails server vào localhost xem kết quả đây là kết quả
Xác thực với Google
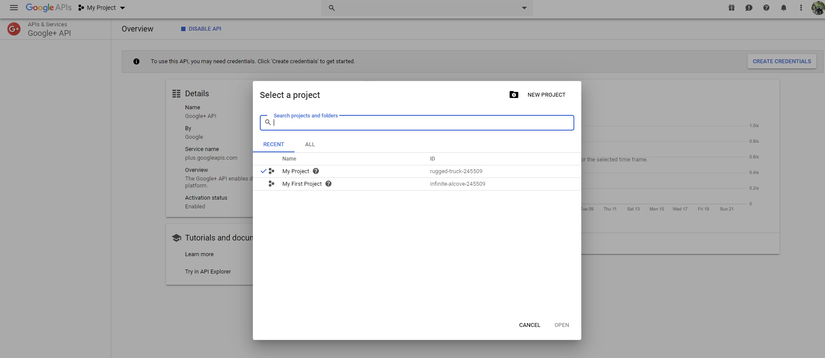
Đăng kí app với google api tại đây chọn select a project màn hình hiện ra như sau Chọn + để thêm 1 app
Vào link sau để config thư viện API của Google tìm Google+ API để active nó.
Enable Google+ API
Bấm vào Create Identifiers để chọn Oauth Client ID promt.
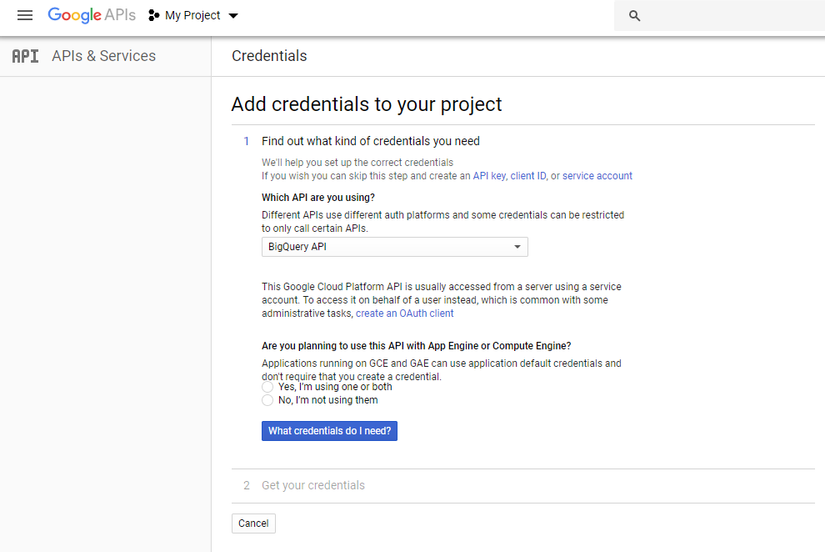
Điền thông tin vào rồi bấm What credentials do I need? hiện ra giao diện sau.
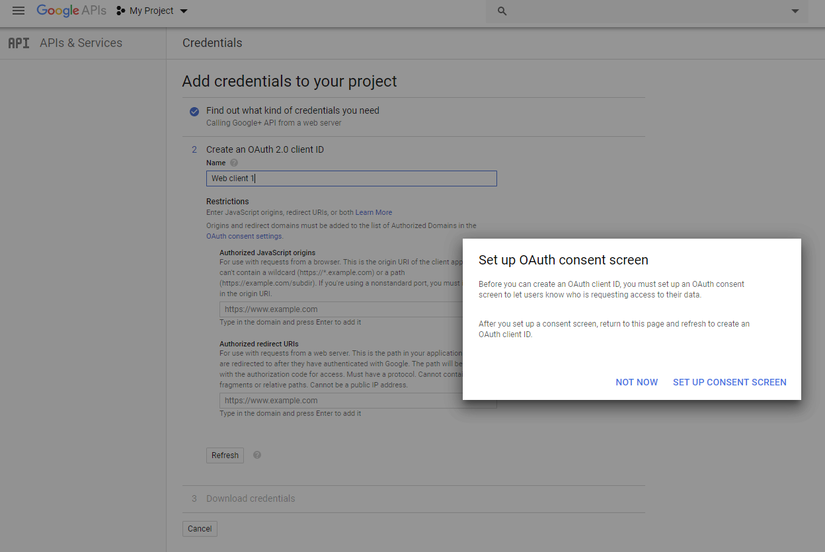
Chọn setup hiện ra giao diện sau
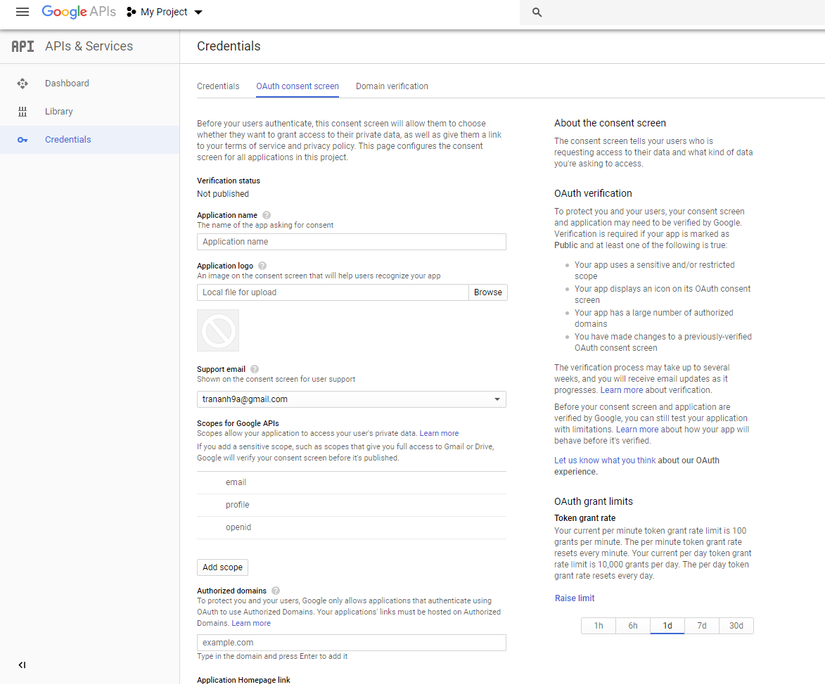
Điền thông tin mình muốn, tiếp tục quay trở lại chọn Oauth Client ID promt lúc này ta có thể chọn Web application lúc này chưa configure nên không thể chọn Web application
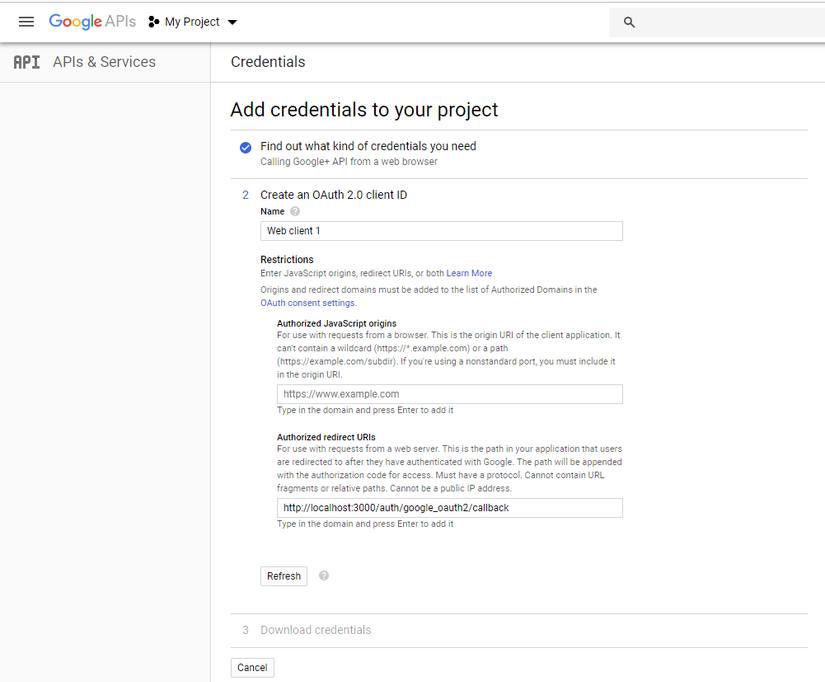
Điền Chỗ uri y như hình nhé :
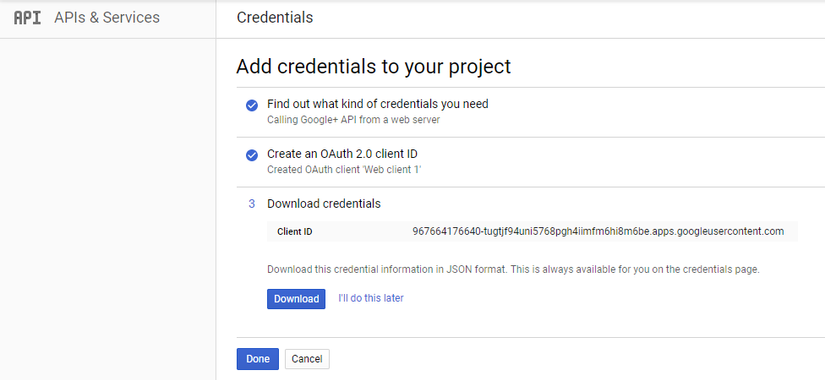
http://localhost:3000/auth/google_oauth2/callback. Sau đó nhấn Referesh để tạo key rồi Dowload xuống
Key sẽ có dạng
{
 "client_id": APP_ID,
 "client_secret": APP_SECRET
}
Truy cập config/initializers/devise.rb để thêm code sau (Thay APP_Id , APP_SECRET tương ứng với app bạn vừa tạo nhé)
config.omniauth :google_oauth2, "APP_Id", "APP_SECRET", scope: 'email', info_fields: 'email,
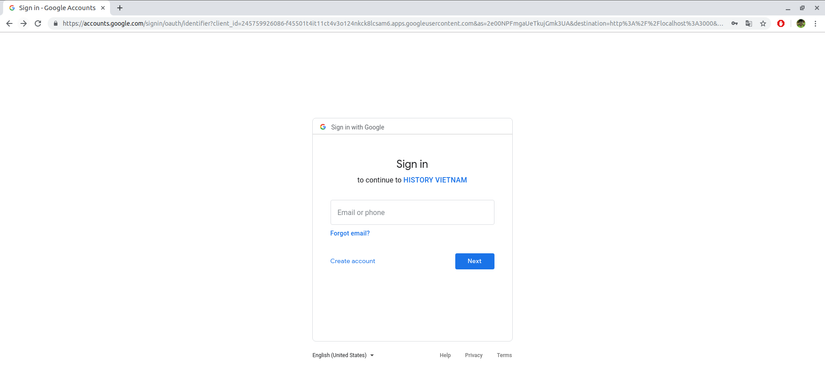
Chạy rails server vào localhost xem kết quả đây là kết quả
Vấn đề về ảnh đại diện
Khi ta dùng 1 app với facebook nên để hiển thị avatar thi ta dung graph api của facebook; giờ dùng multi nên ta sẽ code như sau cho tất cả ứng dụng luôn nếu dùng google, twitter, github thì không cần sửa nữa.
Vào app/helpers/application_helper.rb thêm
module ApplicationHelper
  def avatar_url(user)
      if user.image
        user.image
      else
        gravatar_id = Digest::MD5::hexdigest(user.email).downcase
        "https://www.gravatar.com/avatar/#{gravatar_id}.jpg?d=identical&s=150"
      end
  end
end
Tham khảo
https://viblo.asia/p/mot-so-ki-thuat-co-ban-trong-rails-phan-2-V3m5WbE8lO7
https://viblo.asia/p/tich-hop-theme-bat-ky-vao-rails-djeZ10woKWz?fbclid=IwAR2dkACmwOfcsmjVk_G3nBA_r1azousLZ6aMXH9_NeQ_UXqkZ9mkljyVQN0
https://coder9s.blogspot.com/2018/02/devise-voi-facebook-google-github-p3.html
All rights reserved
