Creating an Account and Sending Payment Transactions using Algorand JavaScript SDK
Bài đăng này đã không được cập nhật trong 3 năm
In this tutorial, we will learn how to create an Algorand account and send payment transactions using the Algorand JavaScript SDK. The Algorand SDK provides various methods and wrappers for connecting to the Algorand network. Here, we will be using JavaScript, but there are also SDKs available for Python, Go, and Java. Additionally, there are community-driven SDKs such as the C#/.NET SDK and Unity SDK, offering multiple options to develop on the Algorand blockchain.
Step 1: Cloning the Repository
First, clone the repository https://github.com/cuongpo/algo-bootcamp to get the necessary code for our tutorial.
git clone https://github.com/cuongpo/algo-bootcamp
Step 2: Installing Dependencies
Next, navigate to the cloned repository and install the required dependencies using yarn:
cd algo-bootcamp
yarn install
Step 3: Importing Important Packages
Open the index.ts file in your preferred code editor. The first thing we need to do is import the algosdk package, which provides various methods and wrappers for interacting with the Algorand network.
import algosdk from 'algosdk';
The algosdk package allows us to connect to the Algorand network and interact with it. Along with JavaScript, there are SDKs available for Python, Go, and Java. Although the official SDKs are the recommended ones, there are also community-driven SDKs that offer similar functionalities. For example, there is a C#/.NET SDK and a Unity SDK.
Additionally, we need to import information about the smart contract. In this case, we can import it from the contract.json file:
import * as abi from './contract/contract.json';
Step 4: Creating an Account
To interact with the Algorand blockchain, we need to ensure that we have an account. There are several ways to obtain an account. You can use a wallet like Pera, a local key management daemon (KMD), or create an account using the SDK.
To create an account using the SDK, we can use the generateAccount() method:
const account = algosdk.generateAccount();
After creating the account, we can print the secret key and address of the account:
console.log('Mnemonic:', algosdk.secretKeyToMnemonic(account.sk));
console.log('Address:', account.addr);
The generateAccount() method generates a new Algorand account and returns an object containing the secret key (account.sk) and the address (account.addr). The secret key is used to sign transactions and should be kept secure.
Step 5: Check account balance
Now that we have created our first account, let's proceed to learn how to check the balance of the account. We need to connect to the Algorand network using the algodClient, which provides a connection to the Algorand node's HTTP endpoints.
const algodToken = '';
const algodServer = 'https://testnet-api.algonode.cloud';
const algodPort = undefined;
const algodClient = new algosdk.Algodv2(algodToken, algodServer, algodPort);
We create an instance of algosdk.Algodv2 with the algodToken (your Algod API token) and the algodServer (the Algorand node's URL). If necessary, you can specify the algodPort as well.
To check the balance of the account via algodClient, we can use the following code:
let accountInfo = await algodClient.accountInformation(account.addr).do();

console.log('accountInfo:', accountInfo);

await waitForInput();
The accountInformation() method retrieves the account information from the Algorand node. The account information includes the balance, pending rewards, and other relevant data. The await keyword is used to wait for the asynchronous call to complete.
Additionally, we create an async function called waitForBalance() to wait until the account is funded:
// Check balance of account via algod
const waitForBalance = async () => {
  accountInfo = await algodClient.accountInformation(account.addr).do();

  const balance = accountInfo.amount;

  if (balance === 0) {
    await waitForBalance();
  }
};

await waitForBalance();

console.log(`${account.addr} funded!`);

await waitForInput();
The waitForBalance() function retrieves the account information repeatedly until the account balance is greater than zero. This ensures that the account is funded before proceeding with the next steps. The waitForInput() function is used to pause the execution and wait for user input.
Full code index.ts file
import algosdk from 'algosdk';
import readline from 'readline';
import process from 'process';
import fs from 'fs';
import * as abi from './contract/contract.json';

const rl = readline.createInterface({ input: process.stdin, output: process.stdout });
const skipPrompts = process.argv.includes('--skip-prompts');

function waitForInput() {
  if (skipPrompts === true) return new Promise((resolve) => { resolve(true); });
  return new Promise((resolve) => {
    rl.question('Press enter to continue...', resolve);
  });
}

async function main() {
  // Account creation
  const account = algosdk.generateAccount();
  console.log('Mnemonic:', algosdk.secretKeyToMnemonic(account.sk));
  console.log('Address:', account.addr);

  await waitForInput();

  // Create connection to network via public algod API
  const algodToken = '';
  const algodServer = 'https://testnet-api.algonode.cloud';
  const algodPort = undefined;
  const algodClient = new algosdk.Algodv2(algodToken, algodServer, algodPort);

  // get accountInfo
  let accountInfo = await algodClient.accountInformation(account.addr).do();

  console.log('accountInfo:', accountInfo);

  await waitForInput();

  console.log('Dispsene ALGO at https://testnet.algoexplorer.io/dispenser. Script will continue once ALGO is received...');

  // Check balance of account via algod
  const waitForBalance = async () => {
    accountInfo = await algodClient.accountInformation(account.addr).do();

    const balance = accountInfo.amount;

    if (balance === 0) {
      await waitForBalance();
    }
  };

  await waitForBalance();

  console.log(`${account.addr} funded!`);

  await waitForInput();

  // Get basic information needed for every transcation
  const suggestedParams = await algodClient.getTransactionParams().do();
  console.log('suggestedParams:', suggestedParams);

  await waitForInput();

}
Let's run the code by using
npx tsx index.ts
The account was generated successfully

Now, to fund your Algorand account, you can visit one of the following faucet websites:
- https://thealgofaucet.com/
- https://bank.testnet.algorand.network/ (my prefer)
- https://algodrops.org/faucet
- https://testnet.algoexplorer.io/dispenser
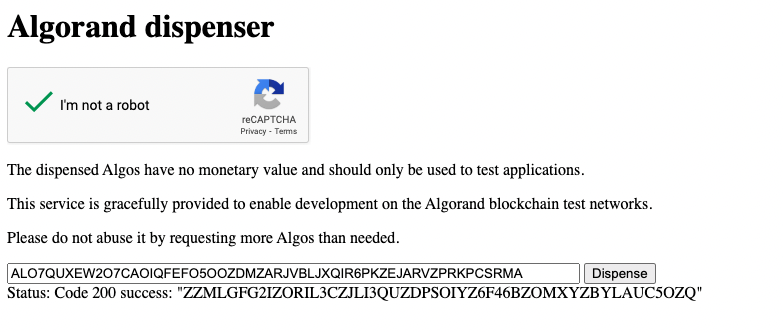
After funding your account, you can proceed with the next steps in the script.
Congratulations! You have successfully created an Algorand account and checked its balance. In the next steps, you can learn how to send payment transactions using the Algorand JavaScript SDK.
All rights reserved
