Bắt đầu với ConstraintLayout trong Kotlin. Phần 4: Sử dụng MotionLayout cho Animations
Bài đăng này đã không được cập nhật trong 7 năm
I) MotionLayout (Hiệu ứng động trên layout)
So với phương pháp tạo animations trên android, MotionLayout cho phép chúng ta linh hoạt hơn rất nhiều trong việc chỉ định cho ứng dụng của mình.
MotionLayout là một nhánh con của Constraintlayout và cho phép bạn tạo animations giữa hai constraints. Như chúng ta đã biết, các constraints là khối xây dựng cho layout, và các view có trong constraints.
MotionLayout có thể khai báo. Điều này có nghĩa là bạn có thể dễ dàng mô tả trong tệp XML của mình, cách chuyển đổi sẽ diễn ra mà không có bất cứ dòng code nào. ó có thể animate thuộc tính của hệ thống.
Hiển thị trong ảnh dưới, màu nền của button thông tin xen kẻ giữa hình ảnh được làm động.
 MotionLayout hỗ trợ các sự kiện chạm vào khung hình chính. Điều này làm cho nó có thể dễ dàng tùy chỉnh chuyển tiếp theo nhu cầu của riêng bạn. Trong phần sau của bài viết này, chúng ta sẽ thấy cách thức này hoạt động bằng cách sử dụng một số ví dụ.
Sự khác nhau giữa ConstraintLayout và MotionLayout.
MotionLayout là một phần của ConstraintLayout. Điểm khác biệt chính là Motionlayout không nhất thiết phải có trong cùng tệp bố cục. Thay vào đó, nó được giữ trong tệp XML riêng, MotionScene mà nó tham chiếu.
MotionLayout chỉ khả dụng trên phiên bản ConstraintLayout 2.0 trở lên.
Bạn thêm thư viện của MotionLayout vào project của bạn, build.gradle:
MotionLayout hỗ trợ các sự kiện chạm vào khung hình chính. Điều này làm cho nó có thể dễ dàng tùy chỉnh chuyển tiếp theo nhu cầu của riêng bạn. Trong phần sau của bài viết này, chúng ta sẽ thấy cách thức này hoạt động bằng cách sử dụng một số ví dụ.
Sự khác nhau giữa ConstraintLayout và MotionLayout.
MotionLayout là một phần của ConstraintLayout. Điểm khác biệt chính là Motionlayout không nhất thiết phải có trong cùng tệp bố cục. Thay vào đó, nó được giữ trong tệp XML riêng, MotionScene mà nó tham chiếu.
MotionLayout chỉ khả dụng trên phiên bản ConstraintLayout 2.0 trở lên.
Bạn thêm thư viện của MotionLayout vào project của bạn, build.gradle:
  dependencies {
        implementation 'com.android.support.constraint:constraint-layout:2.0.0-alpha1'
    }
Tạo một ví dụ animation với MotionLayout
Lưu ý: Motion cung cấp một trải nghiệm. Các đối tượng được trình bày cho người dùng mà không phá vỡ tính liên tục của trải nghiệm ngay cả khi họ biến đổi và sắp xếp lại.
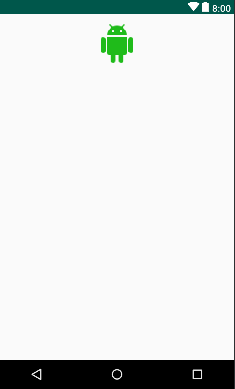
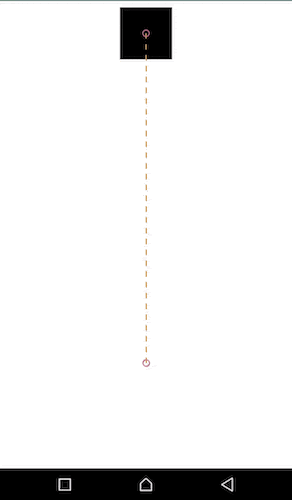
Với ví dụ đầu tiên, chúng ta sẽ tạo animation, imageView tăng kích thước khi nó di chuyển xuống dưới màn hình.

Để tạo được hiệu ứng này, chúng ta phải tạo 2 tệp, cho vị trí ban đầu và vị trí cuối cùng.
Thuộc tính motion_one_img_start
<android.support.constraint.ConstraintLayout
    xmlns:android="http://schemas.android.com/apk/res/android"
    xmlns:app="http://schemas.android.com/apk/res-auto"
    xmlns:tools="http://schemas.android.com/tools"
    android:layout_width="match_parent"
    android:layout_height="match_parent">

    <ImageView
        android:id="@+id/imageView"
        android:layout_width="64dp"
        android:layout_height="64dp"
        android:layout_marginTop="16dp"
        app:layout_constraintEnd_toEndOf="parent"
        app:layout_constraintStart_toStartOf="parent"
        app:layout_constraintTop_toTopOf="parent"
        app:srcCompat="@drawable/ic_android_black_24dp" />

</android.support.constraint.ConstraintLayout>
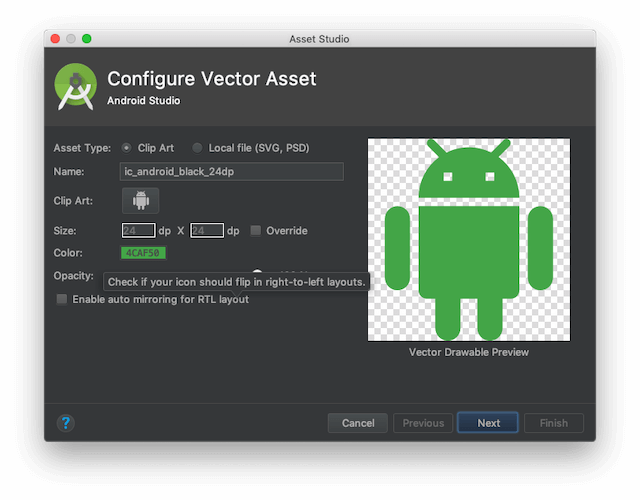
Tiếp theo, chúng ta tạo ra hình bằng vector. File > New > Vector Asset và bạn chọn color #4CAF50 và Next > Finish
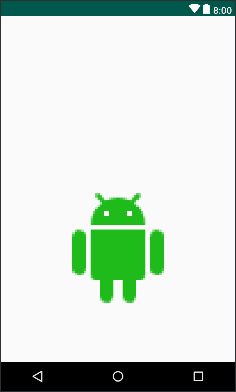
 Hình ảnh cuối cùng mình bố trí như này:
 Dùng thuộc tính
 motion_one_img_end
 <android.support.constraint.ConstraintLayout
        xmlns:android="http://schemas.android.com/apk/res/android"
        xmlns:app="http://schemas.android.com/apk/res-auto"
        android:layout_width="match_parent"
        android:layout_height="match_parent">

        <ImageView
            android:id="@+id/imageView"
            android:layout_width="180dp"
            android:layout_height="180dp"
            app:layout_constraintBottom_toBottomOf="parent"
            app:layout_constraintEnd_toEndOf="parent"
            app:layout_constraintStart_toStartOf="parent"
            app:layout_constraintTop_toTopOf="parent"
            app:layout_constraintVertical_bias="0.75"
            app:srcCompat="@drawable/ic_android_black_24dp" />

    </android.support.constraint.ConstraintLayout>
Bây giờ chúng ta đã xác định vị trí ban đầu và cuối cùng cho hình ảnh của mình, chúng ta cần tạo tệp bố cục MotionLayout, chúng ta sẽ gọi nó là Motion_layout_01.
<android.support.constraint.motion.MotionLayout
        xmlns:android="http://schemas.android.com/apk/res/android"
        xmlns:app="http://schemas.android.com/apk/res-auto"
        xmlns:tools="http://schemas.android.com/tools"
        android:layout_width="match_parent"
        android:layout_height="match_parent"
        app:layoutDescription="@xml/motion_scene_01"
        app:showPaths="true">

        <ImageView
            android:id="@+id/imageView"
            android:layout_width="64dp"
            android:layout_height="64dp"
            android:layout_marginTop="16dp"
            app:layout_constraintEnd_toEndOf="parent"
            app:layout_constraintStart_toStartOf="parent"
            app:layout_constraintTop_toTopOf="parent"
            app:srcCompat="@drawable/ic_android_black_24dp" />

    </android.support.constraint.motion.MotionLayout>
Chúng tôi sẽ giới thiệu 2 thuộc tính, app:layoutDescription và app:showPaths . showPaths dùng để hiển thị đường dẫn của hình ảnh. layoutDescription là thuộc tính trong XML, gọi motion_scene_01. Phần tử MotionScene sẽ cho MotionLayout biết cách chuyển đổi giữa layout ban đầu và layout cuối. Tất cả các tệp MotionScene phải được giữ trong thư mục res/xml
<MotionScene xmlns:motion="http://schemas.android.com/apk/res-auto">
        <Transition
            motion:constraintSetStart="@layout/motion_one_img_start"
            motion:constraintSetEnd="@layout/motion_one_img_end"
            motion:duration="1000">
            <OnClick
                motion:target="@+id/imageView"
                motion:mode="toggle" />
        </Transition>
    </MotionScene>
Quá trình chuyển đổi constraintSetStart , constraintSetEnd , duration
constraintSetStartthuộc tính gắn vị trí ban đầumotion_one_img_startconstraintSetEndthuộc tính gắn vị trí cuối cùngmotion_one_img_enddurationThời gian chuyển đổi lúc bắt đầu và kết thúc. Chúng ta đã sử dụng chế độ chuyển đổi ở đây để nhìn thấy sự linh hoạt vị trí ban đầu vào cuối cùng.transitionToEnd,transitionToStart,jumpToEnd,jumpToStartCuối cùng mở MainActivity thay đổi tham số setContentView từR.layout.activity_mainthànhR.layout.motion_layout_01trong phương thứconCreate
import android.support.v7.app.AppCompatActivity
    import android.os.Bundle

    class MainActivity : AppCompatActivity() {
        override fun onCreate(savedInstanceState: Bundle?) {
            super.onCreate(savedInstanceState)
            setContentView(R.layout.motion_layout_01)
        }
    }
Đi sâu hơn về MotionScene
MotionScene là hiệu ứng cho MotionLayout bằng các hướng dẫn MotionLayout phải làm gì. Đây là trung tâm điều khiển hiệu ứng.
Để chỉ định một hiệu ứng, phần tử MotionScene có thể chứa:
StateSetmô tả trạng thái hệ thống, để xác định vị trí layout trước và sau chuyển đổi.ConstraintSetnó đóng gói tất cả các phương thức layout. nó đảm bảo chứa tất cả các constraint áp dụng cho các view. nó rất quan trọng vì mỗi constraint sẽ thay thế tất cả các constraint hiện có của view bị ảnh hưởng.TransitionPhần tử mô tả quá trình chuyển đổi giữa 2 trạng thái hoặc constrainSet. Trong phần tử chuyển đổi, bạn cũng có thể chỉ định kích hoạt sự kiệnOnclickhoặcOnSwipevàKeyFrameSet.
<MotionScene>
        <Transition>
            <OnClick />
            <OnSwipe />
            <KeyFrameSet >
                <KeyPosition />
                <KeyAttribute />
                <KeyCycle />
            </KeyFrameSet>
        </Transition>

        <ConstraintSet>
            <Constraint >
                <CustomAttribute/>
            </Constraint>
        </ConstraintSet>

        <StateSet>
            <State>
                <Variant />
            </State>
        </StateSet>
    </MotionScene>
Dùng ConstraintSet thay thế cho nhiều file layout Chúng ta sử dụng ConstraintSet và xác định ràng thuộc tính ban đầu và thuộc tính cuối cùng được áp dụng.
<MotionScene xmlns:motion="http://schemas.android.com/apk/res-auto"
       xmlns:android="http://schemas.android.com/apk/res/android">
       <Transition
           motion:constraintSetStart="@+id/start"
           motion:constraintSetEnd="@+id/end"
           motion:duration="1000">
           <OnClick
               motion:target="@+id/imageView"
               motion:mode="toggle" />
       </Transition>

       <ConstraintSet android:id="@+id/start">
           <Constraint
               android:id="@+id/imageView"
               android:layout_width="64dp"
               android:layout_height="64dp"
               android:layout_marginTop="16dp"
               motion:layout_constraintEnd_toEndOf="parent"
               motion:layout_constraintStart_toStartOf="parent"
               motion:layout_constraintTop_toTopOf="parent"
               motion:srcCompat="@drawable/ic_android_black_24dp"/>
       </ConstraintSet>

       <ConstraintSet android:id="@+id/end">
           <Constraint
               android:id="@+id/imageView"
               android:layout_width="180dp"
               android:layout_height="180dp"
               motion:layout_constraintBottom_toBottomOf="parent"
               motion:layout_constraintEnd_toEndOf="parent"
               motion:layout_constraintStart_toStartOf="parent"
               motion:layout_constraintTop_toTopOf="parent"
               motion:layout_constraintVertical_bias="0.75"
               motion:srcCompat="@drawable/ic_android_black_24dp"  />
       </ConstraintSet>
   </MotionScene>
Ở trên chúng ta đã xác định 2 yếu tố ConstraintSet. Một cho layout ban đầu với ID start vào layout cuối cùng với ID - end.
Tùy chỉnh thuộc tính
Chúng ta đề cập với MotionLayout, thực hiện chuyển đổi trên các thuộc tính không liên quan đến vị trí, chúng được gọi là thuộc tính tùy chỉnh.
 Trong ảnh trên , bạn có thể thấy màu nền thay đổi dần trong quá trình hiệu ứng và không chỉ là sự thay đổi đột ngột.
Tạo mới file trong XML
Trong ảnh trên , bạn có thể thấy màu nền thay đổi dần trong quá trình hiệu ứng và không chỉ là sự thay đổi đột ngột.
Tạo mới file trong XML res/layouts với đường dẫn motion_layout_02.xml
  <android.support.constraint.motion.MotionLayout
        xmlns:android="http://schemas.android.com/apk/res/android"
        xmlns:app="http://schemas.android.com/apk/res-auto"
        xmlns:tools="http://schemas.android.com/tools"
        android:layout_width="match_parent"
        android:layout_height="match_parent"
        app:layoutDescription="@xml/motion_scene_02"
        app:showPaths="true">

        <View
            android:id="@+id/view"
            android:layout_width="64dp"
            android:layout_height="64dp"
            android:layout_marginTop="8dp"
            app:layout_constraintEnd_toEndOf="parent"
            app:layout_constraintStart_toStartOf="parent"
            app:layout_constraintTop_toTopOf="parent" />

    </android.support.constraint.motion.MotionLayout>
Điều quan trọng cần lưu ý là phần tử view chúng ta áp dụng màu nền không có thuộc tính backgroundColor. Thay vào đó chúng ta sẽ khai báo trong tệp MotionScene.
Tạo mới file trong res/xml với đường dẫn motion_scene_02
<MotionScene xmlns:android="http://schemas.android.com/apk/res/android"
        xmlns:motion="http://schemas.android.com/apk/res-auto">

        <Transition
            motion:constraintSetEnd="@+id/end"
            motion:constraintSetStart="@+id/start"
            motion:duration="1000"
            motion:interpolator="linear">
            <OnClick
                motion:target="@+id/view"
                motion:mode="toggle" />
        </Transition>

        <ConstraintSet android:id="@+id/start">
            <Constraint
                android:id="@+id/view"
                android:layout_width="64dp"
                android:layout_height="64dp"
                android:layout_marginTop="8dp"
                motion:layout_constraintEnd_toEndOf="parent"
                motion:layout_constraintStart_toStartOf="parent"
                motion:layout_constraintTop_toTopOf="parent">
                <CustomAttribute
                    motion:attributeName="backgroundColor"
                    motion:customColorValue="#000000" />
            </Constraint>
        </ConstraintSet>

        <ConstraintSet android:id="@+id/end">
            <Constraint
                android:id="@+id/view"
                android:layout_width="180dp"
                android:layout_height="180dp"
                motion:layout_constraintBottom_toBottomOf="parent"
                motion:layout_constraintEnd_toEndOf="parent"
                motion:layout_constraintStart_toStartOf="parent"
                motion:layout_constraintTop_toTopOf="parent"
                motion:layout_constraintVertical_bias="0.90" >
                <CustomAttribute
                    motion:attributeName="backgroundColor"
                    motion:customColorValue="#0e0e96" />
            </Constraint>
        </ConstraintSet>

    </MotionScene>
Khi xác định một thuộc tính tùy chỉnh, bạn cần xác định cả thuộc tính đầu và cuối ConstrainSet. Thuộc tính tùy chỉnh được chỉ định với attributeName
- getter - getAttributeName (e.g getBackgroundColor)
- setter - setAttributeName (e.g setBackgroundColor) Kiểu giá trị setter cũng cần được chỉ định các giá trị hỗ trợ:
-
customColorValue -
customIntegerValue -
customFloatValue -
customStringValue -
customDimension -
customBoolean
II) KeyFrames
Cho đến nay chúng ta chỉ thực hiện chuyển đổi giữa 2 trạng thái, bắt đầu và kết thúc. Đôi khi chúng ta muốn trạng thái bắt đầu đi qua trạng thái trung gian trước khi đến trạng thái kết thúc.
 Trong ví dụ trên, chúng ta đã chỉ định ở mức 50% dòng thời gian hiệu ứng, hình ảnh sẽ di chuyển sang bên trái màn hình và xoay trước khi đến trạng thái cuối cùng. Để làm điều này, chúng ta cần thêm phần tử
 KeyFrameSet và MotionScene.
<Transition
            motion:constraintSetStart="@layout/motion_one_img_start"
            motion:constraintSetEnd="@layout/motion_one_img_end"
            motion:duration="1000">

            [...]

          <KeyFrameSet>
              <KeyPosition
                  motion:type="parentRelative"
                  motion:percentX="0.25"
                  motion:framePosition="50"
                  motion:target="@+id/imageView"/>
              <KeyAttribute
                  android:rotation="-45"
                  motion:framePosition="50"
                  motion:target="@id/imageView" />
          </KeyFrameSet>

        </Transition>
Để thực hiện thay đổi vị trí trong quá trình chuyển đổ, chúng ta cần thêm phần tử KeyPocation trong KeyFrameSet. hướng phần trăm trục x, phần trăm trục y.
Cuối cùng, thuộc tính FramePocation được sử dụng để chỉ định thời điểm trong quá trình hiệu ứng, các thay đổi sẽ được áp dụng. Lưu lý rằng chúng ta không cần thay đổi bất cứ điều gì trong MotionLayout. Chúng ta chỉ định thay đổi sẽ được thực hiện trong tệp MotionScene.
 <MotionScene xmlns:motion="http://schemas.android.com/apk/res-auto"
      xmlns:android="http://schemas.android.com/apk/res/android">
      <Transition
          motion:constraintSetStart="@+id/start"
          motion:constraintSetEnd="@+id/end"
          motion:duration="1000">
          <OnClick
              motion:target="@+id/imageView"
              motion:mode="toggle" />

          <KeyFrameSet>
              <KeyPosition
                  motion:type="parentRelative"
                  motion:percentX="0.25"
                  motion:framePosition="50"
                  motion:target="@+id/imageView"/>
              <KeyAttribute
                  android:rotation="-45"
                  motion:framePosition="50"
                  motion:target="@id/imageView" />
          </KeyFrameSet>
      </Transition>

    </MotionScene>
Cảm ơn bạn đã theo dõi bài viết của mình
Nguồn tham khảo: https://pusher.com/tutorials/constraintlayout-kotlin-part-4
All rights reserved
