Basic Painting with Views on Android
Bài đăng này đã không được cập nhật trong 7 năm
Overview
Chúng ta hãy xem việc xây dựng một custom view cho phép người dùng vẽ trên màn hình bằng cách nhấn ngón tay xuống. Điều này sẽ minh họa cách xây dựng các custom components, cách vẽ hình dạng và đường dẫn trên view và cũng như cách xử lý các tương tác chạm của người dùng.
Creating our Custom View
Tạo một class đơn gian cho việc vẽ bằng cách extends class View, đặt tên là SimpleDrawingView:
public class SimpleDrawingView extends View {
    public SimpleDrawingView(Context context, AttributeSet attrs) {
        super(context, attrs);
    }
}
Thêm nó vào layout xml cho activity
<RelativeLayout xmlns:android="http://schemas.android.com/apk/res/android"
    xmlns:tools="http://schemas.android.com/tools"
    android:layout_width="match_parent"
    android:layout_height="match_parent"
    tools:context=".MainActivity" >

    <com.codepath.example.simpledrawapp.SimpleDrawingView
        android:id="@+id/simpleDrawingView1"
        android:layout_width="wrap_content"
        android:layout_height="wrap_content"
        android:layout_alignParentBottom="true"
        android:layout_alignParentLeft="true"
        android:layout_alignParentRight="true"
        android:layout_alignParentTop="true" />

</RelativeLayout>
Simple Drawing with Canvas
Hãy thử vẽ một vài vòng tròn trên màn hình. Điều này đòi hỏi chúng ta phải xác định một đối tượng Paint định nghĩa style và màu sắc của những gì được vẽ. Hãy bắt đầu bằng cách chuẩn bị Paint:
public class SimpleDrawingView extends View {
  // setup initial color
  private final int paintColor = Color.BLACK;
  // defines paint and canvas
  private Paint drawPaint;

  public SimpleDrawingView(Context context, AttributeSet attrs) {
    super(context, attrs);
    setFocusable(true);
    setFocusableInTouchMode(true);
    setupPaint();
  }

  // Setup paint with color and stroke styles
  private void setupPaint() {
    drawPaint = new Paint();
    drawPaint.setColor(paintColor);
    drawPaint.setAntiAlias(true);
    drawPaint.setStrokeWidth(5);
    drawPaint.setStyle(Paint.Style.STROKE);
    drawPaint.setStrokeJoin(Paint.Join.ROUND);
    drawPaint.setStrokeCap(Paint.Cap.ROUND);
  }
}
Bây giờ chúng ta có thiết lập Paint để có màu đen và định cấu hình một kiểu nét cụ thể, hãy thử vẽ một vài vòng tròn với các màu khác nhau. Tất cả các lệnh vẽ xảy ra trong một khung nhìn sẽ diễn ra trong phương thức onDraw được gọi tự động khi một khung nhìn được hiển thị:
public class SimpleDrawingView extends View {
    // ...variables and setting up paint...
    // Let's draw three circles
    @Override
    protected void onDraw(Canvas canvas) {
      canvas.drawCircle(50, 50, 20, drawPaint);
      drawPaint.setColor(Color.GREEN);
      canvas.drawCircle(50, 150, 20, drawPaint);
      drawPaint.setColor(Color.BLUE);
      canvas.drawCircle(50, 250, 20, drawPaint);
    }
}
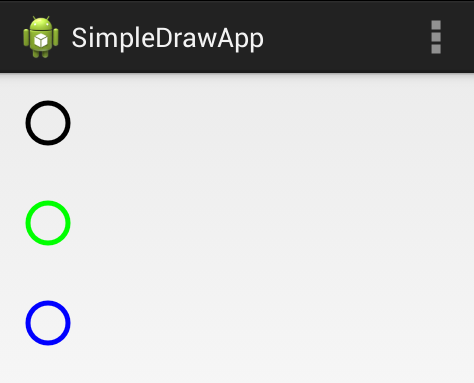
Lưu ý rằng onDraw chuyển cho chúng ta một đối tượng canvas mà chúng ta sử dụng để vẽ các hình bằng Paint mà chúng ta đã xác định trước đó. Phương thức drawCircle chấp nhận x, y và bán kính của vòng tròn. Chúng ta được kết quả như sau

Handling Touch Interactions
Giả sử bây giờ chúng tôi muốn vẽ một vòng tròn mỗi khi người dùng chạm vào view. Điều này sẽ yêu cầu chúng ta theo dõi một loạt các điểm cho vòng tròn và sau đó nối thêm một điểm cho mỗi sự kiện onTouch được kích hoạt:
public class SimpleDrawingView extends View {
  // setup initial color
  private final int paintColor = Color.BLACK;
  // defines paint and canvas
  private Paint drawPaint;
  // Store circles to draw each time the user touches down
  private List<Point> circlePoints;

  public SimpleDrawingView(Context context, AttributeSet attrs) {
    super(context, attrs);
    setupPaint(); // same as before
    circlePoints = new ArrayList<Point>();
  }

  // Draw each circle onto the view
  @Override
  protected void onDraw(Canvas canvas) {
    for (Point p : circlePoints) {
      canvas.drawCircle(p.x, p.y, 5, drawPaint);
    }
  }

  // Append new circle each time user presses on screen
  @Override
  public boolean onTouchEvent(MotionEvent event) {
    float touchX = event.getX();
    float touchY = event.getY();
    circlePoints.add(new Point(Math.round(touchX), Math.round(touchY)));
    // indicate view should be redrawn
    postInvalidate();
    return true;
  }

  private void setupPaint() {
    // same as before
    drawPaint.setStyle(Paint.Style.FILL); // change to fill
    // ...
  }
}
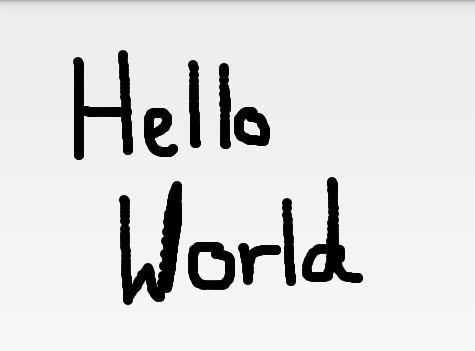
Với đoạn code trên thì một vòng tròn màu đen được vẽ mỗi lần chúng ta nhấn xuống:

Drawing with Paths
Cho đến bây giờ chúng ta đã khám phá phương pháp onDraw của View và chúng ta có thể vẽ các vòng tròn lên View dựa trên các tương tác touch với View. Tiếp theo, hãy cải thiện ứng dụng vẽ của chúng ta bằng cách xóa danh sách các vòng tròn và thay vào đó vẽ bằng các đường dẫn. Lớp Path là lý tưởng để cho phép người dùng vẽ trên màn hình. Một Path có thể chứa nhiều đường, đường viền và thậm chí các hình dạng khác. Trước tiên, hãy thêm một biến Path để theo dõi bản vẽ của chúng ta:
public class SimpleDrawingView extends View {
  // ...
  private Path path = new Path();
  // ...
}
Tiếp theo, hãy nối các điểm vào Path khi người dùng chạm vào màn hình. Khi người dùng nhấn xuống, hãy bắt đầu một Path và sau đó khi họ kéo, hãy kết nối các điểm lại với nhau. Để làm điều này, chúng ta cần sửa đổi onTouchEvent để nối các điểm này vào đối tượng Path của chúng ta:
public class SimpleDrawingView extends View {
    private Path path = new Path();

    // Get x and y and append them to the path
    public boolean onTouchEvent(MotionEvent event) {
        float pointX = event.getX();
        float pointY = event.getY();
        // Checks for the event that occurs
        switch (event.getAction()) {
        case MotionEvent.ACTION_DOWN:
            // Starts a new line in the path
            path.moveTo(pointX, pointY);
            break;
        case MotionEvent.ACTION_MOVE:
            // Draws line between last point and this point
            path.lineTo(pointX, pointY);
            break;
        default:
            return false;
       }

       postInvalidate(); // Indicate view should be redrawn
       return true; // Indicate we've consumed the touch
    }

   // ...
}
và sau đó hãy thay đổi onDraw để xóa các vòng tròn và thay vào đó để hiển thị các dòng đã vẽ trong path của chúng ta:
public class SimpleDrawingView extends View {
  // ... onTouchEvent ...

  // Draws the path created during the touch events
  @Override
  protected void onDraw(Canvas canvas) {
      canvas.drawPath(path, drawPaint);
  }

  private void setupPaint() {
    // same as before
    drawPaint.setStyle(Paint.Style.STROKE); // change back to stroke
    // ...
  }
}
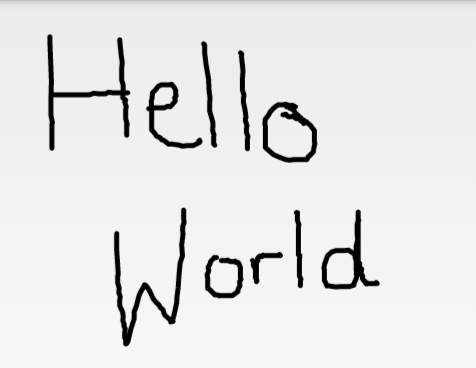
Chúng ta đã có ứng dụng vẽ rất đơn giản trông như sau:

Efficient Drawing with Bitmap Cache
Khi vẽ lên một Canvas, bạn có thể cải thiện đáng kể thời gian kết xuất bằng cách lưu trữ hình ảnh vào một bitmap như được nêu trong bài đăng stackoverflow này.
Bitmap mField = null;

public void init()
{
  mField = new Bitmap(...dimensions...);
  Canvas c = new Canvas(mField);
  c.drawRect(...);
  ...
}

public void onDraw(Canvas c)
{
  c.drawBitmap(mField);
}
Đây là pattern phổ biến để cải thiện hiệu năng khi vẽ.
Reference for SimpleDrawingView
import android.content.Context;
import android.graphics.Canvas;
import android.graphics.Color;
import android.graphics.Paint;
import android.graphics.Path;
import android.util.AttributeSet;
import android.view.MotionEvent;
import android.view.View;

public class SimpleDrawingView extends View {
	// setup initial color
	private final int paintColor = Color.BLACK;
	// defines paint and canvas
	private Paint drawPaint;
	// stores next circle
	private Path path = new Path();

	public SimpleDrawingView(Context context, AttributeSet attrs) {
		super(context, attrs);
		setFocusable(true);
		setFocusableInTouchMode(true);
		setupPaint();
	}

	private void setupPaint() {
		// Setup paint with color and stroke styles
		drawPaint = new Paint();
		drawPaint.setColor(paintColor);
		drawPaint.setAntiAlias(true);
		drawPaint.setStrokeWidth(5);
		drawPaint.setStyle(Paint.Style.STROKE);
		drawPaint.setStrokeJoin(Paint.Join.ROUND);
		drawPaint.setStrokeCap(Paint.Cap.ROUND);
	}

	@Override
	protected void onDraw(Canvas canvas) {
		canvas.drawPath(path, drawPaint);
	}

	@Override
	public boolean onTouchEvent(MotionEvent event) {
		float pointX = event.getX();
		float pointY = event.getY();
		// Checks for the event that occurs
		switch (event.getAction()) {
		case MotionEvent.ACTION_DOWN:
			path.moveTo(pointX, pointY);
			return true;
		case MotionEvent.ACTION_MOVE:
			path.lineTo(pointX, pointY);
			break;
		default:
			return false;
		}
		// Force a view to draw again
		postInvalidate();
		return true;
	}
}
All rights reserved