Android: Xử lý ảnh đơn giản và nhanh chóng với RenderScript
Bài đăng này đã không được cập nhật trong 7 năm
Intro
Bạn muốn chỉnh sửa ảnh muộn cách nhanh chóng chỉ với vài dòng code đơn giản. Bạn muốn sử dụng sức mạnh tính toán của GPU mà không phải học các câu lệnh phức tạp của OpenCL. Renderscript sẽ giúp bạn thực hiện tất cả các điều trên.
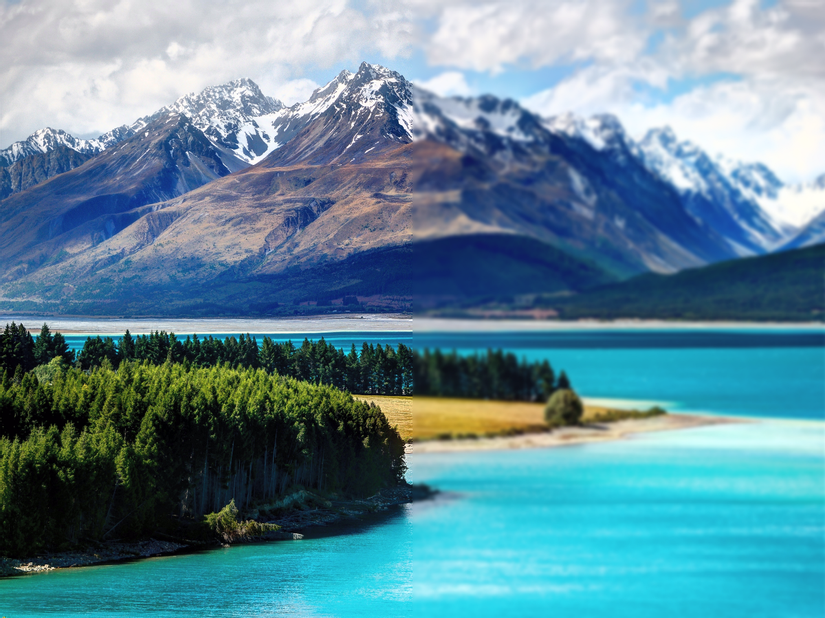
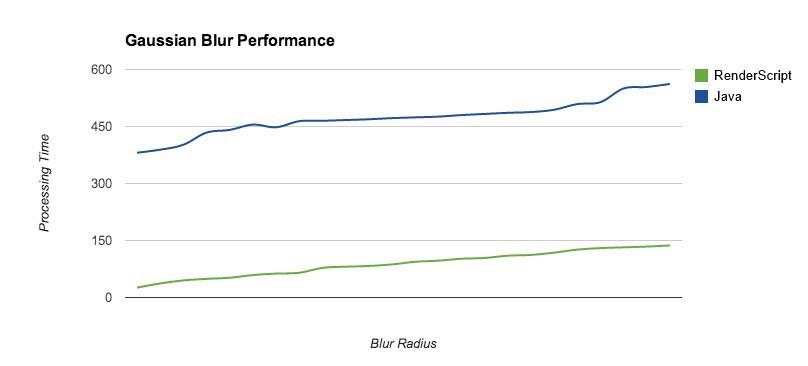
Mình đã thực hiện 1 bài so sánh về làm mở ảnh bằng renderscript với code java thông thường java based fastblur. Với ảnh có độ phân giải là 4806x3604 pixel thì renderscript xử lý mất 738ms trên Nexus 6P, còn với thuật toán fastblur thì không xử lý được ảnh to như thế này (xảy ra lỗi out of memory). Do đó mình đã thử với ảnh nhỏ hơn với kích thước là 1944x1944 thì fastblur xử lý mất 1,354ms còn renderscript thì nhanh hơn gấp 8 lần với 160ms.

Bạn có thể tìm kiếm sự so sánh hiệu năng giữa java code và renderscript với thuật toán xử lý hiệu ứng ảnh Gaussian Blur:

Mình sẽ không nói về NDK ở đây vì về phần này mình chưa đủ kiến thức để giải thích rõ ràng cho các bạn. Nếu các bạn muốn tìm hiểu về NDK của Renderscript thì cá bạn có thể tham khảo ở đây.
Renderscript là "Script" viết dựa trên ngôn ngữ C (Ed. C language), nên mình nghĩ để sử dụng tốt Renderscript thì các bạn nên giành chút thời gian tìm hiểu về C language.
Để có thể sử dụng Renderscript bạn cần thêm 2 dòng lệnh vào file build.gradle:
android {
   ...
   defaultConfig {
    ...
      renderscriptTargetApi 24
      renderscriptSupportModeEnabled true
   }
}
Renderscript sẽ được viết bằng C nó sẽ được chạy song song để tính toán xử lý cho từng pixel ảnh. File Script sẽ có phần mở rộng có đuôi là ".rs"và phải được đặt trong thư mục " / src / main / rs". Điều này thì các bạn phải tạo thư mục cũng như file bằng tay vì Android Studio sẽ không thực hiện công việc đó cho bạn.
Sau đây mình sẽ giới thiệu với các bạn 1 số ứng dụng đơn giản của Renderscript để xử lý ảnh.
Blur image
Trong ví dụ đầu tiên này mình sẽ không viết các mã Script vì nó đã được cung cấp qua API ScriptIntrinsicBlur mà sẽ chủ yếu giúp các bạn biết cách sử dụng Renderscript như thế nào.
public static Bitmap blurBitmap(Bitmap bitmap, float radius, Context context) {
    //Create renderscript
    RenderScript rs = RenderScript.create(context);

    //Create allocation from Bitmap
    Allocation allocationIn = Allocation.createFromBitmap(rs, bitmap);

    Type t = allocationin.getType();

    //Create allocation with the same type
    Allocation allocationOut = Allocation.createTyped(rs, t);

    //Create script
    ScriptIntrinsicBlur blurScript = ScriptIntrinsicBlur.create(rs, Element.U8_4(rs));
    //Set blur radius (maximum 25.0)
    blurScript.setRadius(radius);
    //Set input for script
    blurScript.setInput(allocationIn);
    //Call script for output allocation
    blurScript.forEach(allocationOut);

    //Copy script result into bitmap
    allocationOut.copyTo(bitmap);

    //Destroy everything to free memory
    allocationIn.destroy();
    allocationOut.destroy();
    blurScript.destroy();
    t.destroy();
    rs.destroy();
    return bitmap;
}
Trong đoạn code trên mình có tạo ra 2 biến Allocation là allocationIn và allocationOut một biến để nhận ảnh Bitmap đầu vào và 1 biến để nhận ảnh Bitmap sau khi đã xử lý. Hàm allocationOut.copyTo(bitmap); để copy ảnh Bitmap đã xử lý xong ra ảnh Bitmap để mình hiển thị lên View.
Saturation image
Ví dự dưới đây mình sẽ viết 1 Script đơn giản để xử lý tăng Saturation của ảnh.
file saturation.rs
#pragma version(1)
#pragma rs java_package_name(com.example.android.basicrenderscript)
#pragma rs_fp_relaxed

const static float3 gMonoMult = {0.299f, 0.587f, 0.114f};

float saturationValue = 0.f;

/*
 * RenderScript kernel that performs saturation manipulation.
 */
uchar4 __attribute__((kernel)) saturation(uchar4 in)
{
    //Convert input uchar4 to float4
    float4 f4 = rsUnpackColor8888(in);

    float3 result = dot(f4.rgb, gMonoMult);
    result = mix(result, f4.rgb, saturationValue);

    //Put the values in the output uchar4
    return rsPackColorTo8888(result);
}
Khi các bạn build project thì Android Studio sẽ sinh ra cho các bạn 1 file ScriptC_saturation.java
File này sẽ biên dịch các dòng lệnh bạn viết trong file saturation.rs để code java có thể gọi các hàm xử lý được.
Và bây giờ quay lên code java mình sẽ viết hàm để xử lý staturation ảnh.
public static Bitmap blurBitmap(Bitmap bitmap, float statu, Context context) {
    //Create renderscript
    RenderScript rs = RenderScript.create(context);

    //Create allocation from Bitmap
    Allocation allocationIn = Allocation.createFromBitmap(rs, bitmap);

    Type t = allocationin.getType();

    //Create allocation with the same type
    Allocation allocationOut = Allocation.createTyped(rs, t);

    //Create script
    ScriptC_saturation saturationScript = ScriptC_saturation.create(rs);

    // Set global variable in RS
    saturationScript.set_saturationValue(statu);

    //Call script for output allocation
    saturationScript.forEach_saturation(allocationIn, allocationOut);

    //Copy script result into bitmap
    allocationOut.copyTo(bitmap);

    //Destroy everything to free memory
    allocationIn.destroy();
    allocationOut.destroy();
    saturationScript.destroy();
    t.destroy();
    rs.destroy();
    return bitmap;
}
Kết luận
Trên đây là 2 ví dụ đơn giản về RenderScript để xử lý ảnh, ngoài ra ứng dụng của RenderScript có thể áp dụng vào các ứng dựng sau đây
-
3D Rendering
-
Image Processing
-
Computational Photography
-
Computer Vision
Qua bài viết này hi vọng các bạn sẽ tìm hiểu thêm về 1 kỹ thuật mới trong xử lý ảnh trong Android nhằm tăng hiệu năng của các ứng dụng có tác vụ liên quan đến xử lý ảnh.
Tham khảo:
All rights reserved