Xcode Project: Sử dụng Github Actions + Fastlane để tự động distribute
Bài đăng này đã không được cập nhật trong 6 năm
Xin chào mọi người, chắc hẳn gần đây chúng ta nghe nói nhiều đến CI/CD. Trong bài viết này mình sẽ đưa ra cách mình sử dụng Github actions + Fastlane để hỗ trợ việ build app và upload app lên Firebase/Deploygate... cho QA.
Chuẩn bị
Đầu tiên để có thể bắt đầu, chúng ta sẽ cần phải có:
- Xcode project đã được config bundle id, provisioning profile, certificate tương ứng.
- File _Dev.provisionprofile và file ***.p12
- Init fastlane cho project.
Setup fastlane
fastlane is the easiest way to automate beta deployments and releases for your iOS and Android apps. 🚀 It handles all tedious tasks, like generating screenshots, dealing with code signing, and releasing your application.
Nếu bạn nào chưa từng sử dụng fastlane thì hãy thử truy cập vào link trên và tìm hiểu nó. Về cơ bản, fastlane cung cấp sẵn cho chúng ta các action ví dụ như, build, test, screenshot app, upload deploygate/firebase. Như vậy là cũng đã đủ cho chúng ta sử dụng. Tuy nhiên, để kết hợp cùng github actions, thì chúng ta còn cần sử dụng thêm 2 action được cộng đồng đóng góp nữa đó là: install_provisioning_profile Example
install_provisioning_profile(path: "profiles/profile.mobileprovision")
path: chúng ta sẽ cần chỉ đến đúng đường dẫn chứa *.mobileprovision
import_certificate Example
import_certificate(
  certificate_path: "certs/dist.p12",
  certificate_password: "***",
  keychain_password: "***",
  keychain_name: "KeychainName"
)
certificate_path: chúng ta sẽ cần chỉ đến đúng đường dẫn chứa *.p12
Mục đích của việc sử dụng 2 action này đó là install provisioning profile và import certificate vào MacOs device của github. Tuy nhiên, để có thể sử dụng đc 2 action kia, chúng ta sẽ cần phải có keychain. Fastlane cũng cung cấp action có tên create_keychain để giúp chúng ta có thể dễ dàng khởi tạo. Example
create_keychain(
  name: "KeychainName",
  default_keychain: true,
  unlock: true,
  timeout: 3600,
  lock_when_sleeps: true
)
Tiếp theo, chúng ta sẽ sử dụng action gym để thực hiện archive + export app ra file ipa. Example:
gym(
	    scheme: "Learning1",
	    workspace: "Learning1.xcworkspace",
	    export_method: 'enterprise',
	    clean: true
    )
Ở đây chúng ta sẽ cần config một số thuộc tính như trên ví dụ.
Tiếp theo, dành cho upload file ipa lên deploygate hoặc firebase distribution. Cái này sẽ tuỳ theo dự án các bạn đang thống nhất là deliver cho QA thông qua đâu. Các bạn có thể đọc thêm: Deploygate Example
deploygate(
  api_token: "...",
  user: "target username or organization name",
  ipa: "./ipa_file.ipa",
  message: "Build #{lane_context[SharedValues::BUILD_NUMBER]}",
  distribution_key: "(Optional) Target Distribution Key",
  distribution_name: "(Optional) Target Distribution Name"
)
Firebase Distribution Example
firebase_app_distribution(
            app: "1:123456789:ios:abcd1234",
            testers: "tester1@company.com, tester2@company.com",
            release_notes: "Lots of amazing new features to test out!",
            firebase_cli_path: "/absolute/path/to/firebase/cli/binary"
        )
Thiết lập security.
Vấn đề lúc này chúng ta cần quan tâm đó là liên quan đến bảo mật, bởi vì việc sử dụng Github actions này chúng ta sẽ cần phải đẩy file p12 và mobileprovisioning lên github cùng với source code. Chưa kể tới để upload lên Firebase Distribution/Deploygate thì chúng ta còn cần cung cấp apiKey nữa. Giải pháp lúc này là chúng ta sẽ sử dụng Secrets key được cung cấp sẵn trong Setting của project trên github:
Sau khi đã truy cập vào Settings -> Secrets. Chúng ta sẽ thực hiện khởi tạo KEY để sử dụng lưu trữ vào bảo mật apiKey, password để mở file p12.
Example:
 Trong bài viết này mình sẽ thực hiện upload ipa lên Firebase App Distribution. Vì vậy như trên mình tạo một secrets key có tên là APP_KEY
Thì để sử dụng key này trong github actions, thì chúng ta sẽ gọi như sau:
Trong bài viết này mình sẽ thực hiện upload ipa lên Firebase App Distribution. Vì vậy như trên mình tạo một secrets key có tên là APP_KEY
Thì để sử dụng key này trong github actions, thì chúng ta sẽ gọi như sau:
${{ secrets.APP_KEY }}
Ghép các actions của Fastlane vào Fastfile
Tiếp theo chúng ta sẽ bắt tay vào việc ghép các action vào 1 file sao cho chạy đúng các step mà chúng ta mong muốn. Sau khi ghép xong, mình sẽ được 1 file như sau:
default_platform(:ios)

platform :ios do
 desc "Description of what the lane does"
 lane :codesigning do |options|
   create_keychain(
   name: "Learning1Keychain",
   default_keychain: true,
   unlock: true,
   timeout: 3600,
   lock_when_sleeps: true,
   password: options[:keychain_password]
 )

 install_provisioning_profile(path: "./fastlane/***.mobileprovision")

 import_certificate(
     keychain_name: "Learning1Keychain",
 		certificate_path: "./fastlane/certs.p12",
     keychain_password: options[:keychain_password],
     certificate_password: options[:certificate_password]
   )

 end

 lane :buildApp do
 	gym(
       scheme: "Learning1",
       workspace: "Learning1.xcworkspace",
       export_method: 'enterprise',
       clean: true
   )

 end

 lane :distribute do |options|

       firebase_app_distribution(
           app: options[:app_id],
           testers: "tester1@company.com, tester2@company.com",
           release_notes: "Demo",
           firebase_cli_path: "/absolute/path/to/firebase/cli/binary"
       )

   end
end
Config github actions
Sau khi đã có Fastfle, chúng ta sẽ tiến hành thiết lập github actions sao cho chạy chính xác theo kịch bản có sẵn.
- Tạo keychain
- Install provisioning profile
- Import certificate
- Build app
- Distribute to Firebase App Distribution
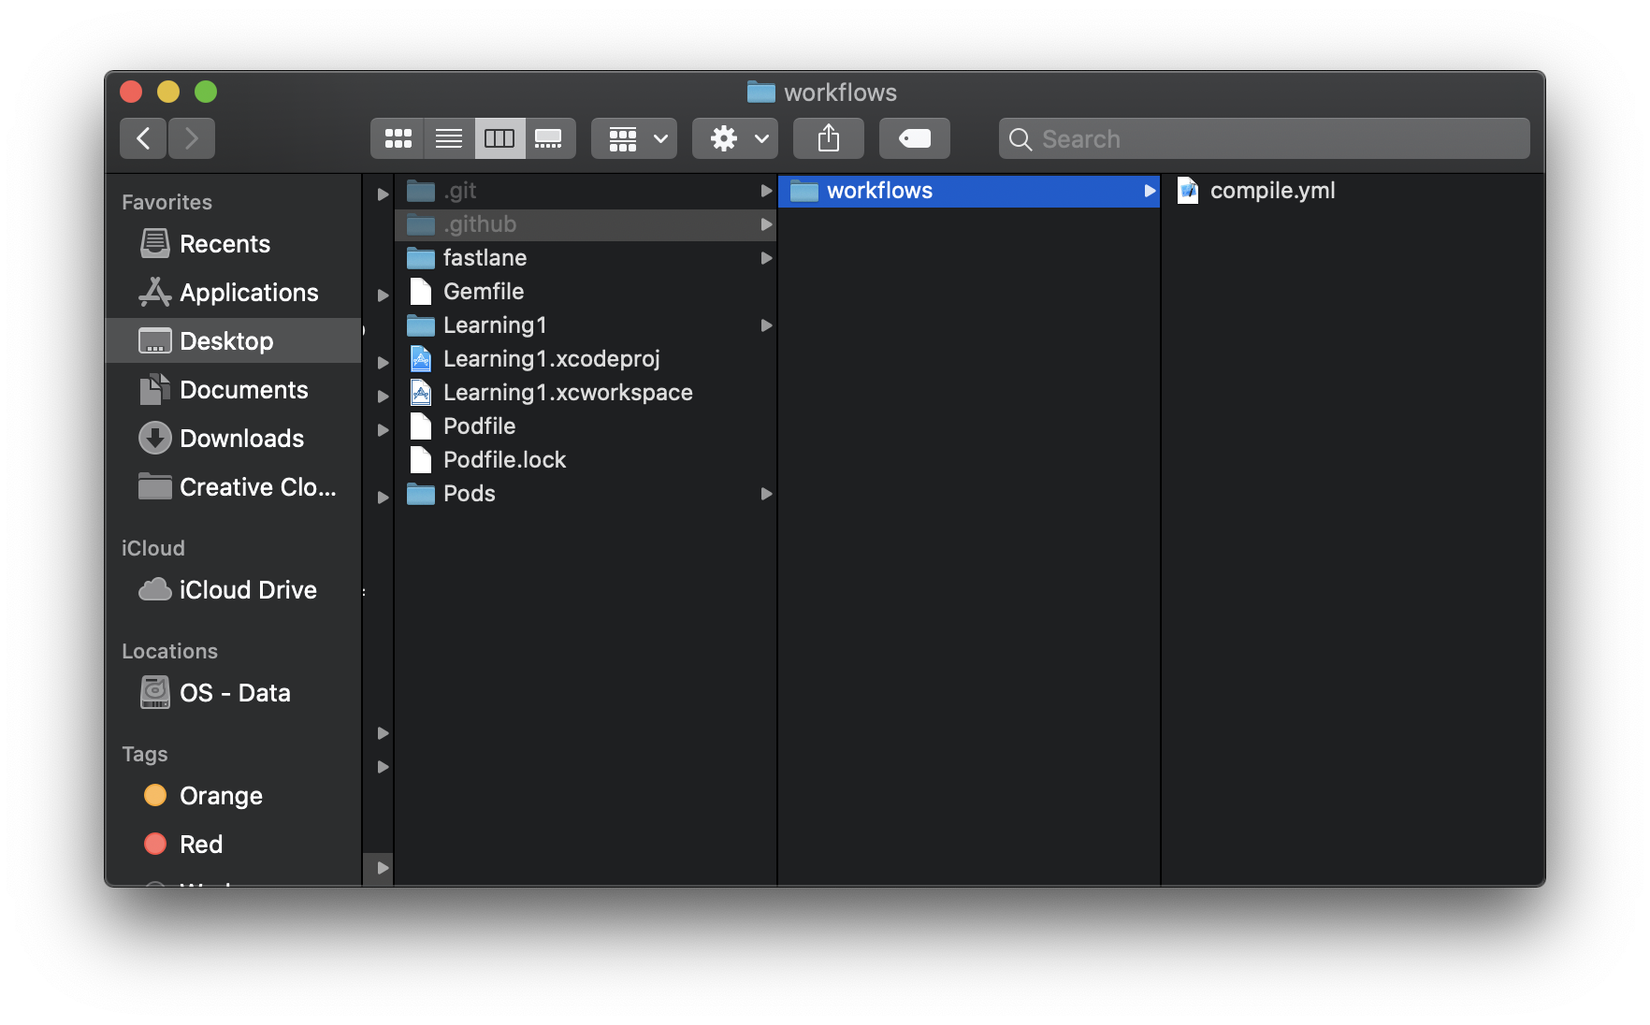
Để thiết lập được github actions, chúng ta sẽ cần khởi tạo một thư mục .github, bên trong có chứa folder con là workflows. Cuối cùng là tạo 1 file có tên compile.yml bên trong thư mục workflows.
Sau khi tạo xong, chúng ta sẽ thêm các action vào như sau:
name: iOS CI Example

on: [push]

jobs:
  build:

    runs-on: macOS-latest

    steps:
      - name: Checkout
        uses: actions/checkout@v2
      - name: CocoaPod Install
        run: pod install
      - name: Provisioning profile
        run: fastlane codesigning keychain_password:${{ secrets.KEYCHAIN_PWD }} certificate_password:PWD_P12
      - name: Build
        run: fastlane buildApp
      - name: Distribute
        run: fastlane distribute app_id:${{ secrets.APP_ID }}
Như vậy là chúng ta đã setup 1 kịch bản cho việc tự động build và distribute bản build lên Firebase App Distribute cho QA. Các bạn có thê tuỳ biến thêm các action khác như notify lên chatwork, slack...
Vì lý do bảo mật nên mình ko thể show chi tiết được quá trình build
 Đây là 1 ví dụ mình thực hiện với step phía trên, tuy nhiên chưa có phần distribute.
Kết luận
Cảm ơn các bạn đã đọc bài viết này, hy vọng nó ít nhiều giúp ích được cho các bạn.
All rights reserved
