Xây dựng ứng dụng hỗ trợ luyện viết tiếng Anh bằng ChatGPT API và NextJS
Bài đăng này đã không được cập nhật trong 3 năm
Xin chào tất cả các bạn!
Nhân dịp năm mới xin chúc tất cả các bạn đọc của Viblo một năm an khang thịnh vượng, đạt được nhiều thành công trong sự nghiệp và cuộc sống!
Chắc hẳn các bạn đều biết tới ChatGPT, 1 con bot AI nổi lên trong thời gian gần đây với khả năng trò chuyện và trả lời về hầu như mọi lĩnh vực trong cuộc sống. Dù còn nhiều tranh cãi về tính đúng sai của dữ liệu nhưng không thể phủ nhận được sức mạnh rất lớn của công cụ này cũng như AI trong việc giúp tăng năng suất của con người trong nhiều ngành nghề khác nhau như lập trình, marketing,…
Trong bài viết này, chúng ta sẽ sử dụng API của nó để viết 1 ứng dụng đơn giản hỗ trợ người dùng trong việc học tiếng Anh, và cụ thể hơn là tối ưu việc viết bài luận IELTS Writing và Speaking.
Và tất nhiên, khá nhiều đoạn code trong ứng dụng này được chính ChatGPT viết 😃
Vì OpenAI chưa mở public đến API của chính ChatGPT, nên mình sẽ sử dụng API Text Completion với tính năng generate text tương tự như ChatGPT.
Các bạn có thể tham khảo ở đây.
Các tính năng của ứng dụng này bao gồm:
- Từ kiểu bài luận: IELTS Writing task 2 và đề bài do người dùng nhập, ứng dụng cung cấp gợi ý, tạo bài mẫu
- Chỉnh sửa lỗi, gợi ý câu văn, giải thích nghĩa của từ,… dựa theo đoạn văn bản người dùng đã nhập và đề bài luận
Các bạn có thể check source code của project ở đây.
https://github.com/ngviethoang/ai-writing-assistant
Demo ứng dụng.
Cài đặt
Khởi tạo NextJS project
yarn create next-app --typescript
Cài đặt các thư viện: OpenAI client, ChakraUI (UI framework)
yarn add @chakra-ui/react @emotion/react @emotion/styled framer-motion
yarn add openai
Đăng ký OpenAI API key
Đăng nhập tài khoản OpenAI tại trang https://platform.openai.com/
Tạo API Secret Key
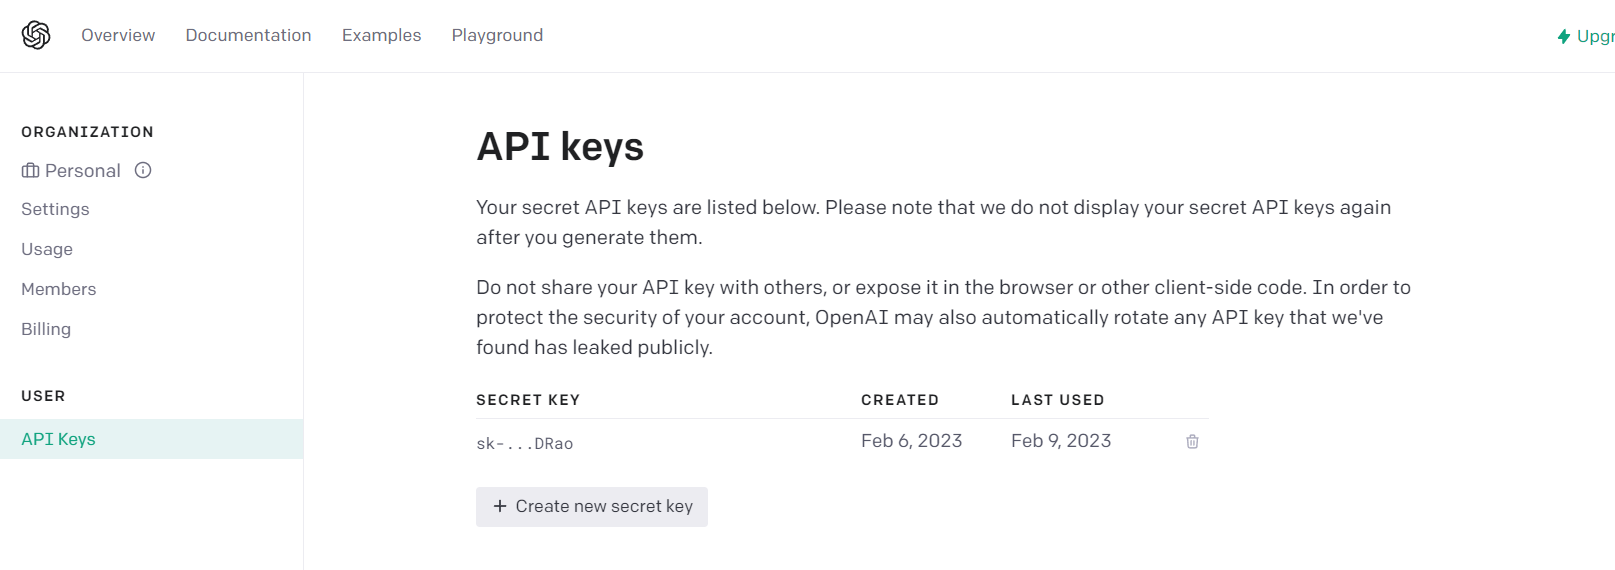
Tạo file .env trong project và lưu secret key
OPENAI_API_KEY=[Nhập key đã tạo]
Thêm file .env này vào file .gitignore để tránh bị lộ key khi commit code
Tạo prompt để giao tiếp với API
Để giao tiếp với Text Completion API, ta cần sử dụng các câu truy vấn (prompt). Đây là bước quan trọng để có thể ra được output chính xác như những gì ta mong muốn. Theo thuật ngữ trong NLP là prompt engineering.
Ví dụ như 1 prompt mẫu để tạo outline mẫu cho bài viết theo đề bài của IELTS Writing task:
Act as an IELTS test taker with a band score of 8.0. Write an essay outline in response to the following IELTS Writing Task 2 question: [insert IELTS Writing Task 2 question]
Ở đây ta có thể định nghĩa các parameter có thể truyền lên từ UI:
actor: an IELTS test taker with a band score of 8.0question: IELTS Writing Task 2 questioncontent: đoạn text do người dùng nhập
Tạo hàm xây dựng prompt dùng cho việc truy vấn API dựa trên các parameter actor, question, content.
const getPrompt = (topicType: string, promptType: string, topic: string, content: string) => {
  let actor, questionType
  switch (topicType) {
    case 'IELTS Writing':
      questionType = 'IELTS Writing Task 2'
      actor = 'an IELTS test taker with a band score of 8.0'
      break
    case 'IELTS Speaking':
      questionType = 'IELTS Speaking'
      actor = 'an IELTS test taker with a band score of 8.0'
      break
    default:
      questionType = ''
      actor = 'a person'
      break
  }

  switch (promptType) {
		case 'outline':
      return `Act as ${actor}. Write an essay outline in response to the following ${questionType} question: ${topic}`
    case 'support_arguments':
      return `Act as ${actor}. Given the following ${questionType} question, generate 3 arguments to support the statement: ${topic}`
    case 'oppose_arguments':
      return `Act as ${actor}. Given the following ${questionType} question, generate 3 arguments to oppose the statement: ${topic}`
    case 'sample_answer':
      return `Act as ${actor}. Write an essay in response to the following ${questionType} question with at least 250 words: ${topic}`

    case 'summarize':
      return `Act as a summarizer and summarize this essay:
${content}`
		// ...

    default:
      return ''
  }
}
Tạo API handler trong NextJS
Để tạo API handler xử lý kết quả truy vấn từ Text Completion, tạo API route trong thư mục pages/api/prompt.ts
import type { NextApiRequest, NextApiResponse } from 'next'
import { Configuration, OpenAIApi } from 'openai';

const configuration = new Configuration({
  apiKey: process.env.OPENAI_API_KEY,
});
const openai = new OpenAIApi(configuration);

const isEmpty = (str: string) => !str.trim().length

export default async function handler(
  req: NextApiRequest,
  res: NextApiResponse<any>
) {
  if (!configuration.apiKey) {
    res.status(500).json({
      error: {
        message:
          'OpenAI API key not configured, please follow instructions in README.md',
      },
    });
    return;
  }

  const question = req.body.question || '';
  const topicType = req.body.topicType || '';
  const promptType = req.body.promptType || '';
  const content = req.body.content || '';

  if (isEmpty(question) || isEmpty(topicType) || isEmpty(promptType)) {
    res.status(400).json({
      error: {
        message: 'Invalid args',
      },
    });
    return;
  }

  const prompt = getPrompt(topicType, promptType, question, content)
  if (isEmpty(prompt)) {
    res.status(400).json({
      error: {
        message: 'Invalid prompt',
      },
    });
    return;
  }

  try {
    const completion = await openai.createCompletion({
      model: 'text-davinci-003',
      prompt,
      temperature: 0.5,
      max_tokens: 550,
    });
    res.status(200).json({ result: completion.data.choices[0].text });
  } catch (error: any) {
    if (error.response) {
      console.error(error.response.status, error.response.data);
      res.status(error.response.status).json(error.response.data);
    } else {
      console.error(`Error with OpenAI API request: ${error.message}`);
      res.status(500).json({
        error: {
          message: 'An error occurred during your request.',
        },
      });
    }
  }
}
Các tham số trong Text Completion API được sử dụng
model: sử dụng model text-davinci-003 mới nhất và mạnh nhất trong các GPT-3 modelprompt: câu truy vấn đã build ở step trướctemperature: quyết định độ ổn định của kết quả, temperature càng cao model ra kết quả càng đa dạng hơnmax_tokens: số lượng token tối đa trả về, có thể giới hạn số lượng token trả về mỗi prompt để giảm chi phí
Code giao diện
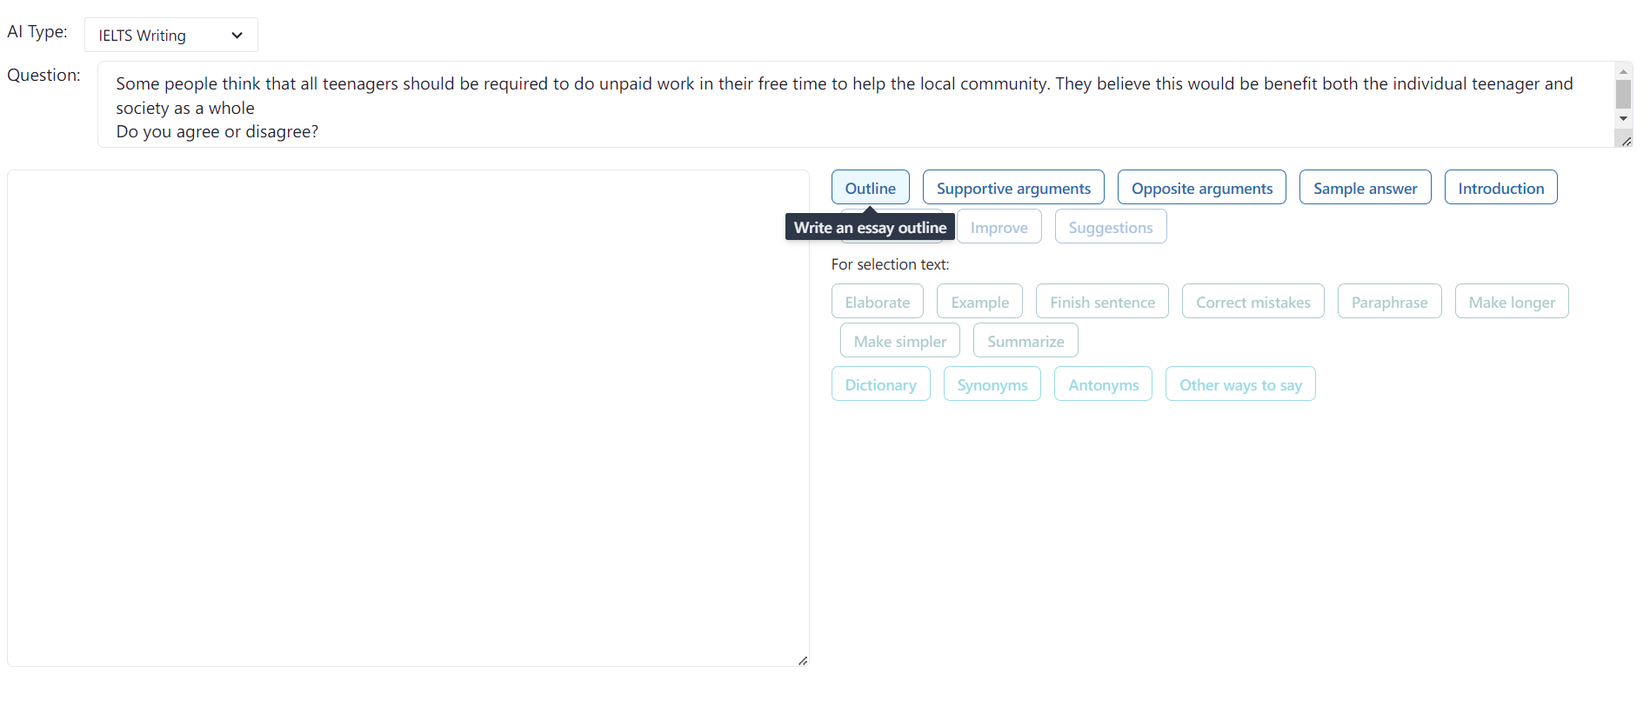
Tiếp theo là phần frontend cho ứng dụng, mình sẽ viết các component cơ bản như
- Text editor để nhập câu hỏi, nội dung bài viết
- Các button dùng để gọi API tương ứng với các function như tạo outline bài viết, tạo bài viết sample, chữa lỗi chính tả, nhận xét,…
- Component hiển thị kết quả trả về từ API
Tạo các component và layout cho page bằng ChakraUI
import { Box, Button, Heading, HStack, Select, Spinner, Text, Textarea, Tooltip, useToast, VStack } from '@chakra-ui/react';
import { useState } from 'react';

const topicTypes = ['IELTS Writing', 'IELTS Speaking'];

const Writing = () => {
  const [topicType, setTopicType] = useState(topicTypes[0]);
  const [question, setQuestion] = useState('');
  const [content, setContent] = useState('');
  const [selectedContent, setSelectedContent] = useState('');

  return (
    <div style={{ position: 'relative' }}>
      <VStack spacing={5} padding={5}>
        <VStack w={'100%'} spacing={2} alignItems="flex-start">
          <HStack alignItems="flex-start" w="100%" gap={2}>
            <Text>AI Type: </Text>
            <Select
              size={'sm'}
              w={40}
              value={topicType}
              onChange={(e) => setTopicType(e.target.value)}
            >
              {topicTypes.map((type) => (
                <option key={type} value={type}>
                  {type}
                </option>
              ))}
            </Select>
          </HStack>
          <HStack alignItems="flex-start" w="100%" gap={2}>
            <Text>Question: </Text>
            <Textarea
              value={question}
              onChange={(e) => setQuestion(e.target.value)}
            />
          </HStack>
        </VStack>

        <HStack spacing={5} alignItems="flex-start" w="100%">
          <VStack w="100%">
            <Textarea
              rows={20}
              value={content}
              onChange={(e) => setContent(e.target.value)}
              onSelect={(e: any) => {
                // lưu selection text để lấy gợi ý từ API cho các từ này
                e.preventDefault();
                const { selectionStart, selectionEnd }: any = e.target;
                const selectedText = content.slice(selectionStart, selectionEnd);
                setSelectedContent(selectedText);
              }}
            />
          </VStack>
          {/* render buttons và kết quả gợi ý */}
          <VStack alignItems="flex-start" w="100%"></VStack>
        </HStack>
      </VStack>
    </div>
  );
};

export default Writing;
Render các button để generate prompt và kết quả gợi ý từ API
const generateButtons = [
  { name: 'Outline', promptType: 'outline', tooltip: 'Write an essay outline' },
  {
    name: 'Supportive arguments',
    promptType: 'support_arguments',
    tooltip: 'generate 3 arguments to support the statement',
  },
  {
    name: 'Opposite arguments',
    promptType: 'oppose_arguments',
    tooltip: 'generate 3 arguments to oppose the statement',
  },
  // ... full list button in source code
];

const vocabButtons = [
  {
    name: 'Dictionary',
    promptType: 'dictionary',
    tooltip:
      'Explain the meaning of the word and give me an example of how to use it in real life',
  },
  { name: 'Synonyms', promptType: 'synonyms', tooltip: 'Give me 5 synonyms' },
  { name: 'Antonyms', promptType: 'antonyms', tooltip: 'Give me 5 antonyms' },
];

const [result, setResult] = useState({ title: '', content: '' });

const renderButtons = (buttons: any[], color: string, content: string, isDisabled: boolean) => {
  return (
    <HStack gap={1} wrap="wrap" alignItems="flex-start">
      {buttons.map((btn, i) => (
        <Tooltip key={i} hasArrow label={btn.tooltip}>
          <Button
            colorScheme={color}
            variant="outline"
            size="sm"
            isDisabled={isDisabled}
            onClick={async () => {
              setSelectContent();
              const resultContent = await queryPrompt(btn.promptType, content);
              if (resultContent) {
                setResult({ title: btn.name, content: resultContent });
              }
            }}
          >
            {btn.name}
          </Button>
        </Tooltip>
      ))}
    </HStack>
  );
};

return (
	// ...
	<VStack alignItems="flex-start" w="100%">
	  {renderButtons(generateButtons, 'blue', content, false)}
		<Text fontSize="sm">For selection text: </Text>
		{/* chỉ enable các button khi content text được select */}
    {renderButtons(contentButtons, 'teal', selectedContent, !selectedContent )}

		{!!result.title && (
	    <VStack alignItems="flex-start">
	      <Heading size="md">{result.title}</Heading>
	      <pre style={{ whiteSpace: 'pre-wrap', fontFamily: 'inherit' }}>
	        {result.content}
	      </pre>
	    </VStack>
	  )}
	</VStack>
	// ...
)
Kết quả trả về từ API:

GPT API này có chi phí khá cao nên chúng ta có thể sử dụng cache để lưu lại kết quả các truy vấn trước đó.
Gọi API /api/prompt khi click các button trên để hiển thị kết quả gợi ý
const toast = useToast();

const [loadingPrompt, setLoadingPrompt] = useState(false);

const queryPrompt = async (promptType: string, content: string) => {
  setLoadingPrompt(true);
  const response = await fetch('/api/prompt', {
    method: 'POST',
    headers: {
      Accept: 'application/json',
      'Content-Type': 'application/json',
    },
    body: JSON.stringify({ topicType, promptType, question, content }),
  });
  const data = await response.json();
  setLoadingPrompt(false);
  if (!response.ok) {
    toast({
      title: 'Error',
      description: data?.error?.message,
      status: 'error',
      duration: 9000,
      isClosable: true,
    });
    return '';
  }
  return (data.result || '').trim();
};
Chạy ứng dụng
npm run dev
Giao diện ứng dụng
Kết luận
Qua việc xây dựng ứng dụng này, hy vọng bạn đã nắm được cách để tích hợp AI vào ứng dụng của mình để phục vụ các use case khác như chatbot, gia sư dạy học, PT lên lịch tập,…
Hẹn gặp lại ở các bài viết sau!
All rights reserved
