Xây dựng chức năng tự động suggest tag với ngôn ngữ tiếng Nhật (P2)
Bài đăng này đã không được cập nhật trong 7 năm
Mở đầu
Trong phần 1 mình đã giới thiệu cách sử dụng thuật toán tf-idf để tiếp cận bài toán phân tích ngôn ngữ tự nhiên, và cách sử dụng tool phân tích tiếng nhật mecab để phân tích 1 câu tiếng nhật thành các POS.
Trong phần 2 này mình sẽ xây dựng demo một ứng dụng nhỏ do mình viết ra để demo cho các bạn sử dụng. Mình sẽ sử dụng ruby on rails làm API và reactjs làm client, bao gồm các chức năng sau:
- Extract keyword
- Suggest tag with similarity input
Setup môi trường
Bạn có thể chọn bất kì ngôn ngữ mà mình ưa thích, trong ứng dụng này mình sử dụng ruby on rails để thực hiện. Trước tiên là việc tạo mới ứng dụng rails api bằng câu lệnh sau
rails new --api suggest-api
Cài đặt gem cần thiết cho ứng dụng(lưu ý với gem natto cần phải cài tool mecab trước khi sử dụng). Cách cài đặt mecab các bạn có thể tham khảo ở P1
gem "mysql2"
gem "natto"

gem "redis"
gem "redis-namespace"
gem "redis-rails"
gem "redis-rack-cache"
Thiết lập gemfile xong chạy lệnh sau: bundle install
Thiết lập config cho redis. Redis sẽ hỗ trợ lưu trữ dữ liệu và tăng tốc tốc độ truy vấn
# config/initializers/redis.rb
$redis = Redis::Namespace.new "suggest",
  :redis => Redis.new(
    host: "localhost",
    port: "6379",
    db: 0
  )
Thiết lập database.yml
default: &default
  adapter: mysql2
  encoding: utf8
  pool: 5
  username:
  password:
  host: localhost
  socket: /var/run/mysqld/mysqld.sock

development:
  <<: *default
  database: suggest_development
Tiếp theo ta sẽ thực hiện generate model cho app như sau:
rails generate model Faquestion question:text
rails generate model Tag name:string notes:string
rails generate model FaquestionTag faquestion_id:integer tag_id:integer

rails db:migrate
Sau khi chạy migrate ta sẽ tạo data cho bộ dữ liệu. Lưu ý là data nhập vào phải là tiếng nhật để đảm bảo tính chính xác của công cụ phân tích mecab(chỉ dành cho tiếng nhật).
Xây dựng service suggest API
Vì ứng dụng đang được build theo hướng sử dụng API do đó ta cần phải khai báo thêm đừng dẫn để load thư mục service như sau:
#config/application.rb
config.autoload_paths << Rails.root.join("app/services")
Khởi tạo service
$ cd app/
$ mkdir services
$ cd services
$ touch auto_suggest_service.rb
Sau khi đã tạo xong file, ta sẽ viết code cho phần initialize của service. Nhiệm vụ của phần khởi tạo là load toàn bộ dữ liệu trong faquestion DB để làm corpus cho việc phần tích keyword
def initialize
  @faquestions = Faquestion.all.uniq
  @faquestions = @faquestions.map{|faq| [faq.id, faq.question]}.compact
  @documents = load_document
end

private
def load_document
  documents = []
  nm = Natto::MeCab.new

  @faquestions.each do |faq|
    arr = []
    nm.parse(faq[1]) do |n|
      arr.push(n.surface) if !n.is_eos?
    end
    documents.push arr
  end
  documents
end
Sau phần khởi tạo tiếp theo là function để xử lý trực tiếp đoạn text được đưa vào để phân tích. Nhiệm vụ của function sẽ thực hiện như sau
- Input là đoạn text cần extract keyword
- Phân tích input(dùng mecab để phân tích thành các POS, đếm số lần xuất hiện các POS), sử dụng tfidf được tương tự ở phần 1
- Lấy ra 5 keyword có trọng số tf-idf cao nhất và keyword phải có dạng là danh từ
  NOUN = "名詞"

  def make_tag term
    nm = Natto::MeCab.new
    doc = []
    hash_term = {}
    nm.parse(term) do |n|
      if !n.is_eos?
        doc.push(n.surface)
        hash_term[n.surface] = {counter: count_sub_string(term, n.surface), type: n.feature.split(",")[0]}
      end
    end
    hash_term[:size_doc] = term.split("").size

    hash_result = {}
    doc.each do |word|
      value = tfidf(doc, @documents, word, hash_term);
      hash_result[word] = {tfidf: value, type: hash_term[word][:type]}
    end
    load_highest_score Hash[hash_result.sort_by{|k,v| v[:tfidf]}.reverse]
  end

  def tfidf
    ...
  end

  def count_sub_string string, substring
    begin
      string.scan(/(?=#{substring})/).count
    rescue => error
      string.count(substring)
    end
  end

  def load_highest_score hash_key
    hash_key.map{|k,v| k if v[:type] == NOUN}.compact.take(5)
  end
Để có thể test kết quả service vừa tạo, ta có thể chạy console của rails c:
pry(main)> a = AutoSuggestService.new
pry(main)> a.make_tag "洗面所の天井照明が部品交換になった場合、玄関についているセンサー付きのタイプと同じようなものに交換可能か。"
=> ["交換", "付き", "センサー", "洗面", "タイプ"]
Sau khi chạy xong function make_tag thì ta cũng hoàn thành được 50% chức năng suggest này rồi, việc tiếp theo cần làm là tạo controller(app/controllers/api/v1/faquestions_controller.rb) để sử dụng service:
class Api::V1::FaquestionsController < Api::V1::BaseController

  def suggest_tag
    ...
  end
end
Cập nhật resources của file config/routes.rb như sau:
Rails.application.routes.draw do
  namespace :api do
    namespace :v1 do
      resources :faquestions do
        get "suggest_tag", on: :collection
      end
    end
  end
end
Thiết lập môi trường front-end sử dụng react-js
1.Setup môi trường
Tạo thư mục client trong react app như sau
$ mkdir client
$ cd client
$ touch package.json
Trong file json ta sẽ sử dụng nhưng node-module sau:
{
  "name": "suggest-api",
  "version": "0.1.0",
  "private": true,
  "dependencies": {
    "axios": "^0.18.0",
    "immutability-helper": "^2.6.4",
    "react": "^16.2.0",
    "react-bootstrap": "^0.32.1",
    "react-dom": "^16.2.0",
    "react-scripts": "1.1.0"
  },
  "scripts": {
    "start": "react-scripts start",
    "build": "react-scripts build",
    "test": "react-scripts test --env=jsdom",
    "eject": "react-scripts eject"
  }
}
Sau khi thêm file package ta sẽ chạy lệnh npm install để cài đặt các gói module mà mình đã đăng kí. Tiếp theo là cấu trúc thư mục xây dựng
client
  node-modules
  public
    index.html
  src
     TagContainer
     index.js
  package.json
  package-lock.json
Thay đổi nội dung của file index.html như sau:
<!DOCTYPE html>
<html lang="en">

<head>
  <meta charset="utf-8">
  <meta name="viewport" content="width=device-width, initial-scale=1, shrink-to-fit=no">
  <meta name="theme-color" content="#000000">
  <link rel="manifest" href="%PUBLIC_URL%/manifest.json">
  <link rel="shortcut icon" href="%PUBLIC_URL%/favicon.ico">
  <link rel="stylesheet" href="https://maxcdn.bootstrapcdn.com/bootstrap/3.3.7/css/bootstrap.min.css" integrity="sha384-BVYiiSIFeK1dGmJRAkycuHAHRg32OmUcww7on3RYdg4Va+PmSTsz/K68vbdEjh4u" crossorigin="anonymous">
  <title>Suggest Api</title>
</head>

<body>
  <noscript>
    You need to enable JavaScript to run this app.
  </noscript>
  <div id="root">

  </div>
</body>

</html>
2.Các component
Tiếp theo là code của phần index.js, ban đầu ta sẽ mặc định nội dung của TagContainer sẽ được show trên root như sau:
import React from "react";
import ReactDOM from "react-dom";
import TagContainer from "./TagContainer/index";

ReactDOM.render(<TagContainer />, document.getElementById('root'));
Phần tiếp theo là xây dựng giao diện cho ứng dụng. Để hỗ trợ cho việc xây dựng giao diện mình sẽ sử dụng react-bootstrap, các bạn có thể tham khảo cách sử dụng tại đây.
Đối với các developer thì không quá xa lạ với hệ thống grid,các component(button, modal, list...) của bootstrap do đó mọi người đều có thể áp dụng dễ dàng react-bootstrap vào ứng dụng để cải thiện giao diện.
Tiếp theo mình sẽ viết code cho phần TagContainer bao gồm các phần sau
src
 TagContainer
   FaquestionForm.jsx
   TagList.jsx
   index.jsx
 index.js
Bắt đầu với file index.jsx
#index.jsx
import React from 'react';
import FaquestionForm from './FaquestionForm';
import {Grid, Row, Col} from 'react-bootstrap';

class TagContainer extends React.Component {
  constructor(props) {
    super(props);
    this.state = {
      faquestion: null,
    };
  }

  render(){
    return (
      <div>
        <Grid>
          <Row className="show-grid">
            <Col md={2}>
            </Col>
            <Col md={8}>
              <FaquestionForm />
            </Col>
            <Col md={2}>
            </Col>
          </Row>
        </Grid>
      </div>
    );
  }
}

export default TagContainer
Để kiểm tra bạn đã cài đặt đúng chưa, bạn có thể thay <FaquestionForm /> thành 1 đoạn text đơn giản vd: hello world sau đó cd vào thư mục chứa jsx file và chạy lệnh npm start để chạy chương trình.
Mình giải thích 1 chút: ở đây giao diện sẽ được chia làm 3 phần, phần ở giữa sẽ chứa toàn bộ giao diện chính và đồng thời chứa component con chịu trách nhiệm xử lý tất cả các sự kiện(buttton suggest, list task).
#FaquestionForm.jsx
import React from 'react';
import {FormGroup, ControlLabel, FormControl, HelpBlock, Button} from 'react-bootstrap';

class FaquestionForm extends React.Component {
  constructor(props) {
    super(props);
    this.state = {
      question: '',
      tags: [],
    };
  }

  handleInput = (e) => {
    this.setState({[e.target.name]: e.target.value})
  }

  handleSubmit = () => {
    let data = {
      faq: {
        question: this.state.question,
      }
    }
  }

  render() {
    return(
      <div>
        <FormGroup
          controlId="formBasicText"
        >
          <ControlLabel>Question</ControlLabel>
          <FormControl
            name="question"
            type="text"
            placeholder="Enter text"
            onChange={this.handleInput}
          />
          <FormControl.Feedback />
          <HelpBlock>Validation is based on string length.</HelpBlock>
          <Button
            bsStyle="primary"
            type="submit"
            onClick={this.handleSubmit}>
            Submit
          </Button>
        </FormGroup>
      </div>
    );
  }
}

export default FaquestionForm
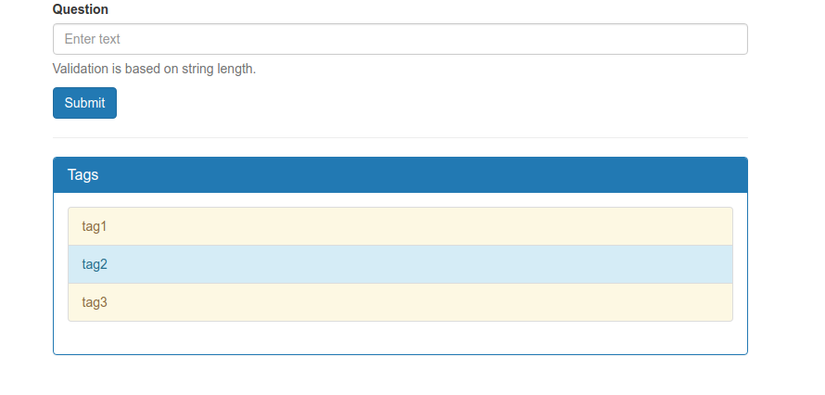
Kết quả hiện thị trên giao diện như sau:

Hiển thị danh sách các tag sử dụng List Group trong react-bootrap. Các tag sẽ được truyền từ component cha xuống thông qua props tags như sau:
#TagList.jsx
import React from 'react'
import {ListGroup, ListGroupItem, Panel} from 'react-bootstrap';

class TagList extends React.Component {

  renderTagList() {
    return (
      <ListGroup>
        {
          this.props.tags.map((tag, index) => {
            let style = (index % 2) === 1 ? 'info' : 'warning';
            return (
              <ListGroupItem key={index} bsStyle={style}>{tag}</ListGroupItem>
            )
          })
        }
      </ListGroup>
    );
  }

  render() {
    return (
      <div>
        <hr/>
        <Panel bsStyle="primary">
          <Panel.Heading>
            <Panel.Title componentClass="h3">Tags</Panel.Title>
          </Panel.Heading>
          <Panel.Body>{this.renderTagList()}</Panel.Body>
        </Panel>
      </div>
    );
  }
}

export default TagList
Import component TagList vừa tạo được vào FaquestionForm:
...
import TagList from './TagList';

class FaquestionForm extends React.Component {
  constructor(props) {
    super(props);
    this.state = {
      question: '',
      tags: ['tag1', 'tag2', 'tag3'],
    };
  }

  render() {
    return(
      <div>
        <FormGroup
          controlId="formBasicText"
        >
          ...
        </FormGroup>
        <TagList
          tags = {this.state.tags}
        />
      </div>
    );
  }
Kết quả các tag như sau
3.Sử dụng thư viện axios để tạo request lên server
Phần tiếp theo sẽ thực hiện gửi request lên server để xử lý. Trong bài viết này mình sẽ sử dụng thư viện axios để hỗ trợ việc tưng tác với API
#FaquestionForm.jsx
  handleSubmit = () => {
    let data = {
      faq: {
        question: this.state.question,
      }
    }

    axios.get('http://localhost:3001/api/v1/faquestions/suggest_tag', {
      params: data
    }).then(response => {
      this.setState({
        tags: response.data.data
      });
    }).catch(error => {
      console.error(error);
    })
  }
Do client chạy trên localhost có port là 3000 do đó mình chạy rails s trên port 3001 bằng câu lệnh sau rails s -p 3001. Đồng thời chỉnh sửa config trong app để giới hạn permission request từ localhost có port là 3000:
#config/application.rb
config.middleware.insert_before 0, Rack::Cors do
  allow do
    origins 'http://localhost:3000'
    resource '*', :headers => :any, :methods => [:get, :post, :put, :delete, :patch, :options]
  end
end
Chỉnh sửa lại controller 1 chút là bạn có thể chạy được rồi
#base_controller.rb
class Api::V1::BaseController < ApplicationController
  def response_success data = nil
    render json: {
      data: data,
      status: true
    }
  end

  def response_fail data = nil, status_code = 200
    render json: {
      data: data,
      status: false
    }, status: status_code
  end
end

#faquestions_controller.rb
class Api::V1::FaquestionsController < Api::V1::BaseController
  def suggest_tag
    a = AutoSuggestService.new
    hash_params = JSON.parse params[:faq]
    result = a.make_tag hash_params["question"]
    response_success result
  end
end
Thử test qua 1 chút nhé:
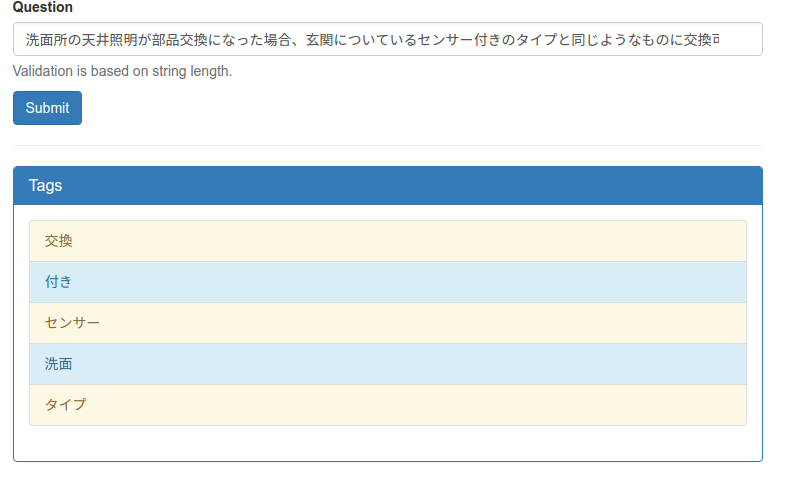
Mình giải thích qua về kết quả ở ảnh trên, với input đầu vào: 洗面所の天井照明が部品交換になった場合、玄関についているセンサー付きのタイプと同じようなものに交換可能か。 sau khi chạy thuật toán kết quả trả về gồm 5 từ khóa:
交換
付き
センサー
洗面
タイプ
Để có được 5 keyword trên mình đã thực hiện các bước sau:
- Dùng mecab để phân tích thành các POS
- Từ các pos phân tích đc, tính điểm tf-idf với từng POS
- Lấy ra 5 POS có trọng số tf-idf cao nhất và có type là danh từ
Kết luận
Trên đây là demo ứng dụng phân tích keyword của 1 câu được nhập vào, có thể là độ chính xác của 5 keyword chưa chính xác tuy nhiên mình sẽ ra đưa thêm các chức năng nâng cao để tăng độ chính xác của việc trích xuất hơn.
Bài viết của mình có thể còn nhiều chỗ sai sót nhưng mình cũng đã dành ra nhiều thời gian và công sức để nghiên cứu và cài đặt, cảm ơn bạn đã theo dõi bài viết của mình
Cuối cùng là github của project: https://github.com/duongpham910/suggest-api
All rights reserved
