Viết ứng dụng chat realtime với Laravel, VueJS, Laravel Reverb và Laravel Echo
Hello các bạn lại là mình đâyyy 👋👋
Hôm nay tiếp tục quay trở lại với series Xây dựng ứng dụng chat realtime với Laravel, VueJS, Laravel Echo, ở bài này thay vì dùng Laravel Echo Server + Redis thì ta sẽ dùng Laravel Reverb mới toanh của Laravel nhé
Mặc áo phao rồi lên thuyền với mình thôi nào ⛴️⛴️
Tổng quan
Ở bài này ta sẽ build 1 app chat nhỏ nhỏ xinh xinh như bài Viết ứng dụng chat realtime với Laravel, VueJS, Redis và Socket.IO, Laravel Echo:
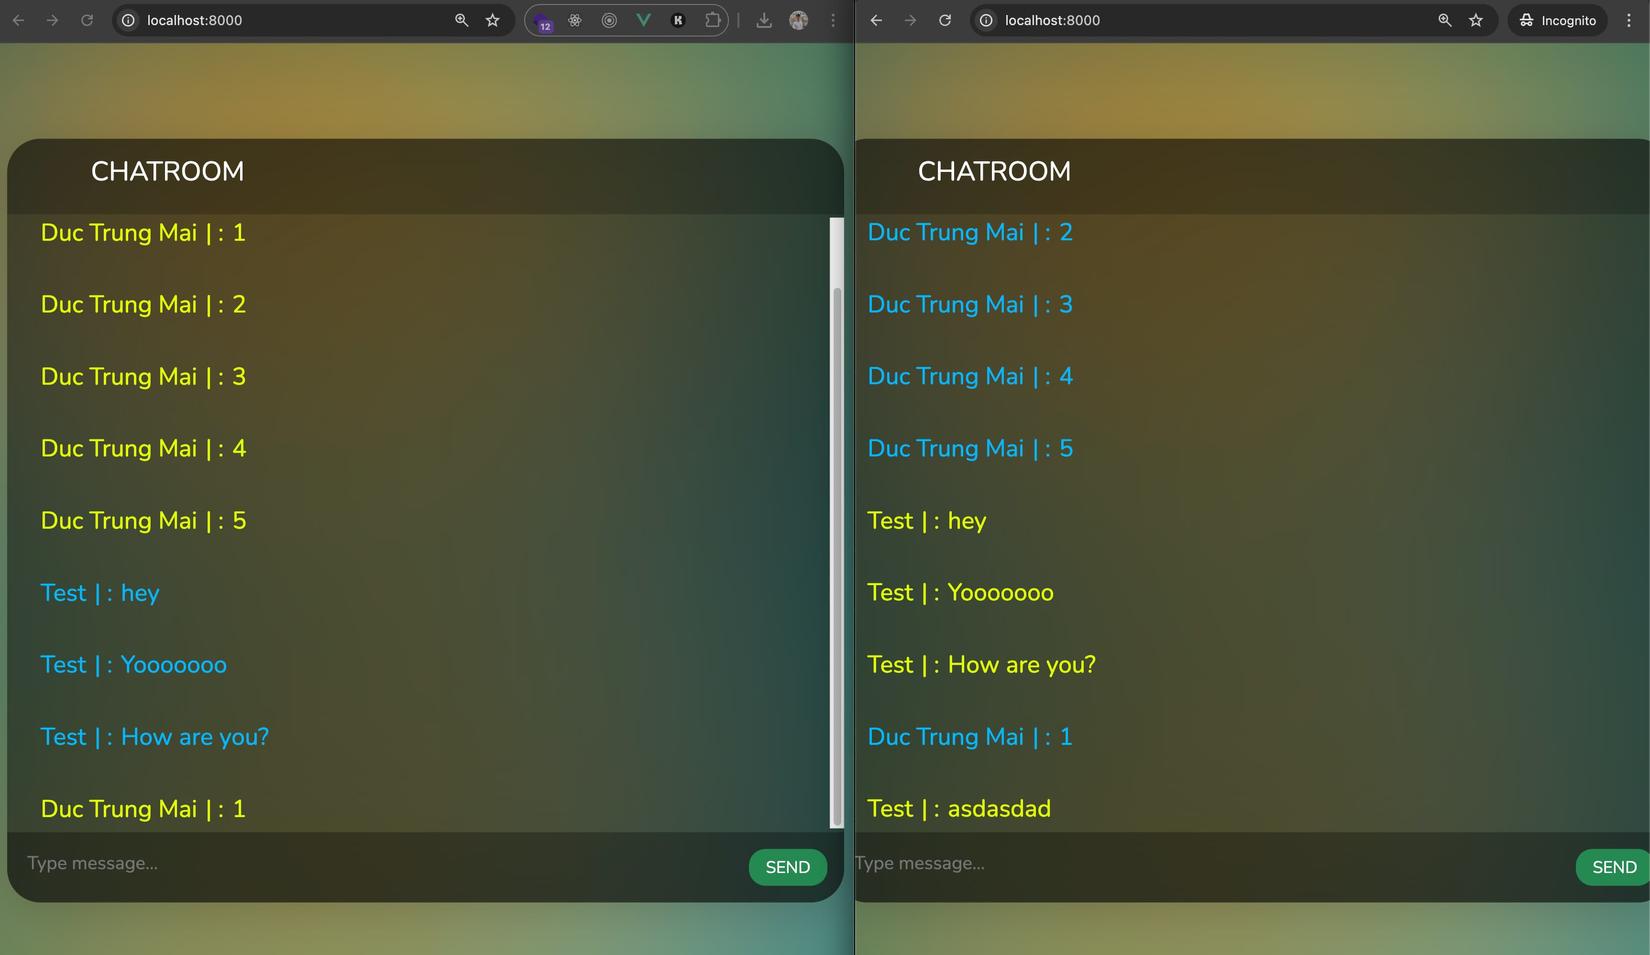
Chỉ khác là phần xử lý realtime thì thay vì ta dùng Laravel Echo Server + Redis, ta sẽ thay thế bằng Laravel Reverb.
Vậy nên mấy phần setup ban đầu mình cũng đi nhanh hơn xiu nha 😘
Setup
Ở bài này ta dùng Laravel bản mới nhất (11) nên đảm bảo là các bạn có PHP 8.2 đổ lên nha. Database MySQL phải sẵn sàng nữa đó
Đầu tiên ta tạo project với Laravel Installer:
laravel new chat-app
Khi được hỏi thì ta chọn các option như sau nha:
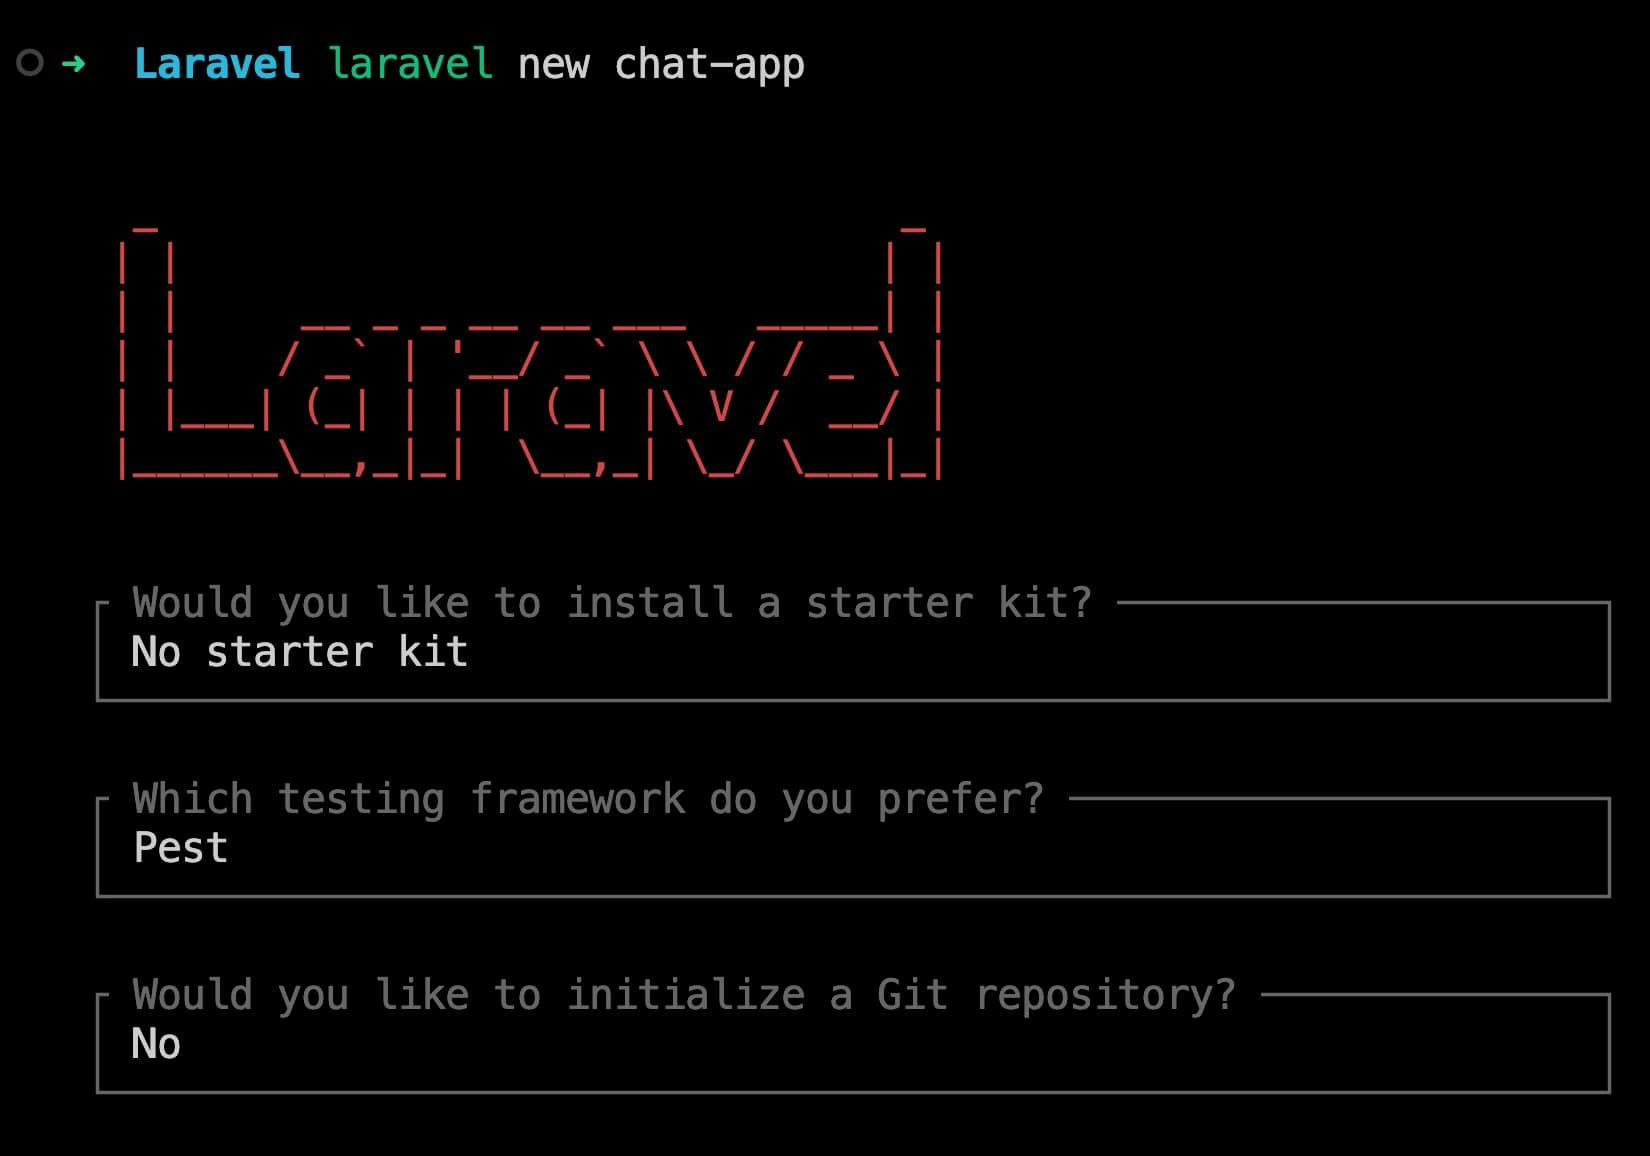
Đoạn được hỏi về thông tin DB thì ta chọn như sau nhé (đừng migrate vội lát ta migrate thủ công sau):

Oke thì ta mở file .env update lại phần thông tin kết nối database cho phù hợp với máy của các bạn nhé (ví dụ đây là của mình):
DB_CONNECTION=mysql
DB_HOST=127.0.0.1
DB_PORT=3306
DB_DATABASE=chat_app
DB_USERNAME=user
DB_PASSWORD=userpass
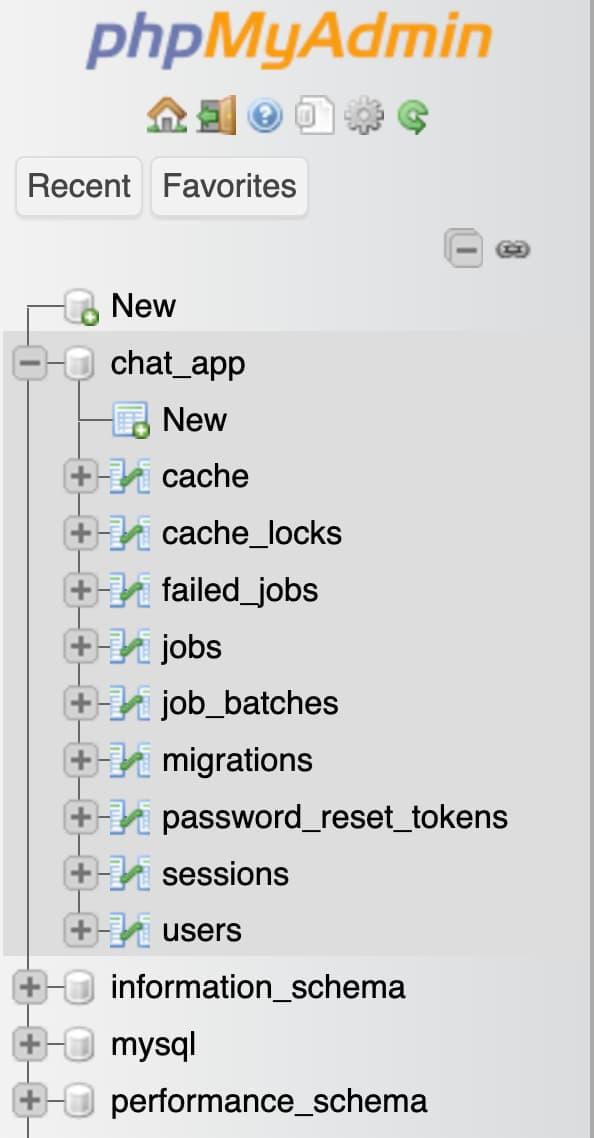
Đảm bảo là ta đã tạo database trong MySQL trước nữa đó các bạn:

Oke thì ta chạy command sau ở root folder project để migrate database:
php artisan migrate
Oke sẽ thấy như sau:

Sau đó ta start project lên nhé:
php artisan serve
Xong thì ta truy cập ở trình duyệt ở địa chỉ http://localhost:8000 phải thấy như sau nha:
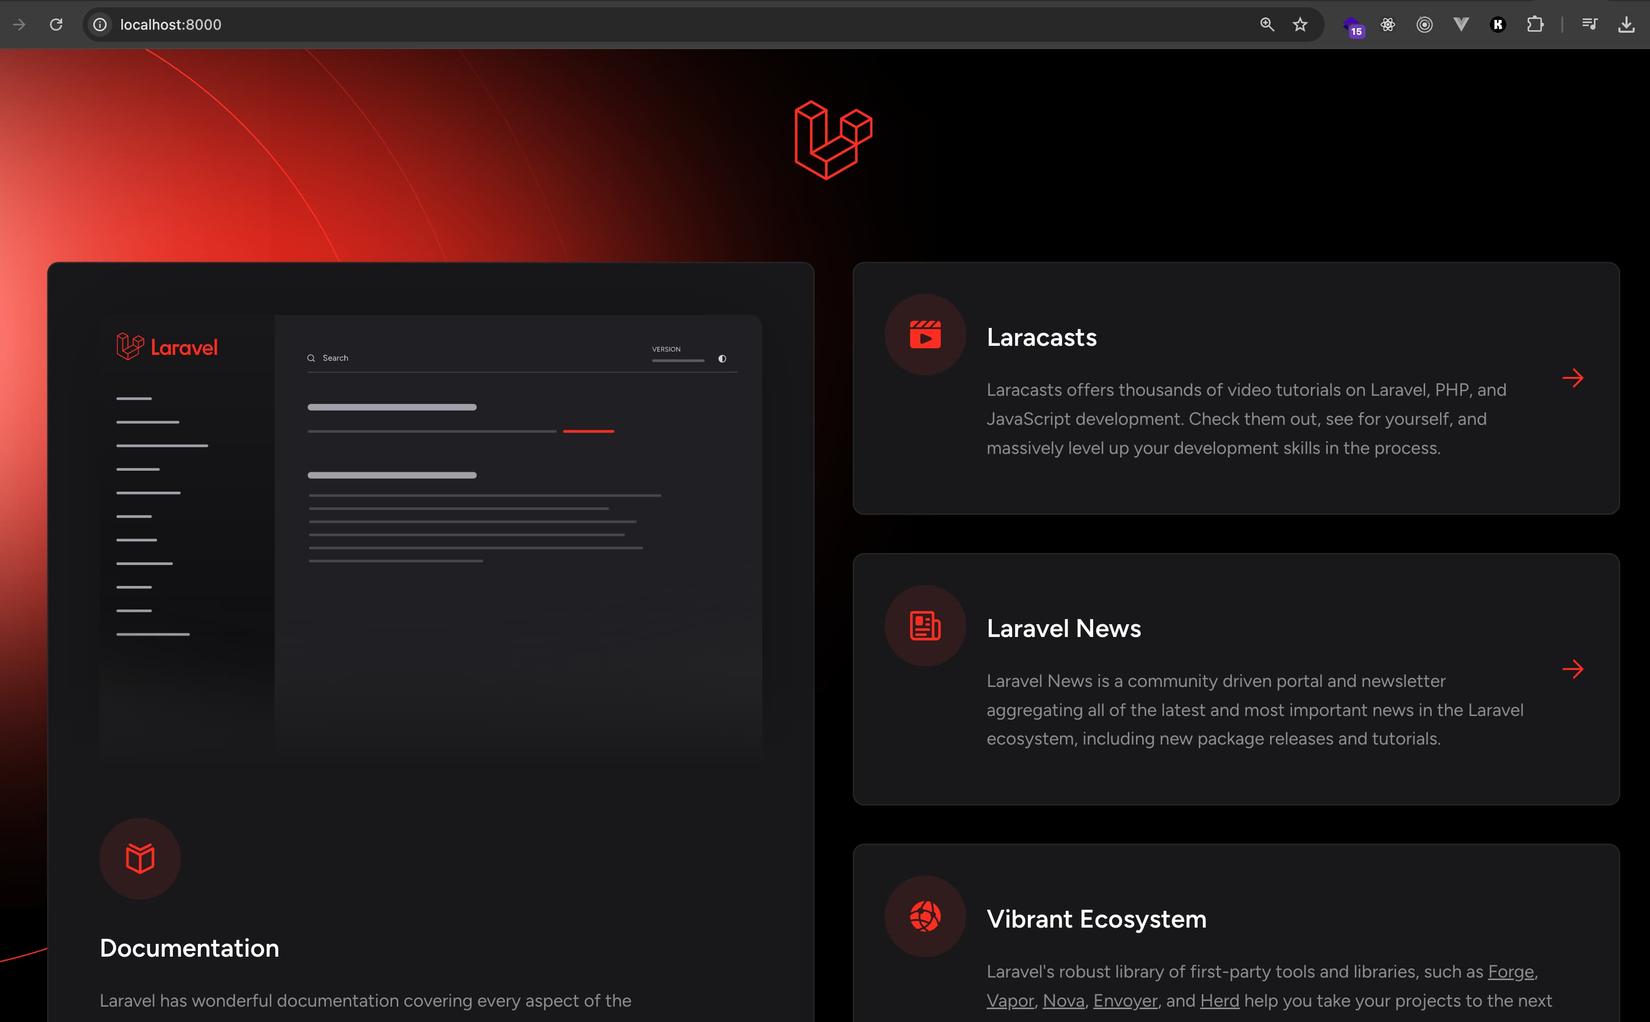
Âu cây rồi tiếp theo ta sẽ setup từng phần từ Frontend đến backend nhé 😘😘
Frontend VueJS
Đầu tiên ta cần cài đặt module cho frontend:
composer require laravel/ui
Sau đó ta khởi tạo code VueJS, thêm luôn cả UI cho phần authentication:
php artisan ui vue --auth

Tiếp đó ta cài frontend dependencies:
npm install
Oke thì folder structure nom như sau:
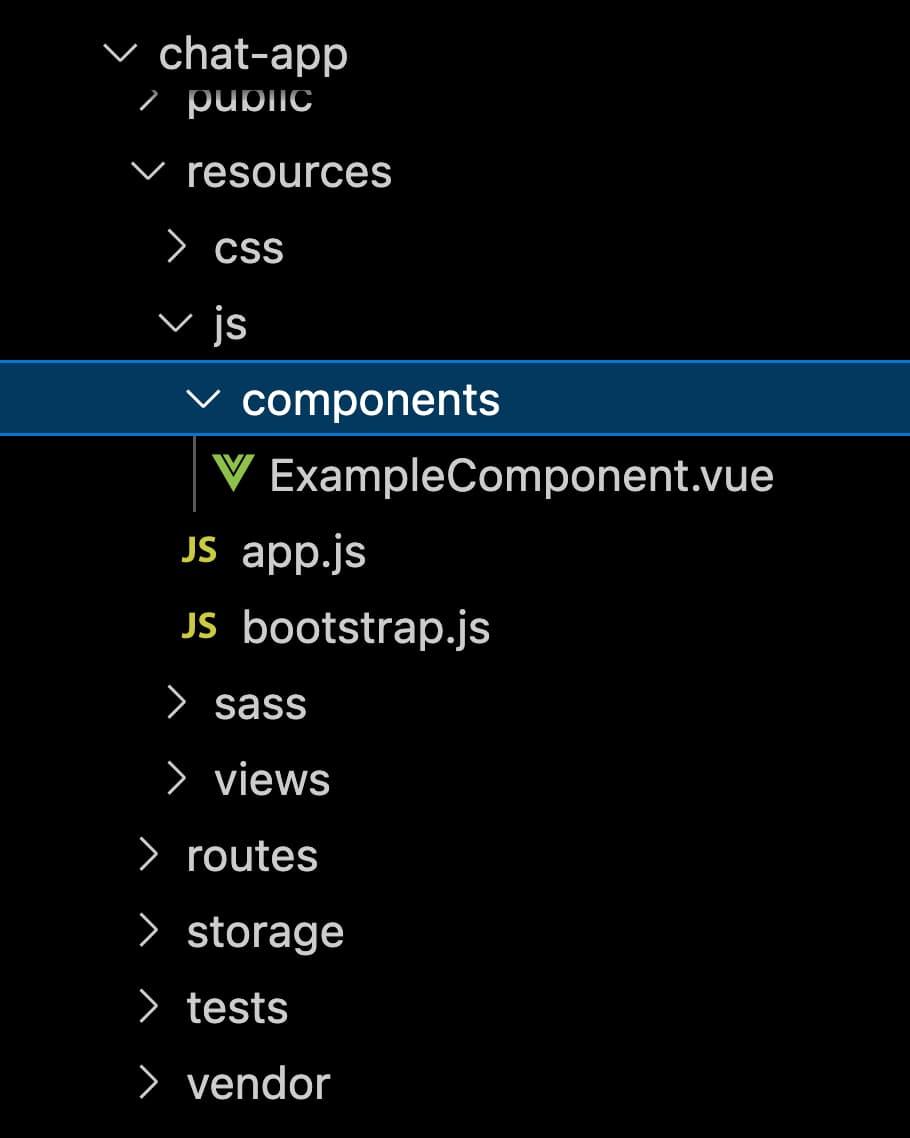
Tiếp đó chúng ta tạo file resources/views/chat.blade.php chứa layout cơ bản của ứng dụng:
<!DOCTYPE html>
<html>
<head>
	<title>Chat App</title>
	<meta name="csrf-token" content="{{ csrf_token() }}">
	<link href="https://fonts.googleapis.com/css?family=Open+Sans:300,400,600,700" rel="stylesheet">
	<style type="text/css">
		*,
		*::before,
		*::after {
		  box-sizing: border-box;
		}
		html,
		body {
		  height: 100%;
		}
		body {
		  background: linear-gradient(135deg, #044f48, #2a7561);
		  background-size: cover;
		  font-family: 'Open Sans', sans-serif;
		  font-size: 14px;
		  line-height: 1.3;
		  overflow: hidden;
		}
	</style>
	@vite(['resources/sass/app.scss', 'resources/js/app.js'])
</head>
<body>
	<div id="app">
		<chat-layout></chat-layout>
	</div>
</body>
</html>
Trong đoạn code trên mình có tạo sẵn một cặp thẻ <chat-layout>, đây là component VueJS mà chúng ta sẽ nói ở phần sau nhé.
Sau đó tạo một route để truy cập vào view này, các bạn sửa lại routes/web.php như sau:
<?php

use Illuminate\Support\Facades\Route;

Route::get('/', function () {
    return view('chat');
});

Auth::routes();
Tiếp đó ở folder resources/js/components ta tạo 2 file mới là ChatLayout.vue và ChatItem.vue với nội dung như sau:
<script setup>

</script>

<template>
  <div class="message">
    <div class="message-item user-name">
      MTD
    </div>
    <div class="message-item timestamp">
      | 11:21:32:
    </div>
    <div class="message-item text-message">
      Hello how are you
    </div>
  </div>
</template>


<style lang="scss" scoped>
.message {
  display: flex;
  color: #00b8ff;

  .message-item:not(:last-child) {
    margin-right: 5px;
  }
}

.message:not(:last-child) {
  padding-bottom: 20px;
}

.is-current-user {
  color: #e1ff00;
}
</style>
<script setup>
import ChatItem from './ChatItem.vue'

</script>

<template>
  <div>
    <div class="chat">
      <div class="chat-title">
        <h1>Chatroom</h1>
      </div>
      <div class="messages">
        <div class="messages-content">
          <ChatItem v-for="n in 30" :key="n"></ChatItem>
        </div>
      </div>
      <div class="message-box">
        <textarea type="text" class="message-input" placeholder="Type message..."></textarea>
        <button type="submit" class="message-submit">Send</button>
      </div>
    </div>
    <div class="bg"></div>
  </div>
</template>


<style lang="scss" scoped>
.messages {
  height: 80%;
  overflow-y: scroll;
  padding: 0 20px;
}

/*--------------------
Body
--------------------*/
.bg {
  position: absolute;
  width: 100%;
  height: 100%;
  top: 0;
  left: 0;
  z-index: 1;
  background: url('https://images.unsplash.com/photo-1451186859696-371d9477be93?crop=entropy&fit=crop&fm=jpg&h=975&ixjsv=2.1.0&ixlib=rb-0.3.5&q=80&w=1925') no-repeat 0 0;
  filter: blur(80px);
  transform: scale(1.2);
}

/*--------------------
Chat
--------------------*/
.chat {
  position: absolute;
  top: 50%;
  left: 50%;
  transform: translate(-50%, -50%);
  width: 500px;
  height: 80vh;
  max-height: 700px;
  z-index: 2;
  overflow: hidden;
  box-shadow: 0 5px 30px rgba(0, 0, 0, .2);
  background: rgba(0, 0, 0, .5);
  border-radius: 20px;
  display: flex;
  justify-content: space-between;
  flex-direction: column;
}

/*--------------------
Chat Title
--------------------*/
.chat-title {
  flex: 0 1 45px;
  position: relative;
  z-index: 2;
  background: rgba(0, 0, 0, 0.2);
  color: #fff;
  text-transform: uppercase;
  text-align: left;
  padding: 10px 10px 10px 50px;

  h1,
  h2 {
    font-weight: normal;
    font-size: 16px;
    margin: 0;
    padding: 0;
  }

  h2 {
    color: rgba(255, 255, 255, .5);
    font-size: 8px;
    letter-spacing: 1px;
  }

  .avatar {
    position: absolute;
    z-index: 1;
    top: 8px;
    left: 9px;
    border-radius: 30px;
    width: 30px;
    height: 30px;
    overflow: hidden;
    margin: 0;
    padding: 0;
    border: 2px solid rgba(255, 255, 255, 0.24);

    img {
      width: 100%;
      height: auto;
    }
  }
}

/*--------------------
Message Box
--------------------*/
.message-box {
  flex: 0 1 40px;
  width: 100%;
  background: rgba(0, 0, 0, 0.3);
  padding: 10px;
  position: relative;
  display: flex;
  gap: 8px;

  & .message-input {
    width: 100%;
    background: none;
    border: none;
    outline: none !important;
    resize: none;
    color: rgba(255, 255, 255, .7);
    font-size: 11px;
    height: 17px;
  }

  textarea:focus:-webkit-placeholder {
    color: transparent;
  }

  & .message-submit {
    color: #fff;
    border: none;
    background: #248A52;
    font-size: 10px;
    text-transform: uppercase;
    line-height: 1;
    padding: 6px 10px;
    border-radius: 10px;
    outline: none !important;
    transition: background .2s ease;

    &:hover {
      background: #1D7745;
    }
  }
}
</style>
File resources/js/app.js ta sửa lại như sau:
import './bootstrap';
import { createApp } from 'vue';
import ChatLayout from './components/ChatLayout.vue'

const app = createApp({});
app.component('chat-layout', ChatLayout)
app.mount('#app');
Sau đó ta start phần code VueJS:
npm run dev
Oke thì ta quay trở lại trình duyệt F5 sẽ thấy như sau:
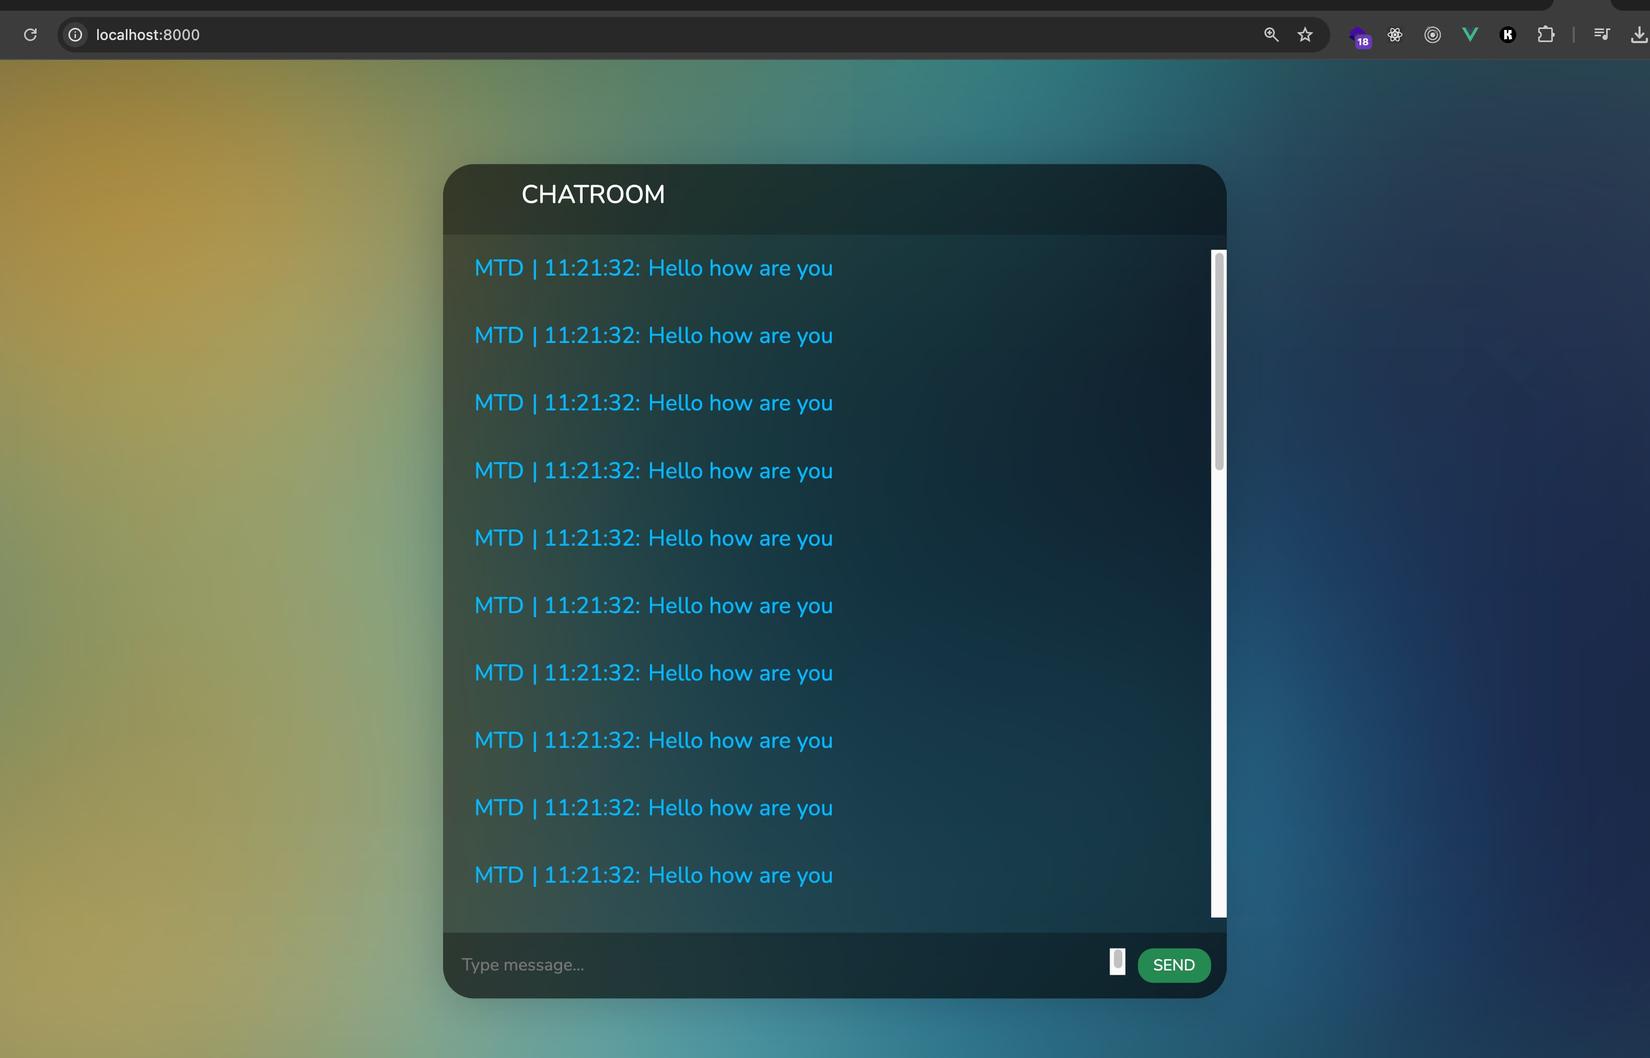
Giờ toàn data fake thôi chứ chưa có tí backend nào các bạn ạ 😆😆
Backend Laravel
Tiếp tục chiến phần backend, đầu tiên ta cần model Message để xử lý tin nhắn:
php artisan make:model Message -m
option -m để tạo luôn migration cho nó nha

Các bạn vào database/migrations/ Tìm đến file migration vừa tạo, và sửa lại hàm up() như sau:
public function up()
{
        Schema::create('messages', function (Blueprint $table) {
            $table->id();
            $table->text('message');
            $table->unsignedBigInteger('user_id');
            $table->foreign('user_id')->references('id')->on('users');
            $table->timestamps();
        });
}
Tiếp đó ta sửa lại file app/Models/Message.php như sau:
<?php

namespace App\Models;

use Illuminate\Database\Eloquent\Model;
use Illuminate\Database\Eloquent\Relations\BelongsTo;

class Message extends Model
{
    protected $fillable = ['message', 'user_id'];

    public function user(): BelongsTo
    {
        return $this->belongsTo(User::class);
    }
}
Giải thích: vì mỗi tin nhắn sẽ phụ thuộc vào 1 user nên ở Message ta có quan hệ belongsTo và mỗi User có thể có nhiều tin nhắn nên ở User ta có quan hệ hasMany.
Tiếp đó ta migrate để tạo bảng trong database:
php artisan migrate

Tiếp đó, ta sửa lại routes/web.php như sau (đồng thời sửa lại route đã tạo để yêu cầu đăng nhập nếu muốn vào phòng chat nhé):
<?php

use Illuminate\Support\Facades\Route;

Auth::routes();

Route::get('/', function() {
    return view('chat');
})->middleware('auth');

Route::get('/getUserLogin', function() {
	return Auth::user();
})->middleware('auth');

Route::get('/messages', function() {
    return App\Models\Message::with('user')->get();
})->middleware('auth');

Route::post('/messages', function() {
   $user = Auth::user();

  $message = new App\Models\Message();
  $message->message = request()->get('message', '');
  $message->user_id = $user->id;
  $message->save();

  return ['message' => $message->load('user')];
})->middleware('auth');
Để app đơn giản mình sẽ không tạo controller mà thao tác trực tiếp trong route nhé:
- route GET
/để trả về view. - route Get
/getUserLoginmục đích trả về user hiện tại đang login - route GET
/messagesmục đích lấy các messages trong database ra, đi kèm là thông tin user người gửi message đó. - route POST
/messagesđơn giản là lưu tin nhắn do user gửi đi vào database. Tạo thêm một route để Vue component có thể gọi và lấy dữ liệu chat ban đầu (lịch sử chat) lúc mới load trang.Quay trở lại Vue componentChatLayout.vueđể thiết lập sự kiện gửi tin nhắn.
Quay lại file ChatLayout.vue ở ô input nhập tin nhắn các bạn sửa lại như sau:
<div class="message-box">
    <input type="text" v-model="message" @keyup.enter="sendMessage" class="message-input" placeholder="Type message..."/>
    <button type="button" class="message-submit" @click="sendMessage">Send</button>
</div>
Ở đây khi người dùng bấm enter hoặc click vào button thì phương thức sendMessage sẽ được gọi. Chúng ta sẽ tạo phương thức sendMessage nhé, đồng thời chúng ta tạo luôn một phương thức để load các Message trong database mỗi lần truy cập, giờ ta update lại phần <script> ở file ChatLayout.vue nha:
<script setup>
import { ref, onBeforeMount, nextTick } from 'vue';
import ChatItem from './ChatItem.vue'

const message = ref('')
const list_messages = ref([])

onBeforeMount(() => {
  loadMessage();
});

async function loadMessage() {
  try {
    const response = await axios.get('/messages')
    list_messages.value = response.data

    scrollToBottom()
  } catch (error) {
    console.log(error)
  }
}

async function sendMessage() {
  try {
    const response = await axios.post('/messages', {
      message: message.value
    })
    list_messages.value.push(response.data.message)
    message.value = ''

    scrollToBottom()
  } catch (error) {
    console.log(error)
  }
}

function scrollToBottom() {
  nextTick(() => {
    const messages = document.querySelector('.messages')
    // scroll đến cuối cùng
    messages.scrollTo({
      top: messages.scrollHeight, // Scroll to the bottom
      behavior: 'smooth', // Smooth scrolling
    });
  })
}
</script>
Các bạn tự thẩm nội dung có gì không hiểu comment cho mình nha 😘
Ở trên mình có thêm
scrollToBottomđể mỗi khi load tin nhắn hay gửi tin thì nó tự động scroll xuống cuối cho dễ nhìn 😎
Ở app.js ta sẽ tạo 1 biến để lưu lại user đang login để từ đó ta có thể truy cập được từ các component nhé.
import "./bootstrap";
import { createApp } from "vue";
import ChatLayout from "./components/ChatLayout.vue";

const app = createApp({
    data: () => {
        return {
            currentUserLogin: {},
        };
    },
    created() {
        this.getCurrentUserLogin();
    },
    methods: {
        async getCurrentUserLogin() {
            try {
                const response = await axios.get("/getUserLogin");
                this.currentUserLogin = response.data;
            } catch (error) {
                console.log(error);
            }
        },
    },
});
app.component("chat-layout", ChatLayout);
app.mount("#app");
À còn phần truyền data từ ChatLayout.vue vào ChatItem.vue nữa, chúng ta quay lại file ChatLayout.vue và sửa một chút ở phần template nhé:
<div class="messages">
  <ChatItem v-for="(message, index) in list_messages" :key="index" :message="message"></ChatItem>
</div>
Tiếp theo các bạn sửa lại 1 chút ở phần template của ChatItem.vue như sau để hiện thị đúng thông tin nhé:
<script setup>
defineProps({
  message: Object
})
</script>

<template>
  <div
    class="message"
    :class="{ 'is-current-user': $root.currentUserLogin.id === message.user.id }"
  >
    <div class="message-item user-name">
      {{ message.user.name }}
    </div>
    <div class="message-item timestamp">
      | {{ message.created_at.split(' ')[1] }}:
    </div>
    <div class="message-item text-message">
      {{ message.message }}
    </div>
  </div>
</template>
Oke ngon rồi giờ ta quay lại trình duyệt F5 sẽ thấy như sau:
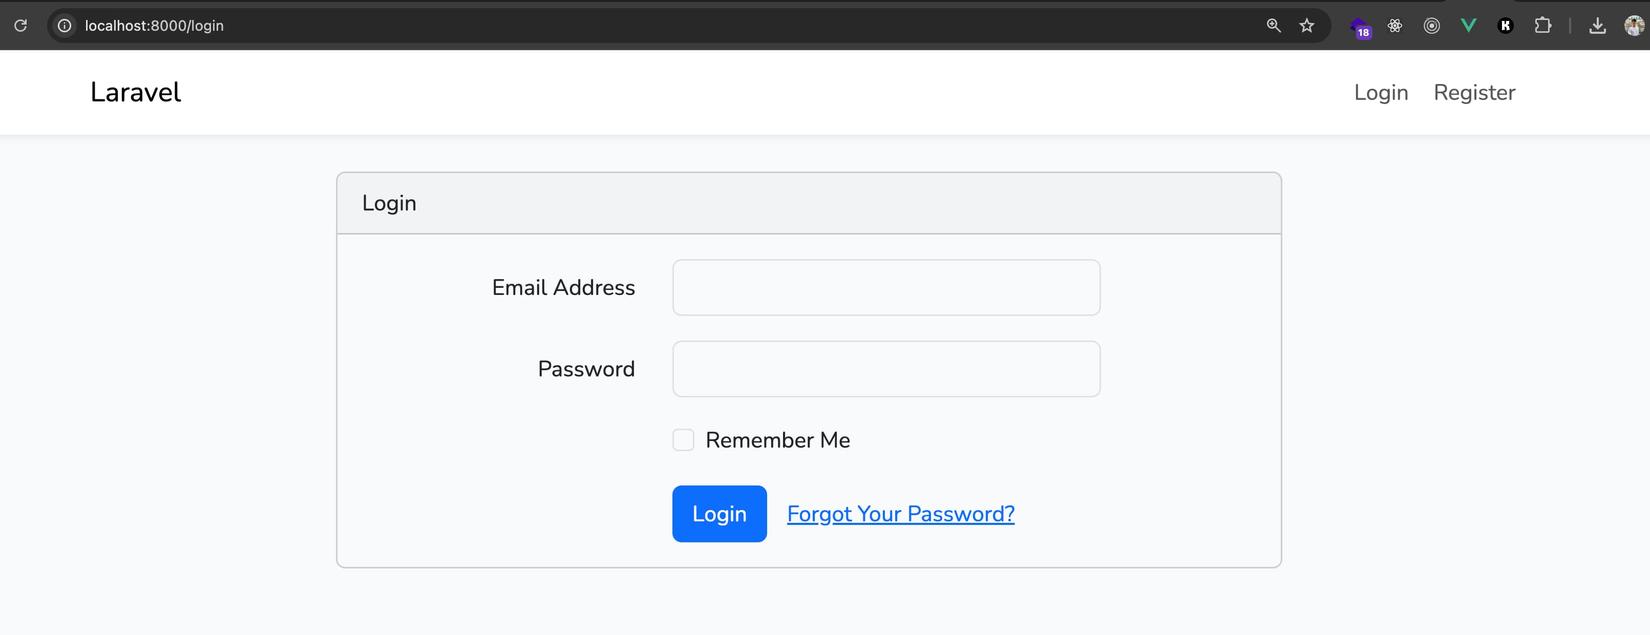
Ta tạo account, login, nhớ là đoạn login thì nó bị redirect về /home nên có thể show 404, ta kệ nó đổi lại url thành http://localhost:8000/ là được nhé:
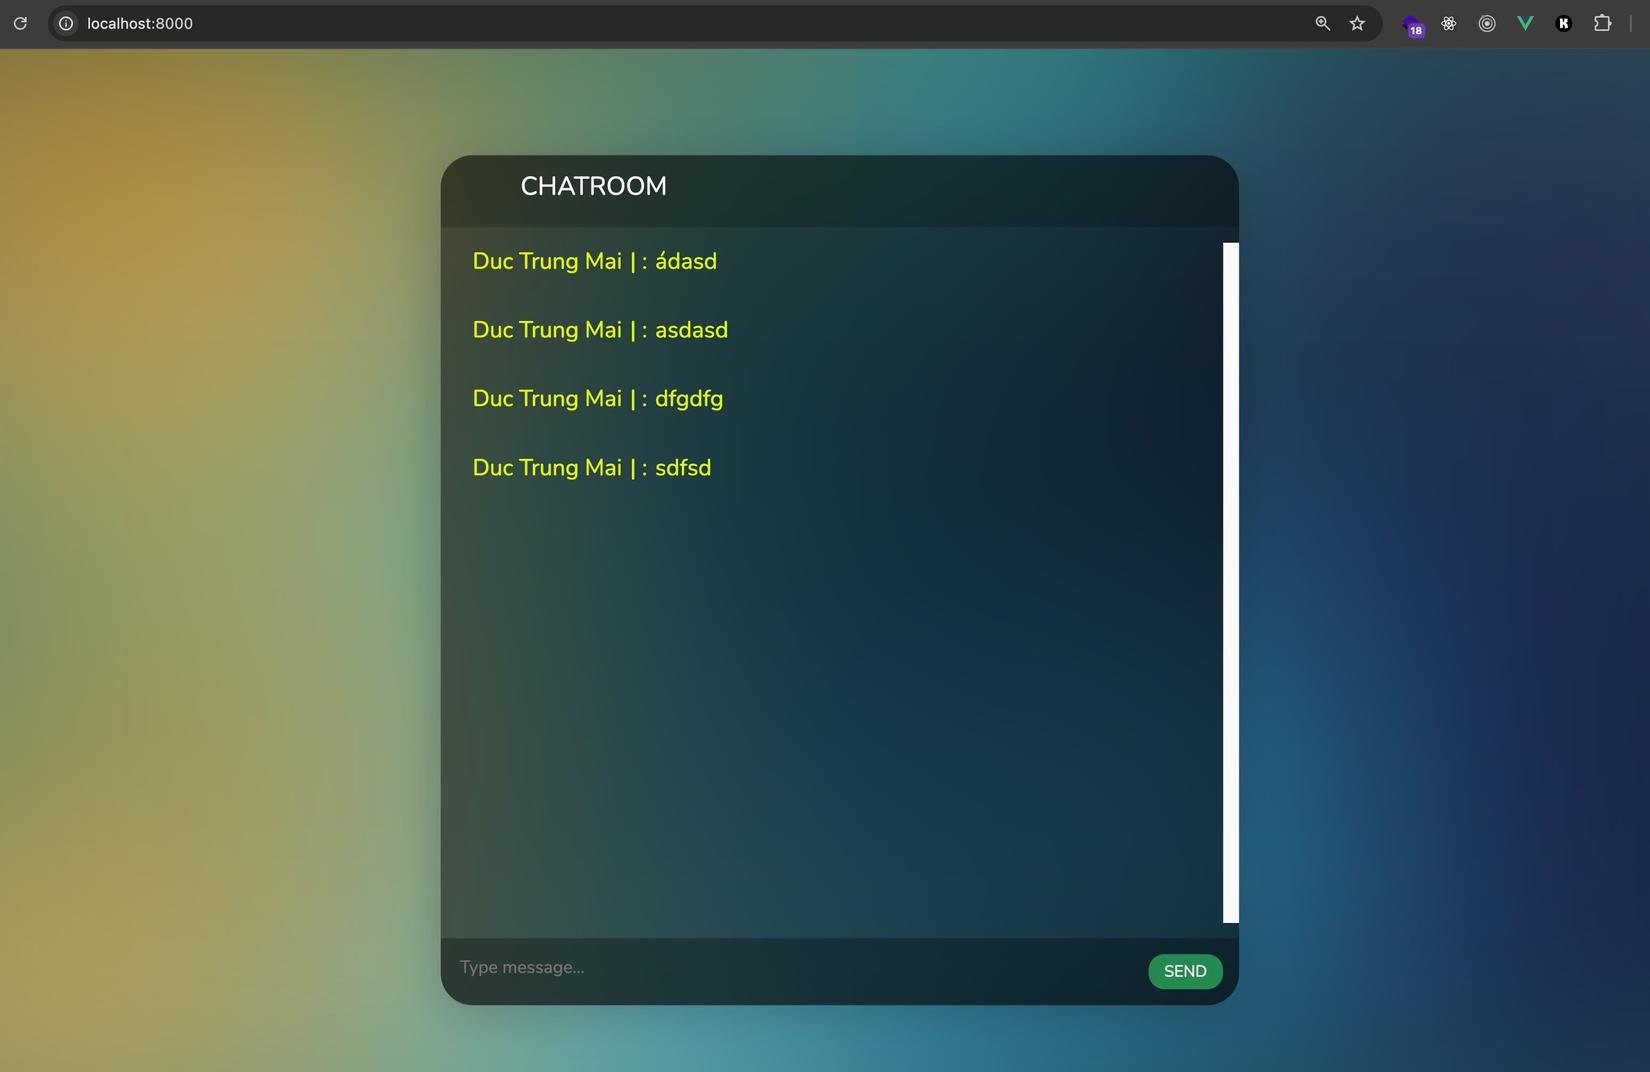
Sau đó các bạn zô gửi vài tin nhắn rồi F5 đảm bảo là tin nhắn đã được lưu vào DB oke nha 😘
Xử lý realtime
Ở bài này để xử lý phần chat realtime thì ta sẽ follow theo doc mới nhất của Laravel: https://laravel.com/docs/master/broadcasting nhé 💪
Đầu tiên ta cần enable module broadcasting:
php artisan install:broadcasting
Khi được hỏi có cài Reverb + Node dependencies không thì ta chọn Yes nhé:


Khi cài Oke thì ở .env ta phải thấy xêm xêm như sau:
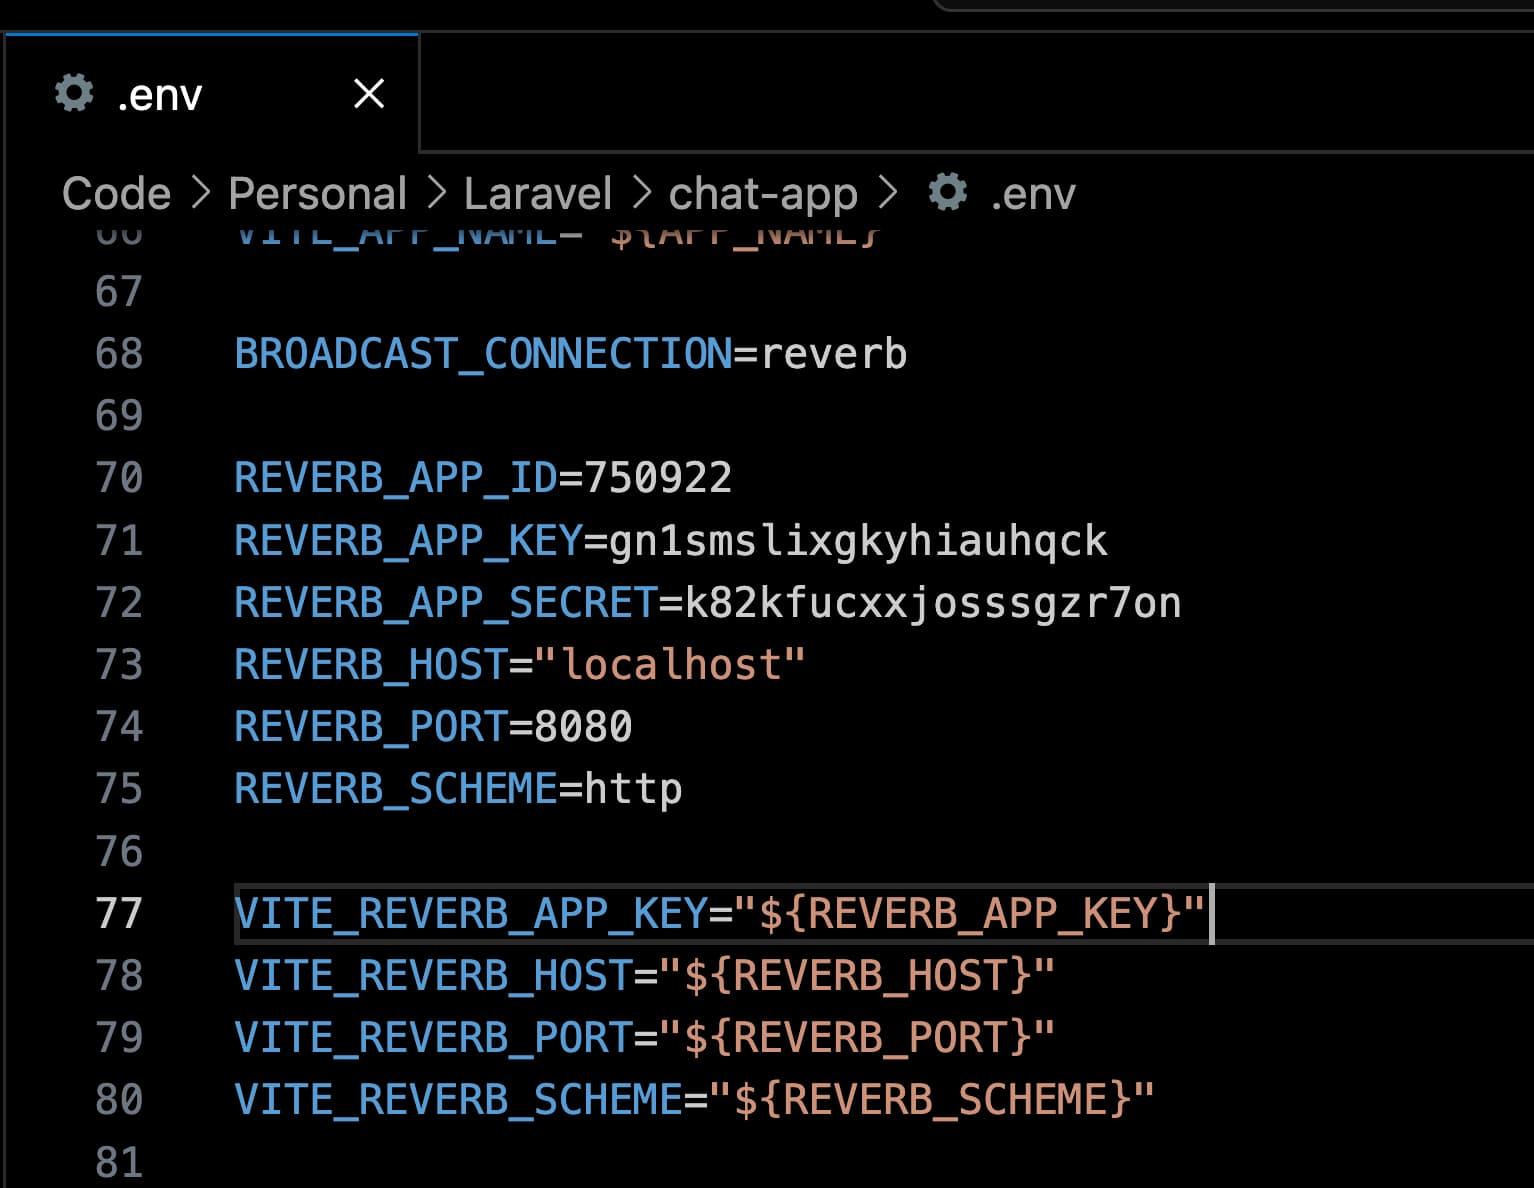
Chú ý: BROADCAST_CONNECTION=reverb nhé
Tiếp theo ta cài thêm 2 packages sau cho Frontend nhé:
npm install --save-dev laravel-echo pusher-js
Lý do ở trên ta cài
pusher-jslà vì Reverb nó cũng follow theo protocol của Pusher
Tiếp theo ta mở file resources/js/bootstrap.js, kéo xuống dưới cùng sẽ thấy là ở đoạn install broadcasting vừa nãy nó đã tự động thêm:
import './echo';
Và file echo.js có nội dung như sau cũng đã được tạo ra:
import Echo from 'laravel-echo';

import Pusher from 'pusher-js';
window.Pusher = Pusher;

window.Echo = new Echo({
    broadcaster: 'reverb',
    key: import.meta.env.VITE_REVERB_APP_KEY,
    wsHost: import.meta.env.VITE_REVERB_HOST,
    wsPort: import.meta.env.VITE_REVERB_PORT ?? 80,
    wssPort: import.meta.env.VITE_REVERB_PORT ?? 443,
    forceTLS: (import.meta.env.VITE_REVERB_SCHEME ?? 'https') === 'https',
    enabledTransports: ['ws', 'wss'],
});
Oke ngon rồi tiếp theo ta tạo 1 Event phía Laravel nhé, sau này mỗi khi ta gửi 1 message thì event này sẽ được tạo và broadcast đi cho những user khác:
php artisan make:event MessagePosted

Tiếp đó ta sửa lại file App/Events/MessagePosted.php như sau:
<?php

namespace App\Events;

use Illuminate\Broadcasting\Channel;
use Illuminate\Broadcasting\InteractsWithSockets;
use Illuminate\Broadcasting\PresenceChannel;
use Illuminate\Broadcasting\PrivateChannel;
use Illuminate\Contracts\Broadcasting\ShouldBroadcast;
use Illuminate\Foundation\Events\Dispatchable;
use Illuminate\Queue\SerializesModels;

use App\Models\Message;
use App\Models\User;

class MessagePosted implements ShouldBroadcast
{
    use Dispatchable, InteractsWithSockets, SerializesModels;

    public $message;
    public $user;

    /**
     * Create a new event instance.
     */
    public function __construct(Message $message, User $user)
    {
        $this->message = $message;
        $this->user = $user;
    }

    /**
     * Get the channels the event should broadcast on.
     *
     * @return array<int, \Illuminate\Broadcasting\Channel>
     */
    public function broadcastOn()
    {
        return ['chatroom'];
        // hoặc: return new Channel('chatroom');
    }
}
Chú ý đoạn
implements ShouldBroadcastnha 😉
Ở đây chúng ta tạo ra một public channel tên là chatroom, event trả về thông tin gồm message và thông tin user gửi message đó.
Sửa lại một chút ở file routes/web.php để fire event cho các mỗi lần có message gửi lên server nhé. Ta sửa Route POST /messages lại như sau:
Route::post('/messages', function() {
    $user = Auth::user();

    $message = new App\Models\Message();
    $message->message = request()->get('message', '');
    $message->user_id = $user->id;
    $message->save();

    broadcast(new App\Events\MessagePosted($message, $user))->toOthers();
    return ['message' => $message->load('user')];
})->middleware('auth');
Ở đây mỗi khi có một user gửi message lên server, server sẽ fire event MessagePosted và sẽ broadcast cho các client khác, ta dùng phương thức toOthers() mục đích chỉ broadcast cho các client khác cập nhật còn chính user gửi thì không cần.
Giờ ta quay qua Vue component để lắng nghe event nhé. Ở ChatLayout.vue chúng ta sửa lại hook onBeforeMount như sau:
onBeforeMount(() => {
  loadMessage();
  Echo.channel("chatroom").listen("MessagePosted", (data) => {
    const message = data.message;
    message.user = data.user;
    list_messages.value.push(message);

    scrollToBottom()
  });
});
Giờ ta đóng hết tất cả các terminal đang chạy, và lần lượt chạy những cái sau, mỗi cái trên 1 terminal:
php artisan serve

npm run dev

php artisan reverb:start
Nếu khi start Reverb mà ta bị lỗi port 8080 đã bị sử dụng:
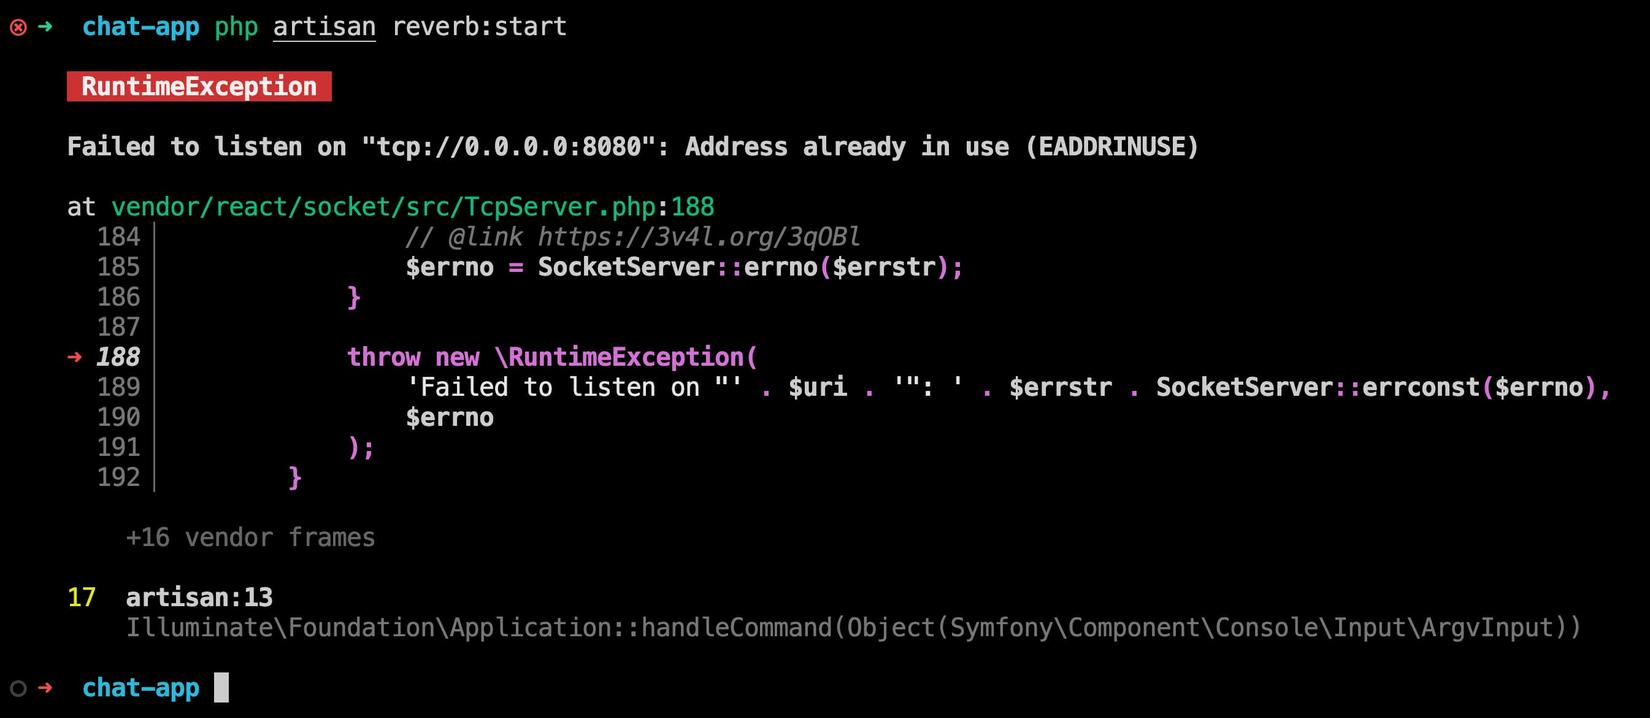
Thì ta có thể dùng command sau:
php artisan reverb:start --port=9000
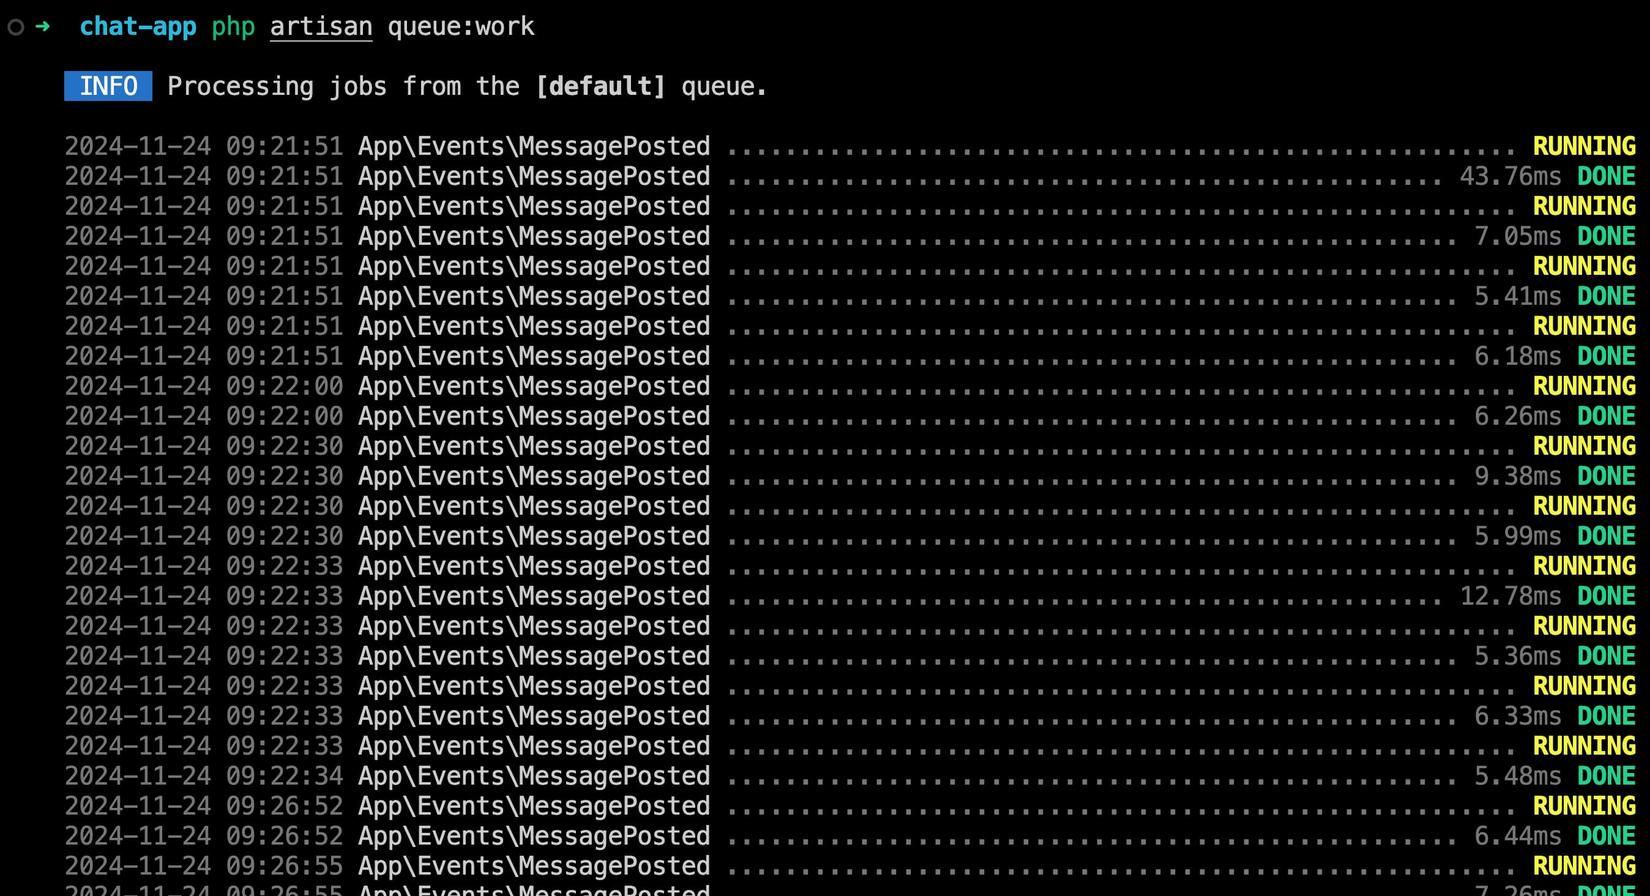
À trước khi test thì ta cần phải start cả Worker nữa, vì mỗi Event sẽ được xử lý bởi queue jobs, ta chạy thêm command sau:
php artisan queue:work
Âu cây ngon rồi giờ ta quay lại trình duyệt mở 1 tab thường 1 tab ẩn danh, login với 2 account và bắt đầu test thôiiiiii 😎😎😎:
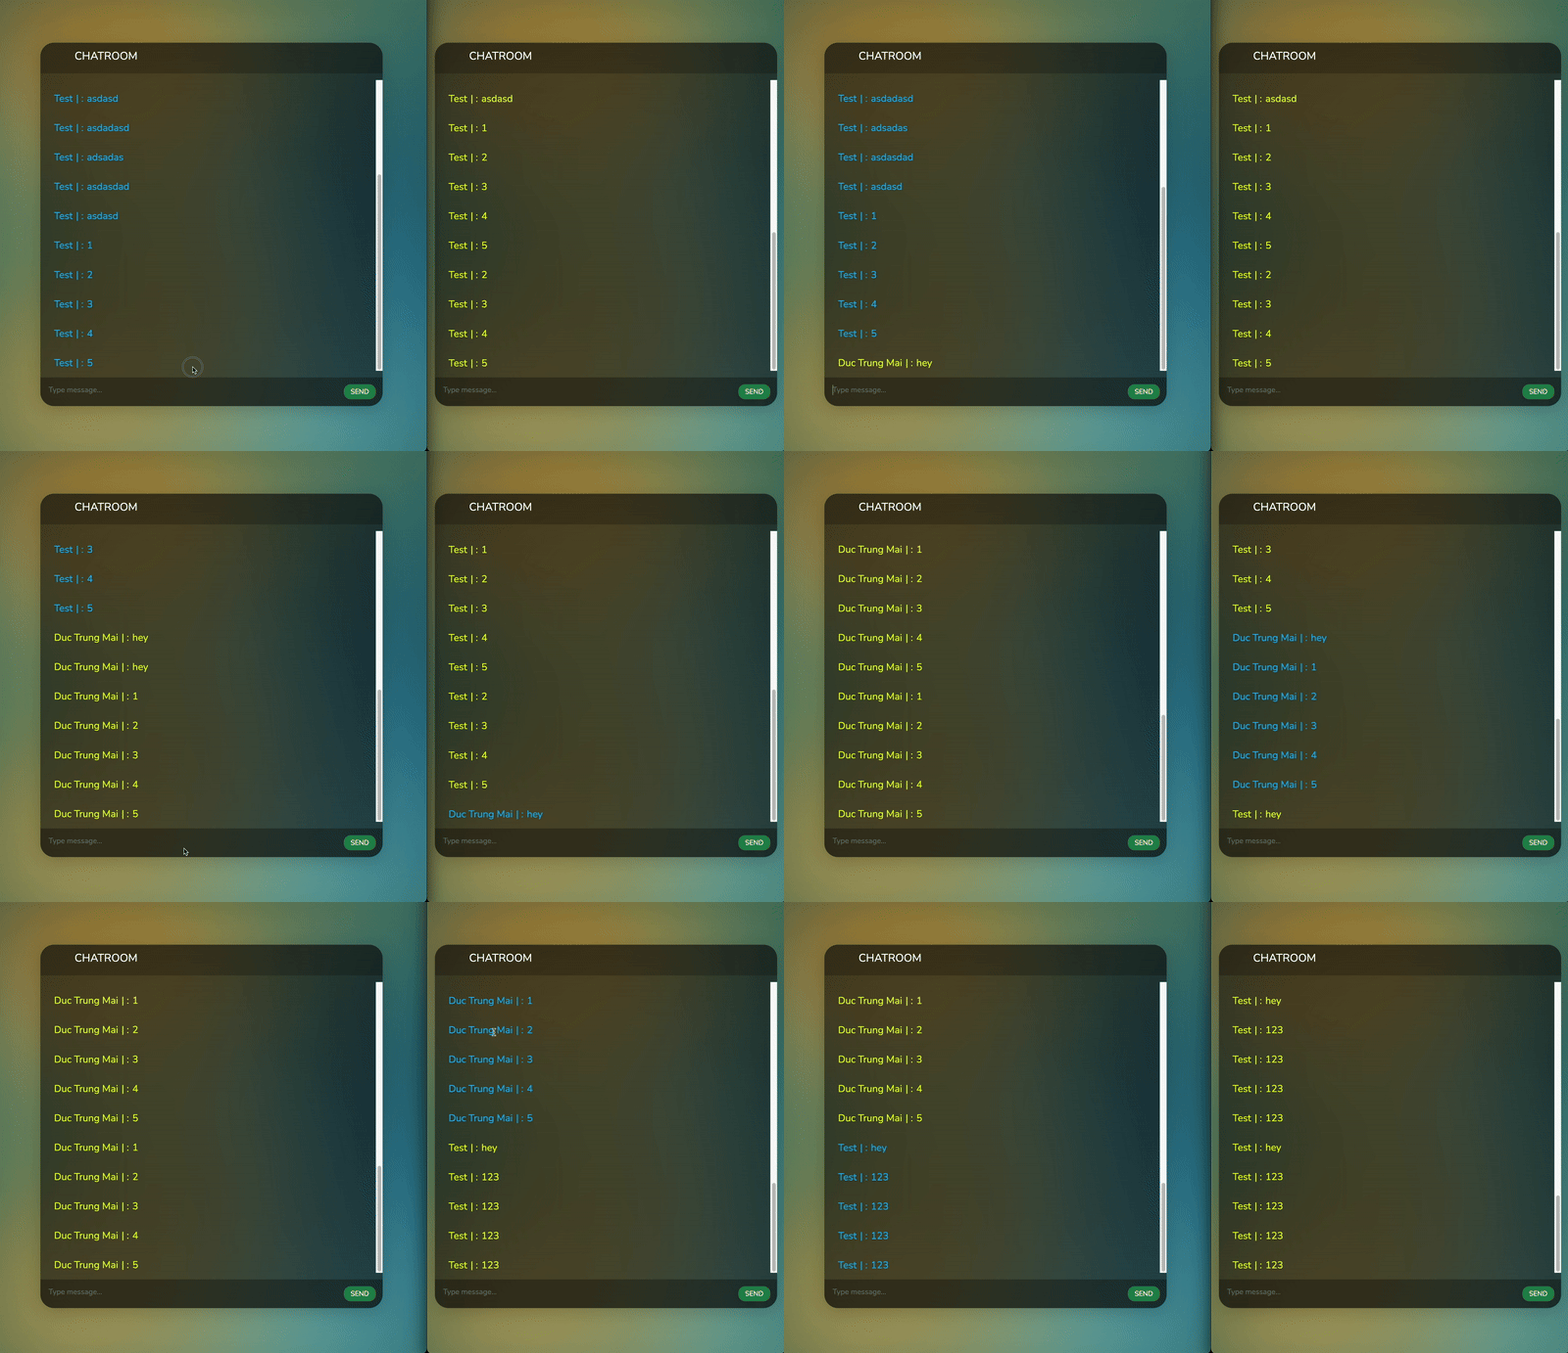
Quá ngonnn 🤩🤩
Nếu mọi thứ Oke thì terminal của queue:work phải trông như thế này:
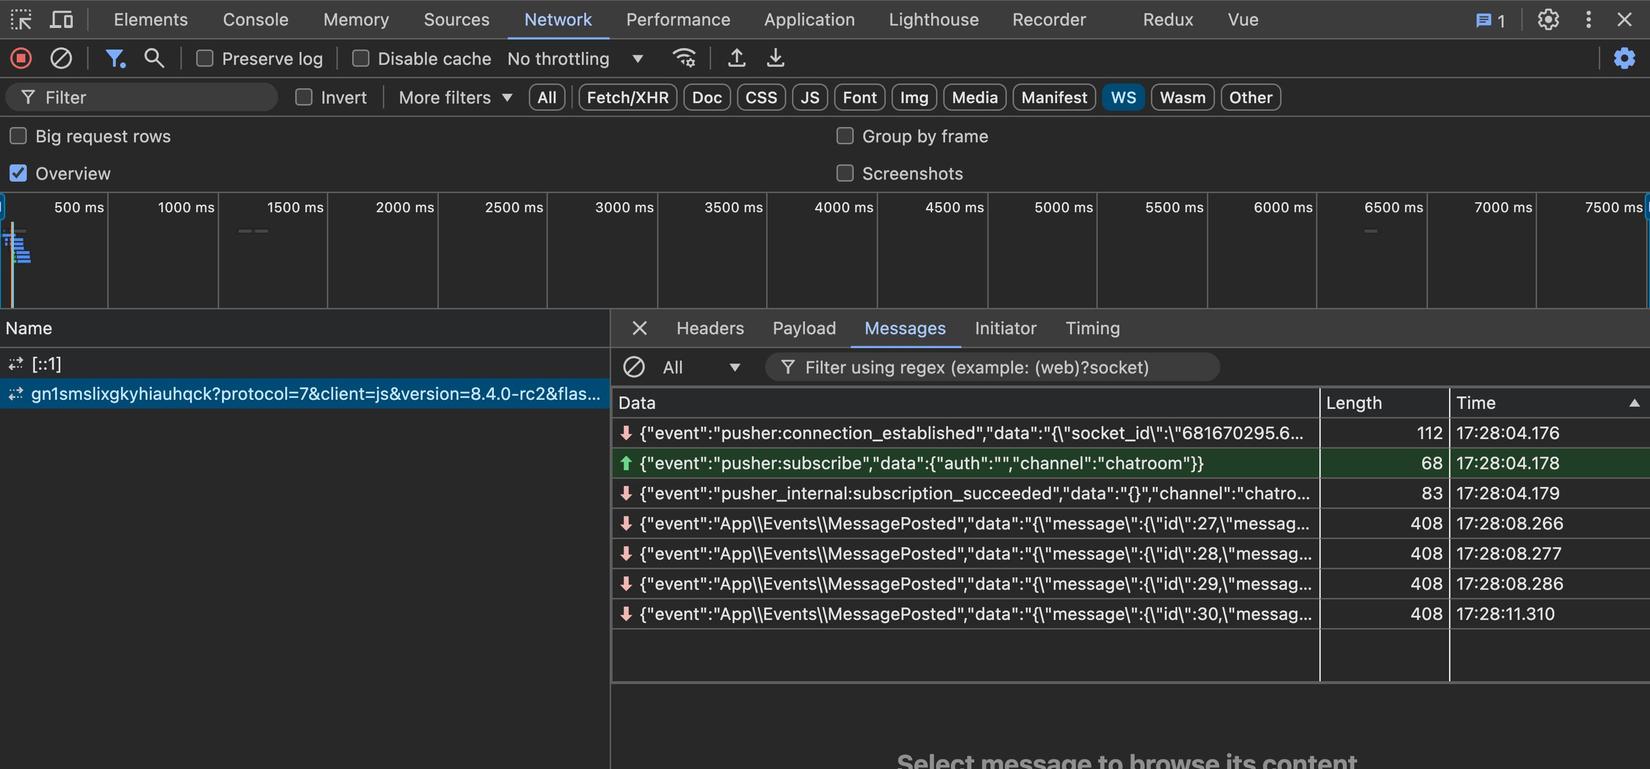
Inspect network > WS từ trình duyệt sẽ như thế này:
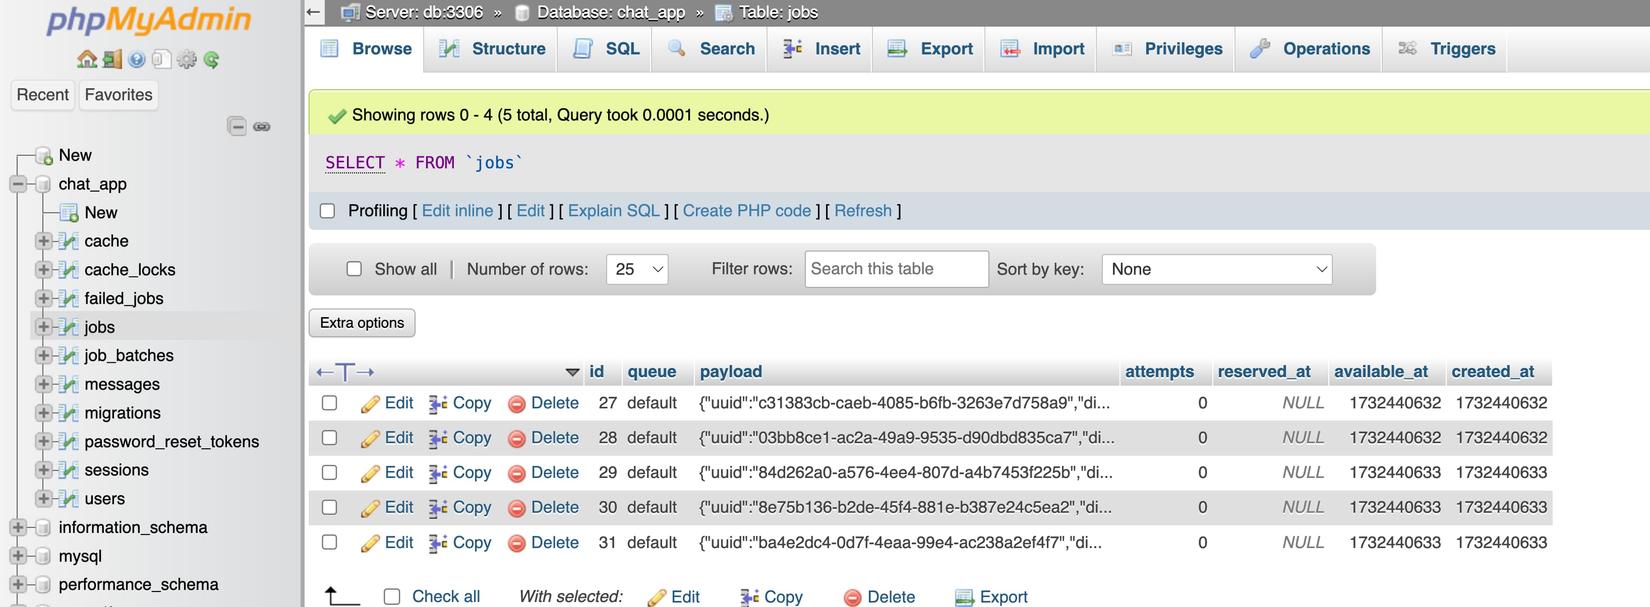
Hiện tại ở .env ta set QUEUE_CONNECTION=database, tức là event sẽ được đưa vào database và tí nữa queue jobs sẽ lấy ra để xử lý. Để xem kĩ hơn các bạn có thể tắt terminal đang chạy queue:work đi để ta xem các job pending trong database nha:
Chạy debug mode
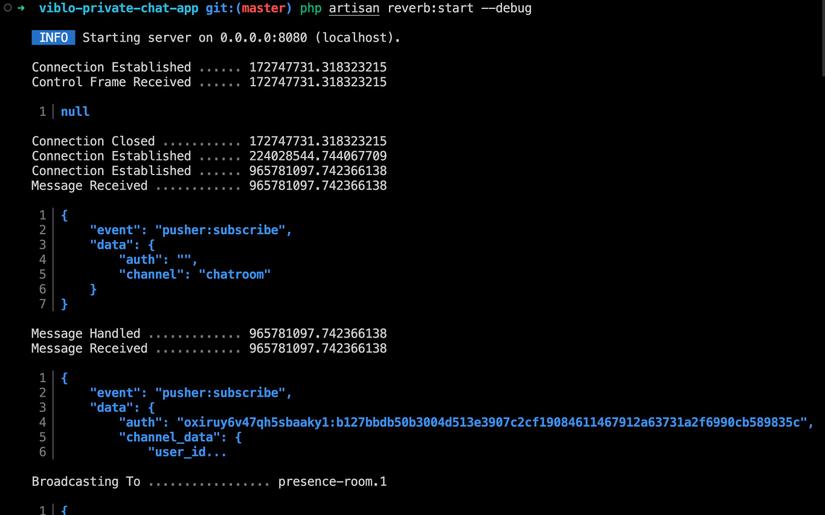
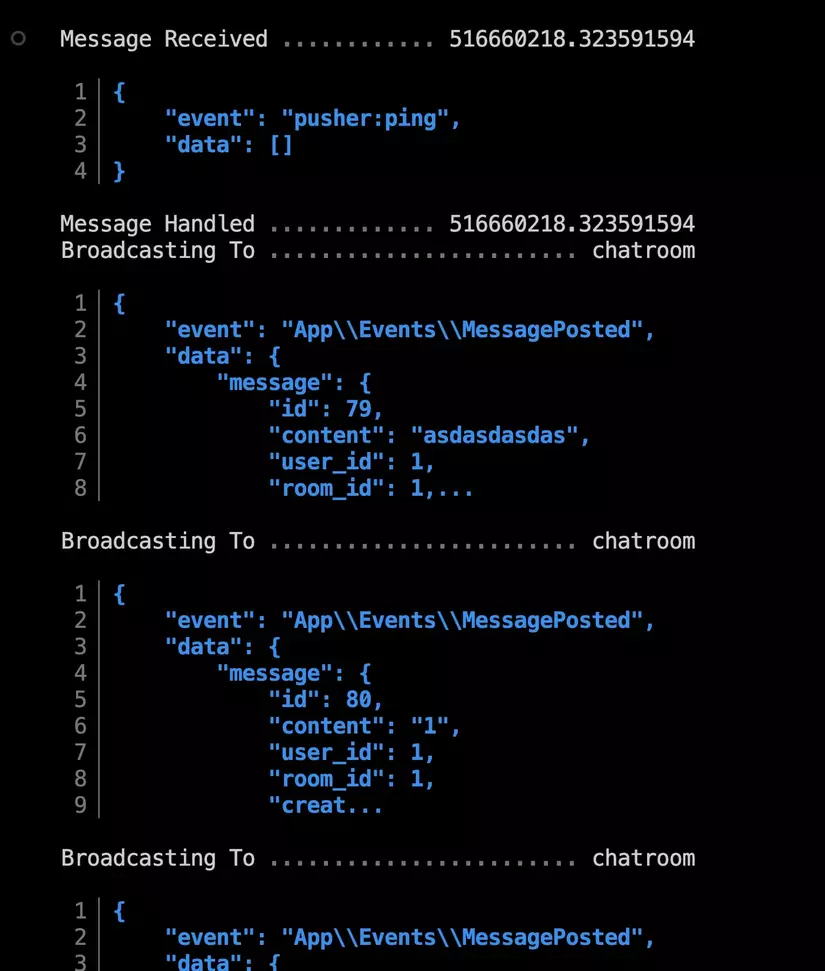
Hiện tại nếu các bạn để ý thỉ ở terminal chạy Reverb không có gì được in ra cả, trong quá trình phát triển thì thường ta sẽ muốn có log để debug xem có chuyện gì đang xảy ra, để như vậy thì ta tắt terminal Reverb đi chạy lại nhé:
php artisan reverb:start --debug
Sau đó ta quay lại trình duyệt chat chủng các kiểu sẽ thấy terminal Reverb in ra như sau:
Kết bài
So sánh với bài Viết ứng dụng chat realtime với Laravel, VueJS, Redis và Socket.IO, Laravel Echo, thì với việc dùng Laravel Reverb mọi thứ đã dễ dàng hơn khá nhiều, mọi thứ đều được Laravel support tới tận chân răng 😘😘
Hi vọng qua bài này các bạn đã biết các setup app chat realtime với Laravel Reverb.
Ở bài này mình dùng public channel, mọi người đều có thể lắng nghe, khi làm app thực thế thì ta hay dùng Private + Presence Channel hơn, các bạn có thể xem lại các bài khác ở trong series này của mình nhé.
Cám ơn các bạn đã theo dõi. Hẹn gặp lại các bạn vào những bài sau 👋👋
All rights reserved