Unity 3D advanced - Occlusion Culling and Lightmapping
Bài đăng này đã không được cập nhật trong 4 năm
It has been said many times, Unity 3D is a great multi-platform engine for creating games and applications, it is getting popular, it is getting trendy, everybody feel like they ought to learn it, it just keep getting better. Unity was meant to be a powerful program, allowing people to use tools that previously were available only for AAA developers, such tools may not be known by many, today I would like to introduce to you some of them, more advanced tools, which may improve the experience in your games greatly.
Increase performance in games
Now with games processing power was always a big problem, in real-time rendering there are at least three performance goals we want to achieve, more frames per second, higher resolution, and more objects in scene. Thus speed-up techniques and acceleration schemes are always considered a necessity. Occlusion Culling, to cull means to “select from a flock”, and in computer graphics that is exactly what it does, the flock meant to be a whole scene to be rendered, and the selection, “culling”, is limited to those parts that are not going to be rendered, the rest will be sent through the rendering pipeline.
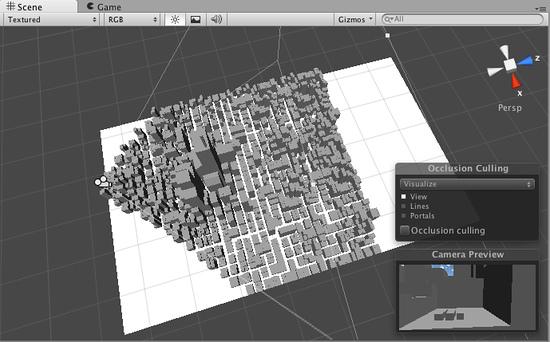
Occlusion Culling
To say it simply, it is a feature that disables rending object where they are not be seen by the camera. Occlusion Culling is different from Frustum Culling, the latter only disables renders for objects that are outside of camera, but does not disable anything hidden from overdraw (simply the unseen parts under camera visibility range), though using Occlusion Culling does benefit from Frustum Culling too. The parts to be occluded are needed to be tagged to Occluder Static in the Inspector. The fastest way to do this is to multi-select the objects to be included in occlusion calculations, and mark them as Occluder Static and Occludee Static.
Occludee & Occluder
When Occludee Static should be used? Transparent objects that do not occlude, as well as small objects that are unlikely to occlude other things, should be marked as Occludees, but not Occluders. To say it simpler, Occluders are objects that can hide objects from view, and Occludees are object that can be hidden from view (being occluded by another object), but cannot itself hide other objects, be careful to not set children objects with different tags than the parents.
Occlusion Setup
If selected Occlusion Culling Window with Mesh Renderer enabled object selected in the scene, modifying relevant Static flags is possible:
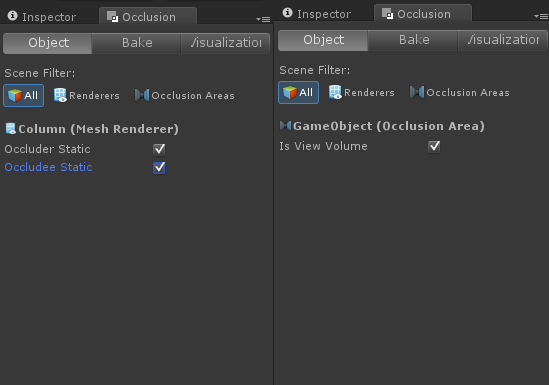
If selected Occlusion Culling Window with Occlusion Area enabled, it is possible to work with relevant OcclusionArea properties. NOTE: By default if there is no occlusion areas, occlusion culling will be applied to the whole scene.
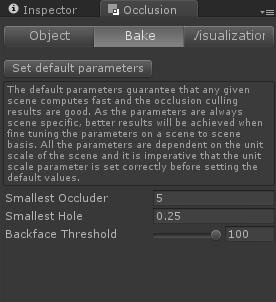
The occlusion culling bake window has a “Set Default Parameters” button, which allows to reset the bake values to Unity’s default values.

After your occlusion is set up, you can test it by enabling the Occlusion Culling (in the Occlusion Culling Preview Panel in Visualize mode) and moving the Main Camera around in the scene view.
About shadow performance
Shadow was always an important part of realism for games, games look better with them, but shadow calculation costs a lot memories, and so what can we do to retain shadow in our scenes and still have as good as possible performance, thus enters Lightmap.
Lightmapping
Lightmaps work pretty much in the same way as textures. The game engine calculates a new texture for all static (nonmoving and non-changing) lights in a scene, and overlays that light information on top of the actual textures. Since the original textures are kept and the lightmap texture is overlayed, dynamic lights can interact with the lightmap lighting information.
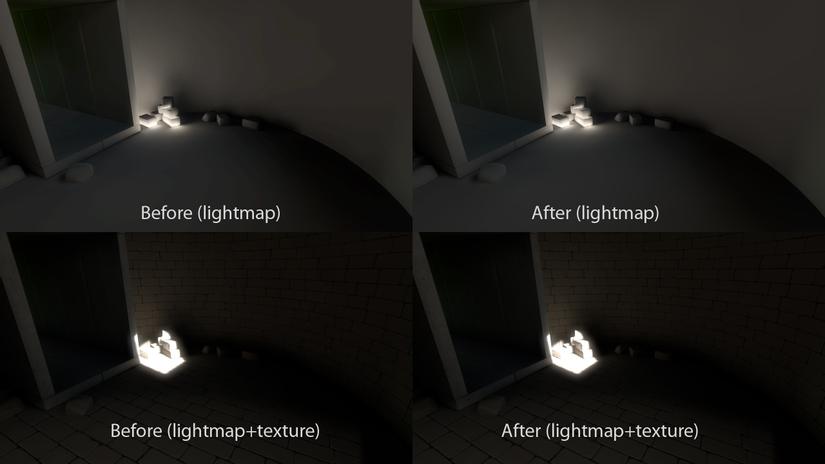
The reason lightmaps are used is it is possible to get much higher lighting quality than just using static lights and computing them in real time. If the engine is set to bake (calculate) the lightmaps for a good long time, it can generate a lightmap that has additional details like light that's reflected or diffused onto other objects that cannot be calculated in real-time, the result is much more realistic looking lighting.
Unity Lightmapping
Unity uses Beast by Illuminate Labs as a lightmapper, Beast will bake lightmaps for the scene based on setup within Unity, taking into account meshes, materials, texture and lights. Once the lightmaps are created nothing else will need to be done. They will be automatically picked up by objects.
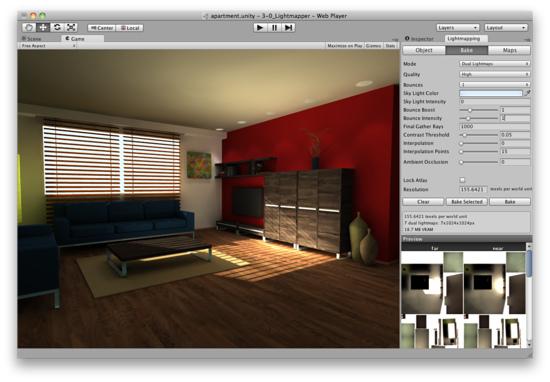
Preparing the scene and baking the lightmaps
Selecting Window – Lightmapping from the menu will open the Lightmapping window:
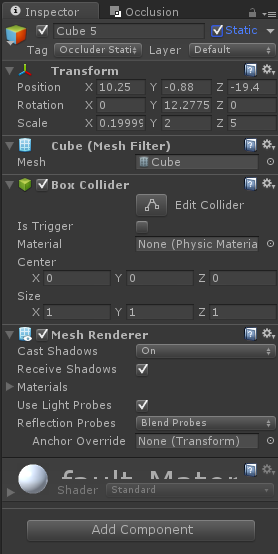
In Inspector check any Mesh Renderer, Skinned Mesh Renderer or Terrain that you want to bake as static, this will tell Unity those objects won’t move nor change.
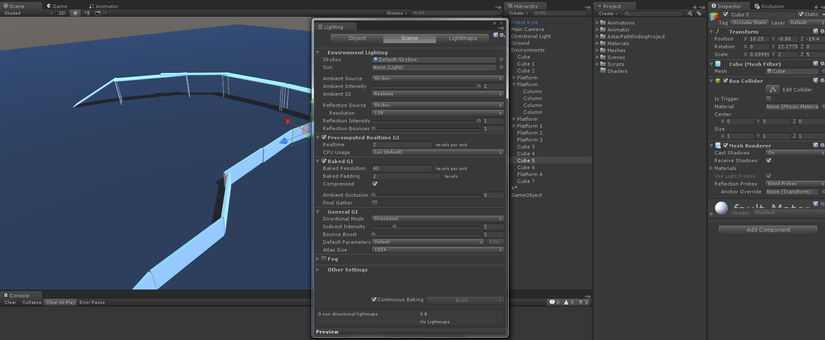
Simply press bake and the progress bar will appear in Unity Editor’s status bar at the bottom Lightmap Editor, the scene and game will automatically update, the scene is now lightmapped.
Now those are just few functions that could help you optimize your scenes in the game, for the next time I would like to introduce you more of Unity’s functionality, I hope they will be helpful to you and your projects, until next time!
All rights reserved