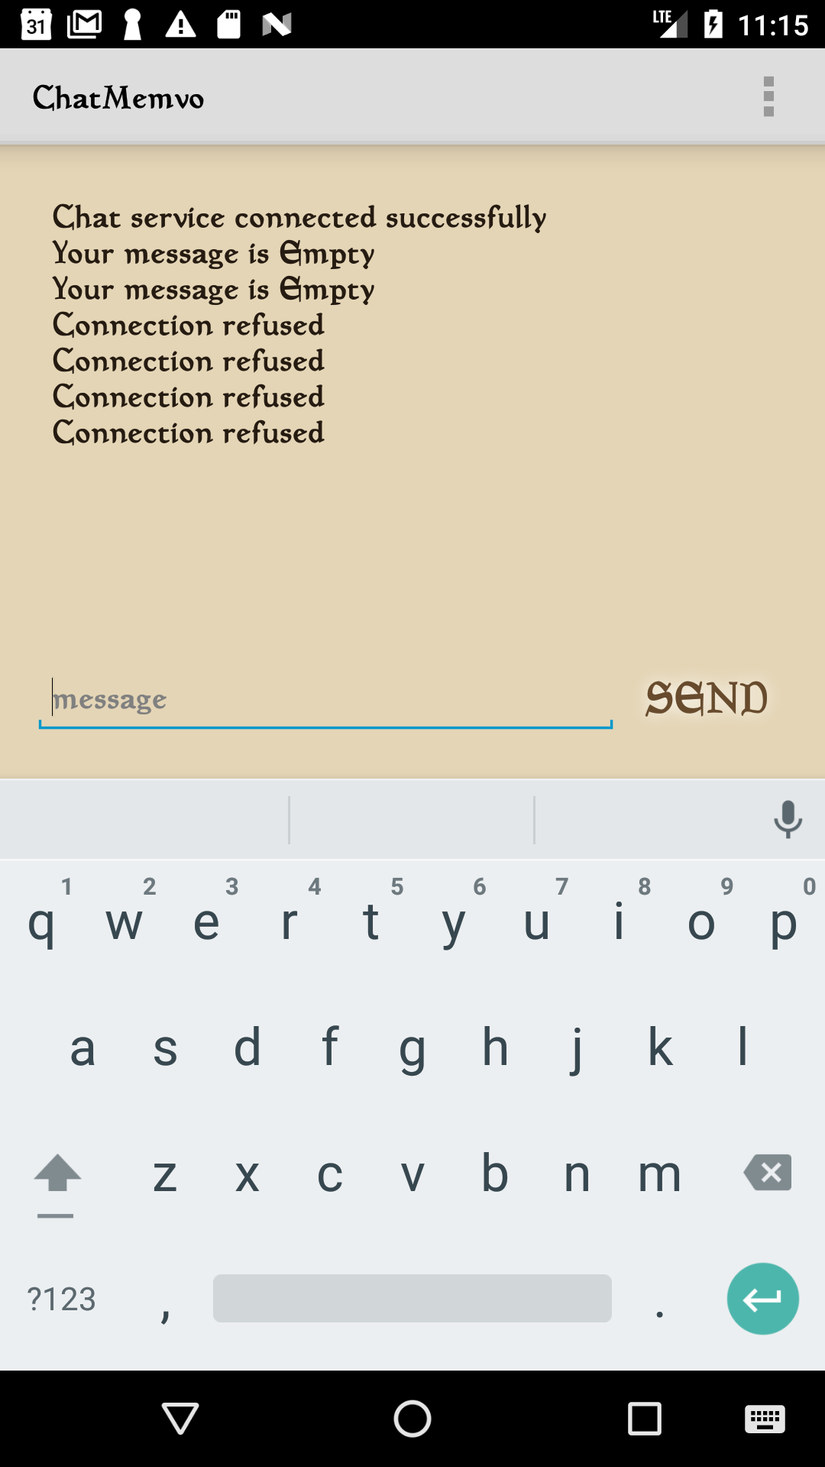
[Training] Custom font cho ứng dụng android
Bài đăng này đã không được cập nhật trong 4 năm
Bạn nhìn thấy những ứng dụng màu mè hoa lá cành với bộ font thư pháp tuyệt đẹp. Bạn muốn bắt chước nó. Nhưng bạn lại không biết làm như thế nào. Trong bài viết này mình sẽ hướng dẫn các bạn 1 thủ thuật đơn giản để thay đổi font ứng dụng chỉ với vài dòng code đơn giản
Custom font ngay khi start
Các bạn nên áp dụng phương thức này khi bạn muốn app của bạn hoạt động với 1 loại font nhất định
Tạo custom application
Bạn khởi tạo 1 class application kế thừa từ android application như bên dưới
import android.app.Application;

public class App extends Application {
    private static App self;

    public static App instance() {
        return self;
    }

    @Override
    public void onCreate() {
        super.onCreate();
        self = this;
    }
}
Sau đó khai báo trong file Manifest.xml để ứng dụng nhận file custom này nhé
    <application
        android:name=".App"
        android:allowBackup="false"
        android:icon="@mipmap/ic_launcher"
        android:label="@string/app_name"
        android:roundIcon="@mipmap/ic_launcher_round"
        android:supportsRtl="true"
        android:theme="@style/AppTheme">
        .............
    </application>
Override các font mặc định của hệ thống
Bạn có thể override các font mặc định của hệ thống, tùy thuộc vào nhà sản xuất nào mà có thể viết lại code nhé. Bạn tạo 1 method như bên dưới và gọi nó trong method onCreated của class App phía trên nhé
    private void initialFont() {
        FontsOverride.setDefaultFont(this, "DEFAULT", "pelagiad.ttf");
        FontsOverride.setDefaultFont(this, "MONOSPACE", "pelagiad.ttf");
    }
Trong đó thì FontsOverride là 1 utility class mình tạo ra nhằm đọc file font từ trong thư mục assets của ứng dụng (giới thiệu bên dưới).
Và đây là toàn bộ class App
import android.app.Application;

public class App extends Application {
    private static App self;

    public static App instance() {
        return self;
    }

    @Override
    public void onCreate() {
        super.onCreate();
        self = this;
        initialFont();
    }

    private void initialFont() {
        FontsOverride.setDefaultFont(this, "DEFAULT", "pelagiad.ttf");
        FontsOverride.setDefaultFont(this, "MONOSPACE", "pelagiad.ttf");
    }
}
Update font in app
Trong trường hợp mà bạn muốn override các font khác nhau trong ứng dụng, mình lấy ví dụ. Trong 1 list các item của 1 recyclerview mình muốn item chẵn sẽ dùng font helvetica (font mặc định trên ios), item lẻ thì dùng font timesnewroman chẳng hạn... Vậy bạn có thể sử dụng đoạn code dưới đây
    public static void updateFontViews(ViewGroup viewGroup, String fontName) {
        final Typeface regular =
                Typeface.createFromAsset(viewGroup.getContext().getAssets(), fontName);
        updateFontOnView(viewGroup, regular);
    }

    private static void updateFontOnView(final ViewGroup viewGroup, final Typeface newTypeface) {
        if (viewGroup == null || viewGroup.getChildCount() <= 0) {
            return;
        }
        for (int i = 0; i < viewGroup.getChildCount(); ++i) {
            View child = viewGroup.getChildAt(i);
            if (child instanceof ViewGroup) {
                // recursive call
                updateFontOnView((ViewGroup) child, newTypeface);
            } else if (child instanceof TextView) {
                // base case
                ((TextView) child).setTypeface(newTypeface);
            }
        }
    }
Mỗi khi muốn update font cho view bạn chỉ cần gọi method này updateFontViews(ViewGroup viewGroup, String fontName) và truyền vào đối số tương ứng là đc:
- viewGroup: view mà bạn muốn đổi font
- fontName: tên file font trong thư mục assets của ứng dụng
Code
Đây là toàn bộ nội dung file FontsOverride của mình, các bạn có thể tham khảo rồi tùy biến
import android.content.Context;
import android.graphics.Typeface;
import android.view.View;
import android.view.ViewGroup;
import android.widget.TextView;
import java.lang.reflect.Field;

public final class FontsOverride {

    // thx stackoverflow.com/a/16883281
    public static void setDefaultFont(Context context, String staticTypefaceFieldName,
            String fontAssetName) {
        final Typeface regular = Typeface.createFromAsset(context.getAssets(), fontAssetName);
        replaceFont(staticTypefaceFieldName, regular);
    }

    private static void replaceFont(String staticTypefaceFieldName, final Typeface newTypeface) {
        try {
            final Field staticField = Typeface.class.getDeclaredField(staticTypefaceFieldName);
            staticField.setAccessible(true);
            staticField.set(null, newTypeface);
        } catch (NoSuchFieldException e) {
            e.printStackTrace();
        } catch (IllegalAccessException e) {
            e.printStackTrace();
        }
    }

    public static void updateFontViews(ViewGroup viewGroup, String fontName) {
        final Typeface regular =
                Typeface.createFromAsset(viewGroup.getContext().getAssets(), fontName);
        updateFontOnView(viewGroup, regular);
    }

    private static void updateFontOnView(final ViewGroup viewGroup, final Typeface newTypeface) {
        if (viewGroup == null || viewGroup.getChildCount() <= 0) {
            return;
        }
        for (int i = 0; i < viewGroup.getChildCount(); ++i) {
            View child = viewGroup.getChildAt(i);
            if (child instanceof ViewGroup) {
                // recursive call
                updateFontOnView((ViewGroup) child, newTypeface);
            } else if (child instanceof TextView) {
                // base case
                ((TextView) child).setTypeface(newTypeface);
            }
        }
    }
}
Demo

Rất mong bài viết này sẽ giúp ích được các bạn. Hẹn gặp lại các bạn trong bài chia sẻ kế tiếp ^^
All rights reserved