Tìm hiểu về Laravel 5 Shopping Cart trong PHP
Bài đăng này đã không được cập nhật trong 7 năm
Đối với trang web thương mại điện tự bất kỳ nào thì việc xây dựng giỏ hàng là việc khá quan trọng, bạn nghĩ làm sao để tối ưu và nhanh chóng nhất không ạ. Không để mọi người lâu nữa, bây giờ mình sẽ giới thiệu cho mọi người một thư viện khá phổ biến hiện nay, giúp chúng ta xây dựng nhanh chóng một giỏ hàng với đẩy đủ các chức năng cơ bản của giỏ hàng, thêm, sửa, xóa, sửa các sản phẩm của giỏ hàng được lưu dưới dạng mảng và lưu trong session, với thư viện Shopping Cart mọi việc trở nên khá dễ dàng. Nào chúng ta bắt đầu đến những việc bắt đầu vào việc tìm hiểu và cài đặt thư viện này luôn nhé, không để các bạn phải chờ lâu nữa ạ !!
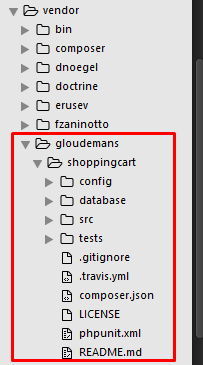
Cài đặt Shopping Cart.
Chúng ta cài package sử dụng composer như sau :
composer require gloudemans/shoppingcart
 Bây giờ chúng ta tiếp tục configuring cho thư viện này nhé, đơn giản thôi bạn chỉ đơn giản làm theo các bước sau nhé
1. Mở file trong thư mục có đường dẫn sau config/app.php
2. Thêm vào mảng providers dòng sau : Gloudemans\Shoppingcart\ShoppingcartServiceProvider::class,
'providers' => [

/*
* Laravel Framework Service Providers...
*/
......................................
App\Providers\EventServiceProvider::class,
App\Providers\RouteServiceProvider::class,
Gloudemans\Shoppingcart\ShoppingcartServiceProvider::class
],
3. Thêm vào mảng aliases dòng sau: Cart' => Gloudemans\Shoppingcart\Facades\Cart::class,
'aliases' => [
......................................
'URL' => Illuminate\Support\Facades\URL::class,
'Validator' => Illuminate\Support\Facades\Validator::class,
'View' => Illuminate\Support\Facades\View::class,
'Cart' => Gloudemans\Shoppingcart\Facades\Cart::class,
],
Usage
Adding items to the shopping cart
Cart::add()
Cú pháp
Cart::add('293ad', 'Product 1', 1, 9.99)
Bây giờ chúng ta sẽ cùng demo một chút nhé
Step 1: Xây dựng route
- Mở file trong thư mục có đường dẫn sau app/Http/web.php
- Thêm vào flie web.php
Route::post('/cart', 'Front@cart');
Step 2: Xây dựng form products.blade.php
Bây giờ chúng ta sẽ bắt đầu xây dựng blade form để khách hàng add thêm sản phẩm vào giỏ hàng.
1. Thay đổi nội dung trong file products.balde.php
@extends('layouts.layout')
@section('content')
<section id="cart_items">
    <div class="container">
        <div class="breadcrumbs">
            <ol class="breadcrumb">
                <li><a href="#">Home</a></li>
                <li class="active">Shopping Cart</li>
            </ol>
        </div>
        <div class="table-responsive cart_info">
            @if(count($cart))
            <table class="table table-condensed">
                <thead>
                    <tr class="cart_menu">
                        <td class="image">Item</td>
                        <td class="description"></td>
                        <td class="price">Price</td>
                        <td class="quantity">Quantity</td>
                        <td class="total">Total</td>
                        <td></td>
                    </tr>
                </thead>
                <tbody>
                    @foreach($cart as $item)
                    <tr>
                        <td class="cart_product">
                            <a href=""><img src="images/cart/one.png" alt=""></a>
                        </td>
                        <td class="cart_description">
                            <h4><a href="">{{$item->name}}</a></h4>
                            <p>Web ID: {{$item->id}}</p>
                        </td>
                        <td class="cart_price">
                            <p>${{$item->price}}</p>
                        </td>
                        <td class="cart_quantity">
                            <div class="cart_quantity_button">
                                <a class="cart_quantity_up" href=""> + </a>
                                <input class="cart_quantity_input" type="text" name="quantity" value="{{$item->qty}}" autocomplete="off" size="2">
                                <a class="cart_quantity_down" href=""> - </a>
                            </div>
                        </td>
                        <td class="cart_total">
                            <p class="cart_total_price">${{$item->subtotal}}</p>
                        </td>
                        <td class="cart_delete">
                            <a class="cart_quantity_delete" href=""><i class="fa fa-times"></i></a>
                        </td>
                    </tr>
                    @endforeach
                    @else
                <p>You have no items in the shopping cart</p>
                @endif
                </tbody>
            </table>
        </div>
    </div>
</section> <!--/#cart_items-->
@endsection
Step 3: Thay đổi phương thức cart trong controller
1. Mở file trong thư mục có đường dẫn sau app/Http/Controllers/Front.php
2. Import thư viện the Request, Redirect and Cart namespaces
use Illuminate\Support\Facades\Request;
use Illuminate\Support\Facades\Redirect;
use Cart;
public function cart() {
if (Request::isMethod('post')) {
$product_id = Request::get('product_id');
$product = Product::find($product_id);
Cart::add(array('id' => $product_id, 'name' => $product->name, 'qty' => 1, 'price' => $product->price));
}

$cart = Cart::content();

return view('cart', array('cart' => $cart, 'title' => 'Welcome', 'description' => '', 'page' => 'home'));
}
Update các sản phẩm trong giỏ hàng
Cập nhật được một mặt hàng bất kỳ trong giỏ hàng bạn cần lấy được id của sản phẩm đó, tiếp theo sử dụng phương thức update() được hỗ trợ sẵn để cập nhật giỏ hàng của mình ** Cú pháp **
Cart::update($rowId, 3); // update số lượng của sản phẩm trong giỏ hàng
Ta update lại trong file resources/views/cart.blade.php
<a class="cart_quantity_up" href='{{url("cart?product_id=$item->id&increment=1")}}'> + </a>
<a class="cart_quantity_down" href='{{url("cart?product_id=$item->id&decrease=1")}}'> - </a>
Update lại hàm trong controller
  public function cart() {
    thêm sản phẩm mới vào giỏ hàng
    if (Request::isMethod('post')) {
        $product_id = Request::get('product_id');
        $product = Product::find($product_id);
        Cart::add(array('id' => $product_id, 'name' => $product->name, 'qty' => 1, 'price' => $product->price));
    }
    if (Request::get('product_id') && (Request::get('increment')) == 1) {
        $rowId = Cart::search(array('id' => Request::get('product_id')));
        $item = Cart::get($rowId[0]);

        Cart::update($rowId[0], $item->qty + 1);
    }
    if (Request::get('product_id') && (Request::get('decrease')) == 1) {
        $rowId = Cart::search(array('id' => Request::get('product_id')));
        $item = Cart::get($rowId[0]);

        Cart::update($rowId[0], $item->qty - 1);
    }

    $cart = Cart::content();

    return view('cart', array('cart' => $cart, 'title' => 'Welcome', 'description' => '', 'page' => 'home'));
}
Xóa sản phẩm trong giỏ hàng
 $rowId = Cart::search(array('id' => Request::get('product_id')));
 Cart::remove($rowId[0]);
Xóa toàn bộ sản phẩm trong giỏ hàng
Cú pháp
Cart::destroy();
Tổng kết
Trong bài hướng dẫn này, mình đã chia sẻ cách sử dụng package shopping cart cùng các phương thức của nó, cùng demo xây dựng một giỏ hàng như trên, hy vọng bào viết này có thể giúp ích cho các bạn. Từ tất cả phần chia sẻ trên mình mong rằng các bạn có thể xây dựng được một trang web thương mại điện tử một cách dễ dàng và thuận tiện nhất, hi vọng bài viết này có thể giúp ích được cho mọi người nhé, cám ơn đã đọc bài viết của mình.
All rights reserved