Tìm hiểu 3 Modules Built-in trong Nodejs: HTTP - URL - File System
Bài đăng này đã không được cập nhật trong 2 năm
Chào các bạn, gần đây mình ít cập nhật bài viết trên Viblo, tuy nhiên mình vẫn làm content trên kênh YouTube đều đặn, nếu bạn nào quan tâm tới nhiều nội dung thú vị về lập trình, có thể thử qua kênh của mình để xem và ủng hộ mình bằng cách tặng mình một lượt đăng ký kênh nhé ^^ Cảm ơn các bạn!
Link YouTube của mình: https://www.youtube.com/@trungquandev

Xin chào tất cả các bạn, ở bài trước chúng ta đã đi tìm hiểu về khái niệm Module trong Nodejs, hôm nay chúng ta sẽ tiếp tục tìm hiểu tới 3 module tích hợp sẵn trong Nodejs là http, url và fs (file system) nhé.
Những nội dung có trong bài này:
1. HTTP module.
2. URL module.
3. FS (file system) module.
4. Kết hợp cả 3 module viết một ứng dụng đơn giản.
– Bài viết cũng đồng thời được Post trên trang blog cá nhân: https://trungquandev.com/series-lap-trinh-nodejs/
1. HTTP module
Ở những bài trước, các bạn cũng có thể thấy mình hay dùng module http này, hôm nay mình mới cho nó một chỗ đứng cụ thể trong bài viết =))
- http có thể hiểu đơn giản là module cho phép Nodejs truyền dữ liệu qua giao thức http, cụ thể hơn xíu, chức năng của nó là tạo một máy chủ HTTP lắng nghe các cổng kết nối trên đó và trả lời lại cho máy khách (client).
Phương thức tạo server của http:
*createServer(): tạo một máy chủ HTTP
/**
 * Trung Quân
 * https://cv.trungquandev.com
 * July 22, 2018
 */
// server.js

const http = require('http');

const server = http.createServer((req, res) => {
    res.write('<h1> Hi, thank you for visit https://trungquandev.com </h1><hr>');
    res.end();
});

server.listen(8017, 'localhost');

//end
Trong ví dụ trên mình nạp module http, sau đó khởi tạo server bằng phương thức http.createServer(), cuối cùng là lắng nghe cái server này trên cổng 8017.
Tương tự như ở bài Hello World, vào terminal của ứng dụng, chạy lệnh node server.js và ra trình duyệt truy cập vào http://localhost:8017 kết quả trả về sẽ là dòng chữ:
"Hi, thank you for visit https://trungquandev.com".
Trong method createServer() mình có truyền vào 2 tham số:
-
req: viết tắt của request, là biến chứa các thông tin mà Client truyền lên Server.
-
res: viết tắt của response, là biến chứa các thông tin mà Server trả về cho Client.
Một số phương thức bên trong request (req) và response (res):
*res.writeHead():
Sử dụng phương thức này để định nghĩa kiểu dữ liệu trả về. Mình vẫn sử dụng code ví dụ như ở trên, thêm 1 dòng writeHead() vào để định nghĩa kiểu dữ liệu trả về là html.
/**
 * Trung Quân
 * https://cv.trungquandev.com
 * July 22, 2018
 */
// server.js

const http = require('http');

const server = http.createServer((req, res) => {
    res.writeHead(200, {'Content-Type': 'text/html'});
    res.write('<h1> Hi, thank you for visit https://trungquandev.com </h1><hr>');
    res.end();
});

server.listen(8017, 'localhost');

//end
*res.write()
Thiết lập nội dung mà server muốn trả về cho client, có thể thêm nhiều dòng res.write() liên tiếp nhau được. Ví dụ:
/**
 * Trung Quân
 * https://cv.trungquandev.com
 * July 22, 2018
 */
// server.js

const http = require('http');

const server = http.createServer((req, res) => {
    res.writeHead(200, {'Content-Type': 'text/html'});

    res.write('<html>');
        res.write('<head>');
            res.write('<title>Test module HTTP - TrungQuanDev</title>');
        res.write('</head>');
        res.write('<body>');
            res.write('<h1> Hi, thank you for visit https://trungquandev.com </h1><hr>');
        res.write('</body>');
    res.write('</html>');

    res.end();
});

server.listen(8017, 'localhost');

//end
*req.url()
Bên trong đối tượng request (req) từ client truyền lên có một thuộc tính là url, thuộc tính này chứa các phần tử phía sau tên miền của bạn, ví dụ:
/**
 * Trung Quân
 * https://cv.trungquandev.com
 * July 22, 2018
 */
// server.js

const http = require('http');

const server = http.createServer((req, res) => {
    res.writeHead(200, {'Content-Type': 'text/html'});

    res.write(req.url);

    res.end();
});

server.listen(8017, 'localhost');

//end
Kết quả khi mình truy cập: http://localhost:8017/trungquan?search=abc

2. URL module
Chức năng của module này là chia nhỏ địa chỉ trang web thành các phần có thể đọc được, phục vụ cho nhiều tác vụ cần lấy dữ liệu từ url.
Giả sử mình truyền lên server một url như thế này:
http://localhost:8017/search.html?animal=cat&color=black
Bây giờ từ server muốn lấy ra 2 giá trị là cat và black, mình sẽ code như sau:
/**
 * Trung Quân
 * https://cv.trungquandev.com
 * July 22, 2018
 */
// server.js

const http = require('http');
const url = require('url');

const server = http.createServer((req, res) => {
    res.writeHead(200, {'Content-Type': 'text/html'});

    let urlData = url.parse(req.url, true);
    console.log(urlData);

    res.write(`param animal: ${ urlData.query.animal } <br>`);
    res.write(`param color: ${ urlData.query.color } <br>`);

    res.end();
});

server.listen(8017, 'localhost');

//end
Giải thích một chút, ở trên mình nạp module url sau đó dùng phương thức url.parse() để phân tích chuỗi req.url truyền lên, rồi trả về một đối tượng URL, log cái đối tượng này ra thì sẽ được một đoạn dữ liệu như hình dưới:
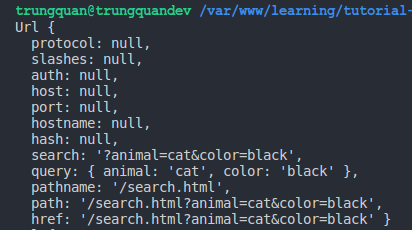
Các bạn để ý bên trong đối tượng trên có một thuộc tính là query, chúng ta sẽ sử dụng thuộc tính này để lấy ra 2 giá trị cat và black. Kết quả (mình không log ra nữa mà lại trả về cho client hiển thị):

3. FS (file system) module
- fs là viết tắt của file system, module này cho phép chúng ta làm việc với các file ở trên máy tính của mình.
Những trường hợp mà hàng ngày ta hay làm như:
- Tạo file - Đọc file - Cập nhật file - Đổi tên file - Xóa file.
- Tạo file: fs.writeFile()
Trong project mình tạo thêm một thư mục là files để lưu trữ các file mà chuẩn bị mình sẽ tạo bằng code.
Đầu tiên là tạo một file cat.txt đơn giản, lưu tên vài con mèo chẳng hạn, code sẽ trông như sau:
/**
 * Trung Quân
 * https://cv.trungquandev.com
 * July 22, 2018
 */
// server.js

const fs = require('fs');

let fileContent = 'Ragdoll, Scottish fold, British shorthair...';
let filePath = 'files/cats.txt';

fs.writeFile(filePath, fileContent, (err) => {
    if(err) throw err;

    console.log('The file was successfully saved.');
});

//end
Trong đoạn code trên, mình nạp module fs, tạo 2 biến fileContent và filePath để định nghĩa nội dung và đường dẫn của file cần tạo.
Cuối cùng là dùng phương thức fs.writeFile() với 3 tham số truyền vào lần lượt là filePath, fileContent và một callback function.
Phương thức này sẽ ghi dữ liệu vào một tệp, nếu như tệp đó chưa tồn tại thì sẽ tự động tạo mới, còn nếu đã có thì sẽ ghi đè dữ liệu lên. Dữ liệu có thể là chuỗi ký tự (string) hoặc kiểu buffer.
Kết quả sau khi chạy file server.js: node server.js, tệp cat.txt của mình được tạo thành công.

Như mình vừa mới nói, dữ liệu truyền vào hàm writeFile() có thể ở dạng buffer, bây giờ, mình sẽ tạo một tấm ảnh cat.png từ một chuỗi base64 nhé, sửa đoạn code ở trên như sau:
/**
 * Trung Quân
 * https://cv.trungquandev.com
 * July 22, 2018
 */
// server.js

const fs = require('fs');

let base64String = "iVBORw0KGgoAAAANSUhEUgAAACAAAAAgCAYAAABzenr0AAAABHNCSVQICAgIfAhkiAAAAAlwSFlzAAAA3QAAAN0BcFOiBwAAABl0RVh0U29mdHdhcmUAd3d3Lmlua3NjYXBlLm9yZ5vuPBoAAAfOSURBVFiFrZd7UJTXGcZ/Z79v7xd25SYoiwFUEI3iNdSApdYx3hpvCVYn7Qyt1OjEVE3TNEknaZqUTKy2naQ2jRlixrGTi6ZNrSZInIyK0RjABLyBqPFCURABWXbZ6+kfsAvoklt9Znbm7Hmf8z7Pec+Zd88ipURKCWCKd+iqk2MNnwATwvN36gNMSI41fBLv0FUDpsh8eGAyqE8WzXf6y1+eLh02bYeiKIV3SlxRlEKHTdtR/vJ0WTTf6TcZ1CfDMQ29sBiV4W/uvay2d/qp2lZguyvJuNVm0W4UQgi+I4QQwmbRbrwrybi1aluBzW7R8ubey6rFqAwPcyIGNBpYfX8aG/5ygsYWD59vL7Dmj49dZbdo9wshrN9B3Gq3aPfnj49d9fn2AmtKopERiSY2PDgSjaaPp+m/yJlo5I3HJ7L8t5VcuuZm96Zcy9rCtFybWVsrhMjoTawIIUYKIe63mvXPWs36Z4UQC3vnlF5Ohs2srV1bmJa7e1OupbHFQ/riffhckni7boBR9Vbnd6fF8MdV41iw4SiH/p7H71ZmGYZYdc4ntpyqHZZgahuVarNNzUmQqckWQ1KCSQVoanYHLja6PIerrgXjHMYOg05JfG5lpv7RZeniams389Yf4cWVY9FpNbfK3W4A4Ac58Ty6JJ25646QPzGO0t0XxboVIw1FD4xOyhgVH22JClgBGi7etJe+W8fTr53kfJObQ8ev88iidGZNSoh6VFENAGSl2LjQ5MZ0up2jpd8ne6KTAYc3CDJSbfzhsSmsuD+D4qcqONfoZozTNig/asbyqmZWlFRSsjqbiq0zyM5J+Ubi/ZE90kHF2wt48fGprCippLyqOSrvtgqcudTJui21HPjbdDJH2CDGBoryrcTDEAIeXpFFwT1JzPjxf9j1zNTbOAO21d7p56cvVfNccSaZqVYwmUAd9JS+MTLT7fx+/WR+8lI17Z3+wQ1s3tnAuAwrxQtH9JTcYPi/xcMoXpbJ3VmxbN7ZMLgBu1XL67/J6fliNPbU8A7i9ZI8YqwD+0DEgNWizXr+F1nEhRvFHdx9GHEOAy9smIKiKCMGGBBCKM2t3nsWzkjqmVWUO777MBbOSqWj05cX7prhCkwbl2EXQ2y6PgO9qDlzg9yle1iypobrbfJrBUperSHl3p28vacranyIXU9mhj0ATOtvIH1MmqXvuvcz8Mhzx0hx5vHEM39l7s8rqai8Oqj42S87eGX7WUrfeJeG1ruZvOiDqLxxo4aoQHrEgEZDsjPB2Kfar+lU1jYT6A7x/q7deH1QfbJ1UAMfHryCzZxA2e5yztef52R9S1RemtNm1GhIht5GZDHpTDq135mHQpGh3abH5XJxrv4cbncnqcOi93QAZ7KFUKiRhroGtDqVGKs+Kk+v0yg6VdVHKnDT5as5/aWrjxEMRoaP/WwsJxqOUl17CCHamF/gHNTA/AInkk5On6vkcNU+fl08Niqvtu6Gt9sXOBmpAHDmxPmbobAhAoEIeV1RNgtmpnDmXDtzZqSgKD2V8vqCNDW7AUhKMKHXKSiK4HTZYj44cJnMdDsZqdF/hGrq2oLAGQAhpUQIobOZte6O/fP67kFMDD4UXF1+hABHTF85g0FJav4ugiGBogj0Okl9+eKIOYC2Di9SgsWsve0dYB63zev2BGxSSl+4Amvc3YFQVuF+xe0N0OUJIgGdTsFs1JIzJpZ3X5kZSaAoAokkPWUcZouZsxeODhAHKH6qguOnWuny+PH5QwjAbNJiMqp0e4MAa4A/hSuwXK/VTJo7fei67c9MEiaD0tOH7HZcPsnHR5vwdAd4cG5aRKD65HVmPrQPVRGUbZvFxOy4SOydvecxGlQK7knCYtICICW4uwMUrt3vLjvQuCUQCh2XUv5D9L7ZEUJo44cYru37c65DCPjwaDNln7ZQd8lF/tQkipaOYta9wwbssvFaT7MZlmgeMF9e0UjpznoOHmtidFoMs/OGc19+ChJJ/rI9TZ1dvlQppT9yB3oNxAFbVUUsnJzlYN70RGZPS2DShKFobD2P4qc3V5I90sG8AidHjl/jvbeuALB42XBycxLZ8/ElTp5t4/n1kwEIhSRVJ65TdugKez6+zGe1LTIYlO8DK6WU1281cBA4GO8wjMod61iys2SKRqv2Xh6TCUwmjn3RQunOOt7ec55YxUyqpeeWX3TdpDXYReG8NIqWjmbq+IHvRn8gxPyVZa7Dlc3/6vL4LwF5Usr8AQbCEEIoyfHGA9OyHd9754UpQg1fLr0eLBYQgi07TtGwO8iqSdMAeLXqUzIWKKxeMYZbEQiGWLTqI8+hz5oOd7j890kpg/3jtz30pJTB/7Z4Co6datuRu/JgoKbhZk/A64X2dvD5eGBOGnsbzxLSqoS0Knsbz/LAnLRbU1Fz5gYT5v/z5qHKph0dLv/cW8WjVqA/LEb1IZ1Wea3oR6n6XxamieEJxp6AqvJeRTMbX6sH4FdrxrJ49ojIuitXu9i4tcZd+k5d0BeUD3u9gR2DaXylAej5ixXvMDzp8QbW54y2K8tnDVPGj4whJdFIUpwBVJWmGz4uN3fzRX27fOPfF9w1dW1Co4hNbndgo5Sy8yvzf52Bfkb0wIyhsYZlOp3mhx5v0O72BI0AJqPiMeqVdl8g9NHVlu63gANSSu83yfs/vJhTo2p3GXYAAAAASUVORK5CYII=";

let fileContentBuffer = new Buffer(base64String, "base64");
let filePath = 'files/cat.png';

fs.writeFile(filePath, fileContentBuffer, (err) => {
    if(err) throw err;

    console.log('The file was successfully saved.');
});

//end
Cũng chạy tương tự và tạo thành công:
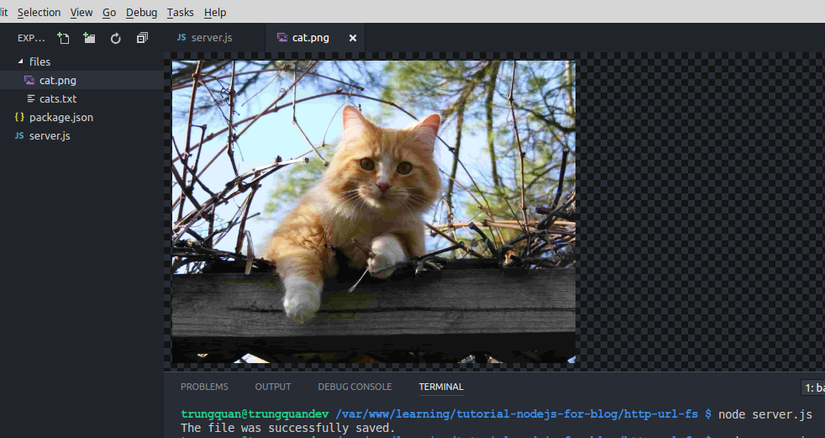
Chú ý là dữ liệu chuỗi base64 mà mình để trong code trên nếu các bạn copy vào test thử thì sẽ tạo ra một file có dung lượng 2kb hình con mèo nhỏ xíu để demo thôi nhé, nếu chọn ảnh có dung lượng cao thì chuỗi base64 tạo ra dài quá, mình không cho vào code ví dụ được.
Còn ảnh trên kia là ảnh xịn, mình để ví dụ trong bài cho đẹp =))
- Đọc file: fs.readFile()
Bây giờ, trong thư mục files của dự án, mình tạo thêm 1 file là cat.html
<!--
* Trung Quân
* https://cv.trungquandev.com
* July 22, 2018
*/
// files/cat.html
-->
<!DOCTYPE html>
<html lang="en">
<head>
    <meta charset="UTF-8">
    <meta name="viewport" content="width=device-width, initial-scale=1.0">
    <meta http-equiv="X-UA-Compatible" content="ie=edge">
    <title>Cats</title>
</head>
<body>
    This is sample content. Thank you for reading!
    <p>
        <span style="font-weight:bold;">Trung Quân:</span>
        <a href="https://cv.trungquandev.com/" target="_blank">https://cv.trungquandev.com/</a>
    </p>
</body>
</html>
Và ở file server.js, mình sửa lại code để đọc file cat.html sau đó trả dữ liệu về trình duyệt:
/**
 * Trung Quân
 * https://cv.trungquandev.com
 * July 22, 2018
 */
// server.js

const http = require('http');
const fs = require('fs');

const server = http.createServer((req, res) => {
    let filePath = 'files/cat.html';
    fs.readFile(filePath, (err, data) => {
        if(err) throw err;

        res.writeHead(200, {'Content-Type': 'text/html'});
        res.write(data);

        res.end();
    });
});

server.listen(8017, 'localhost');

//end
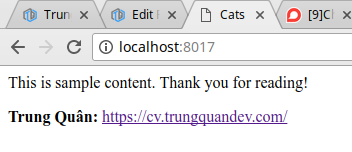
Kết quả sau khi chạy ứng dụng:
- Cập Nhật file: fs.appendFile()
Như ở phần tạo file bằng phương thức fs.witeFile() ở trên, chúng ta có thể dùng chính nó để làm mới lại toàn bộ nội dung của một file.
Mình sẽ giới thiệu thêm một phương thức nữa là fs.appendFile(), phương thức này sử dụng khi chúng ta muốn thêm dữ liệu vào cuối file.
Ví dụ mình muốn thêm một con mèo nữa là "Korat cat" vào file cats.txt
/**
 * Trung Quân
 * https://cv.trungquandev.com
 * July 22, 2018
 */
// server.js

const http = require('http');
const fs = require('fs');

let content = 'Korat cat';
let filePath = 'files/cat.txt';

fs.appendFile(filePath, content, (err) => {
    if(err) throw err;

    console.log('The file was successfully updated.');
});

//end
Kết quả sau khi chạy lại code:

- Đổi tên file: fs.rename()
Giờ mình lại muốn đổi cái tên "cats.txt" thành "những con mèo.txt" 
/**
 * Trung Quân
 * https://cv.trungquandev.com
 * July 22, 2018
 */
// server.js

const http = require('http');
const fs = require('fs');

fs.rename('files/cats.txt', 'files/những con mèo.txt', (err) => {
    if(err) throw err;

    console.log('The file was successfully renamed.');
});

//end
Kết quả sau khi chạy lại code:

- Xóa file: fs.unlink()
Tiếc quá, tạo mãi mới được, bây giờ lại phải xóa đi :v, mình sẽ xóa file "những con mèo.txt"
/**
 * Trung Quân
 * https://cv.trungquandev.com
 * July 22, 2018
 */
// server.js

const http = require('http');
const fs = require('fs');

fs.unlink('files/những con mèo.txt', (err) => {
    if(err) throw err;

    console.log('The file was successfully deleted.');
});

//end
Kết quả xóa file thì chắc thôi mình không show ra nữa =))
4. Kết hợp cả 3 module viết một ứng dụng web đơn giản
Sau khi đã tìm hiểu từng module một, bây giờ mình sẽ kết hợp cả 3 lại để tạo một ứng dụng web đơn giản như thế này.
Trong thư mục của dự án tạo một thư mục mới tên là views, và tạo 3 file bên trong nó: index.html, cat.html, dog.html
<!--
* Trung Quân
* https://cv.trungquandev.com
* July 22, 2018
*/
// views/index.html
-->
<!DOCTYPE html>
<html lang="en">
<head>
<meta charset="UTF-8">
<meta name="viewport" content="width=device-width, initial-scale=1.0">
<meta http-equiv="X-UA-Compatible" content="ie=edge">
<title>Document</title>
</head>
<body>
<a href="http://localhost:8017/cat.html">Cat page</a>
<a href="http://localhost:8017/dog.html">Dog page</a>
</body>
</html>
<!--
* Trung Quân
* https://cv.trungquandev.com
* July 22, 2018
*/
// views/cat.html
-->
<!DOCTYPE html>
<html lang="en">
<head>
    <meta charset="UTF-8">
    <meta name="viewport" content="width=device-width, initial-scale=1.0">
    <meta http-equiv="X-UA-Compatible" content="ie=edge">
    <title>Cat page</title>
</head>
<body>
    <h3>This is cat's page!</h3>
</body>
</html>
<!--
* Trung Quân
* https://cv.trungquandev.com
* July 22, 2018
*/
// views/dog.html
-->
<!DOCTYPE html>
<html lang="en">
<head>
    <meta charset="UTF-8">
    <meta name="viewport" content="width=device-width, initial-scale=1.0">
    <meta http-equiv="X-UA-Compatible" content="ie=edge">
    <title>Dog page</title>
</head>
<body>
    <h3>This is dog's page!</h3>
</body>
</html>
Và chỉnh sửa Code trong file server.js:
/**
 * Trung Quân
 * https://cv.trungquandev.com
 * July 22, 2018
 */
// server.js

const http = require('http');
const url = require('url');
const fs = require('fs');

const server = http.createServer((req, res) => {
    let urlData = url.parse(req.url, true);
    let fileName = './views' + urlData.pathname;

    if(urlData.pathname === '/') {
        fileName = './views/index.html';
    }

    fs.readFile(fileName, (err, data) => {
        if(err) {
            console.log(err);
            res.writeHead(404, {'Content-Type': 'text/html'});
            res.write('404 Not Found');

            return res.end();
        }
        res.writeHead(200, {'Content-Type': 'text/html'});
        res.write(data);

        return res.end();
    });
});

server.listen(8017, 'localhost');

//end
Chạy ứng dụng lên, ra trình duyệt test thử các url:
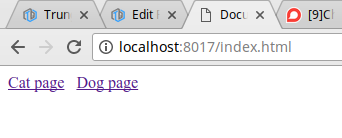
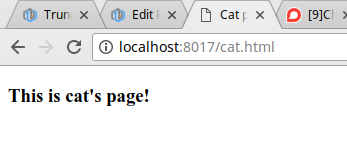
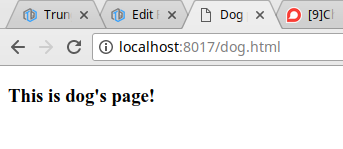
Trên đây là chút kiến thức mình tìm hiểu được về 3 module http - url - fs trong Nodejs, khi xem bài viết thấy có chỗ nào sai sót hy vọng được các bạn comment góp ý.
Cảm ơn các bạn đã dành chút thời gian xem bài viết của mình và hẹn gặp lại các bạn ở những bài viết tiếp theo!
All rights reserved