Thử làm app Flutter cho nhận diện chứng minh thư
Bài đăng này đã không được cập nhật trong 5 năm
Lời mở đầu
Chao xìn, chả là tôi với đồng bọn có ý tưởng làm 1 poc về nhận diện chữ trên chứng minh thư qua mobile như dự án eKYC của VNPT. Ngặt nỗi trong team chả ai biết làm app apk các kiểu thế nên tôi đành xung phong đi làm. Sau 2 tuần tìm hiểu cũng làm được 1 cái app, tuy rằng fail so với app của VNPT nhưng mà có vẫn hơn không. Đành chịu 
Hôm nay viết bài này một phần vì tôi muốn chia sẻ kiến thức, một phần là do không có đề tài nào khác, cảm ơn các bạn ghé thăm.
P/S: Bài viết sẽ không đề cập tới phần OCR !!!
Flutter
Flutter là gì
Là 1 SDK dành cho mobile và là 1 bộ SDK đa nền tảng cho cả IOS và Android. Giao diện và chức năng của flutter nhanh hơn, mượt hơn so với các framework khác.
Flutter sử dụng ngôn ngữ Dart, nổi bật với việc fast development (không cần build lại apk, reload chưa tới 1s), flexible UI(design component theo style Material và Cupertino), native performance (đa nền tảng).
Install via Linux
Install by using snap
Nếu máy bạn có snap, bạn có thể dùng luôn cmd sau: sudo snap install flutter --classic
Install manually
Còn không thì tự cài bằng tay:
- Clone từ git repo:
git clone https://github.com/flutter/flutter.git - Thêm flutter vào biến PATH để dùng CLI:
export PATH="$PATH:pwd/flutter/bin"
Post installing
Sau khi install flutter về máy, chúng ta làm bước kiểm tra: components, certificates, emulators, ... bằng cmd: flutter doctor -v
Để thiết kế cho app Android, tôi cần làm thêm bước cài android studio. Nếu bạn có một điện thoại Android thì không vấn đề gì, lấy ra làm thiết bị test ok, còn không thì phải cài emulator thôi.
Các bước cài emulator:
- Bật VM acceleration trên máy (https://developer.android.com/studio/run/emulator-acceleration)
- Chạy Android Studio -> Configure -> AVD Manager -> Create Virtual Device, mặc định device là Google Pixel 2 -> nên chọn API Level >= 22 (có thể 26 cho Android 8 hoặc 28 cho Android 9).
Ở đây tôi dùng Visual Studio Code để code nên sẽ hướng dẫn setup trên VS Code
- Chạy VS Code
- Vào tab View -> Command Palette hoặc Control + Shift + P
- Điền install -> chọn Extensions: Install Extensions
- Điền flutter -> chọn Flutter và install thôi
- Check xem ok chưa: điền doctor -> Flutter: Run Flutter Doctor
Tạo app:
- Lặp lại bước 1, 2 bên trên
- Điền flutter -> chọn Flutter: New Project, tên app đặt sao cũng được, chờ khởi tạo sẽ xuất hiện file
main.dartnhư sau
import 'package:flutter/material.dart';
void main() => runApp(MyApp());
class MyApp extends StatelessWidget {
Widget build(BuildContext context) {
return MaterialApp(
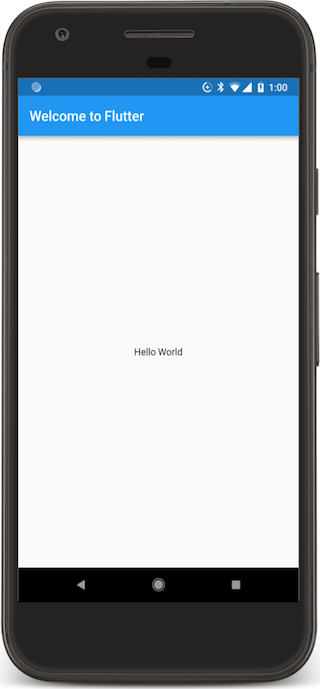
title: 'Welcome to Flutter',
home: Scaffold(
appBar: AppBar(
title: Text('Welcome to Flutter'),
),
body: Center(
child: Text('Hello World'),
),
),
);
}
}
Xong chúng ta đã khởi tạo được 1 project flutter, tiếp theo tôi sẽ giải thích một số khái niệm quan trọng trong flutter .
Widgets
Đầu tiên chúng ta cần phải làm rõ khái niệm Widget trong Flutter bởi mọi component của nó đều xoay quanh khái niệm Widget này. Lấy cảm hứng từ React, Widgets về cơ bản là những khối dùng để xây dựng giao diện app trên điện thoại và có thể thay đổi dựa trên trạng thái. Widgets có thể là container, button, text, row, column, ... 1 chức năng nào đó trong app của bạn.
Có 2 loại Widgets: Stateless và Stateful.
- Stateless: không mang trạng thái, khi đã được tạo ra thì sẽ không bị thay đổi, tiện cho việc code các chức năng độc lập trong app
- Stateful: đồng bộ với các Widget khác, có thể thay đổi xuyên suốt vòng đời của nó, ví dụ: chức năng đồng hồ nội bộ là một chức năng động, có 1 hay nhiều widget phụ thuộc vào chức năng này nên trạng thái của nó phải luôn thay đổi.
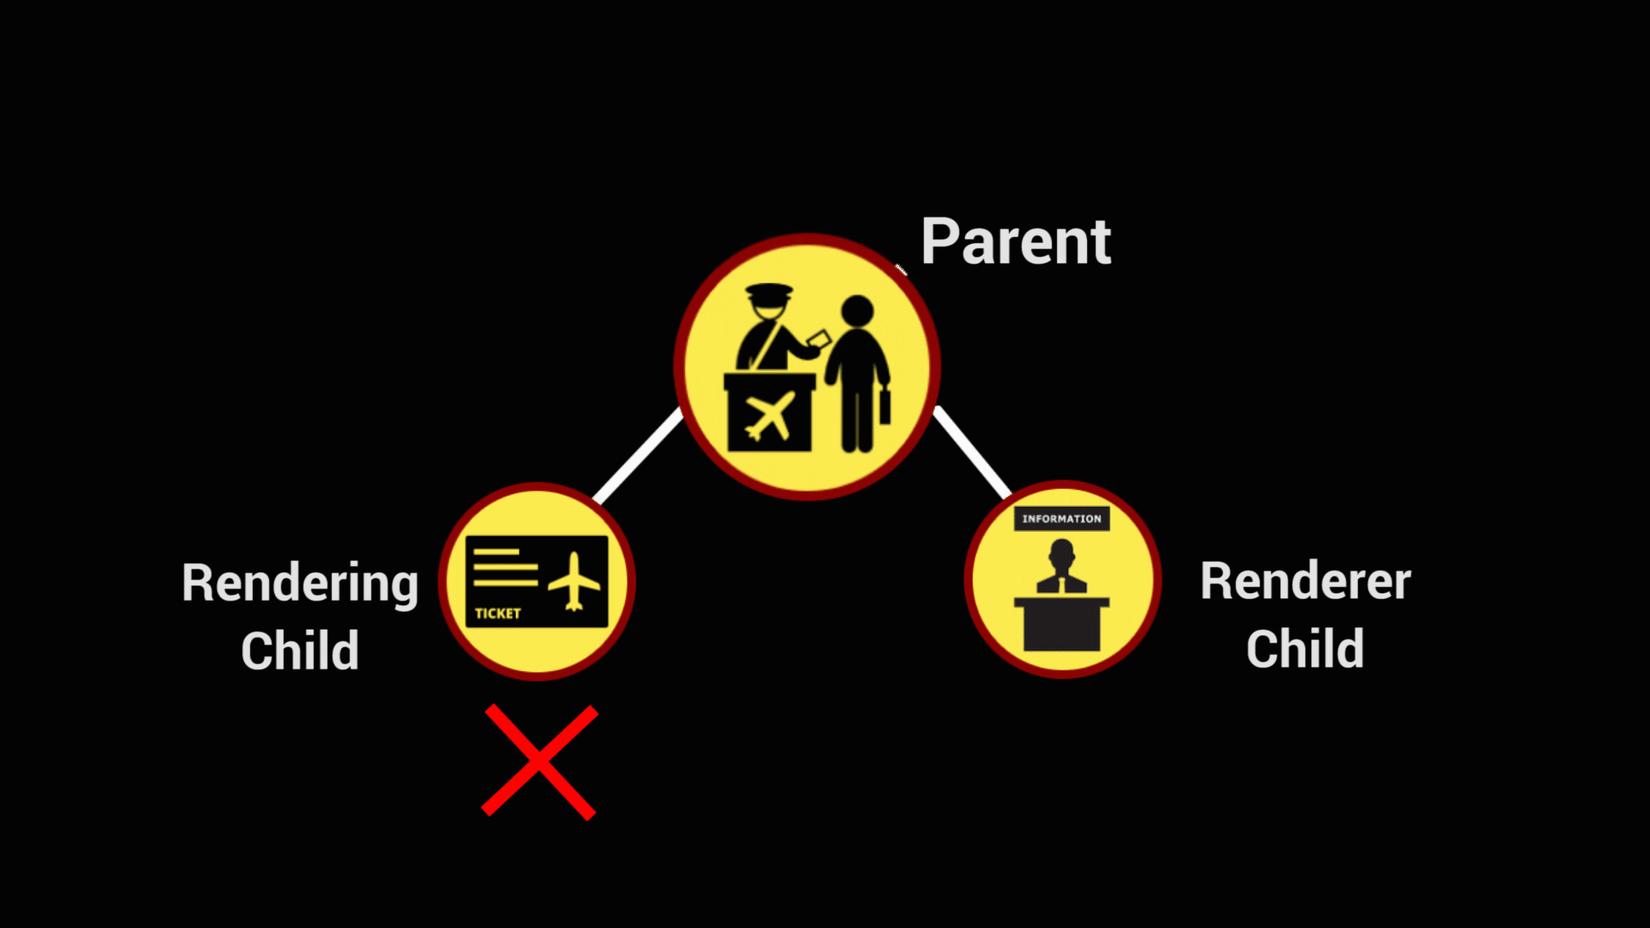
Cấu trúc layout của Flutter
Cấu trúc của Flutter đơn giản là một sơ đồ cây gồm nhiều node, node cha chứa node con, các node con thì không có liên hệ với nhau như sơ đồ bên dưới.

Thôi khái niệm đủ rồi, tôi sẽ vọc code và giải thích cho các bạn dễ hiểu, có lẽ có sai sót xin hãy bỏ qua do tôi tìm hiểu chưa sâu.
ID Card OCR UI
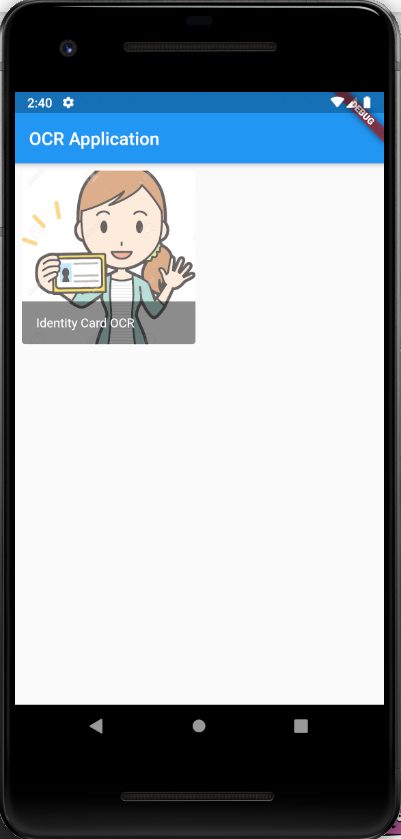
Dưới đây là một số hình ảnh mình chụp từ màn hình emulator, bởi vì không phải dân chuyên mà chỉ là vọc vạch làm poc nên các bạn thông cảm.
Home page
import 'package:flutter/material.dart';
import 'package:ocr/front_idcard.dart';
void main() {
runApp(GridListDemo());
}
class GridListDemo extends StatelessWidget {
const GridListDemo({Key key}) : super(key: key);
List<_Photo> _photos(BuildContext context) {
return [
_Photo(assetName: 'images/id_card2.jpg', title: 'Identity Card OCR'),
];
}
Widget build(BuildContext context) {
return MaterialApp(
home: Scaffold(
appBar: AppBar(
automaticallyImplyLeading: false,
title: Text("OCR Application"),
),
body: GridView.count(
crossAxisCount: 2,
mainAxisSpacing: 8,
crossAxisSpacing: 8,
padding: const EdgeInsets.all(8),
childAspectRatio: 1,
children: _photos(context).map<Widget>((photo) {
return _GridDemoPhotoItem(
photo: photo,
);
}).toList(),
),
),
);
}
}
class _Photo {
_Photo({
this.assetName,
this.title,
});
final String assetName;
final String title;
}
/// Allow the text size to shrink to fit in the space
class _GridTitleText extends StatelessWidget {
const _GridTitleText(this.text);
final String text;
Widget build(BuildContext context) {
return FittedBox(
fit: BoxFit.scaleDown,
alignment: AlignmentDirectional.centerStart,
child: Text(text),
);
}
}
class _GridDemoPhotoItem extends StatelessWidget {
_GridDemoPhotoItem({
Key key,
this.photo,
}) : super(key: key);
final _Photo photo;
Widget build(BuildContext context) {
final Widget image = Material(
shape: RoundedRectangleBorder(borderRadius: BorderRadius.circular(4)),
clipBehavior: Clip.antiAlias,
child: Image.asset(
photo.assetName,
fit: BoxFit.cover,
),
);
return GridTile(
footer: Material(
color: Colors.transparent,
shape: const RoundedRectangleBorder(
borderRadius: BorderRadius.vertical(bottom: Radius.circular(4)),
),
clipBehavior: Clip.antiAlias,
child: GridTileBar(
backgroundColor: Colors.black45,
title: _GridTitleText(photo.title),
),
),
child: new InkResponse(
child: image,
onTap: () {
Navigator.push(context,
MaterialPageRoute(builder: (context) => FrontCameraOCR()));
},
),
);
}
}
Ok, bên trên là code ngôn ngữ dart cho home page của app, giờ chúng ta bóc tách từng phần một nhé.
Đầu tiên, tôi add ảnh vào folder project ocr/images/{my_image}.
Trong file pubspec.yaml, ở mục flutter, thêm đường dẫn ảnh:
flutter:

  # The following line ensures that the Material Icons font is
  # included with your application, so that you can use the icons in
  # the material Icons class.
  uses-material-design: true

  # To add assets to your application, add an assets section, like this:
  assets:
    - images/id_card2.jpg
  #   - images/a_dot_ham.jpeg
Trong file main.dart, tôi tạo 1 class GridListDemo aka Stateless Widget, define 1 list _photos, mỗi phần tử trong list là 1 ảnh có các trường là tên và đường dẫn ảnh.
List<_Photo> _photos(BuildContext context) {
    return [
      _Photo(assetName: 'images/id_card2.jpg', title: 'Identity Card OCR'),
    ];
  }
class _Photo {
  _Photo({
    this.assetName,
    this.title,
  });

  final String assetName;
  final String title;
}
Trong class GridListDemo call function build, hàm này trả về MaterialApp - đây là 1 Widget có chứa các tiện ích của Material Design widget. Scaffold là 1 Material Design widget có nhiệm vụ đảm bảo các widgets con không bị overlap.
Thanh màu xanh bên trên là appBar có title là 1 Text widget, param automaticallyImplyLeading: false để không hiện lên nút điều hướng.
Body là khu vực phía dưới thanh appBar có dạng GridView ( đây là kiểu view gallery trên web mà bạn thường gặp). Các attributes crossAxisCount, mainAxisSpacing, crossAxisSpacing, padding, childAspectRatio quyết định số lượng box view và khoảng cách giữa các box view trên màn hình.
Attribute children và child đều cho phép khai báo widget con nhưng child chỉ cho phép 1 widget còn children cho phép list các widget.
Widget build(BuildContext context) {
return MaterialApp(
home: Scaffold(
appBar: AppBar(
automaticallyImplyLeading: false,
title: Text("OCR Application"),
),
body: GridView.count(
crossAxisCount: 2,
mainAxisSpacing: 8,
crossAxisSpacing: 8,
padding: const EdgeInsets.all(8),
childAspectRatio: 1,
children: _photos(context).map<Widget>((photo) {
return _GridDemoPhotoItem(
photo: photo,
);
}).toList(),
),
),
);
}
}
Khai báo class _GridDemoPhotoItem là 1 stateless widget, mỗi instance của class này tương ứng 1 box view.
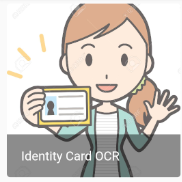
Đầu tiên chúng ta cần chỉnh sửa ảnh một tí: điều chỉnh 4 góc của ảnh từ nhọn thành cong bằng attribute shape: RoundedRectangleBorder(), giới hạn vùng pixel của ảnh bằng attribute clipBehavior, hiển thị ảnh bằng cách thêm 1 widget Image có hàm asset với param là đường dẫn ảnh và kích thước ảnh fit vào trong box view.
Tiếp đấy tôi mới điều chỉnh trạng thái của một box view. Như box view ở trên không chỉ chứa ảnh mà còn thêm một thanh thông tin. Khởi tạo box view bằng cách return GridTile widget. Mặc định kích thước của GridTile widget đã được điều chỉnh bởi GridView widget nên tôi không cần điều chỉnh thêm gì nữa, giờ chỉ việc thêm thanh thông tin và setup một sự kiện. Cụ thể như sau, thanh thông tin kia có vị trí là dưới đáy box view nên các config của nó cần nằm trong attribute footer. 1 thanh thông tin thì cần có những gì: màu sắc trong suốt để không đè lên ảnh, 4 góc làm mịn để fit với box view, khai báo 1 widget con GridTileBar để thêm thêm màu sắc vào background ( bởi vì để transparent nên cần đổ thêm màu ) và title cho thanh thông tin này.
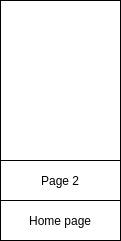
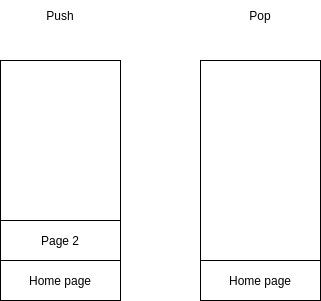
Để chuyển từ trang này sang trang khác tôi thêm sự kiện onTap ( tức là mỗi lần ấn vào thì sẽ chuyển trang ). Class Navigator có cơ chế là đẩy page 2 vào 1 stack, stack trước đó đã có home page.
class _GridDemoPhotoItem extends StatelessWidget {
_GridDemoPhotoItem({
Key key,
this.photo,
}) : super(key: key);
final _Photo photo;
Widget build(BuildContext context) {
final Widget image = Material(
shape: RoundedRectangleBorder(borderRadius: BorderRadius.circular(4)),
clipBehavior: Clip.antiAlias,
child: Image.asset(
photo.assetName,
fit: BoxFit.cover,
),
);
return GridTile(
footer: Material(
color: Colors.transparent,
shape: const RoundedRectangleBorder(
borderRadius: BorderRadius.vertical(bottom: Radius.circular(4)),
),
clipBehavior: Clip.antiAlias,
child: GridTileBar(
backgroundColor: Colors.black45,
title: _GridTitleText(photo.title),
),
),
child: new InkResponse(
child: image,
onTap: () {
Navigator.push(context,
MaterialPageRoute(builder: (context) => FrontCameraOCR()));
},
),
);
}
}
Tôi khai báo class _GridTitleText để căn chỉnh vị trí title của thanh footer.
class _GridTitleText extends StatelessWidget {
const _GridTitleText(this.text);
final String text;
Widget build(BuildContext context) {
return FittedBox(
fit: BoxFit.scaleDown,
alignment: AlignmentDirectional.centerStart,
child: Text(text),
);
}
}
Page 2
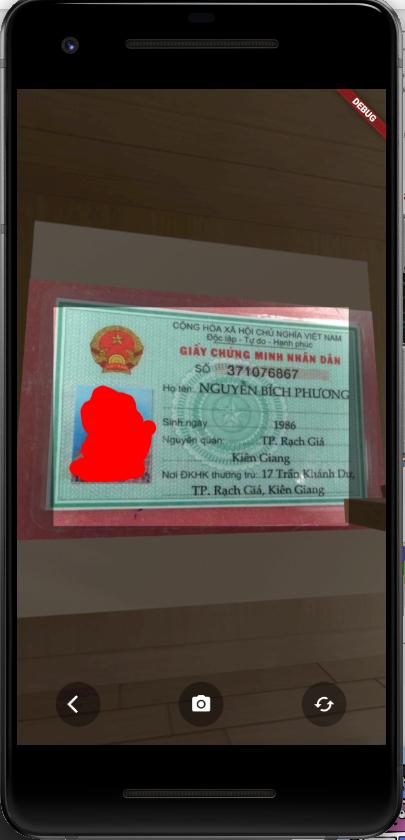
Ở đây tôi dùng thư viện camera_camera của flutter. Package này cho phép tạo 1 box view nằm trong camera preview để tiện căn chỉnh sự vật giống như của google lens.
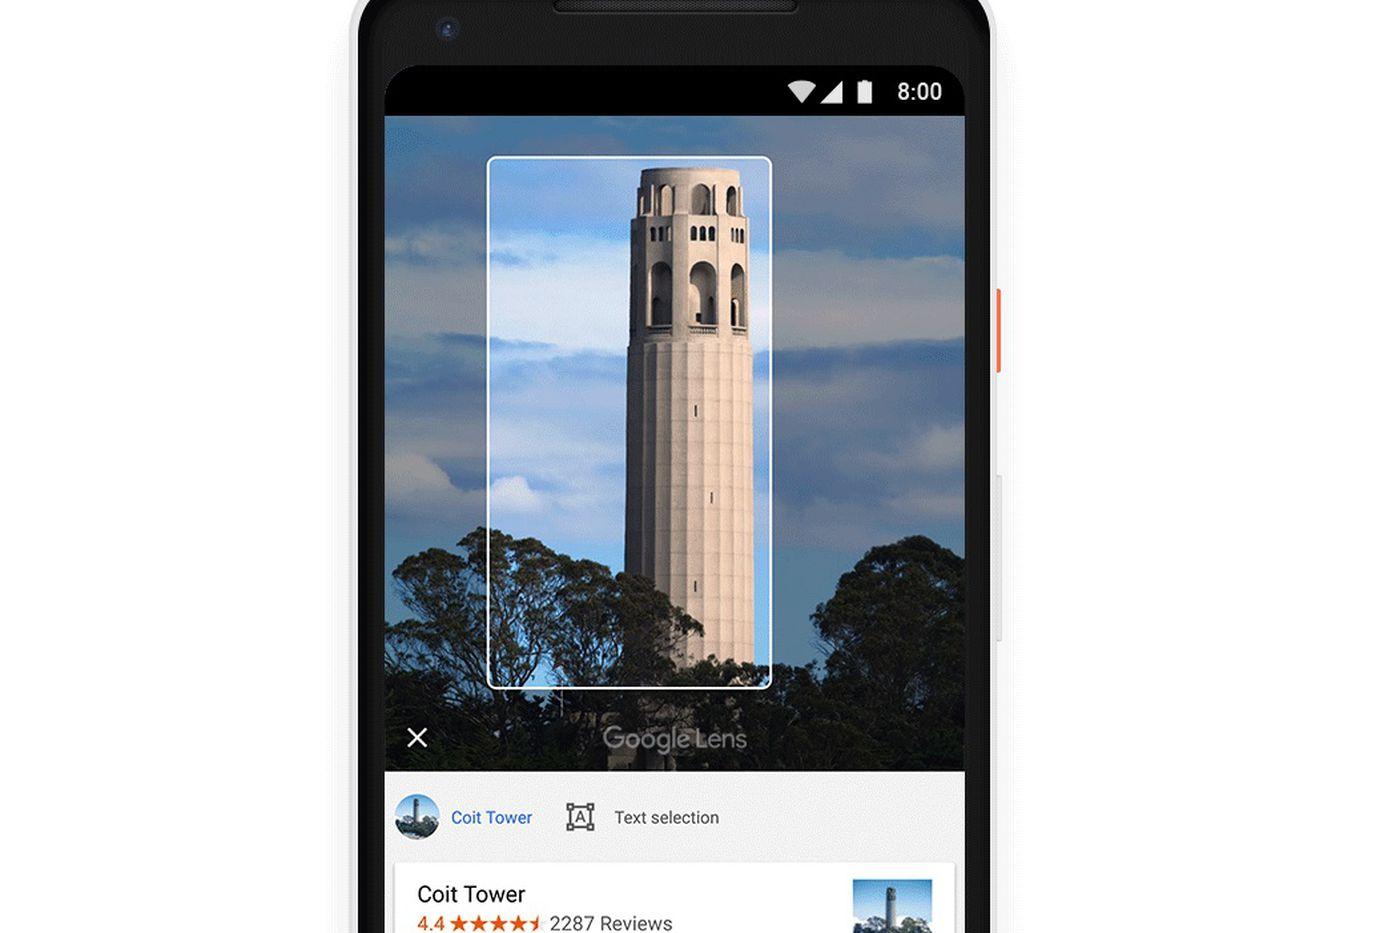
Mặc định của package này là một box view portrait nên tôi phải sửa lại kích thước của box view trong package cho phù hợp với bài toán ID Card OCR.
import 'dart:io';
import 'package:flutter/material.dart';
import 'package:camera_camera/camera_camera.dart';
import 'show_result.dart';
class FrontCameraOCR extends StatelessWidget {
File val;
Widget build(BuildContext context) {
return Scaffold(
appBar: AppBar(
        title: Text("Take a photo of front id card"),
        automaticallyImplyLeading: true,
        leading: IconButton(
            icon: Icon(Icons.arrow_back),
            onPressed: () => Navigator.of(context).pop()),
        actions: [
          Padding(
            padding: EdgeInsets.only(right: 20.0),
            child: GestureDetector(
              onTap: () {
                Navigator.push(
                    context,
                    MaterialPageRoute(
                        builder: (context) => ListDemo(image: val)));
              },
              child: Icon(
                Icons.arrow_forward,
                size: 26.0,
              ),
            ),
          ),
        ],
      ),
floatingActionButton: FloatingActionButton(
child: Icon(Icons.camera_alt),
onPressed: () async {
val = await showDialog(
context: context,
builder: (context) => Camera(
mode: CameraMode.fullscreen,
// mode: CameraMode.normal,
// initialCamera: CameraSide.front,
// enableCameraChange: false,
// orientationEnablePhoto: CameraOrientation.landscape,
onChangeCamera: (direction, _) {
print('--------------');
print('$direction');
print('--------------');
},
imageMask: CameraFocus.rectangle(
color: Colors.black.withOpacity(0.5),
),
),
);
},
),
body: Center(
child: Container(
height: MediaQuery.of(context).size.height * 0.7,
width: MediaQuery.of(context).size.width * 0.7,
child: val != null
? Image.file(
val,
fit: BoxFit.contain,
)
: Text("Please take a photo of front id card"),
),
),
);
}
}
Tiếp tôi sẽ bóc tách từng đoạn code bên trên.
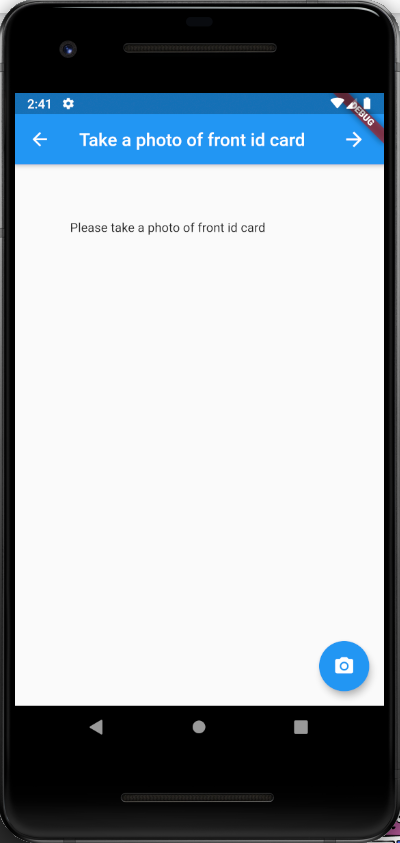
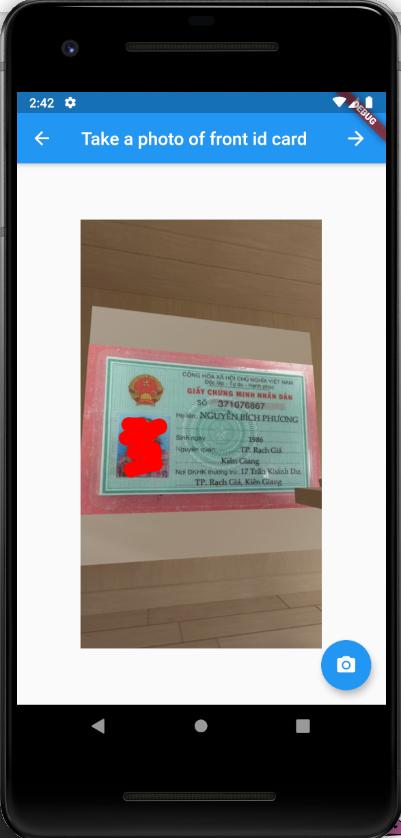
Khai báo class FrontCameraOCR là 1 stateless widget, gọi hàm build trả về Scaffold gồm 3 phần: AppBar, Camera Button và Body Container.

Đây là 1 thanh thông tin nằm ở trên cùng màn hình, không chỉ có title của page mà còn đi kèm chức năng quay lại và tiến tới trang khác. Để quay lại home page, tôi ấn vào nút có hình mũi tên quay lại. Để sang trang tiếp theo tôi ấn vào nút có hình mũi tên tiến tới.
- Back Arrow: thêm dòng
automaticallyImplyLeading: trueđể thanh appBar kích hoạt chức năng leading. Attributeleadingkhai báo thêm 1 widget con là một button khi ấn vào sẽ xóa đi page trong stack.
- Forward Arrow: do thanh appBar không hỗ trợ chức năng chuyển sang trang tới nên tôi thiết kế một sự kiện. Nói chung config khá giống với back arrow nhưng có chức năng ngược lại và vị trí thiết kế nằm phía bên phải của thanh appBar, setup theo dòng này
padding: EdgeInsets.only(right: 20.0). Khi bấm vào nút này người dùng không chỉ chuyển trang mà còn truyền param qua trang khác. Tôi sẽ nói biến val ở phần dưới.
appBar: AppBar(
title: Text("Take a photo of front id card"),
automaticallyImplyLeading: true,
leading: IconButton(
icon: Icon(Icons.arrow_back),
onPressed: () => Navigator.of(context).pop()),
actions: [
Padding(
padding: EdgeInsets.only(right: 20.0),
child: GestureDetector(
onTap: () {
Navigator.push(
context,
MaterialPageRoute(
builder: (context) => ListDemo(image: val)));
},
child: Icon(
Icons.arrow_forward,
size: 26.0,
),
),
),
],
),
Để gọi lên camera tôi thiết kế một float button ở góc của màn hình, khi ấn nút sẽ chuyển qua giao diện camera. Nhờ có package camera_camera, tôi import camera plugin chỉ vài dòng code. Để thêm package, các bạn vào trong file pubspec.yaml, trong mục dependencies thêm camera_camera: phía dưới mục flutter kiểu kiểu này.
dependencies:
  flutter:
    sdk: flutter
  camera:
  camera_camera:
  path_provider:
  path:
  http:
  dio:
Thư viện này cho phép preview Camera là full màn hình hoặc một phần màn hình mode: CameraMode.fullscreen or CameraMode.normal, init preview Camera mặc định là camera phía sau chứ không phải mặt trước, các bạn có thể thay đổi bằng cách thêm dòng nàyinitialCamera: CameraSide.front. Hoặc nếu chỉ muốn dùng camera 1 phía thì có thể tắt cơ chế chuyển đổi camera bằng attribute enableCameraChange: false. Có thể chuyển đổi hướng của camera portrait hoặc landscape bằng attribute orientationEnablePhoto: CameraOrientation.landscape.
floatingActionButton: FloatingActionButton(
        child: Icon(Icons.camera_alt),
        onPressed: () async {
          val = await showDialog(
            context: context,
            builder: (context) => Camera(
              mode: CameraMode.fullscreen,
              // mode: CameraMode.normal,
              // initialCamera: CameraSide.front,
              // enableCameraChange: false,
              // orientationEnablePhoto: CameraOrientation.landscape,
              onChangeCamera: (direction, _) {
                print('--------------');
                print('$direction');
                print('--------------');
              },
              imageMask: CameraFocus.rectangle(
                color: Colors.black.withOpacity(0.5),
              ),
            ),
          );
        },
      ),
Ở bên trên tôi có khai báo một biến val, biến này sẽ lấy hình ảnh chụp từ camera làm giá trị. Ở trong body container xét điều kiện val có giá trị thì show hình trên giao diện ngược lại mời người dùng chụp ảnh. 2 attribute height và weight dùng để căn chỉnh lại kích thước ảnh như mong muốn.
body: Center(
        child: Container(
          height: MediaQuery.of(context).size.height * 0.7,
          width: MediaQuery.of(context).size.width * 0.7,
          child: val != null
              ? Image.file(
                  val,
                  fit: BoxFit.contain,
                )
              : Text("Please take a photo of front id card"),
        ),
      ),
Page 3
Sau khi cap được hình ảnh bằng camera tôi sẽ gửi ảnh lên server để trích xuất các thông tin trong ảnh rồi lấy thông tin dưới dạng json trả về trong giao diện dưới dạng các thẻ.
import 'dart:io';
import 'package:flutter/material.dart';
import 'package:dio/dio.dart';
class ListDemo extends StatefulWidget {
final File image;
ListDemo({this.image});
_ListDemoState createState() {
return _ListDemoState();
}
}
class _ListDemoState extends State<ListDemo> {
uploadImage(File file) async {
    String fileName = file.path.split('/').last;

    FormData data = FormData.fromMap({
      "file": await MultipartFile.fromFile(
        file.path,
        filename: fileName,
      ),
    });

    Dio dio = new Dio();

    Response response =
        await dio.post("http://192.168.xx.xx:8000/predict/image", data: data);

    return (response.data as List);
  }
Widget build(BuildContext context) {
return MaterialApp(
home: Scaffold(
appBar: AppBar(
automaticallyImplyLeading: true,
leading: IconButton(
icon: Icon(Icons.arrow_back),
onPressed: () => Navigator.of(context).pop()),
title: Text("Result"),
),
body: new FutureBuilder<dynamic>(
future: uploadImage(widget.image),
builder: (BuildContext context, AsyncSnapshot snapshot) {
switch (snapshot.connectionState) {
case ConnectionState.none:
case ConnectionState.waiting:
return Center(child: CircularProgressIndicator());
default:
if (snapshot.hasError)
return Container(child: Text(snapshot.error.toString()));
return new ListView.builder(
scrollDirection: Axis.vertical,
itemCount: snapshot.data.length,
itemBuilder: (BuildContext context, int index) {
return new Card(
child: Row(
mainAxisSize: MainAxisSize.min,
children: <Widget>[
Expanded(
flex: 1,
child: new Container(
padding: const EdgeInsets.all(20.0),
child: Text(snapshot.data[index][0].toString()),
),
),
Expanded(
flex: 4,
child: new Container(
padding: const EdgeInsets.all(20.0),
child: Text(snapshot.data[index][1].toString()),
),
),
],
),
);
},
);
}
},
),
),
);
}
}
Cũng như 2 phần trên tôi sẽ lại bóc tách code thành từng phần.
Như trên kia tôi có đề cập gửi biến có chứa ảnh qua page này, trong class ListDemo khai báo biến image có kiểu File, biến này sẽ được gán giá trị sau khi chuyển từ page 2 sang page 3.
Class _ListDemoState là state của class ListDemo. Trong class này tôi khai báo 2 hàm: hàm uploadImage() để lấy output từ API, hàm build() để tạo giao diện.
Rồi đầu tiên chúng ta vọc qua hàm uploadImage(). Như đã nói ở trên hàm này có tác dụng lấy output từ API nên hàm này phải bất đồng bộ ( bạn có thể tìm hiểu khái niệm này trên google sama ), việc đầu tiên tôi phải làm là kết nối tới API đó. Có 2 thư viện flutter hỗ trợ: https và dio, ở đây tôi chọn dùng dio. Dio hỗ trợ tạo kết nối với API, việc còn lại là khai báo format đầu vào theo đúng API yêu cầu. Bởi vì đầu vào ở đây là ảnh nên tôi dùng kiểu multipart/form-data, cần tên file và đường dẫn file. Gọi instance của Dio, sử dụng phương thức post tới url api. Kết quả trả về có kiểu Future<dynamic> do hàm bất đồng bộ nên phải có bước convert về dạng List.
uploadImage(File file) async {
String fileName = file.path.split('/').last;
FormData data = FormData.fromMap({
"file": await MultipartFile.fromFile(
file.path,
filename: fileName,
),
});
Dio dio = new Dio();
Response response =
await dio.post("http://192.168.xx.xx:8000/predict/image", data: data);
return (response.data as List);
}
[
  [
    "id",
    "37-107687"
  ],
  [
    "name",
    "NGUYỄN BÍCH PHƯƠNG"
  ],
  [
    "birth",
    "1986"
  ],
  [
    "home",
    "17 Trần Khánh Dư TP Rạch Giá Kiên Giang"
  ],
  [
    "add",
    "TP Rạch Giá Kiên Giang"
  ]
]
Rồi dạo qua phần giao diện nào.
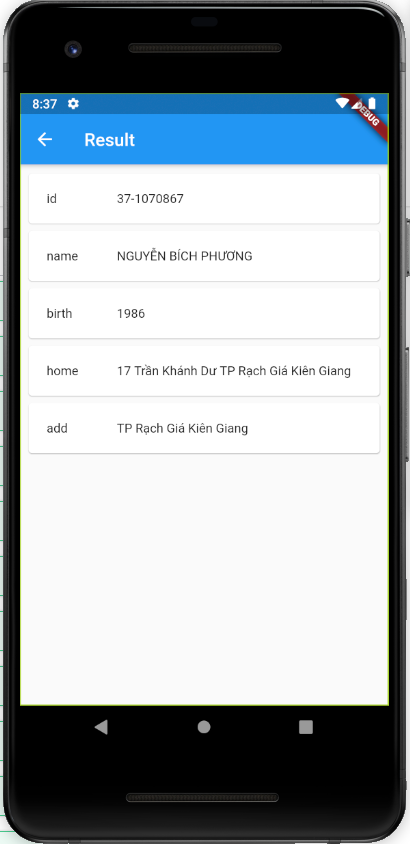
Giao diện ở đây là 1 list gồm các thẻ có 2 phần: key và value.
Thanh appBar y hệt các page trước.
appBar: AppBar(
          automaticallyImplyLeading: true,
          leading: IconButton(
              icon: Icon(Icons.arrow_back),
              onPressed: () => Navigator.of(context).pop()),
          title: Text("Result"),
        ),
Trong phần body container, wrap với class FutureBuilder chuyên load dữ liệu bất đồng bộ, nghĩa là nó sẽ chờ dữ liệu được trả về hết mới generate giao diện. Tôi dùng switch case để kiểm tra các trường hợp có thể xảy ra: không có kết nối, đang chờ kết nối, có kết nối. Trong trường hợp có kết nối sẽ lại xảy ra 2 trường hợp tiếp: api server lỗi hoặc api server trả dữ liệu.
Sau khi có dữ liệu, tôi wrap với class ListView để tạo giao diện cho 1 list mà không cần code for...loop. Attribute scrollDirection cho phép lăn hoặc di theo chiều dọc. Attribute itemCount xác định số lượng item trong list để gen. Với mỗi item được gen ra, tôi wrap với class Card nhét dữ liệu vào thẻ. Mỗi thẻ gồm có 2 widget con: key và value. Widget Expanded hỗ trợ việc phân chia vị trí và kích thước hệt bootstrap của web.
body: new FutureBuilder<dynamic>(
          future: uploadImage(widget.image),
          builder: (BuildContext context, AsyncSnapshot snapshot) {
            switch (snapshot.connectionState) {
              case ConnectionState.none:
              case ConnectionState.waiting:
                return Center(child: CircularProgressIndicator());
              default:
                // Completed with error
                if (snapshot.hasError)
                  return Container(child: Text(snapshot.error.toString()));

                // Completed with data
                return new ListView.builder(
                  scrollDirection: Axis.vertical,
                  itemCount: snapshot.data.length,
                  itemBuilder: (BuildContext context, int index) {
                    return new Card(
                      child: Row(
                        mainAxisSize: MainAxisSize.min,
                        children: <Widget>[
                          Expanded(
                            flex: 1,
                            child: new Container(
                              padding: const EdgeInsets.all(20.0),
                              child: Text(snapshot.data[index][0].toString()),
                            ),
                          ),
                          Expanded(
                            flex: 4,
                            child: new Container(
                              padding: const EdgeInsets.all(20.0),
                              child: Text(snapshot.data[index][1].toString()),
                            ),
                          ),
                        ],
                      ),
                    );
                  },
                );
            }
          },
        ),
Ok thế là code xong rồi đấy, đến phần build app thôi. À từ từ quên mất, bạn sửa flie android/src/main/AndroidManifest.xml override đống này để cấp quyền các thứ chạy được trên android.
<manifest xmlns:android="http://schemas.android.com/apk/res/android"
    package="com.example.ocr">
    <!-- io.flutter.app.FlutterApplication is an android.app.Application that
         calls FlutterMain.startInitialization(this); in its onCreate method.
         In most cases you can leave this as-is, but you if you want to provide
         additional functionality it is fine to subclass or reimplement
         FlutterApplication and put your custom class here. -->
    <!-- Required to fetch data from the internet. -->
    <uses-permission android:name="android.permission.INTERNET" />
    <application
        android:name="io.flutter.app.FlutterApplication"
        android:label="ocr"
        android:icon="@mipmap/ic_launcher">
        <activity
            android:name=".MainActivity"
            android:launchMode="singleTop"
            android:theme="@style/LaunchTheme"
            android:configChanges="orientation|keyboardHidden|keyboard|screenSize|smallestScreenSize|locale|layoutDirection|fontScale|screenLayout|density|uiMode"
            android:hardwareAccelerated="true"
            android:windowSoftInputMode="adjustResize">
            <!-- Specifies an Android theme to apply to this Activity as soon as
                 the Android process has started. This theme is visible to the user
                 while the Flutter UI initializes. After that, this theme continues
                 to determine the Window background behind the Flutter UI. -->
            <meta-data
              android:name="io.flutter.embedding.android.NormalTheme"
              android:resource="@style/NormalTheme"
              />
            <!-- Displays an Android View that continues showing the launch screen
                 Drawable until Flutter paints its first frame, then this splash
                 screen fades out. A splash screen is useful to avoid any visual
                 gap between the end of Android's launch screen and the painting of
                 Flutter's first frame. -->
            <meta-data
              android:name="io.flutter.embedding.android.SplashScreenDrawable"
              android:resource="@drawable/launch_background"
              />
            <intent-filter>
                <action android:name="android.intent.action.MAIN"/>
                <category android:name="android.intent.category.LAUNCHER"/>
            </intent-filter>
        </activity>
        <!-- Don't delete the meta-data below.
             This is used by the Flutter tool to generate GeneratedPluginRegistrant.java -->
        <meta-data
            android:name="flutterEmbedding"
            android:value="2" />
    </application>
</manifest>
Run
Để chạy thử app, tôi dùng Flutter CLI cho dễ dàng control. Bạn vào folder project ( folder có chứa lib/main.dart ý ), bật terminal:
flutter cleanflutter pub getflutter run
Nếu bạn chưa chọn emulator thì có thể dùng CLI để bật emulator lên:
- Kiểm tra xem mình có emulator:
flutter emulators - Chọn emulator mà mình muốn bật:
flutter emulators --launch <emulator id> - Nếu chưa có emulator thì tạo bằng câu lệnh này:
flutter emulators --create [--name xyz]
Lời kết
Cuối cùng cũng end. Các bạn đi ngang qua thấy hay thì cho tôi 1 upvote, đừng nỡ lòng nào downvote 
References
https://blog.geekyants.com/state-management-in-flutter-7df833e6f3bd
All rights reserved
