Tạo notification trong Rails với gem ActivityNotification và ActionCable.
Bài đăng này đã không được cập nhật trong 4 năm
Ngày hôm nay, mình xin giới thiệu 1 kĩ thuật có thể được sử dụng để xây dựng tính năng thông báo real-time trong Rails, sử dụng gem ActivityNotification và ActionCable của rails 5.
Tạo gem và setup table
Ta thêm gem vào Gemfile, chạy bundler và sau đó chạy các hàm generate để khởi tạo các file cần thiết cũng như model tương ứng trong CSDL.
gem 'activity_notification'
rails g activiy_notification:install
rails g activity_notification:migration
rails db:migrate
Configure các models
Về cơ bản, 1 model notification vừa được tạo sẽ bao gồm:
- target: đối tượng được gửi notification tới.
- notifiable: đối tượng mà notification nhắc tới ( 1 comment, 1 bài viết ...).
- notifier: đối tượng tạo ra notification.
- key:action tương ứng với notification này.
- group: sử dụng để gom nhóm các notification tương tự với nhau lại. Trong đó, notifiable, notifier và key là bắt buộc.
configure notifiable model
Đây là đối tượng được nhắc tới trong notification. Trong model, ta chỉ cần thêm vào configure acts_as_notifiable tương ứng với từng target model.
ví dụ:
acts_as_notifiable :users,
  targets: ->(comment,key) {
	([comment.recipe.user] + comment.recipe.commented_users.to_a - [comment.user]).uniq
  },
  notifiable_path: :recipe_notificable_path

private
def recipe_notificable_path
  recipe_path id: recipe.id
end
ở đây:
- :users: target mà notification hướng tới (ta có thể tạo notification cho nhiều đối tượng bằng cách thêm confi này cho tường target - vd: users, admin ......)
- targets: là 1 lambda nhận đầu vào là record được tạo notification cho đi kèm với key tương ứng. Ở đây ta có thể dựa vào key này để trảả về danh sách các targets sẽ nhận được notification.
- notifiable_path: địa chỉ trả về khi người dùng click vào 1 notification.
Config cho target model:
Với target model, ta chỉ cần thêm acts_as_notification_target vào model này.
class User < ApplicationRecord
	acts_as_notification_target
end
config view:
Ta chạy lệnh rails g activity_notification:views để generate ra thư mục activity_notifications trong folder view của project. Sau đó, tương ứng với mỗi model notifier, ta tạo các file tương ứng với các key mà model đó có thể nhận được.
Tạo notification
- Việc tạo và gửi các notification thường khá dài dòng, vì vậy ta có thể tạo các service riêng để thực hiện các công việc này. Với mỗi một action
keytương ứng với 1 modelnotifier, ta có thể tạo 1 service riêng cho nó. Ví dụ service dưới đây sử dụng để tạo notification mỗi khi có 1 member comment vào 1 bài viết.
class Notifications::CommentReplyService
  def initialize comment
	@comment = comment
  end

  def perform
	ActivityNotification::Notification.notify :users, @comment, key: "comment.reply", notifier: @comment.user, group: @comment.recipe
  end
end
Ok, Giải thích 1 chút ! Service này sẽ nhận đầu vào là object mà mình muốn tạo notification cho (ở đây là comment vừa được post). Trong hàm perform, ta sẽ gọi tới Api của gem ActivityNotification là notify. Hàm này có thể chứa các params:
- :users: loại target sẽ nhận được notification (như ở trên đã nói, notifier có thể được gửi tới nhiều loại target : users, admin ...)
- @comment: đối tượng
notifier, chính là đầu vào của service này. - key: action tương ứng cho notification, ở đây là
comment.reply. Chú ý, ta cần tạo file view tương ứngcomment/_reply.html.erbtrong thư mục view được generate phía trên. - notifier: truyền vào đối tượng tạo ra notification này, ở đây là người tạo comment.
- group: object được sử dụng để nhóm các notification lại khi trả về cho target - Ở đây ta sử dụng bài viết chứa comment này.
Implement notifications view bên phía target:
- Cách đơn giản nhất để hiển thị thanh trạng thái notification là nhét nó vào header của trang. Ta chỉ sử dụng helper có sẵn trong gem.
<div id="notifications_in_header">
  <%= render_notifications_of current_user, index_content: :with_attributes %>
</div>
Hàm này sẽ render ra thông báo notification cho target là curent_user.
Sử dụng ActionCable để thông báo cho target mỗi khi có 1 notification được tạo.
Lúc này, sau khi có 1 notification được tạo, khi user là target refresh trình duyệt, thông báo sẽ được hiển thị. Ta có thể làm tốt hơn bằng cách sử dụng ActionCable để đẩy thẳng notification tới cho target ngay khi có notification mới.
Việc tạo và gửi các message thông qua ActionCable có thể khá tốn kém, nhất là khi message được gửi cho số lượng lớn client. Vì vậy ta có thể tạo Job riêng để xử lý riêng việc này. Lúc này, service hoàn chỉnh của ta sẽ như sau:
class Notifications::CommentReplyService
  def initialize comment
	@comment = comment
  end

  def perform
	ActivityNotification::Notification.notify :users, @comment, key: "comment.reply", notifier: @comment.user, group: @comment.recipe
	notification_targets(@comment, key).each do |target_user|
        Notifications::CommentReplyBroadcastJob.perform_later target_user
	end
  end

  private
  def notification_targets comment, key
	([comment.recipe.user] + comment.recipe.commented_users.to_a - [comment.user]).uniq
  end
end
Chú ý, hàm notification_targets ở đây chính là các target để gửi notification tới, nó tương ứng với targets khi mình khai báo acts_as_notifiable trong model.
Mình có thể viết 1 job đơn giản như sau để gửi message tới từng target, phân biệt thông qua channel được đánh id dựa trên id của target.
class Notifications::CommentReplyBroadcastJob < ApplicationJob
  queue_as :default

  def perform user
	ActionCable.server.broadcast "notification_channel_#{user.id}",
  	notifications: render_notifications_for(user)
  end

  private
  def render_notifications_for user
	ApplicationController.renderer.render partial: "activity_notification/socket_notifications",
  	locals: {user: user}
  end
end
Ở đây, message gửi đi chứa partial notifications đã được render lại cho target đó.
// activity_notification/_socket_notifications.html.erb
<%= render_notifications_of user %>
Tương ứng, bên phía client, ta chỉ cần viết các hàm javascript tương ứng để nhận và render ra notification khi nó được gửi tới.
$(document).on('turbolinks:load', function(){
  App.notification = App.cable.subscriptions.create(
	{channel: 'NotificationChannel', id: Cookies.get('current_user_id')}, {
	connected: function(){},
	disconnected: function(){},
	received: function(data){
  	this.executeMessage(data);
	},

	/////////////////////////////
	executeMessage: function(data) {
  	console.log('new notification arrived');
  	$('#notifications_in_header').empty().html(data.notifications);
	}
  });
});
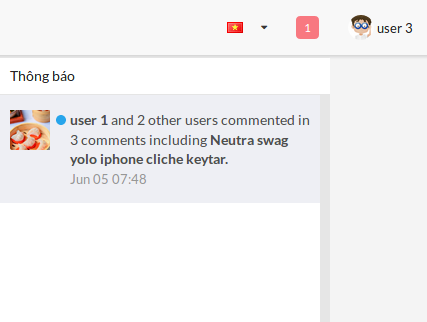
Vậy là đã xong, lúc này, người dùng có thể thấy được các notification được đẩy xuống trực tiếp cho mình thông qua WebSocket mà không cần F5 lại trang.
All rights reserved
