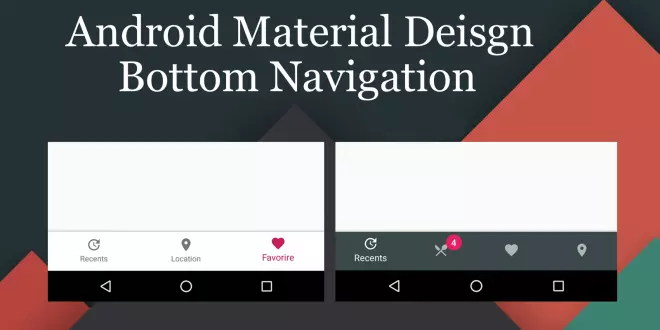
Tạo Bottom Bar giống Google+
Bài đăng này đã không được cập nhật trong 4 năm

Bạn có thể xem bài viết gốc tại: http://onlyu.ga/home/android/tao-bottom-bar-giong-google.html
Ngày trước muốn làm 1 cái Bottom Navigation Bar giống Google+ thì bạn cần phải dùng thư viện ngoài hoặc bạn phải tự thiết kế riêng. Nhưng từ bây giờ bạn có thể sài Bottom Navigation Bar chính chủ mà không cần bất cứ thư viện ngoài nào. Công việc của bạn chỉ cần làm đó là thêm đoạn mã dưới đây vào file build.gradle trong module của bạn.
compile 'com.android.support:design:25.0.1'
Bây giờ ta chỉ cần gọi nó ra thôi
<android.support.design.widget.BottomNavigationView
        android:id="@+id/bottom_navigation"
        android:layout_width="match_parent"
        android:layout_height="wrap_content"
        android:layout_alignParentBottom="true"
        app:itemBackground="@color/backgroundBar"
        app:itemIconTint="#999999"
        app:itemTextColor="#FFFFFF"
        app:menu="@menu/bottom_navigation_main" />
Bạn chú ý đế đoạn app:menu="@menu/bottom_navigation_main" thì đây chính là cái layout menu mà bạn vẫn hay làm menu. Như cái của mình:
<?xml version="1.0" encoding="utf-8"?>
<menu xmlns:android="http://schemas.android.com/apk/res/android"
    xmlns:app="http://schemas.android.com/apk/res-auto">
    <item
        android:id="@+id/action_one"
        android:enabled="true"
        android:icon="@drawable/ic_action_one"
        android:title="One"
        app:showAsAction="always" />
    <item
        android:id="@+id/action_two"
        android:enabled="true"
        android:icon="@drawable/ic_action_two"
        android:title="Two"
        app:showAsAction="always" />
    <item
        android:id="@+id/action_three"
        android:enabled="true"
        android:icon="@drawable/ic_action_three"
        android:title="Three"
        app:showAsAction="always" />
</menu>
Bây giờ bạn có 1 Bottom Navigation Bar đúng nghĩa rồi nhé. Có một vấn đề là google thiết kế cái Bottom Navigation Bar này theo chuẩn material nên khi bạn có 4 item menu trở lên thì với shift mode nhìn rất xấu. Vậy làm thế nào để tắt. Sau 1 hồi tìm kiếm và thử nghiêm cuối cùng mình đã tìm ra. Đầu tiên bạn tạo 1 function disableShiftMode như sau:
 public void disableShiftMode(BottomNavigationView view) {
        BottomNavigationMenuView menuView = (BottomNavigationMenuView) view.getChildAt(0);
        try {
            Field shiftingMode = menuView.getClass().getDeclaredField("mShiftingMode");
            shiftingMode.setAccessible(true);
            shiftingMode.setBoolean(menuView, false);
            shiftingMode.setAccessible(false);
            for (int i = 0; i < menuView.getChildCount(); i++) {
                BottomNavigationItemView item = (BottomNavigationItemView) menuView.getChildAt(i);
                item.setShiftingMode(false);
                // set once again checked value, so view will be updated
                item.setChecked(item.getItemData().isChecked());
            }
        } catch (NoSuchFieldException e) {
            Log.e(TAG, "Unable to get shift mode field");
        } catch (IllegalAccessException e) {
            Log.e(TAG, "Unable to change value of shift mode");
        }
    }
Sau đó bạn chỉ việc gọi nó lên
 bottomNavigation = (BottomNavigationView) findViewById(R.id.bottom_navigation);
 disableShiftMode(bottomNavigation);
.Bây giờ bạn muốn set click từng menu thì bạn chỉ việc gọi hàm setOnNavigationItemSelectedListener . Giống như thế này:
 bottomNavigation.setOnNavigationItemSelectedListener(this::onNavigationItemSelected);
còn đây là hàm onNavigationItemSelected

 private boolean onNavigationItemSelected(MenuItem item) {
        switch (item.getItemId()) {
            case R.id.action_one:
                Utils.startFragment(getSupportFragmentManager(), ContentFragment.newInstance("ONE"));
                break;
            case R.id.action_two:
                Utils.startFragment(getSupportFragmentManager(), ContentFragment.newInstance("TWO"));
                break;
            case R.id.action_three:
                Utils.startFragment(getSupportFragmentManager(), ContentFragment.newInstance("THREE"));
                break;
            case R.id.action_four:
                Utils.startFragment(getSupportFragmentManager(), ContentFragment.newInstance("FOUR"));
                break;
        }
        return true;
    }
Vậy là mình đã hoàn tất tạo một Tạo Bottom Navigation Bar giống Google+.
Lời kết
Với xu hướng thiết kế hiện nay người ta thường hạn chế sử dụng Hambeger menu nên việc tạo một Bottom Navigation Bar với ít menu là hướng di sử dụng của rất nhiều app.
Trong bài viết có sử dụng Lambda Expression và Java 8 nếu bạn thấy khó hiểu thì bạn có thể tìm lại bài viết của mình để đọc lại.
Bạn cũng có thể download source code của mình ở link dưới:
All rights reserved