Tạo bàn phím Android
Bài đăng này đã không được cập nhật trong 8 năm
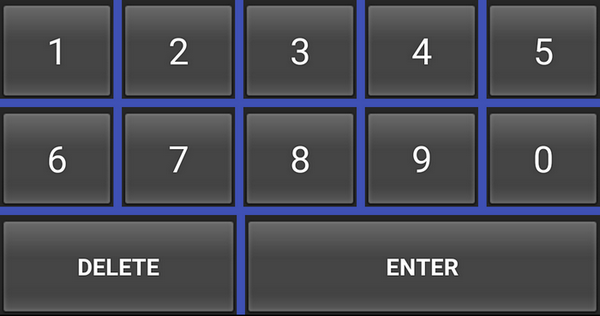
Trong bài này, chúng ta sẽ học cách tạo bàn phím Android như hình dưới
Tạo Layout cho Bàn phím
- Đầu tiên ta sẽ tạo layout cho bàn phím, đặt tên file là keyboard_view.xml
keyboard_view.xml
<?xml version="1.0" encoding="utf-8"?>
<android.inputmethodservice.KeyboardView
    xmlns:android="http://schemas.android.com/apk/res/android"
    android:id="@+id/keyboard_view"
    android:layout_width="match_parent"
    android:layout_height="wrap_content"
    android:keyPreviewLayout="@layout/key_preview"
    android:layout_alignParentBottom="true"
    android:background="@color/colorPrimary">
</android.inputmethodservice.KeyboardView>
- Theo như layout trên, ta set màu background cho keyboard theo màu colorPrimary và align bàn phím ở dưới màn hình điện thoại
- Tiếp theo ta tạo file key_preview.xml, file này dùng để hiển thị giá trị của button mà người dùng vừa ấn vào key bàn phím. Layout này sẽ hữu dụng với những người có ngón tay to và không biết đã ấn vào nút nào trên bàn phím.
key_preview.xml
<?xml version="1.0" encoding="utf-8"?>
<TextView
    xmlns:android="http://schemas.android.com/apk/res/android"
    android:layout_width="match_parent"
    android:layout_height="match_parent"
    android:gravity="center"
    android:background="@android:color/white"
    android:textColor="@color/colorPrimary"
    android:textSize="30sp">
</TextView>
Định nghĩa nội dung bàn phím
- Tiếp theo ta sẽ tạo file xml định nghĩa nội dung của bàn phím number_pad.xml. Trong ví dụ này ta sẽ tạo bàn phím gồm 9 số và nút enter, delete
number_pad.xml
<?xml version="1.0" encoding="utf-8"?>
<Keyboard xmlns:android="http://schemas.android.com/apk/res/android"
    android:keyWidth="20%p"
    android:horizontalGap="5dp"
    android:verticalGap="5dp"
    android:keyHeight="60dp">

    <Row>
        <Key android:codes="49" android:keyLabel="1" android:keyEdgeFlags="left"/>
        <Key android:codes="50" android:keyLabel="2"/>
        <Key android:codes="51" android:keyLabel="3"/>
        <Key android:codes="52" android:keyLabel="4"/>
        <Key android:codes="53" android:keyLabel="5" android:keyEdgeFlags="right"/>
    </Row>

    <Row>
        <Key android:codes="54" android:keyLabel="6" android:keyEdgeFlags="left"/>
        <Key android:codes="55" android:keyLabel="7"/>
        <Key android:codes="56" android:keyLabel="8"/>
        <Key android:codes="57" android:keyLabel="9"/>
        <Key android:codes="48" android:keyLabel="0" android:keyEdgeFlags="right"/>
    </Row>

    <Row>
        <Key android:codes="-5"
            android:keyLabel="DELETE"
            android:keyWidth="40%p"
            android:keyEdgeFlags="left"
            android:isRepeatable="true"/>
        <Key android:codes="10"
            android:keyLabel="ENTER"
            android:keyWidth="60%p"
            android:keyEdgeFlags="right"/>
    </Row>

</Keyboard>
- Tiếp theo ta cần file method.xml để giúp system xác định input method subtypes có sẵn
method.xml

<?xml version="1.0" encoding="utf-8"?>
<input-method
    xmlns:android="http://schemas.android.com/apk/res/android">
    <subtype
        android:imeSubtypeMode="keyboard"/>
</input-method>
Tạo class InputMethodService class
- File này sẽ xử lý logic của phần keyboard này
MyInputMethodService.java

import android.inputmethodservice.InputMethodService;
import android.inputmethodservice.Keyboard;
import android.inputmethodservice.KeyboardView;
import android.text.TextUtils;
import android.view.View;
import android.view.inputmethod.InputConnection;


public class MyInputMethodService extends InputMethodService implements KeyboardView.OnKeyboardActionListener {

    @Override
    public View onCreateInputView() {
        KeyboardView keyboardView = (KeyboardView) getLayoutInflater().inflate(R.layout.keyboard_view, null);
        Keyboard keyboard = new Keyboard(this, R.xml.number_pad);
        keyboardView.setKeyboard(keyboard);
        keyboardView.setOnKeyboardActionListener(this);
        return keyboardView;
    }

    @Override
    public void onPress(int i) {

    }

    @Override
    public void onRelease(int i) {

    }

    @Override
    public void onKey(int primatyCode, int[] keyCodes) {
        InputConnection inputConnection = getCurrentInputConnection();

        if (inputConnection != null) {
            switch(primatyCode) {
                case Keyboard.KEYCODE_DELETE :
                    CharSequence selectedText = inputConnection.getSelectedText(0);

                    if (TextUtils.isEmpty(selectedText)) {
                        inputConnection.deleteSurroundingText(1, 0);
                    } else {
                        inputConnection.commitText("", 1);
                    }

                    break;
                default :
                    char code = (char) primatyCode;
                    inputConnection.commitText(String.valueOf(code), 1);
            }
        }
    }

    @Override
    public void onText(CharSequence charSequence) {

    }

    @Override
    public void swipeLeft() {

    }

    @Override
    public void swipeRight() {

    }

    @Override
    public void swipeDown() {

    }

    @Override
    public void swipeUp() {
    }
- Trong method onKey(), ta sẽ chỉ xử lý button delete, nếu có text selected ta sẽ xóa text đó, nếu không ta sẽ xóa character trước đó. Với các key khác, ta chỉ cần truyền mã code cho InputConnection(sẽ gửi giá trị cho view hiển thị như EditText).
Đăng kí bàn phím với hệ thống
- Để đăng kí bàn phím của ta như bàn phím hệ thống ta làm như sau
AndroidManifest.xml

<?xml version="1.0" encoding="utf-8"?>
<manifest xmlns:android="http://schemas.android.com/apk/res/android"
    package="com.ssaurel.mykeyboard">

    <application
        android:allowBackup="true"
        android:icon="@mipmap/ic_launcher"
        android:label="@string/app_name"
        android:roundIcon="@mipmap/ic_launcher_round"
        android:supportsRtl="true"
        android:theme="@style/AppTheme">
        <activity android:name=".MainActivity">
            <intent-filter>
                <action android:name="android.intent.action.MAIN" />

                <category android:name="android.intent.category.LAUNCHER" />
            </intent-filter>
        </activity>

        <service android:name=".MyInputMethodService"
            android:permission="android.permission.BIND_INPUT_METHOD">
            <intent-filter>
                <action android:name="android.view.InputMethod" />
            </intent-filter>

            <meta-data android:name="android.view.im"
                android:resource="@xml/method" />

        </service>

    </application>

</manifest>
Tạo example test bàn phím
activity_main.xml

<?xml version="1.0" encoding="utf-8"?>
<android.support.constraint.ConstraintLayout
    xmlns:android="http://schemas.android.com/apk/res/android"
    xmlns:app="http://schemas.android.com/apk/res-auto"
    xmlns:tools="http://schemas.android.com/tools"
    android:layout_width="match_parent"
    android:layout_height="match_parent">

    <EditText
        android:layout_width="300dp"
        android:layout_height="wrap_content"
        app:layout_constraintBottom_toBottomOf="parent"
        app:layout_constraintLeft_toLeftOf="parent"
        app:layout_constraintRight_toRightOf="parent"
        app:layout_constraintTop_toTopOf="parent" />

</android.support.constraint.ConstraintLayout>
MainActivity.java

import android.support.v7.app.AppCompatActivity;
import android.os.Bundle;

public class MainActivity extends AppCompatActivity {

    @Override
    protected void onCreate(Bundle savedInstanceState) {
        super.onCreate(savedInstanceState);
        setContentView(R.layout.activity_main);
    }
}
- Tiếp theo để sử dụng bàn phím ta vừa tạo, ta sẽ vào settings và chọn bàn phím là bàn phím vừa tạo
All rights reserved
