Tạo bài viết với gem Ckeditor và Paperclip
Bài đăng này đã không được cập nhật trong 4 năm
1. Giới thiệu
Rất nhiều website có tính tương tác cao với người dùng bằng các bài viết của họ. Điển hình là các trang diễn đàn, du lịch, review ... Vậy ở bài viết này mình xin giới thiệu đến các bạn 2 gem để hỗ trợ việc tạo bài viết trên website của mình, đó là Ckeditor và Paperclip
2. Sử dụng gem ckeditor
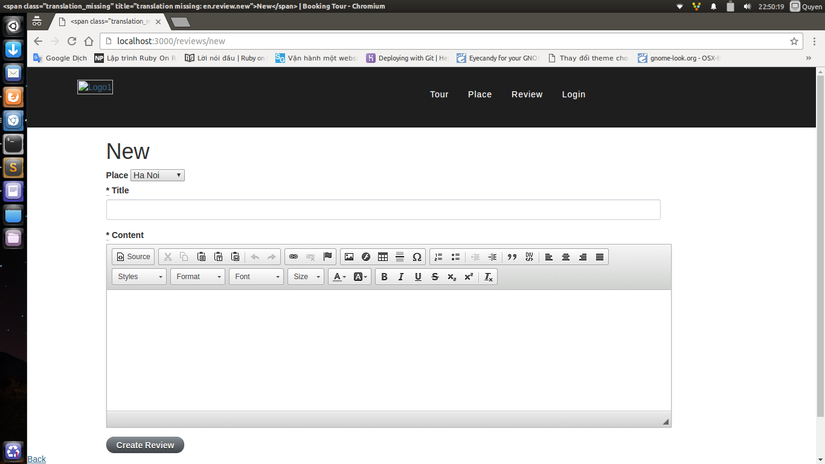
CKeditor là một gem được sử dụng để tạo ra các form text soạn thảo văn bản, hỗ trợ gần như đầy đủ chức năng để tạo ra 1 bài viết đẹp mắt, chuyên nghiệp.
Đầu tiên, thêm gem ckeditor trong Gemfile:
gem "ckeditor"
Tiếp theo bundle install để cài đặt gem.
Bây giờ tạo một model: ví dụ Article:
rails g resource Article title body:text
rake db:migrate
Khai báo đường dẫn trong routes:
root to: "articles#index"
Thêm vào application.js như sau:
...
// Read Sprockets README (https://github.com/sstephenson/sprockets#sprockets-directives) for details
// about supported directives.
//
//= require jquery
//= require jquery_ujs
//= require turbolinks
//= require ckeditor/init
//= require_tree .
...
Ở trong controller:
app/controllers/articles_controller.rb:
class ArticlesController < ApplicationController
  def index
    @articles = Article.order("created_at DESC")
  end

  def show
    @article = Article.find(params[:id])
  end

  def new
    @article = Article.new
  end

  def create
    @article = Article.new(article_params)
    if @article.save
      redirect_to articles_path, notice: "The article has been successfully created."
    else
      render action: "new"
    end
  end

  def edit
    @article = Article.find(params[:id])
  end

  def update
    @article = Article.find(params[:id])
    if @article.update_attributes(article_params)
      redirect_to articles_path, notice: "The article has been           successfully updated."
    else
      render action: "edit"
    end
  end

  private
  def article_params
    params.require(:article).permit(:title, :body)
  end
end
Đến view, đầu tiên là index:
app/views/articles/index.html.erb
<%= link_to "New Article", new_article_path %>
<% @articles.each do |article| %>
  <h3><%= article.title.html_safe %></h3>
  <p><%= article.body.html_safe %></p>
  <%= link_to "Edit Article", edit_article_path(article) %>
  <% if article != @articles.last %>
  <% end %>
<% end %>
Tạo 1 partial để chứa form:
app/views/articles/_form.html.erb:
<% if @article.errors.any? %>
  <ul>
    <%= @article.errors.full_messages.each do |message| %>
        <li><%= message %></li>
    <% end %>
  </ul>
<% end %>
<%= form_for @article do |f| %>
  <div>
    <%= f.label :title %>
  </div>
  <div>
    <%= f.text_field :title %>
  </div>
  <div>
    <%= f.label :body %>
  </div>
  <div>
    <%= f.cktext_area :body, rows: 10 %>
  </div>
  <div>
    <%= f.submit %>
  </div>
<% end %>
Tiếp theo đến new.html.erb:
app/views/articles/new.html.erb
<h3> New Article</h3>
<%= render "form" %>
Ở edit view:
app/views/articles/edit.html.erb
<%= "Editing #{@article.title}" %>
<%= render "form" %>
Kết qủa ta được 1 form editor trông như sau:
3. Chèn ảnh với Paperclip
Để chèn ảnh vào bài viết mình sử dụng gem Paperclip:
Gemfile:
gem "paperclip"
Terminal:
bundle install
Tiếp theo chúng ra cần chạy 1 generator cung cấp bởi ckeditor. Nó sẽ tạo ra các models cần thiết sử dụng để lưu trữ ảnh.
Terminal:
  rails generate ckeditor:install --orm=active_record --backend=paperclip
  rake db:migrate
Cuối cùng, restart lại server, trong form editor, bấm vào thêm ảnh để upload ảnh lên và tùy chọn size.
Chúc các bạn thành công!
Tham khảo: https://github.com/galetahub/ckeditor
All rights reserved
