Symfony Blog Tutorial: The Comments Model, Doctrine Repositories and Migrations
Bài đăng này đã không được cập nhật trong 4 năm
Tiếp tục chuỗi bài viết giới thiệu về Symfony 2 framework thông qua việc xây dựng một blog website. Bài viết này sẽ trình bày về thêm bình luận, Doctrine Repositories và migrations. Các bạn có thể theo dõi các bài viết trước về Validators, Forms and Emailing và Doctrine Model và Data Fixtures.
Tổng quan
Bài viết này sẽ tiếp tục xây dựng blog model từ các bài viết trước và tạo thêm comment blog - xử lý bình luận cho bài viết. Bài viết này sẽ giới thiệu về mối quan hệ giữa các models, ví dụ 1 bài viết có nhiều bình luận. Chúng ta sẽ sử dụng Doctrine 2 QueryBuilder và Doctrine 2 Repository để lấy về các entities từ database. Bên cạnh đó, bài viết sẽ giới thiệu về Doctrine 2 Migration - một cách quản lý thay đổi database. Cuối bài viết, chúng ta có thể thực hiện được việc bình luận cho mỗi bài viết.
Querying the model
Để hiển thị các bài viết, chúng ta cần lấy từ trong database. Doctrine 2 cung cấp Doctrine Query Language (DQL) và QueryBuilder để thực hiện việc này. Chúng ta sẽ sử dụng QueryBuilder để sinh ra DQL giúp chúng ta query database. Hãy cập nhật trong action index của PageController như sau để lấy ra tất cả các bài viết trong database.
// src/Blogger/BlogBundle/Controller/PageController.php
class PageController extends Controller
{
    public function indexAction()
    {
        $em = $this->getDoctrine()
                   ->getEntityManager();

        $blogs = $em->createQueryBuilder()
                    ->select('b')
                    ->from('BloggerBlogBundle:Blog',  'b')
                    ->addOrderBy('b.created', 'DESC')
                    ->getQuery()
                    ->getResult();

        return $this->render('BloggerBlogBundle:Page:index.html.twig', array(
            'blogs' => $blogs
        ));
    }

    // ..
}
The View
Bây giờ sẽ hiển thị các bài viết. Thay thế nội dung hiển thị của trang chủ như sau:
{# src/Blogger/BlogBundle/Resources/views/Page/index.html.twig #}
{% extends 'BloggerBlogBundle::layout.html.twig' %}
{% block body %}
{% for blog in blogs %}
<article class="blog">
<div class="date"><time datetime="{{ blog.created|date('c') }}">{{ blog.created|date('l, F j, Y') }}</time></div>
<header>
<h2><a href="{{ path('BloggerBlogBundle_blog_show', { 'id': blog.id }) }}">{{ blog.title }}</a></h2>
</header>
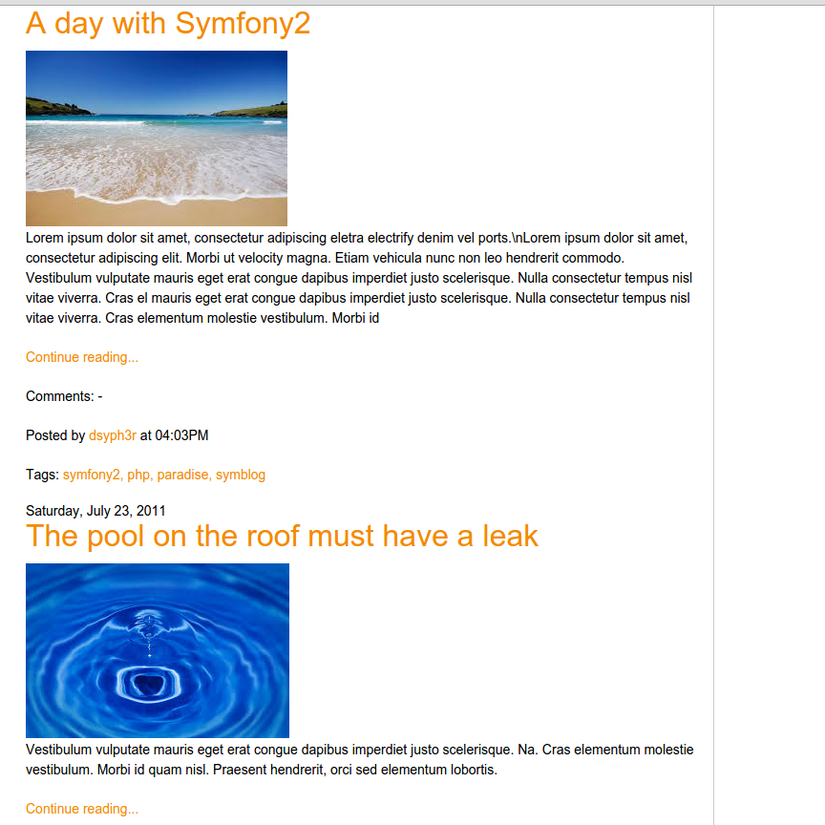
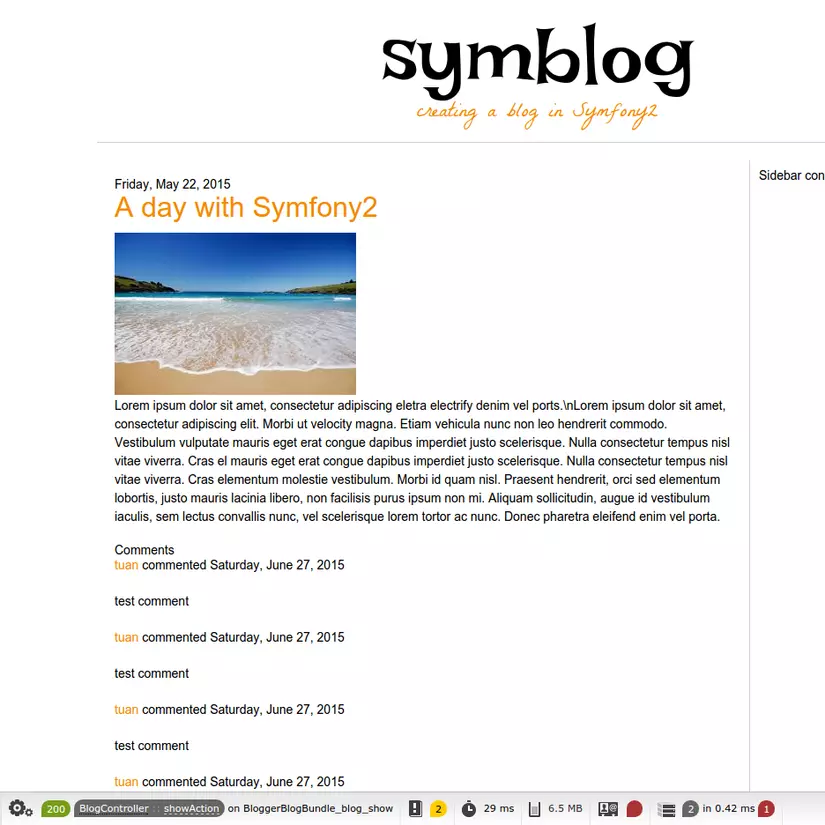
<img src="{{ asset(['images/', blog.image]|join) }}" />
<div class="snippet">
<p>{{ blog.blog(500) }}</p>
<p class="continue"><a href="{{ path('BloggerBlogBundle_blog_show', { 'id': blog.id }) }}">Continue reading...</a></p>
</div>
<footer class="meta">
<p>Comments: -</p>
<p>Posted by <span class="highlight">{{blog.author}}</span> at {{ blog.created|date('h:iA') }}</p>
<p>Tags: <span class="highlight">{{ blog.tags }}</span></p>
</footer>
</article>
{% else %}
<p>There are no blog entries for symblog</p>
{% endfor %}
{% endblock %}
Trong khi query entities trong controller, điều này không được tốt cho lắm. Việc query có thể tốt hơn nếu như đặt bên ngoài controller vì một vài lý do sau:
- Chúng ta không thể sử dụng query này cho bất kỳ chỗ nào nữa.
- Nếu chúng ta lặp code
QueryBuilder, chúng ta sẽ phải sửa nhiều chỗ nếu như có sự thay đổi trong query. - Tách biệt query với controller sẽ giúp chúng ta có thể kiểm tra quey một cách độc lập với controller. Doctrine 2 cung cấp lớp Repository giúp chúng ta làm được điều này.
Doctrine 2 Repositories
Ở bài trước cũng đã giới thiệu về Doctrine 2 Repository khi tạo trang hiển thị bài viết. Chúng ta sử dụng cài đặt mặc định của Doctrine\ORM\EntityRepository để nhận về 1 bài viết thông qua phương thức find(). Nhưng chúng ta muốn tạo một query mới thì chúng ta cần tạo 1 repository khác kế thừa từ EntityRepository. Cập nhật lại Blog entity để tạo ra BlogRepository
// src/Blogger/BlogBundle/Entity/Blog.php
/**
 * @ORM\Entity(repositoryClass="Blogger\BlogBundle\Entity\Repository\BlogRepository")
 * @ORM\Table(name="blog")
 * @ORM\HasLifecycleCallbacks()
 */
class Blog
{
    // ..
}
Sau khi đăng ký xong chúng ta cần chạy lại task sau:
php app/console doctrine:generate:entities Blogger\BlogBundle
Doctrine 2 sẽ tạo ra class BlogRepository như sau:
<?php
// src/Blogger/BlogBundle/Entity/Repository/BlogRepository.php

namespace Blogger\BlogBundle\Entity\Repository;

use Doctrine\ORM\EntityRepository;

/**
 * BlogRepository
 *
 * This class was generated by the Doctrine ORM. Add your own custom
 * repository methods below.
 */
class BlogRepository extends EntityRepository
{

}
Bây giờ hãy chuyển QueryBuilder từ PageController vào trong BlogRepository
<?php
// src/Blogger/BlogBundle/Entity/Repository/BlogRepository.php

namespace Blogger\BlogBundle\Entity\Repository;

use Doctrine\ORM\EntityRepository;

/**
 * BlogRepository
 *
 * This class was generated by the Doctrine ORM. Add your own custom
 * repository methods below.
 */
class BlogRepository extends EntityRepository
{
    public function getLatestBlogs($limit = null)
    {
        $qb = $this->createQueryBuilder('b')
                   ->select('b')
                   ->addOrderBy('b.created', 'DESC');

        if (false === is_null($limit))
            $qb->setMaxResults($limit);

        return $qb->getQuery()
                  ->getResult();
    }
}
Lúc này chúng ta gọi hàm getLastestBlogs() sẽ trả về các bài viết mới nhất. Việc này tương tự với việc sử dụng QueryBuilder trong controller. Cuối cùng, cập nhật lại PageController lại như sau để sử dụng repository.
// src/Blogger/BlogBundle/Controller/PageController.php
class PageController extends Controller
{
    public function indexAction()
    {
        $em = $this->getDoctrine()
                   ->getEntityManager();

        $blogs = $em->getRepository('BloggerBlogBundle:Blog')
                    ->getLatestBlogs();

        return $this->render('BloggerBlogBundle:Page:index.html.twig', array(
            'blogs' => $blogs
        ));
    }

    // ..
}
Creating Comment Entity
Chúng ta bắt đầu định nghĩa cơ bản cho class Comment entity và tạo quan hệ với Blog entity.
<?php
// src/Blogger/BlogBundle/Entity/Comment.php

namespace Blogger\BlogBundle\Entity;

use Doctrine\ORM\Mapping as ORM;
use Symfony\Component\Validator\Mapping\ClassMetadata;
use Symfony\Component\Validator\Constraints\NotBlank;

/**
 * @ORM\Entity(repositoryClass="Blogger\BlogBundle\Entity\Repository\CommentRepository")
 * @ORM\Table(name="comment")
 * @ORM\HasLifecycleCallbacks
 */
class Comment
{
    /**
     * @ORM\Id
     * @ORM\Column(type="integer")
     * @ORM\GeneratedValue(strategy="AUTO")
     */
    protected $id;

    /**
     * @ORM\Column(type="string")
     */
    public $user;

    /**
     * @ORM\Column(type="text")
     */
    public $comment;

    /**
     * @ORM\Column(type="boolean")
     */
    protected $approved;

    /**
     * @ORM\ManyToOne(targetEntity="Blog", inversedBy="comments")
     * @ORM\JoinColumn(name="blog_id", referencedColumnName="id")
     */
    protected $blog;

    /**
     * @ORM\Column(type="datetime")
     */
    protected $created;

    /**
     * @ORM\Column(type="datetime")
     */
    protected $updated;

    public function __construct()
    {
        $this->setCreated(new \DateTime());
        $this->setUpdated(new \DateTime());

        $this->setApproved(true);
    }

    public function setCreated($created)
    {
        $this->created = $created;
    }

    public function setUpdated($updated)
    {
        $this->updated = $updated;
    }

    public function setApproved($approved)
    {
        $this->approved = $approved;
    }

    public function setBlog($blog)
    {
        $this->blog = $blog;
    }

    public function setUser($user)
    {
        $this->user = $user;
    }

    public function setComment($comment)
    {
        $this->comment = $comment;
    }

    public function blog()
    {
        return $this->blog;
    }

    public function getBlog()
    {
        return $this->blog;
    }

    public function getId()
    {
        return $this->id;
    }

    public function getCreated()
    {
        return $this->created;
    }

    /**
     * @ORM\PreUpdate
     */
    public function setUpdatedValue()
    {
        $this->setUpdated(new \DateTime());
    }

    public static function loadValidatorMetadata(ClassMetadata $metadata)
    {
        $metadata->addPropertyConstraint('user', new NotBlank(array(
            'message' => 'You must enter your name'
        )));
        $metadata->addPropertyConstraint('comment', new NotBlank(array(
            'message' => 'You must enter a comment'
        )));
    }
}
Sau đó cập nhật lại Blog entity để khai báo quan hệ giữa 2 entity.
<?php
// src/Blogger/BlogBundle/Entity/Blog.php

namespace Blogger\BlogBundle\Entity;

use Doctrine\ORM\Mapping as ORM;
use Doctrine\Common\Collections\ArrayCollection;

/**
 * @ORM\Entity(repositoryClass="Blogger\BlogBundle\Entity\Repository\BlogRepository")
 * @ORM\Table(name="blog")
 * @ORM\HasLifecycleCallbacks
 */
class Blog
{
    // ..

    /**
     * @ORM\OneToMany(targetEntity="Comment", mappedBy="blog")
     */
    protected $comments;

    // ..

    public function __construct()
    {
        $this->comments = new ArrayCollection();

        $this->setCreated(new \DateTime());
        $this->setUpdated(new \DateTime());
    }

    // ..
}
Sau khi đã thay đổi 2 entity. Chạy lại Doctrine 2 task sau để Doctrine 2 sinh ra quan hệ.
php app/console doctrine:generate:entities Blogger\BlogBundle
Doctrine 2 Migrations
Doctrine 2 Migrations là 1 extension và cài đặt tương tự với Data Fixtures. Mở file composer.json và cập nhật lại như sau:
"require": {
    // ...
    "doctrine/doctrine-migrations-bundle": "dev-master",
    "doctrine/migrations": "dev-master"
}
Tiếp theo, cập nhật lại các thư viện.
php composer.phar update
Sau khi các thư viện cập nhật xong thì hãy đăng ký bundle vào trong app/AppKernel.php
// app/AppKernel.php
public function registerBundles()
{
    $bundles = array(
        // ...
        new Doctrine\Bundle\MigrationsBundle\DoctrineMigrationsBundle(),
        // ...
    );
    // ...
}
Bây giờ để thực sự cập nhật lại thay đổi cho database. Chúng ta cần 2 bước. Đầu tiên, doctrine:migrations:diff để kiểm tra sự khác nhau giữa các thực thể và cơ sở dữ liệu hiện tại. Thứ 2 là doctrine:migrations:migrate để thực thi việc thay đổi dự trên sự khác nhau đó.
php app/console doctrine:migrations:diff
php app/console doctrine:migrations:migrate
Display Comments
Chúng ta hiển thị comments liên quan đến mỗi bài viết. Đầu tiên cập nhật lại CommentRepository để lấy ra các comments của bài viết.
<?php
// src/Blogger/BlogBundle/Entity/Repository/CommentRepository.php

namespace Blogger\BlogBundle\Entity\Repository;

use Doctrine\ORM\EntityRepository;

/**
 * CommentRepository
 *
 * This class was generated by the Doctrine ORM. Add your own custom
 * repository methods below.
 */
class CommentRepository extends EntityRepository
{
    public function getCommentsForBlog($blogId, $approved = true)
    {
        $qb = $this->createQueryBuilder('c')
                   ->select('c')
                   ->where('c.blog = :blog_id')
                   ->addOrderBy('c.created')
                   ->setParameter('blog_id', $blogId);

        if (false === is_null($approved))
            $qb->andWhere('c.approved = :approved')
               ->setParameter('approved', $approved);

        return $qb->getQuery()
                  ->getResult();
    }
}
Blog Controller
Tiếp theo, cập nhật lại BlogController để lấy lại comment của bài viết sử dụng hàm trong CommentRepository vừa viết.
// src/Blogger/BlogBundle/Controller/BlogController.php

public function showAction($id)
{
    // ..

    if (!$blog) {
        throw $this->createNotFoundException('Unable to find Blog post.');
    }

    $comments = $em->getRepository('BloggerBlogBundle:Comment')
                   ->getCommentsForBlog($blog->getId());

    return $this->render('BloggerBlogBundle:Blog:show.html.twig', array(
        'blog'      => $blog,
        'comments'  => $comments
    ));
}
Blog show template
Bây giờ chúng ta hiển thị danh sách các comments trong template show của bài viết. Chúng ta có thể hiển thị đơn giản bằng cách render trực tiếp trong template show. Nhưng comments là của entity khác vì vậy tốt hơn là tách riêng ra template khác và include template đó vào.
{# src/Blogger/BlogBundle/Resources/views/Blog/show.html.twig #}

{# .. #}

{% block body %}
    {# .. #}

    <section class="comments" id="comments">
        <section class="previous-comments">
            <h3>Comments</h3>
            {% include 'BloggerBlogBundle:Comment:index.html.twig' with { 'comments': comments } %}
        </section>
    </section>
{% endblock %}
Comment show template
Chúng ta đang include file mà chưa tồn tại. Vì vậy, chúng ta cần tạo nó với nội dung như sau:
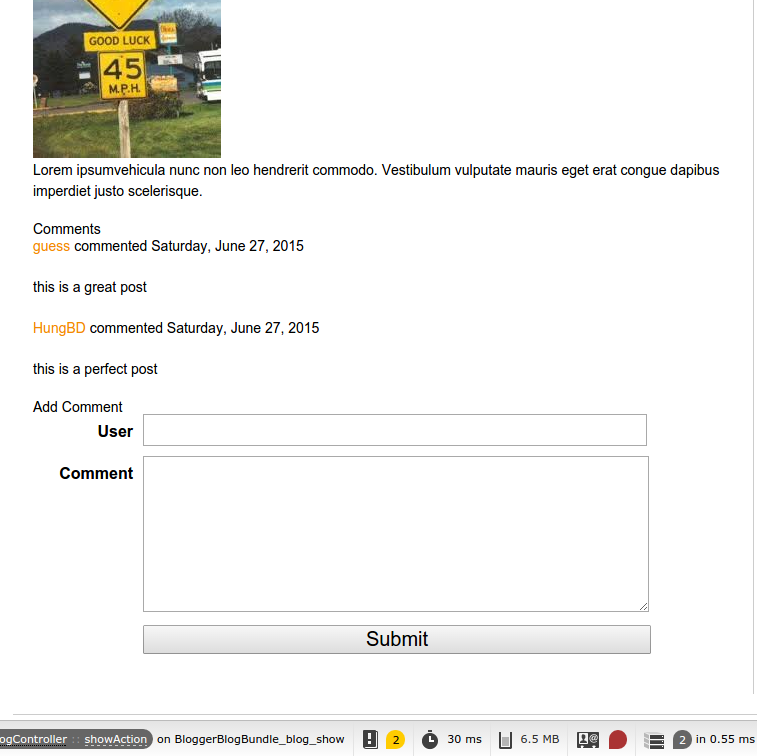
{# src/Blogger/BlogBundle/Resources/views/Comment/index.html.twig #}

{% for comment in comments %}
    <article class="comment {{ cycle(['odd', 'even'], loop.index0) }}" id="comment-{{ comment.id }}">
        <header>
            <p><span class="highlight">{{ comment.user }}</span> commented <time datetime="{{ comment.created|date('c') }}">{{ comment.created|date('l, F j, Y') }}</time></p>
        </header>
        <p>{{ comment.comment }}</p>
    </article>
{% else %}
    <p>There are no comments for this post. Be the first to comment...</p>
{% endfor %}
Adding Comments
Chúng ta sẽ thực hiện việc tạo comments ở trong trang show bài viết. Chúng ta đã được giới thiệu về form trong Symfony2 ở trong bài viết về contact form. Tương tự như vậy, chạy task sau để sinh ra CommentType.
php app/console generate:doctrine:form BloggerBlogBundle:Comment
Display Comment Form
Routing
Định nghĩa routing cho việc hiển thị và thêm comment.
BloggerBlogBundle_comment_create:
    pattern:  /comment/{blog_id}
    defaults: { _controller: BloggerBlogBundle:Comment:create }
    requirements:
        _method:  POST
        blog_id: \d+
BloggerBlogBundle_comment_new:
    pattern:  /comment/{blog_id}
    defaults: { _controller: BloggerBlogBundle:Comment:new }
    requirements:
        _method:  GET
        blog_id: \d+
Controller
Tiếp theo tạo file Commentcontroller
<?php
// src/Blogger/BlogBundle/Controller/CommentController.php

namespace Blogger\BlogBundle\Controller;

use Symfony\Bundle\FrameworkBundle\Controller\Controller;
use Blogger\BlogBundle\Entity\Comment;
use Blogger\BlogBundle\Form\CommentType;

/**
 * Comment controller.
 */
class CommentController extends Controller
{
    public function newAction($blog_id)
    {
        $blog = $this->getBlog($blog_id);

        $comment = new Comment();
        $comment->setBlog($blog);
        $form   = $this->createForm(new CommentType(), $comment);

        return $this->render('BloggerBlogBundle:Comment:form.html.twig', array(
            'comment' => $comment,
            'form'   => $form->createView()
        ));
    }

    public function createAction($blog_id)
    {
        $blog = $this->getBlog($blog_id);

        $comment  = new Comment();
        $comment->setBlog($blog);
        $request = $this->getRequest();
        $form    = $this->createForm(new CommentType(), $comment);
        $form->bindRequest($request);

        if ($form->isValid()) {
            // TODO: Persist the comment entity

            return $this->redirect($this->generateUrl('BloggerBlogBundle_blog_show', array(
                'id' => $comment->getBlog()->getId())) .
                '#comment-' . $comment->getId()
            );
        }

        return $this->render('BloggerBlogBundle:Comment:create.html.twig', array(
            'comment' => $comment,
            'form'    => $form->createView()
        ));
    }

    protected function getBlog($blog_id)
    {
        $em = $this->getDoctrine()
                    ->getEntityManager();

        $blog = $em->getRepository('BloggerBlogBundle:Blog')->find($blog_id);

        if (!$blog) {
            throw $this->createNotFoundException('Unable to find Blog post.');
        }

        return $blog;
    }

}
Chúng ta tạo 2 action trong controller, 1 cho new và 1 cho create. Action new thực hiện hiển thị form comment, create thực hiện việc xử lý thêm comment mới.
Tiếp theo tạo 2 template tương ứng cho 2 action trên.
{# src/Blogger/BlogBundle/Resources/views/Comment/form.html.twig #}

<form action="{{ path('BloggerBlogBundle_comment_create', { 'blog_id' : comment.blog.id } ) }}" method="post" {{ form_enctype(form) }} class="blogger">
    {{ form_widget(form) }}
    <p>
        <input type="submit" value="Submit">
    </p>
</form>
Mục đích của template này rất đơn giản chi render ra comment form. Thêm view này vào create view.
{% extends 'BloggerBlogBundle::layout.html.twig' %}

{% block title %}Add Comment{% endblock%}

{% block body %}
    <h1>Add comment for blog post "{{ comment.blog.title }}"</h1>
    {% include 'BloggerBlogBundle:Comment:form.html.twig' with { 'form': form } %}
{% endblock %}
Tiếp theo, cập nhật lại template show để render ra template add comment.
{# src/Blogger/BlogBundle/Resources/views/Blog/show.html.twig #}

{# .. #}

{% block body %}

    {# .. #}

    <section class="comments" id="comments">
        {# .. #}

        <h3>Add Comment</h3>
        {{ render(controller('BloggerBlogBundle:Comment:new', { 'blog_id': blog.id })) }}
    </section>
{% endblock %}
Tổng kết.
Kết thúc bài viết này blog của chúng ta có thể cho user post comments and đọc comment của những user khác. Ngoài ra cũng nắm được cách sử dụng Doctrine 2 Migration để quản lý thay đổi database.
Download source code
All rights reserved
