Sử dụng CameraX trong Android
This post hasn't been updated for 6 years
CameraX là một thư viện hỗ trợ Jetpack, được xây dựng để giúp bạn phát triển ứng dụng Camera dễ dàng hơn. Nó cung cấp API nhất quán và dễ sử dụng, hoạt động trên hầu hết các thiết bị Android, có khả năng tương thích với Android 5.0 (API level 21).
Mặc dù nó tận dụng các khả năng của camera2, nhưng cách tiếp cận dựa đơn giản hơn.
Nó cũng giải quyết các vấn đề tương thích thiết bị cho bạn để bạn không phải xử lý riêng cho từng thiết bị trong code của mình.
Các tính năng này làm giảm số lượng code bạn cần viết khi thêm tính năng Camera vào ứng dụng của bạn.
1. Tổng quan
Trong bài viết này, chúng ta sẽ tìm hiểu cách tạo một ứng dụng camera sử dụng CameraX để hiển thị viewfinder, chụp ảnh và phân tích luồng hình ảnh từ camera. Để đạt được điều này, chúng ta sẽ tìm hiểu các khái niệm sử dụng trong CameraX, được sử dụng cho nhiều hoạt động khác nhau của camera, từ hiển thị viewfinder đến phân tích khung hình trong thời gian thực.
Chúng ta sẽ học gì ?
- Thêm CameraX dependencies.
- Hiển thị Camera preview trong một Activity. (Preview use case)
- Chụp ảnh, lưu ảnh vào bộ nhớ. (ImageCapture use case)
- Phân tích các khung hình của Camera theo thời gian thực. (ImageAnalysis use case)
Phần cứng cần sử dụng
- Một thiết bị Android. Sử dụng Android 5.0 trở lên ( API level 21).
Phần mềm cần sử dụng
Android Studio 3.3 trở lên.
2. Tạo mới Project
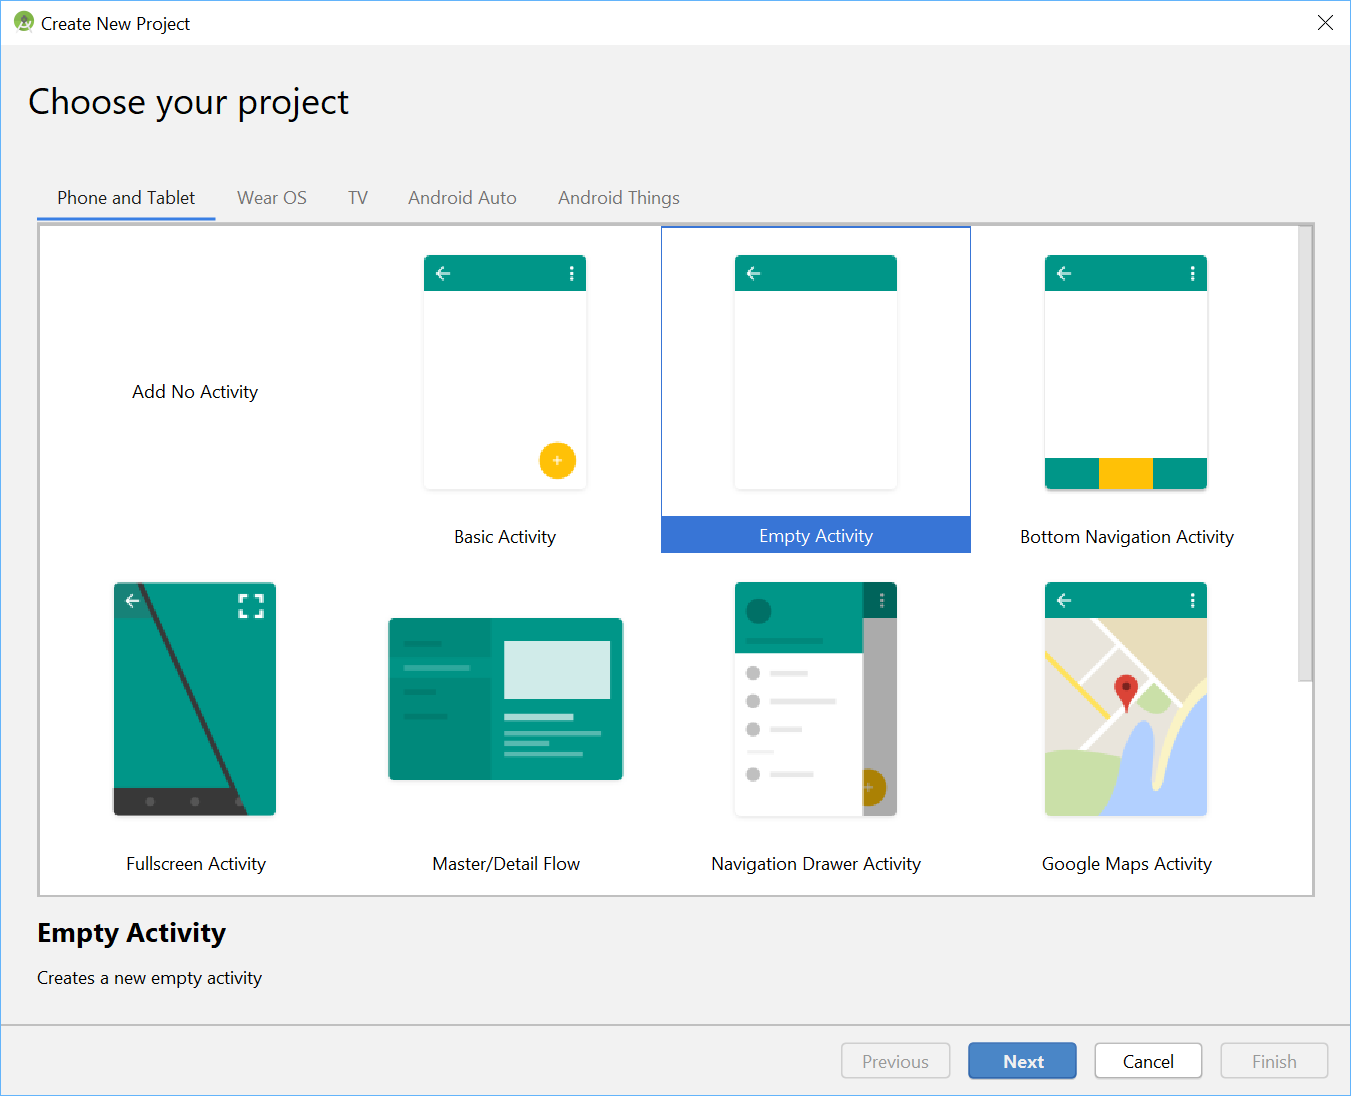
Mở Android Studio, chọn New Project > Empty Activity
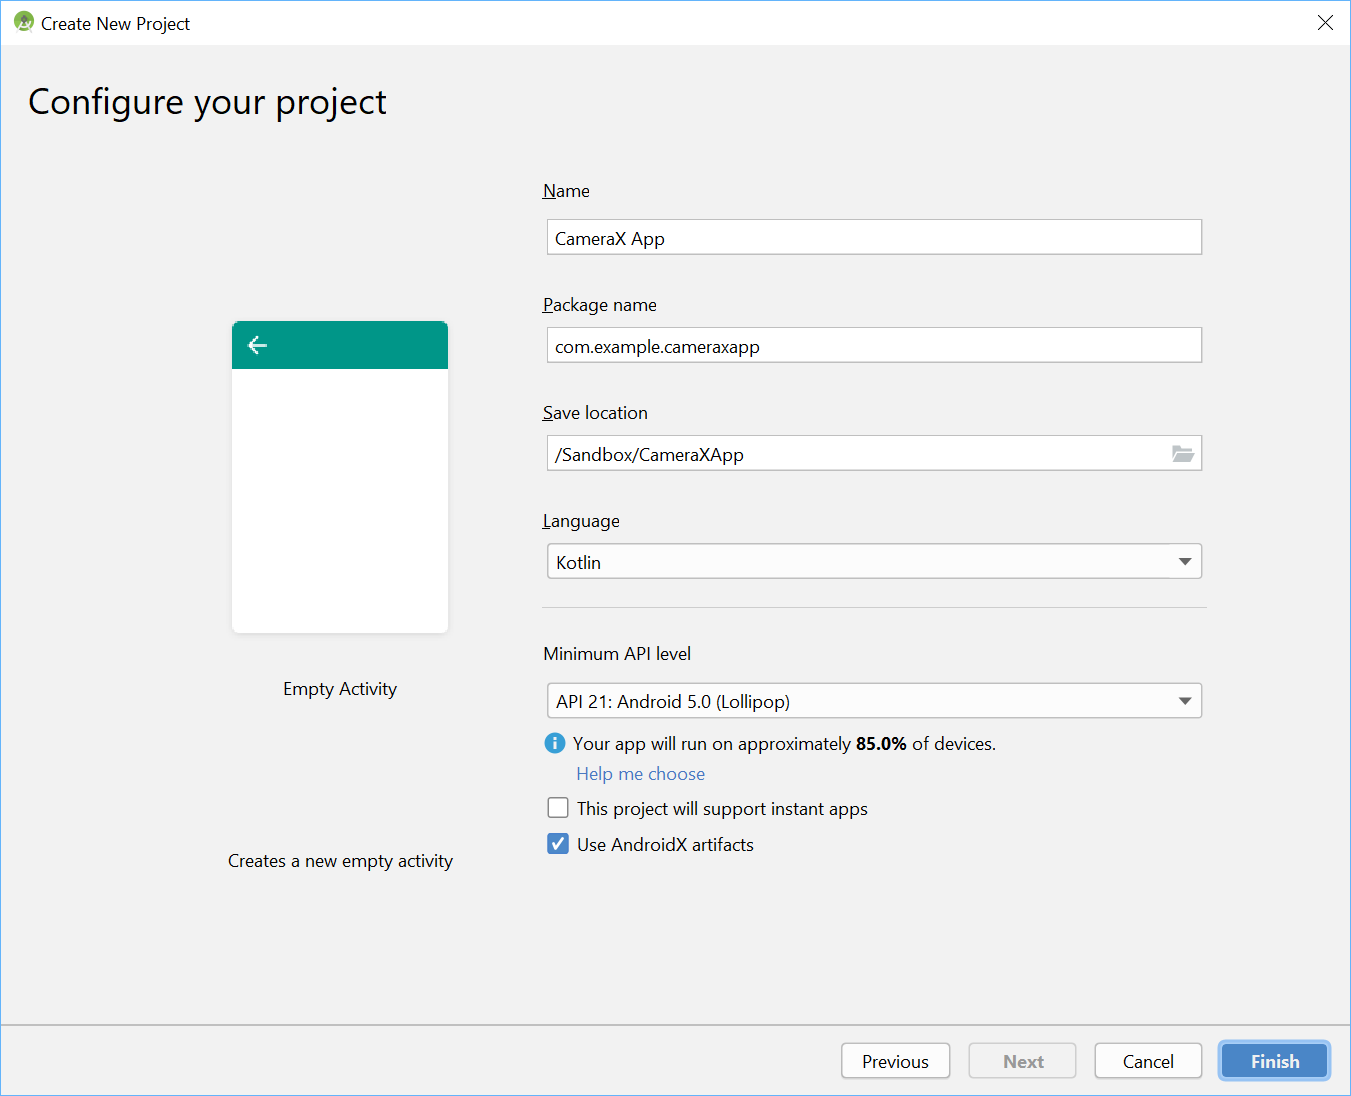
Đặt tên Project là CameraX App Chọn ngôn ngữ là Kotlin Minimum API level là 21 Sử dụng AndroidX artifacts
3. Thêm Gradle dependencies
Mở file app/build.gradle, thêm dependencies như sau :
// Use the most recent version of CameraX, currently that is alpha06.
def camerax_version = '1.0.0-alpha06'
implementation "androidx.camera:camera-core:${camerax_version}"
implementation "androidx.camera:camera-camera2:${camerax_version}"
CameraX cần một số phương thước của Java 8. Vì vậy, thêm options sử dụng Java 8 như sau, thêm ngay sau buildTypes :
    buildTypes {
        release {
            minifyEnabled false
            proguardFiles getDefaultProguardFile('proguard-android-optimize.txt'), 'proguard-rules.pro'
        }
    }

    compileOptions {
        sourceCompatibility JavaVersion.VERSION_1_8
        targetCompatibility JavaVersion.VERSION_1_8
    }
Sau đó, các bạn hãy Sync project và ... code thôi.
4. Tạo layout viewfinder
Chúng ta sẽ sử dụng SurfaceTexture để hiển thị viewfinder của camera. Trong ví dụ này, chúng ta sẽ hiển thị viewfinder hình vuông có kích thước cố định.
res > layout > activity_main.xml
<?xml version="1.0" encoding="utf-8"?>
<androidx.constraintlayout.widget.ConstraintLayout
        xmlns:android="http://schemas.android.com/apk/res/android"
        xmlns:tools="http://schemas.android.com/tools"
        xmlns:app="http://schemas.android.com/apk/res-auto"
        android:layout_width="match_parent"
        android:layout_height="match_parent"
        tools:context=".MainActivity">

    <TextureView
            android:id="@+id/view_finder"
            android:layout_width="640px"
            android:layout_height="640px"
            app:layout_constraintTop_toTopOf="parent"
            app:layout_constraintBottom_toBottomOf="parent"
            app:layout_constraintStart_toStartOf="parent"
            app:layout_constraintEnd_toEndOf="parent" />

</androidx.constraintlayout.widget.ConstraintLayout>
5. Xin quyền Camera permissions
Thêm permission trong AndroidManifest.xml :
<uses-permission android:name="android.permission.CAMERA" />
java > com.example.cameraxapp > MainActivity.kt:
// Your IDE likely can auto-import these classes, but there are several
// different implementations so we list them here to disambiguate.
import android.Manifest
import android.content.pm.PackageManager
import android.util.Size
import android.graphics.Matrix
import android.view.TextureView
import android.widget.Toast
import androidx.core.app.ActivityCompat
import androidx.core.content.ContextCompat
import java.util.concurrent.TimeUnit

// This is an arbitrary number we are using to keep track of the permission
// request. Where an app has multiple context for requesting permission,
// this can help differentiate the different contexts.
private const val REQUEST_CODE_PERMISSIONS = 10

// This is an array of all the permission specified in the manifest.
private val REQUIRED_PERMISSIONS = arrayOf(Manifest.permission.CAMERA)
Trong MainActivity.kt, thêm các hàm sau để yêu cầu permission và xử lý khi permission được cấp phép :
class MainActivity : AppCompatActivity(), LifecycleOwner {

    override fun onCreate(savedInstanceState: Bundle?) {
        ...
    }

    // Add this after onCreate

    private val executor = Executors.newSingleThreadExecutor()
    private lateinit var viewFinder: TextureView

    private fun startCamera() {
        // TODO: Implement CameraX operations
    }

    private fun updateTransform() {
        // TODO: Implement camera viewfinder transformations
    }

    /**
     * Process result from permission request dialog box, has the request
     * been granted? If yes, start Camera. Otherwise display a toast
     */
    override fun onRequestPermissionsResult(
        requestCode: Int, permissions: Array<String>, grantResults: IntArray) {
        if (requestCode == REQUEST_CODE_PERMISSIONS) {
            if (allPermissionsGranted()) {
                viewFinder.post { startCamera() }
            } else {
                Toast.makeText(this,
                    "Permissions not granted by the user.",
                    Toast.LENGTH_SHORT).show()
                finish()
            }
        }
    }

    /**
     * Check if all permission specified in the manifest have been granted
     */
    private fun allPermissionsGranted() = REQUIRED_PERMISSIONS.all {
        ContextCompat.checkSelfPermission(
               baseContext, it) == PackageManager.PERMISSION_GRANTED
    }
}
Cuối cùng, xử lý trong onCreate() :
override fun onCreate(savedInstanceState: Bundle?) {
    ...

    // Add this at the end of onCreate function

    viewFinder = findViewById(R.id.view_finder)

    // Request camera permissions
    if (allPermissionsGranted()) {
        viewFinder.post { startCamera() }
    } else {
        ActivityCompat.requestPermissions(
            this, REQUIRED_PERMISSIONS, REQUEST_CODE_PERMISSIONS)
    }

    // Every time the provided texture view changes, recompute layout
    viewFinder.addOnLayoutChangeListener { _, _, _, _, _, _, _, _, _ ->
        updateTransform()
    }
}
Lúc này, khi mở app, nó sẽ kiểm tra xem quyền sử dụng Camera đã được cấp phép hay chưa. Nếu được cấp phép rồi, nó sẽ trực tiếp gọi hàm startCamera(). Ngược lại, nó sẽ yêu cầu sử dụng Camera, khi được cấp phép, nó sẽ gọi hàm startCamera().
6. Implement view finder
Đối với hầu hết các ứng dụng camera, việc hiển thị viewfinder cho người dùng là rất quan trọng - nếu không, rất khó để người dùng hướng máy ảnh đến đúng nơi. Một viewfinder có thể được thực hiện bằng cách sử dụng lớp Preview của CameraX.
Để sử dụng class Preview, đầu tiên chúng ta cần định nghĩa một configuration, dùng để tạo instance của lớp này. Chúng ta sẽ thực hiện trong hàm startCamera()
- Trước tiên, thêm dependencies sau vào file app/build.gradle :
implementation 'androidx.appcompat:appcompat:1.1.0'
- Sau đó, implement trong startCamera() :
private fun startCamera() {

    // Create configuration object for the viewfinder use case
    val previewConfig = PreviewConfig.Builder().apply {
        setTargetResolution(Size(640, 480))
    }.build()


    // Build the viewfinder use case
    val preview = Preview(previewConfig)

    // Every time the viewfinder is updated, recompute layout
    preview.setOnPreviewOutputUpdateListener {

        // To update the SurfaceTexture, we have to remove it and re-add it
        val parent = viewFinder.parent as ViewGroup
        parent.removeView(viewFinder)
        parent.addView(viewFinder, 0)

        viewFinder.surfaceTexture = it.surfaceTexture
        updateTransform()
    }

    // Bind use cases to lifecycle
    // If Android Studio complains about "this" being not a LifecycleOwner
    // try rebuilding the project or updating the appcompat dependency to
    // version 1.1.0 or higher.
    CameraX.bindToLifecycle(this, preview)
}
Tại thời điểm này, chúng ta cần triển khai phương thức updateTransform ().
Bên trong updateTransform () mục tiêu là xử ký những thay đổi trong hướng thiết bị để hiển thị kính ngắm của chúng ta theo hướng xoay thẳng đứng:
private fun updateTransform() {
    val matrix = Matrix()

    // Compute the center of the view finder
    val centerX = viewFinder.width / 2f
    val centerY = viewFinder.height / 2f

    // Correct preview output to account for display rotation
    val rotationDegrees = when(viewFinder.display.rotation) {
        Surface.ROTATION_0 -> 0
        Surface.ROTATION_90 -> 90
        Surface.ROTATION_180 -> 180
        Surface.ROTATION_270 -> 270
        else -> return
    }
    matrix.postRotate(-rotationDegrees.toFloat(), centerX, centerY)

    // Finally, apply transformations to our TextureView
    viewFinder.setTransform(matrix)
}
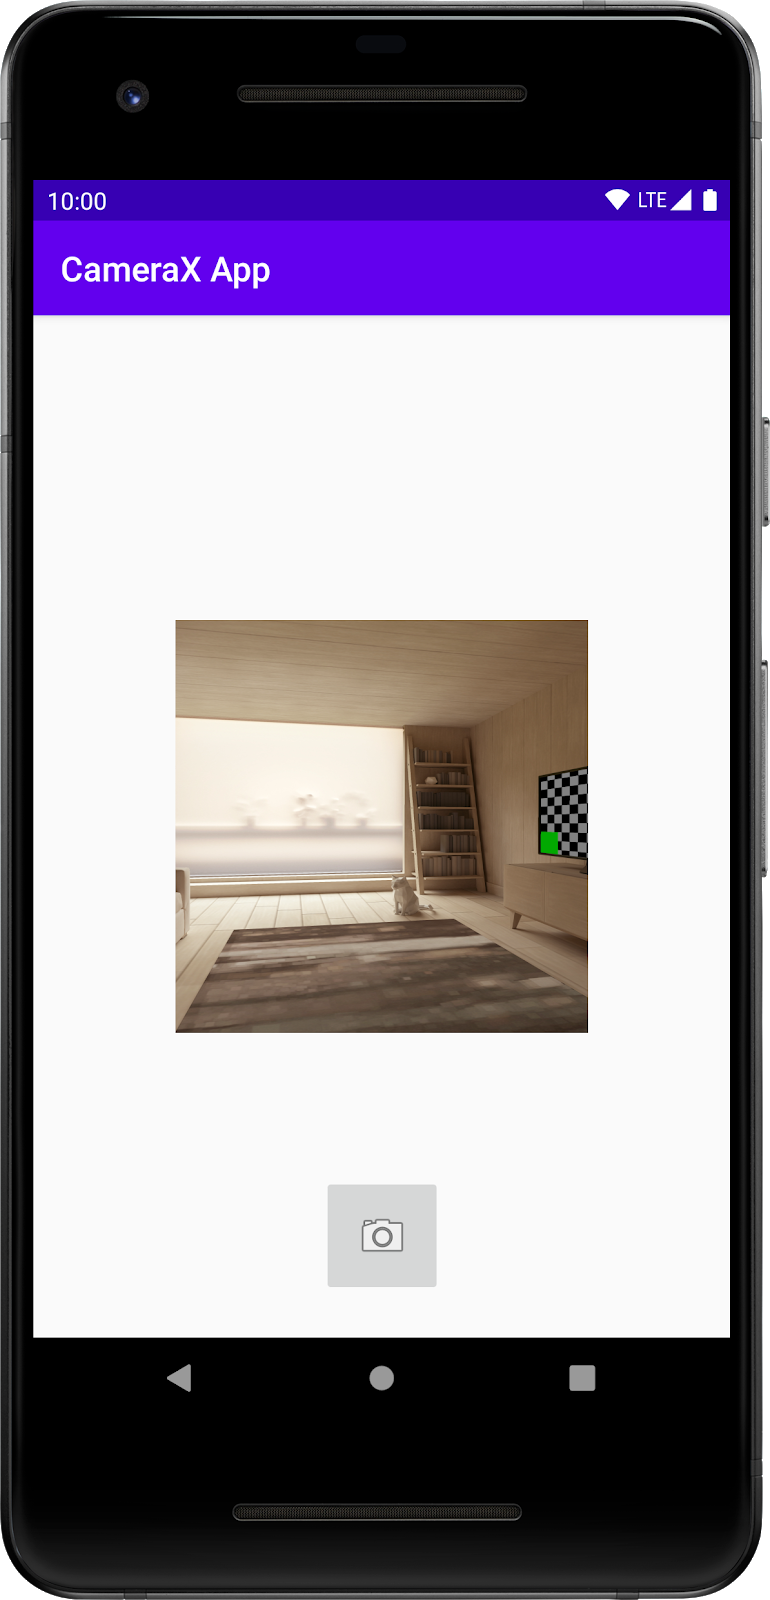
Build và mở app, chúng ta có kết quả như sau :

7. Xử lý chụp ảnh
Để người dùng chụp được ảnh, chúng ta cần một Button để người dùng chụp. Thêm Button vào layout như sau :
<ImageButton
        android:id="@+id/capture_button"
        android:layout_width="72dp"
        android:layout_height="72dp"
        android:layout_margin="24dp"
        app:srcCompat="@android:drawable/ic_menu_camera"
        app:layout_constraintBottom_toBottomOf="parent"
        app:layout_constraintEnd_toEndOf="parent"
        app:layout_constraintStart_toStartOf="parent" />
Các trường hợp sử dụng khác hoạt động theo cách rất giống so với Preview. Đầu tiên, chúng ta phải định nghĩa một đối tượng cấu hình được sử dụng để khởi tạo.
Để chụp ảnh, khi nhấn nút chụp, chúng ta cần cập nhật phương thức startCamera () và thêm một vài dòng code ở cuối, trước khi gọi đến CameraX.bindToLifecycle:
private fun startCamera() {

    ...

    // Add this before CameraX.bindToLifecycle

    // Create configuration object for the image capture use case
    val imageCaptureConfig = ImageCaptureConfig.Builder()
        .apply {
            // We don't set a resolution for image capture; instead, we
            // select a capture mode which will infer the appropriate
            // resolution based on aspect ration and requested mode
            setCaptureMode(ImageCapture.CaptureMode.MIN_LATENCY)
        }.build()

    // Build the image capture use case and attach button click listener
    val imageCapture = ImageCapture(imageCaptureConfig)
    findViewById<ImageButton>(R.id.capture_button).setOnClickListener {
        val file = File(externalMediaDirs.first(),
            "${System.currentTimeMillis()}.jpg")

        imageCapture.takePicture(file, executor,
            object : ImageCapture.OnImageSavedListener {
                override fun onError(
                    imageCaptureError: ImageCapture.ImageCaptureError,
                    message: String,
                    exc: Throwable?
                ) {
                    val msg = "Photo capture failed: $message"
                    Log.e("CameraXApp", msg, exc)
                    viewFinder.post {
                        Toast.makeText(baseContext, msg, Toast.LENGTH_SHORT).show()
                    }
                }

                override fun onImageSaved(file: File) {
                    val msg = "Photo capture succeeded: ${file.absolutePath}"
                    Log.d("CameraXApp", msg)
                    viewFinder.post {
                        Toast.makeText(baseContext, msg, Toast.LENGTH_SHORT).show()
                    }
                }
            })
    }

    // Bind use cases to lifecycle
    // If Android Studio complains about "this" being not a LifecycleOwner
    // try rebuilding the project or updating the appcompat dependency to
    // version 1.1.0 or higher.
    CameraX.bindToLifecycle(this, preview)
}
Sau đó, gọi CameraX.bindToLifecycle
CameraX.bindToLifecycle(this, preview, imageCapture)
8. Implement image analysis
Một tính năng rất thú vị của CameraX là lớp ImageAnalysis. Nó cho phép chúng ta định nghĩa một lớp tùy chỉnh thực hiện ImageAnalysis.
Analyzer interface, sẽ được gọi với khung máy ảnh đến. Để phù hợp với tầm nhìn cốt lõi của CameraX, chúng tôi sẽ không phải lo lắng về việc quản lý trạng thái phiên camera hay thậm chí là xử lý hình ảnh; ràng buộc với vòng đời mong muốn của ứng dụng của chúng tôi là đủ như các thành phần nhận biết vòng đời khác.
Đầu tiên, chúng ta sẽ thực hiện một bộ phân tích hình ảnh tùy chỉnh.
Trình phân tích của chúng ta khá đơn giản - nó chỉ log lại độ sáng trung bình (độ chói) của hình ảnh, nhưng minh họa những gì cần phải làm cho các trường hợp sử dụng phức tạp tùy ý.
Tất cả những gì chúng ta cần làm là ghi đè hàm analy trong lớp mà implement ImageAnalysis.Analyzer.
Chúng ta tạo một inner class trong MainActivity:
private class LuminosityAnalyzer : ImageAnalysis.Analyzer {
    private var lastAnalyzedTimestamp = 0L

    /**
     * Helper extension function used to extract a byte array from an
     * image plane buffer
     */
    private fun ByteBuffer.toByteArray(): ByteArray {
        rewind()    // Rewind the buffer to zero
        val data = ByteArray(remaining())
        get(data)   // Copy the buffer into a byte array
        return data // Return the byte array
    }

    override fun analyze(image: ImageProxy, rotationDegrees: Int) {
        val currentTimestamp = System.currentTimeMillis()
        // Calculate the average luma no more often than every second
        if (currentTimestamp - lastAnalyzedTimestamp >=
            TimeUnit.SECONDS.toMillis(1)) {
            // Since format in ImageAnalysis is YUV, image.planes[0]
            // contains the Y (luminance) plane
            val buffer = image.planes[0].buffer
            // Extract image data from callback object
            val data = buffer.toByteArray()
            // Convert the data into an array of pixel values
            val pixels = data.map { it.toInt() and 0xFF }
            // Compute average luminance for the image
            val luma = pixels.average()
            // Log the new luma value
            Log.d("CameraXApp", "Average luminosity: $luma")
            // Update timestamp of last analyzed frame
            lastAnalyzedTimestamp = currentTimestamp
        }
    }
}
Tiếp thoe, xử lý startCamera()
private fun startCamera() {

    ...

    // Add this before CameraX.bindToLifecycle

    // Setup image analysis pipeline that computes average pixel luminance
    val analyzerConfig = ImageAnalysisConfig.Builder().apply {
        // In our analysis, we care more about the latest image than
        // analyzing *every* image
        setImageReaderMode(
            ImageAnalysis.ImageReaderMode.ACQUIRE_LATEST_IMAGE)
    }.build()

    // Build the image analysis use case and instantiate our analyzer
    val analyzerUseCase = ImageAnalysis(analyzerConfig).apply {
        setAnalyzer(executor, LuminosityAnalyzer())
    }

    // Bind use cases to lifecycle
    // If Android Studio complains about "this" being not a LifecycleOwner
    // try rebuilding the project or updating the appcompat dependency to
    // version 1.1.0 or higher.
    CameraX.bindToLifecycle(this, preview, imageCapture)
}
Cuối cùng, update CameraX.bindtoLifecycle
CameraX.bindToLifecycle(
    this, preview, imageCapture, analyzerUseCase)
Chạy app, chúng ta sẽ thấy Log như sau :
D/CameraXApp: Average luminosity: ...
All Rights Reserved
