React thực chiến - Bài 2 - Quản lý và phân chia Component
Ở bài trước ta đã tìm hiểu cách tạo dự án React. Trong bài này ta cùng tìm hiểu cách chia Component và cách quản lý Component, làm thế nào thay đổi giao diện của Component từ bên ngoài theo ý ta muốn.

Ta cùng xây một ứng dụng Question & Answer đơn giản như bên dưới để tìm hiểu cách chia và quản lý Component.

Khởi tạo dự án
Chạy câu lệnh để tạo dự án:
npx create-react-app question-and-answer && cd question-and-answer
Chạy dự án:
npm start
Mở tệp tin App.js và dán đoạn code sau:
import "./App.css";
// import Card from "./Component/Card";

function App() {
  return (
    <div className="app">
      <div className="card">
        <div className="question-card">
          <div className="title">Question</div>
          <button className="button">Hidden</button>
          <div className="body">
            What is the name of the 25th James Bond film?
          </div>
        </div>
        <div className="question-card">
          <div className="title">Anwser</div>
          <button className="button">Hidden</button>
          <div className="body">
            No Time to Die
          </div>
        </div>
      </div>
      <div className="card">
        <div className="question-card">
          <div className="title">Question</div>
          <button className="button">Hidden</button>
          <div className="body">
            Who created Javascript?
          </div>
        </div>
        <div className="question-card">
          <div className="title">Anwser</div>
          <button className="button">Show</button>
        </div>
      </div>
    </div>
  );
}

export default App;
Mở tệp tin App.css và dán đoạn code css sau vào:
* {
  margin: 0;
  padding: 0;
}

.app {
  margin: 20px;
  display: flex;
  align-items: baseline;
}

.app .card {
  background: #afd7e7;
  padding: 20px 20px 0 20px;
  width: 350px;
  border: 2.5px black solid;
}

.app .card:not(:last-child) {
  margin-right: 10px;
}

.app .question-card {
  border-top: 2.5px black solid;
  display: grid;
  grid-template-columns: repeat(2, 1fr);
  grid-gap: 5px;
  padding: 15px 0;
}

.app .card .title {
  font-weight: bold;
}

.app .card .button {
  padding: 2px;
  justify-self: end;
}

.app .card .body {
  grid-column: 1 / span 2;
}
Mở trình duyệt ở địa chỉ localhost:3000:

Phân tích ứng dụng
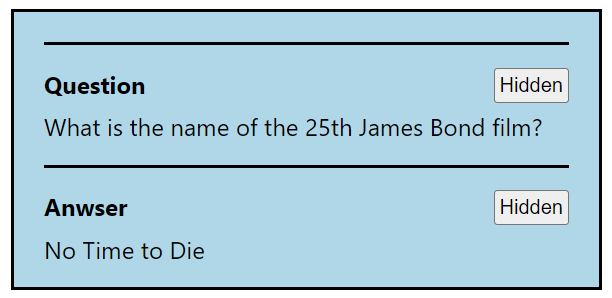
Dựa vào giao diện ta thấy được ứng dụng có thành phần chính là tấm thẻ để hiển thị Question và Answer:

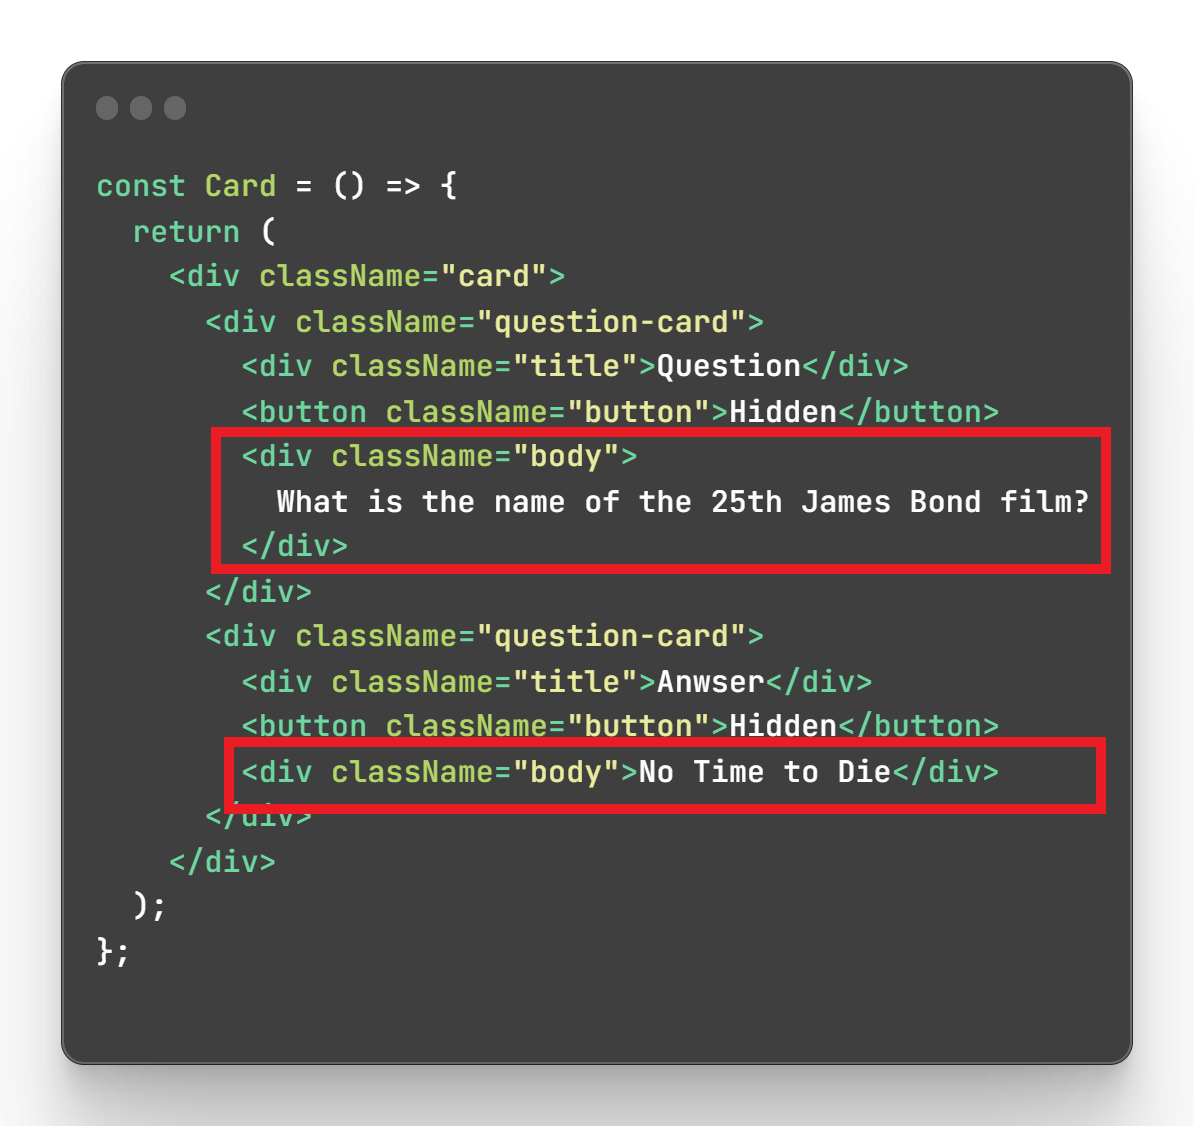
Được định nghĩa bởi đoạn code:
  <div className="card">
    <div className="question-card">
      <div className="title">Question</div>
      <button className="button">Hidden</button>
      <div className="body">
        What is the name of the 25th James Bond film?
      </div>
    </div>
    <div className="question-card">
      <div className="title">Anwser</div>
      <button className="button">Hidden</button>
      <div className="body">
        No Time to Die
      </div>
    </div>
  </div>
Nếu ta muốn có thêm một thẻ Question và Answer thì ta sao chép đoạn code và dán ở phía dưới như code ở dự án trên:
  <div className="card">
    <div className="question-card">
      <div className="title">Question</div>
      <button className="button">Hidden</button>
      <div className="body">
        What is the name of the 25th James Bond film?
      </div>
    </div>
    <div className="question-card">
      <div className="title">Anwser</div>
      <button className="button">Hidden</button>
      <div className="body">
        No Time to Die
      </div>
    </div>
  </div>
  <div className="card">
    <div className="question-card">
      <div className="title">Question</div>
      <button className="button">Hidden</button>
      <div className="body">
        Who created Javascript?
      </div>
    </div>
    <div className="question-card">
      <div className="title">Anwser</div>
      <button className="button">Show</button>
    </div>
  </div>
Tiếp tục nếu ta cần thêm thẻ Question và Answer thì cứ sao chép và dán. Việc này không sai nhưng kết quả là tệp tin App.js cực dài và khó đọc. Có cách nào để ta tách nhỏ và sử dụng lại được đoạn code định nghĩa thẻ Question và Answer hay không?
Component
Câu trả lời là có. Ta tách đoạn code định nghĩa thẻ Question và Answer thành một Component mà có thể sử dụng lại nhiều lần, thay vì phải sao chép và dán đoạn code cực dài. Ta tách đoạn code phía dưới thành một Component:
  <div className="card">
    <div className="question-card">
      <div className="title">Question</div>
      <button className="button">Hidden</button>
      <div className="body">
        What is the name of the 25th James Bond film?
      </div>
    </div>
    <div className="question-card">
      <div className="title">Anwser</div>
      <button className="button">Hidden</button>
      <div className="body">
        No Time to Die
      </div>
    </div>
  </div>
Tạo thư mục tên Components ở trong thư mục src. Ta đặt tên Component là Card. Tạo tệp tin tên là Card.js ở trong thư mục Components:
├── App.css
├── App.js
├── Components
│   ├── Card.js
Dán đoạn code sau vào tệp tin Card.js:
import React from "react";

const Card = () => {

  return (
    <></>
  )
};

export default Card;
Đây là cú pháp khai báo một Component rỗng. Ta sao chép đoạn code định nghĩa thẻ Question và Answer vào trong Component:
import React from "react";

const Card = () => {
  return (
    <div className="card">
      <div className="question-card">
        <div className="title">Question</div>
        <button className="button">Hidden</button>
        <div className="body">
          What is the name of the 25th James Bond film?
        </div>
      </div>
      <div className="question-card">
        <div className="title">Anwser</div>
        <button className="button">Hidden</button>
        <div className="body">No Time to Die</div>
      </div>
    </div>
  );
};

export default Card;
Ta đã tạo được một Card Component đơn giản, để sử dụng nó ở tệp tin khác ta làm như sau:
- Ở đầu tệp tin ta muốn xài Card Component, khai báo câu lệnh
importchỉa tới tệp tin chứa Component
import Card from "./Components/Card";
- Và sử dụng nó như thẻ HTML thông thường:
<div className="app">
  <Card />
</div>
Ví dụ ta dùng nó ở tệp tin App.js. Mở tệp tin App.js và thay thế đoạn code HTML bằng Card Component:
import "./App.css";
import Card from "./Components/Card";

function App() {
  return (
    <div className="app">
      <Card />
    </div>
  );
}

export default App;
Mở trình duyệt lên và ta thấy giao diện hiện tại như sau:

Vậy là ta đã viết được Component đầu tiên 😁. Nếu cần thêm một thẻ Question và Answer ta chỉ cần sao chép và dán thêm một thẻ Card.
import "./App.css";
import Card from "./Components/Card";

function App() {
  return (
    <div className="app">
      <Card />
      <Card />
    </div>
  );
}

export default App;

Nhưng khoan! Lúc này nội dung của hai thẻ giống nhau trong khi ta cần nó khác. Làm thế nào để ta định nghĩa được nội dung ở bên trong Component một cách linh động? Ta chỉ cần truyền giá trị bên ngoài vào Component và nó sẽ hiển thị theo ý ta muốn?
Props
Ta dùng Props, một tính năng của React Component để ta truyền giá trị từ ngoài vào Component. Để định nghĩa props của một Component ta cần phân tích các giá trị ta cần thay đổi của Component đó. Ví dụ đối với Card Component của ta, giá trị ta cần thay đổi là câu hỏi và câu trả lời:

Ta sửa lại Card như sau:
import React from "react";

const Card = (props) => {
  return (
    <div className="card">
      <div className="question-card">
        <div className="title">Question</div>
        <button className="button">Hidden</button>
        <div className="body">{props.question}</div>
      </div>
      <div className="question-card">
        <div className="title">Anwser</div>
        <button className="button">Hidden</button>
        <div className="body">{props.answer}</div>
      </div>
    </div>
  );
};

export default Card;
Ta lấy giá trị props từ parameters của hàm. Ta thay chữ ở thẻ <div className="body"></div> đầu tiên thành props.question và ở thẻ thứ hai thành props.answer. Cú pháp {} cho phép ta nhúng biến của JS vào đoạn code HTML trong React.
Ở App.js ta truyền hai giá trị question và answer vào Component:
import "./App.css";
import Card from "./Components/Card";

function App() {
  return (
    <div className="app">
      <Card
        question="What is the name of the 25th James Bond film?"
        answer="No Time to Die"
      />
      <Card
        question="Who created Javascript?"
        answer="Brendan Eich"
      />
    </div>
  );
}

export default App;
Kết quả:

Kết luận
Vậy là ta đã tìm hiểu xong cách chia và quản lý Component. Ý nghĩa của Props trong React Component. Nhưng ta chưa biết cách làm thế nào để ẩn và hiện mục Answer theo thao tác của người dùng. Bài tiếp theo ta cùng tìm hiểu về vấn đề này.
Frontend VN
Theo dõi FB hoặc Tiktok của Frontend VN để cập nhật kiến thức và tips về FE mỗi ngày 🥰.
All rights reserved