React Native - Integrating Push Notifications using FCM (IOS) - Part 1
Bài đăng này đã không được cập nhật trong 6 năm
Gần đây, tôi đã tích hợp các thông báo đẩy trong ứng dụng react-native của mình bằng cách sử dụng react-native-firebase. Tôi đã gặp rất nhiều khó khăn trong quá trình tích hợp để thực hiện thành công nó, vì vậy tôi nghĩ sẽ chia sẻ các bước với mọi người ở đây. Bài viết này tôi tập trung hước dẩn các bạn thực hiện với ứng dụng chạy trên IOS .
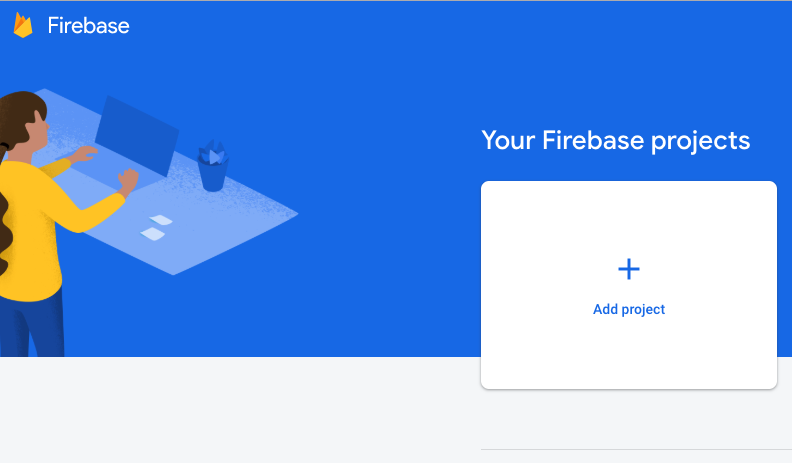
I. Create Application On Console.
Đầu tiên tạo một ứng dụng trên bảng điều khiển Firebase.
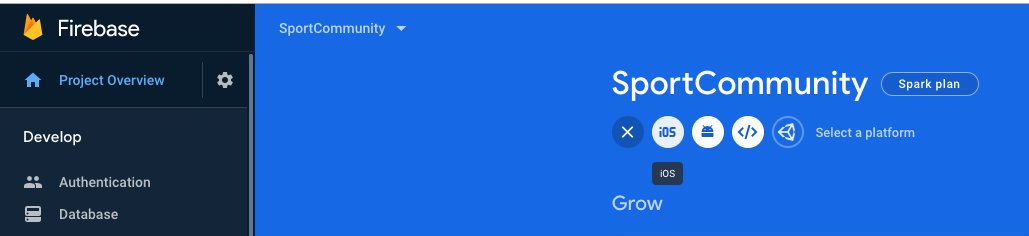
Thêm một ứng dụng thành công bạn hãy thực hiện theo hướng dẩn của firebase document và tạo cho mình một ứng dụng tích hợp cho nền tảng iOS .
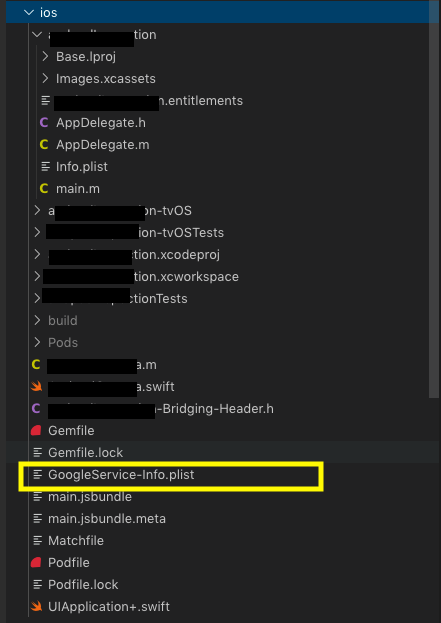
Đảm bảo GoogleService-Info.plist của bạn được đặt trong các thư mục chính xác.
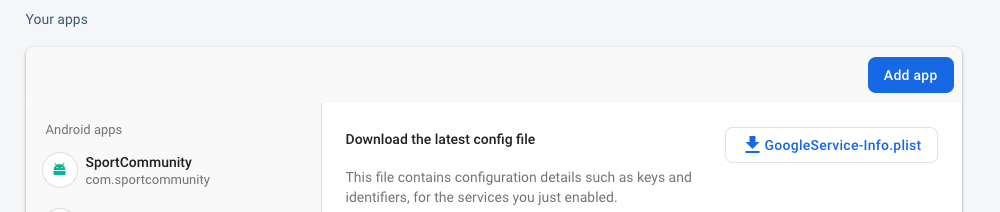
Tải file GoogleService-Info.plist xuống và đặt nó vào cây thư mục như sau .
2. Install Firebase Module
Đầu tiền bạn hãy chạy dòng lệnh ở dự án RN của mình nhé.
npm install --save react-native-firebase
Hoặc
yarn add react-native-firebase
Bạn có thể liên kết Module firebase với các ứng dụng gốc bằng lệnh sau:
react-native link react-native-firebase
Ở đây tôi sẽ liên kếtModule firebase với nền tảng iOS theo cách thủ công mà không cần react-native link, vì nó tránh được các ràng buộc lộn xộn và không đầy đủ trong một số trường hợp xấu có thể xảy ra đối với dự án của mình. Hơn nữa, nếu bạn gặp phải bất kỳ vấn đề nào sau khi liên kết, bạn có thể xác nhận các bước từ bên dưới rằng mọi thứ được hoạt động chính xác trong nền tảng iOS .
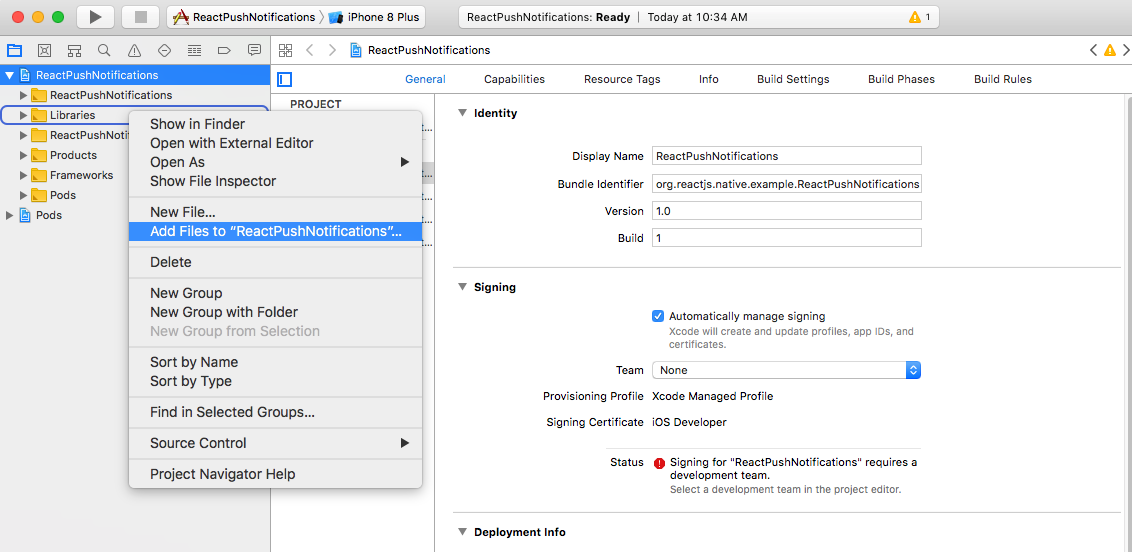
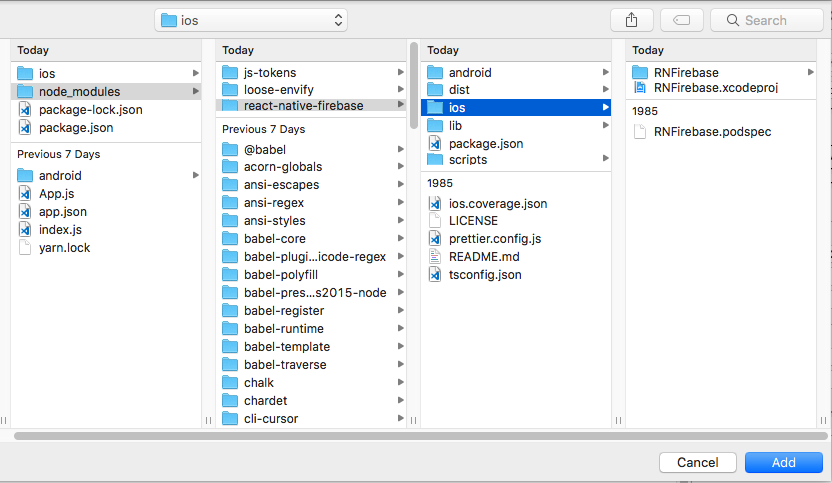
Trong Project Navigator được open bằng Xcode, Bạn click Libraries > Add Files To <YourProject>. Di chuyển đến <YourProject>/node_modules/react-native-firebase/ios/. Select RNFirebase.xcodeproj và ấn vào button Add.
- Đi đến Build Phases trên Xcode. Click vào dấu “+” phía dưới “Link Binary With Libraries” để add 1 thư viện mới. Thêm UserNotifications.framework. Ở cái framework này thì nó hổ trợ cho iOS 10 trở lên.
- Tiếp tục click “+”, chọn libRNFirebase.a và thêm nó.
- Đi đến Build Settings, tìm Header Search Path, nhấn đúp vào và ấn vào button “+” . Sau đó thêm dòng sau vào .
$(SRCROOT)/../node_modules/react-native-firebase/ios/RNFirebase
- Ở AppDelegate:
>>> AppDelegate.h

#import <UIKit/UIKit.h>
#import <UserNotifications/UserNotifications.h>

@interface AppDelegate : UIResponder <UIApplicationDelegate, UNUserNotificationCenterDelegate>

@property (nonatomic, strong) UIWindow *window;

@end
>>> AppDelegate.m

#import "AppDelegate.h"
#import <Firebase.h>
#import "RNFirebaseNotifications.h"
#import "RNFirebaseMessaging.h"

#import <React/RCTBundleURLProvider.h>
#import <React/RCTRootView.h>

@implementation AppDelegate

- (BOOL)application:(UIApplication *)application didFinishLaunchingWithOptions:(NSDictionary *)launchOptions
{
 NSURL *jsCodeLocation;

 //Add these 3 lines
 [FIRApp configure];
 [[UNUserNotificationCenter currentNotificationCenter] setDelegate:self];
 [RNFirebaseNotifications configure];

 jsCodeLocation = [[RCTBundleURLProvider sharedSettings] jsBundleURLForBundleRoot:@"index" fallbackResource:nil];

 RCTRootView *rootView = [[RCTRootView alloc] initWithBundleURL:jsCodeLocation
                                                     moduleName:@"agiledefense"
                                              initialProperties:nil
                                                  launchOptions:launchOptions];
 rootView.backgroundColor = [[UIColor alloc] initWithRed:1.0f green:1.0f blue:1.0f alpha:1];

 self.window = [[UIWindow alloc] initWithFrame:[UIScreen mainScreen].bounds];
 UIViewController *rootViewController = [UIViewController new];
 rootViewController.view = rootView;
 self.window.rootViewController = rootViewController;
 [self.window makeKeyAndVisible];
 return YES;
}

- (void)application:(UIApplication *)application didReceiveRemoteNotification:(nonnull NSDictionary *)userInfo
fetchCompletionHandler:(nonnull void (^)(UIBackgroundFetchResult))completionHandler{
 [[RNFirebaseNotifications instance] didReceiveRemoteNotification:userInfo fetchCompletionHandler:completionHandler];
}

- (void)application:(UIApplication *)application didRegisterUserNotificationSettings:(UIUserNotificationSettings *)notificationSettings {
 [[RNFirebaseMessaging instance] didRegisterUserNotificationSettings:notificationSettings];
}

-(void) userNotificationCenter:(UNUserNotificationCenter *)center didReceiveNotificationResponse:(UNNotificationResponse *)response withCompletionHandler:(void (^)(void))completionHandler {

 [[RNFirebaseMessaging instance] didReceiveRemoteNotification:response.notification.request.content.userInfo];
 completionHandler();
}

@end
3. Receive Push Notifications
-
Trong Firebase console, bạn cần phải thêm APNs Authentication Key hoặc APNs Certificate trong Project Settings > Cloud Messaging để nhận được Notificaiton . Bạn hảy đọc thêm cách tạo chúng và add vào project của mình nhé

-
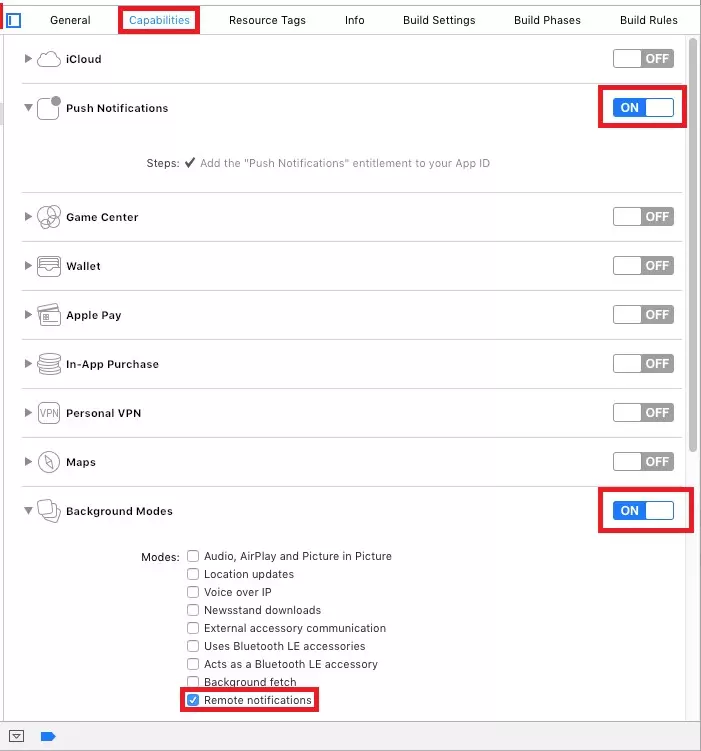
Bật các chức năng sau trong Xcode. Hãy chắc chắn rằng những thứ này được bật trong chứng chỉ cũng như được tạo ở bước 1.
-
Open Podfile và thay đổi nó như comment dưới đây:
# Uncomment the next line to define a global platform for your project
platform :ios, '9.0'

target 'ReactPushNotifications' do
  # Uncomment the next line if you're using Swift or would like to use dynamic frameworks
  # use_frameworks!

  # Pods for ReactPushNotifications - Add these lines
  pod 'Firebase/Core'
  pod 'Firebase/Messaging'

  target 'ReactPushNotificationsTests' do
    inherit! :search_paths
    # Pods for testing
  end

end
Bây giờ là mã nguồn phần Thông báo mà bạn chờ đợi nhất!
Xử lý quyền Trước khi ứng dụng có thể nhận được bất kỳ thông báo nào, điều quan trọng là phải xin phép người dùng đặc biệt trong iOS.
Nếu người dùng không cho phép ứng dụng của bạn nhận thông báo, nó không bao giờ có thể nhận được bất kỳ trừ khi người dùng thay đổi thông tin từ Cài đặt. Mở thành phần chính của ứng dụng React Native của bạn, ở mục App.js. Sửa đổi tệp theo đoạn trích dưới đây để có thể xin quyền khi ngiuwowif dùng mở app .
>>> App.js

import React, {Component} from 'react';
import { AsyncStorage } from 'react-native';
import firebase from 'react-native-firebase';

export default class App extends Component {

async componentDidMount() {
 this.checkPermission();
}

 //1
async checkPermission() {
 const enabled = await firebase.messaging().hasPermission();
 if (enabled) {
     this.getToken();
 } else {
     this.requestPermission();
 }
}

 //3
async getToken() {
 let fcmToken = await AsyncStorage.getItem('fcmToken');
 if (!fcmToken) {
     fcmToken = await firebase.messaging().getToken();
     if (fcmToken) {
         // user has a device token
         await AsyncStorage.setItem('fcmToken', fcmToken);
     }
 }
}

 //2
async requestPermission() {
 try {
     await firebase.messaging().requestPermission();
     // User has authorised
     this.getToken();
 } catch (error) {
     // User has rejected permissions
     console.log('permission rejected');
 }
}

 render() {
   return (
     <View style={{flex: 1}}>
       <Text>Welcome to React Native!</Text>
     </View>
   );
 }
}
-
Trong componentDidMount, chúng tôi kiểm tra xem người dùng có được phép nhận thông báo đẩy hay không.
-
Nếu quyền đã được cấp cho ứng dụng của bạn, hãy yêu cầu người dùng theo phương thức requestPermission. Nếu quyền được gán thành công, hãy tiến hành tìm nạp mã thông báo.
-
Nếu mã thông báo đã được tìm nạp trước đó, bạn hãy lưu nó vào AsyncStorage. Nếu không tìm thấy mã thông báo, hãy yêu cầu Firebase và lưu nó trong AsyncStorage.
Lắng nghe Thông Báo đẩy
Bây giờ chúng ta đã sẵn sàng để nghe các sự kiện thông báo đẩy. Trước khi tiếp tục, bạn nên biết về các loại thông báo khác nhau được Firebase hỗ trợ.
-
Tin nhắn chỉ thông báo: Đây là những tin nhắn hiển thị được xử lý tự động bởi Firebase SDK. Thông báo được ném vào khay thiết bị.
-
Thông báo + thông báo dữ liệu tùy chọn: Chúng cũng được xử lý bởi Firebase SDK. Chỉ khác ở đây là khi người dùng nhấn vào thông báo, ứng dụng của bạn sẽ nhận được dử liệu liên quan đến thông báo đó.
-
Tin nhắn chỉ dữ liệu: Các loại thông báo này được xử lý độc quyền bởi ứng dụng. Không có thông báo nào được ném trên khay thiết bị trừ khi ứng dụng bắt buộc làm như vậy. Trong iOS, các loại thông báo này cũng được gọi là ‘Thông báo đẩy tỉnh .
Để biết thêm chi tiết, bạn có thể đọc từ đây. Thêm các dòng này trong App.js.
>>> App.js

import firebase from 'react-native-firebase';

export default class App extends Component {

async componentDidMount() {
 this.checkPermission();
 this.createNotificationListeners(); // Thêm dòng này
}

////////////////////// Add these methods //////////////////////

 //Remove listeners allocated in createNotificationListeners()
componentWillUnmount() {
 this.notificationListener();
 this.notificationOpenedListener();
}

async createNotificationListeners() {
 /*
 * Triggered when a particular notification has been received in foreground
 * */
 this.notificationListener = firebase.notifications().onNotification((notification) => {
     const { title, body } = notification;
     this.showAlert(title, body);
 });

 /*
 * If your app is in background, you can listen for when a notification is clicked / tapped / opened as follows:
 * */
 this.notificationOpenedListener = firebase.notifications().onNotificationOpened((notificationOpen) => {
     const { title, body } = notificationOpen.notification;
     this.showAlert(title, body);
 });

 /*
 * If your app is closed, you can check if it was opened by a notification being clicked / tapped / opened as follows:
 * */
 const notificationOpen = await firebase.notifications().getInitialNotification();
 if (notificationOpen) {
     const { title, body } = notificationOpen.notification;
     this.showAlert(title, body);
 }
 /*
 * Triggered for data only payload in foreground
 * */
 this.messageListener = firebase.messaging().onMessage((message) => {
   //process data message
   console.log(JSON.stringify(message));
 });
}

showAlert(title, body) {
 Alert.alert(
   title, body,
   [
       { text: 'OK', onPress: () => console.log('OK Pressed') },
   ],
   { cancelable: false },
 );
}
}
4. References:
https://medium.com/@anum.amin/react-native-integrating-push-notifications-using-fcm-349fff071591
All rights reserved
