List & Card on Android 5.0 Lollipop
Bài đăng này đã không được cập nhật trong 4 năm
List & Card on Android 5.0 Lollipop
Trong thực tế chúng ta gặp rất nhiều ứng dựng cần hiển thị gồm nhiều UI phức tạp trong một list và nó cần một không gian khá lớn hiển thị trong màn hình, chính vì vậy mà khi user scroll trên list thì không được trơn tru. Để giải quyết vấn đề đó Android L đưa ra hai UI widget mới là: RecyclerView và CardView.
I) RecyclerView
RecyclerView cung cấp hai tính năng chính: RecyclerView cho phép chứa đựng và hiển thị một lượng lớn dữ liệu và khi scroll rất trơn tru bằng cách hạn chế số lượng item views. RecyclerView được sử dụng khi mà bạn có một tập dữ liệu mà các fields có thể thay đổi tại thời điểm chạy hoặc khi có tương tác từ phái user... RecyleView đơn giản hoá việc hiển thị và sử lý một tập dữ liệu lớn bởi việc cung cấp:
1) Các Layout manages quản lý vị trí các item(very importance)
   RecyclerView cung cấp các built-in layout managers:
   +) LinearLayoutManager hiển thị các items trong list ngang hoặc dọc(vertical or horizontal scrolling list).
    +) GridLayoutManager hiển thị các items trong a grid.
    +) StaggeredGridLayoutManager hiển thị các items trong a staggered grid.
2) Animation mặc định cho các action add hoặc remove item trong list
Để custom các animation phải kết thừa từ RecyclerView.ItemAnimator và sử dụng phương thức RecyclerView.setItemAnimator()

II) CardView
CardView calss được kế thừa từ FrameLayout class:
+) Cho phét hiển thị thông tin trong một card. +) Cung cấp shadows và rounded corners.
III) Ví dụ
Step 1: Để sử dụng RecyclerView và CardView với các version từ 2.1 và 5.0 trở lên chúng ta cần phải thực hiện việc add library support dependencies vào dự án thông qua build.gradle
Step 2: Add RecyclerView on layout activity_main.xml trong đây mình sử lý việc thay đổi việc bố trí vị trí các item trong RecyclerView theo các LayoutManager đã giớ thiệu ở trên với 3 buttons như trong layout sau:
<RelativeLayout xmlns:android="http://schemas.android.com/apk/res/android"
    xmlns:tools="http://schemas.android.com/tools"
    android:layout_width="match_parent"
    android:layout_height="match_parent"
    tools:context=".MainActivity">

    <LinearLayout
        android:id="@+id/lnOption"
        android:layout_width="match_parent"
        android:layout_height="wrap_content"
        android:layout_alignParentTop="true"
        android:gravity="center_vertical"
        android:orientation="horizontal">

        <Button
            android:id="@+id/btnList"
            android:layout_width="wrap_content"
            android:layout_height="wrap_content"
            android:layout_alignParentLeft="true"
            android:layout_alignParentStart="true"
            android:layout_margin="10dp"
            android:text="List" />

        <Button
            android:id="@+id/btnGrid"
            android:layout_width="wrap_content"
            android:layout_height="wrap_content"
            android:layout_centerHorizontal="true"
            android:text="Grid" />
        <Button
            android:id="@+id/btnStaggered"
            android:layout_width="wrap_content"
            android:layout_height="wrap_content"
            android:layout_centerHorizontal="true"
            android:text="Staggered" />
    </LinearLayout>

    <android.support.v7.widget.RecyclerView
        android:id="@+id/rcPhoto"
        android:layout_width="match_parent"
        android:layout_height="match_parent"
        android:layout_below="@+id/lnOption"
        android:scrollbars="vertical" />

</RelativeLayout>
Step 3: sử lý RecyclerView và kết nối tới LayoutManager và gán một adapter cho việc hiển thị data:
+) Khởi tạo RecyclerView tham khảo trong file MainActivity trong resource:
  private void initRecyclerView(){
        recyclerView = (RecyclerView) findViewById(R.id.rcPhoto);
        recyclerView.setHasFixedSize(true);
        // set LayoutManager for manage position of item (very importance)
        GridLayoutManager gridLayoutManager = new GridLayoutManager(this, 2);
        gridLayoutManager.setSmoothScrollbarEnabled(true);
        // set orientation item
        gridLayoutManager.setOrientation(LinearLayoutManager.VERTICAL);
        recyclerView.setLayoutManager(gridLayoutManager);
        // set adapter for recycleview
        PersonAdapter personAdapter = new PersonAdapter(this, dummyList());
        recyclerView.setAdapter(personAdapter);
    }
+) Tạo HolderView class từ Holderview của RecyclerView.ViewHolder.
 package android.tech.listandcard.widgets;

import android.support.v7.widget.RecyclerView;
import android.tech.listandcard.R;
import android.view.View;
import android.widget.ImageView;
import android.widget.TextView;

public class PersonHolderView extends RecyclerView.ViewHolder {

    public ImageView imgAvatar;
    public TextView tvName;
    public TextView tvDescript;

    public PersonHolderView(View itemView) {
        super(itemView);
        imgAvatar = (ImageView) itemView.findViewById(R.id.imgAvatar);
        tvName = (TextView) itemView.findViewById(R.id.tvName);
        tvDescript = (TextView) itemView.findViewById(R.id.tvDescription);
    }
}
+) Create Adapter:
package android.tech.listandcard.adapters;

import android.content.Context;
import android.support.v7.widget.RecyclerView;
import android.tech.listandcard.R;
import android.tech.listandcard.models.Person;
import android.tech.listandcard.widgets.PersonHolderView;
import android.view.View;
import android.view.ViewGroup;

import java.util.ArrayList;

public class PersonAdapter extends RecyclerView.Adapter<PersonHolderView> {

    private Context context;
    private ArrayList<Person> list;

    public PersonAdapter(Context context, ArrayList<Person> list) {
        this.context = context;
        this.list = list;
    }

    @Override
    public PersonHolderView onCreateViewHolder(ViewGroup parent, int viewType) {
        View view = View.inflate(context, R.layout.item_person, null);
        return new PersonHolderView(view);
    }

    @Override
    public void onBindViewHolder(PersonHolderView holder, int position) {
        Person person = list.get(position);
        holder.imgAvatar.setImageResource(getResourceId(person.getAvatar()));
        holder.tvName.setText(person.getName());
        holder.tvDescript.setText(person.getDescription());
    }

    @Override
    public int getItemCount() {
        return list.size();
    }

    public int getResourceId(String pVariableName) {
        try {
            return context.getResources().getIdentifier(pVariableName, "drawable", context.getPackageName());
        } catch (Exception e) {
            e.printStackTrace();
            return -1;
        }
    }

    public void update(ArrayList<Person> list) {
        if (list == null || list.size() < 1) {
            return;
        }
        this.list.clear();
        this.list.addAll(list);
        notifyDataSetChanged();
    }
}
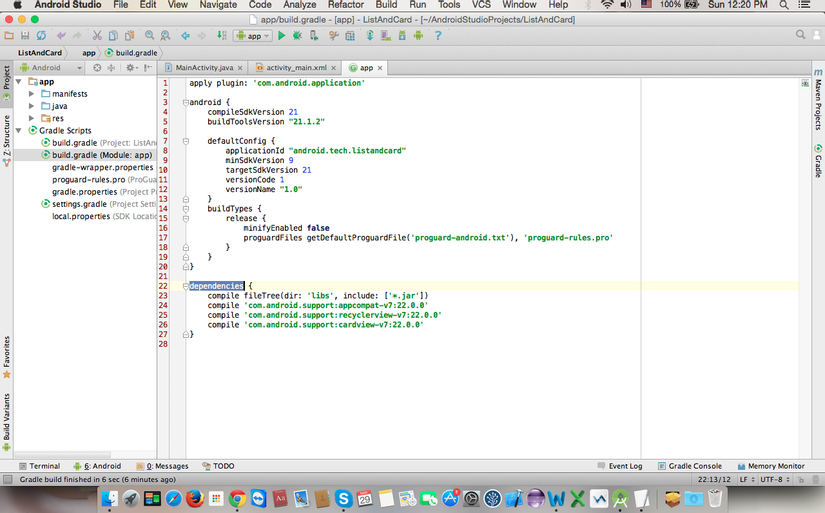
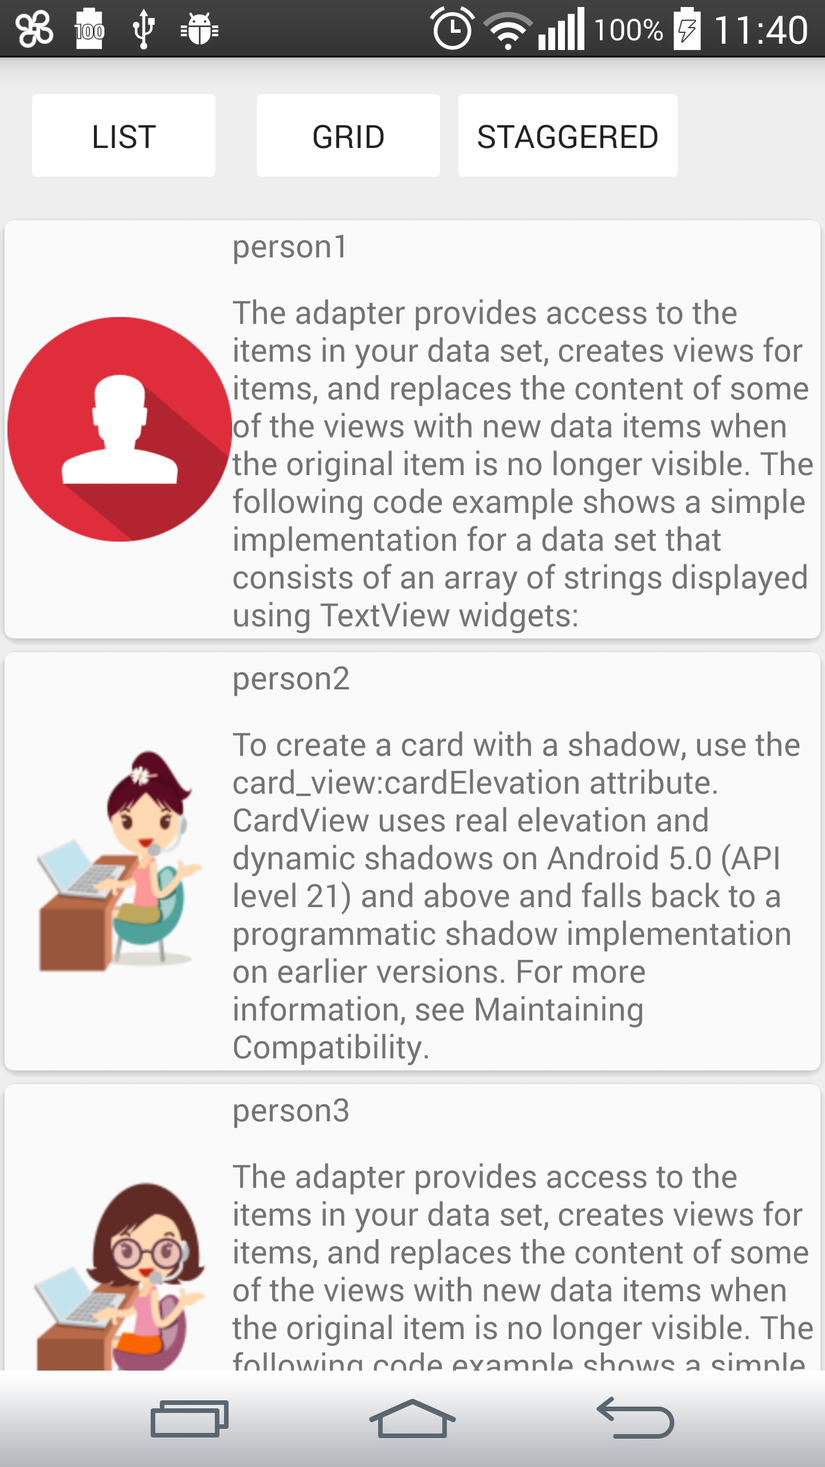
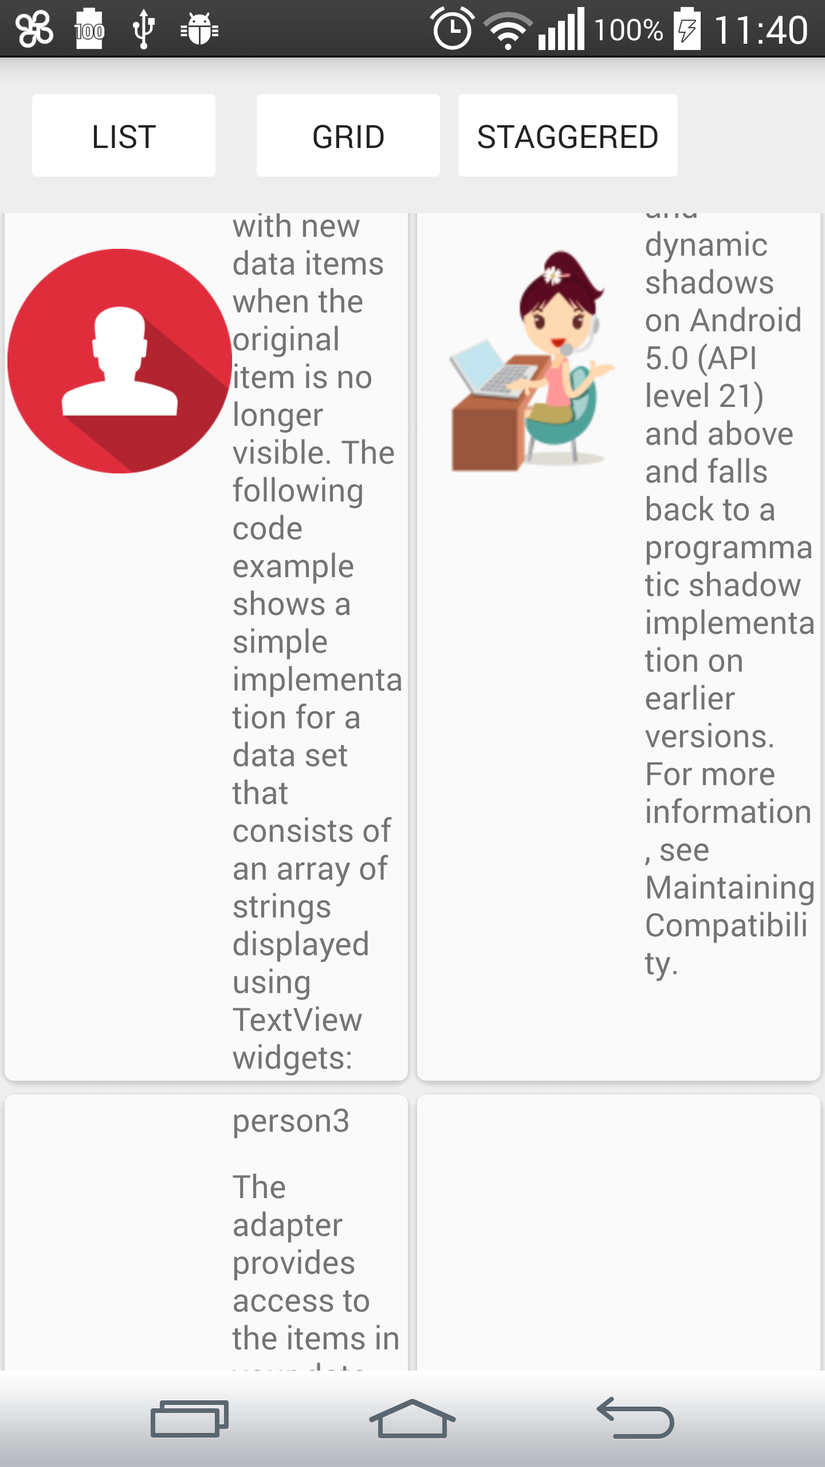
+) Một số screen shot từ demo:
1) List:
 \
\
2) Grid:
 \
\
3) Staggered
 \
\
Source reference: https://www.dropbox.com/s/051uasmjudknqk3/ListAndCard.zip?dl=0
All rights reserved
