[Laravel + VueJS] Cùng tiến hành dựng 1 trang web SPA ( Phần 1 )
Bài đăng này đã không được cập nhật trong 6 năm
Đặt vấn đề
Cấu trúc một trang web thường được chia thành các phần như là Header, Content, Footer . Điều này đã được thực hiện theo cách truyền thống bằng cách sử dụng mô hình client/server , trong đó mỗi trang phải được tải từ máy chủ với một URL khác nhau. Để điều hướng đến một trang mới, trình duyệt phải gửi yêu cầu tới URL của trang đó. Máy chủ sẽ gửi dữ liệu trở lại và trình duyệt có thể phải render một trang mới. Đối với kết nối internet trung bình, quá trình này có thể sẽ mất vài giây, trong thời gian đó, người dùng phải chờ trang mới tải. Tại sao chúng ta lại mất công ngồi đợi quá trình render một trang hoàn toàn mới với đủ thành phần trong khi cái mình cần thực sự chỉ là cái Content của nó ??
Khái Niệm SPA ra đời

Để giải quyết bài toán trên , có một kỹ thuật cũng khá là hay dùng đó là kỹ thuật SPA ( Single Page Application ) nôm là Ứng dụng trang đơn =)))))
Ưu điểm của SPA là nó có thể tạo ra trải nghiệm liền mạch hơn cho người dùng. Dữ liệu cho các trang mới vẫn phải được truy xuất và do đó sẽ tạo ra một số gián đoạn nhỏ đối với luồng của người dùng, nhưng sự gián đoạn này được giảm thiểu do việc truy xuất dữ liệu có thể được thực hiện không đồng bộ. Ngoài ra, vì các trang SPA thường yêu cầu ít dữ liệu hơn do sử dụng lại một số thành phần trang, tải trang nhanh hơn.
Hiểu một cách đơn giản, thì toàn bộ resource của web bao gồm các file CSS, Javascript, master layout hay cấu trúc web page sẽ được load lần đầu tiên khi chúng ta bắt đầu duyệt môt website A nào đó. Ở những lần sau, khi chuyển trang khác, client sẽ gửi những ajax request để get dữ liệu cần thiết( thường là phần nội dung). Khái niệm của SPA trên mạng rất là nhiều nên mình chỉ nói tới đây thôi . Mình cùng vào thực hành dựng SPA với Laravel và VueJS nhé
Cài đặt thư viện
Ở bài viết Laravel + Vue.js : Xử lý thông báo lỗi mình đã đề cập qua việc cài đặt cũng nhưng áp dụng VueJS vào Laravel rồi nên các bạn nào còn lan man phần này có thể xem qua nhé 
Trong bài hướng dẫn này mình chỉ cần dùng thư viện duy nhất thôi đó là : Vue-Router , Các thư viện khác mình sẽ giới thiệu ở các phần sau
- Vue-router: giúp định tuyến trong ứng dụng (định nghĩa các route và mapping nó với các Vue component).
Các bạn chạy lệnh sau để tiến hành cài packge vue-router
npm install vue-router
Ok Xong nhé
Chỉnh sửa bố cục
Khi triển khai SPA giữa 2 thằng này thì các route mình sẽ dùng ở vue-router rồi nên chúng ta cần sửa lại 1 chút file routes/web.php của Laravel nhé
// routes/web.php
Route::get('/{any}', 'VueController@index')->where('any', '.*');
Tạo một controller tên là VueController với nội dung
<?php
 namespace App\Http\Controllers;
 use Illuminate\Http\Request;
 class VueController extends Controller
{
    public function index()
    {
        return view('app.index');
    }
}
Lệnh trên khi có bất cứ request nào nó sẽ bay vào VueController function index để return về file index.blade.php Tạo giúp mình file index.blade.php tại thư mục resources/views/app/index.blade.php nhé Nội dung của nó trông như thế này
<!doctype html>
<html lang="{{ str_replace('_', '-', app()->getLocale()) }}">
<head>
    <meta charset="utf-8">
    <meta name="viewport" content="width=device-width, initial-scale=1">

    <!-- CSRF Token -->
    <meta name="csrf-token" content="{{ csrf_token() }}">

    <title>{{ config('app.name', 'Laravel') }}</title>

    <!-- Scripts -->

    <!-- Fonts -->
    <link rel="dns-prefetch" href="//fonts.gstatic.com">
    <link href="https://fonts.googleapis.com/css?family=Nunito" rel="stylesheet">

    <!-- Styles -->
    <link href="{{ asset('css/app.css') }}" rel="stylesheet">
</head>
<body>
    <div id="app"></div>
    <script src="{{ mix('js/app.js') }}"></script>
</body>
</html>
Quan trọng nhất là ở cái div app kia kìa , tại vì phần này mình sẽ chia bố cục Vue thành các Components và lát nữa đây ở file app.js mình sẽ render vào element #app Trước hết các bạn xây dựng giúp mình bố cục components của Vue trông như sau
-resources
--js
---->components
-------->content
-------------->HelloWorld.vue // nội dung home
-------------->ContentOne.vue // nội dung khi chuyển trang A
-------------->ContentTwo.vue // Nội dung khi chuyển trang B
-------->layouts // Chứa component chung của ứng dụng
-------------->Header.vue
-------->Index.vue // Component home định nghĩa bố cục của web sẽ nằm ở trong này
---->App.vue // File component tổng của ứng dụng từ đây nó sẽ link tới các content nằm trong components con qua router-view
---->app.js // Nơi khai báo thư viện và tạo instance Vue
---->routes.js // Định nghĩa các route
Tiếp theo mình cần sửa lại một chút ở resources/js/app.js
require('./bootstrap');
import Vue from 'vue';
import VueRouter from 'vue-router';
import App from './App';
import routes from './routes';

Vue.use(VueRouter);

const router = new VueRouter({
    mode: 'history',
    routes,
});

new Vue({
    el: '#app',
    render: h => h(App),
    router,
});
Nội dung file App.vue chỉ vỏn vẹn như này thôi
<template>
    <div>
        <router-view></router-view>
    </div>
</template>

<script>
export default {
    name: 'app',
};
</script>
Viết 1 chút nội dung ở các file content nào tí nữa mình sẽ dùng vue-router kết nối chúng lại sau
HelloWorld.vue
<template>
    <div>
        <h1>Hello World</h1>
    </div>
</template>
ContentOne.vue
<template>
    <div>
        <h1>Content One</h1>
        <p>
            It is a long established fact that a reader will be distracted by the readable content of
            a page when looking at its layout. The point of using Lorem Ipsum is that it has a more-or-less
            normal distribution of letters, as opposed to using 'Content here, content here', making it look like
            readable English. Many desktop publishing packages and web page editors now use Lorem Ipsum
            as their default model text, and a search for 'lorem ipsum' will uncover many web sites still in their
            infancy. Various versions have evolved over the years, sometimes by accident, sometimes
            on purpose (injected humour and the like).
        </p>
    </div>
</template>
ContentTwo.vue
<template>
    <div>
        <h1>Content Two</h1>
        <p>
            Lorem Ipsum is simply dummy text of the printing and typesetting industry.
            Lorem Ipsum has been the industry's standard dummy text ever since the 1500s,
            when an unknown printer took a galley of type and scrambled it to make a type specimen book.
            It has survived not only five centuries, but also the leap into electronic typesetting, remaining
            essentially unchanged. It was popularised in the 1960s with the release of Letraset sheets containing
            Lorem Ipsum passages, and more recently with desktop publishing software
            like Aldus PageMaker including versions of Lorem Ipsum.
        </p>
    </div>
</template>
Giờ chúng ta sẽ tới phần định nghĩa các route tại routes.js
import Index from './components/Index'
import HelloWorld from './components/content/HelloWorld'
import ContentOne from './components/content/ContentOne'
import ContentTwo from './components/content/ContentTwo'

const routes = [,
{
    path: '/',
    component: Index,
    name: 'Index',
    redirect: '/home',
    children: [
        {
            path: '/home',
            component: HelloWorld,
        },
        {
            path: 'ContentOne',
            name: 'contentone',
            component: ContentOne,
        },
        {
            path: 'ContentTwo',
            name: 'contentwo',
            component: ContentTwo,
        }
    ]
}
];

export default routes;
Ở trên các bạn có thể thấy khi người dùng truy cập path : "/" nó sẽ render ra component Index rồi nó thực hiện chuyển tới /home được định nghĩa phần children có component là HelloWorld. Tại sao nó lại nằm ở trong children nhỉ đơn giản thôi vì tí nữa file Index.vue mình sẽ chỉ định nghĩa bố cục trong đó có phần content là <router-view></router-view> Nó sẽ render ở trong cặp thẻ đó =))).
Nội dung Index.vue trông như này
<template>
    <div>
        <app-header></app-header>
        <main class="py-4">
            <transition name="slide-fade">
                <router-view></router-view>
            </transition>
        </main>
    </div>
</template>

<script>
import AppHeader from './layouts/Header';

export default {
    name: 'Index',
    components: {
        AppHeader,
    },
}
</script>
<style scoped>
.slide-fade-enter-active {
  transition: all .3s ease;
}
.slide-fade-leave-active {
  transition: all .8s cubic-bezier(1.0, 0.5, 0.8, 1.0);
}
.slide-fade-enter, .slide-fade-leave-to {
  transform: translateX(10px);
  opacity: 0;
}
</style>
Ta thấy là phần đầu nó sẽ include vào component tên là AppHeader được định nghĩa ở Header.vue và phần content sẽ nằm trong cặp thẻ <main></main> Mình có thêm 1 cặp thẻ là <transition></transition> Để khi chuyển trang nó có tí mờ ảo ấy mà =)))) Về css hay transition các bạn có thể tham khảo trên link này nhé https://vuejs.org/v2/guide/transitions.html
Giờ là file Header.vue
<template>
    <div>
        <nav class="navbar navbar-expand-md navbar-light bg-white shadow-sm">
            <div class="container">
                <router-link to="/" class="navbar-brand">Laravel</router-link>
                <button class="navbar-toggler" type="button">
                    <span class="navbar-toggler-icon"></span>
                </button>

                <div class="collapse navbar-collapse" id="navbarSupportedContent">
                    <!-- Left Side Of Navbar -->
                    <ul class="navbar-nav mr-auto">

                    </ul>
                    <ul class="navbar-nav ml-auto">
                        <li class="nav-item">
                            <router-link to="contentone" class="nav-link">Content One</router-link>
                        </li>
                        <li class="nav-item">
                            <router-link to="contenttwo" class="nav-link">Content Two</router-link>
                        </li>
                    </ul>
                </div>
            </div>
        </nav>
    </div>
</template>
<script>
export default {
    name: 'AppHeader',
}
</script>
Đó bạn thấy không , ở trên các đường dẫn chuyển trang mình không dùng thẻ a trong html, mà mình dùng router-link , có tham số to là path bạn muốn chuyển , về router-link nó còn nhiều tham số khác như là path hay name . Các bạn có thể tìm hiểu tại đây https://router.vuejs.org/api/
Chạy và xem thành quả
Chạy ứng dụng với 2 lệnh sau
php artisan serve && npm run dev
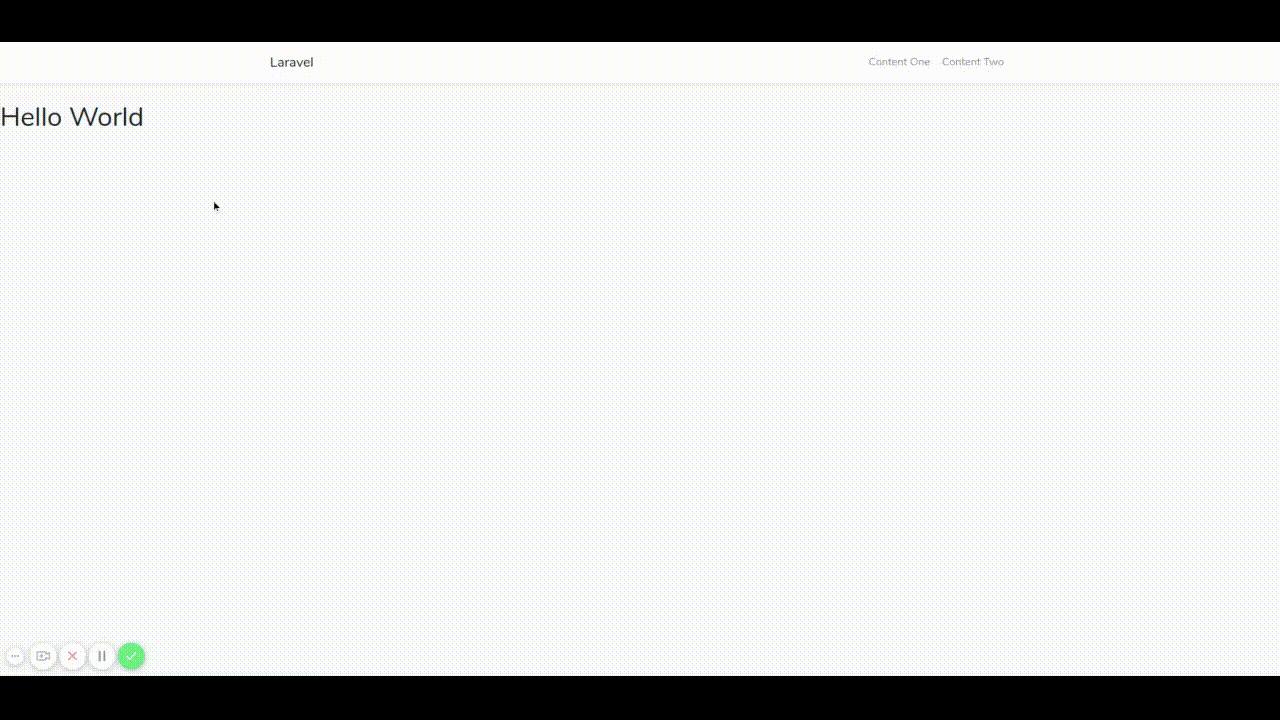
Và truy cập http://localhost:8000 xem thành quả nhé đây là thành quả của mình
Các bạn cũng có thể tham khảo source tại đây https://github.com/hieudt/laravel-vuejs-handle-error/tree/framgia/spa
Các phần sau mình sẽ hướng dẫn các bạn làm chức năng đăng nhập xác thực bằng Laravel Passport
Chào thân ái !!!
All rights reserved
