Hướng dẫn tạo khoảng cách giữa các item cách đều nhau trong recycler view
Bài đăng này đã không được cập nhật trong 4 năm
Hôm nay mình sẽ hướng dẫn mọi người cách tạo khoảng cách đều giữa các item trong recycler view trong android. Thông thường khi tạo list các item, khoảng cách sẽ như sau
 Như các bạn thấy thì khoảng cách bên trên, bên phải, bên trái của item đầu tiên thì bằng nhau nhưng khoảng cách của item đó với item bên dưới lại lớn hơn, điều này nhìn giao diện có vể không cân và không đẹp lắm (cái này là do mình cảm nhận thôi
  ). Sau khi ngâm cứu thì dù đặt padding, margin đủ kiểu từ view cha đến view con trong file xml đều không giải quyết được vấn đề này nên mình quyết định xử lý bằng java code . Để đơn giản mình sẽ tạo một project nho nhỏ để làm demo
Tạo project
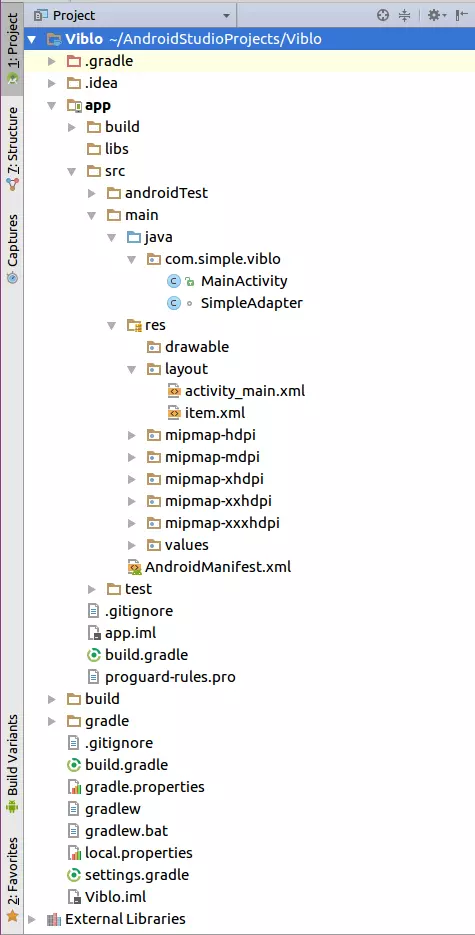
Cấu trúc thư mục sẽ như sau
Thêm thư viện để sử dụng recycler view
Chúng ta thêm compile 'com.android.support:recyclerview-v7:26.0.0-alpha1' vào app/build.gradle
dependencies {
  compile fileTree(include: ['*.jar'], dir: 'libs')
  androidTestCompile('com.android.support.test.espresso:espresso-core:2.2.2', {
    exclude group: 'com.android.support', module: 'support-annotations'
  })
  compile 'com.android.support:appcompat-v7:26.0.0-alpha1'
  testCompile 'junit:junit:4.12'
  compile 'com.android.support:recyclerview-v7:26.0.0-alpha1'
}
Tạo recycler view trong activity_main.xml
Chúng ta sẽ để RecyclerView cách màn hình 16dp.
<?xml version="1.0" encoding="utf-8"?>
<RelativeLayout
    xmlns:android="http://schemas.android.com/apk/res/android"
    xmlns:tools="http://schemas.android.com/tools"
    android:layout_width="match_parent"
    android:layout_height="match_parent"
    tools:context="com.simple.viblo.MainActivity"
    >

    <android.support.v7.widget.RecyclerView
        android:id="@+id/recycler_view"
        android:layout_width="match_parent"
        android:layout_height="wrap_content"
        android:layout_marginLeft="@dimen/dp_16"
        android:layout_marginRight="@dimen/dp_16"
        />

</RelativeLayout>
Tạo layout cho item.xml
Để cho đơn giản nên mình chỉ để một TextView thôi. Item trước sẽ cách item sau 16dp
<?xml version="1.0" encoding="utf-8"?>
<LinearLayout xmlns:android="http://schemas.android.com/apk/res/android"
    android:orientation="vertical"
    android:layout_width="match_parent"
    android:layout_height="100dp"
    android:gravity="center"
    android:layout_marginBottom="@dimen/dp_16">

    <TextView
        android:id="@+id/text_view"
        android:layout_width="match_parent"
        android:layout_height="match_parent"
        android:layout_gravity="center"
        android:gravity="center"/>

</LinearLayout>
Tạo adapter cho recycler view
Code hoàn chỉnh trong SimpleAdapter.java
class SimpleAdapter extends RecyclerView.Adapter<SimpleAdapter.ViewHolder> {

    private List<String> mList;

    SimpleAdapter(List<String> list) {
        if (list == null) {
            return;
        }
        mList = list;
    }

    @Override
    public ViewHolder onCreateViewHolder(ViewGroup parent, int viewType) {
        View view = LayoutInflater.from(parent.getContext()).inflate(R.layout.item, parent, false);
        return new ViewHolder(view);
    }

    @Override
    public void onBindViewHolder(ViewHolder holder, int position) {
        holder.bindData(mList.get(position));
    }

    @Override
    public int getItemCount() {
        return mList == null ? 0 : mList.size();
    }

    class ViewHolder extends RecyclerView.ViewHolder {

        private TextView mTextView;

        ViewHolder(View itemView) {
            super(itemView);
            mTextView = itemView.findViewById(R.id.text_view);
        }

        void bindData(String s) {
            mTextView.setText(s);
            if (getAdapterPosition() % 2 == 0) {
                itemView.setBackgroundColor(Color.GREEN);
            } else {
                itemView.setBackgroundColor(Color.RED);
            }
        }
    }
}
Chắc các bạn cũng sử dụng quen với RecyclerView rồi nên mình sẽ không giải thích các hàm cơ bản kế thừa từ RecyclerView.Adapter nữa Ở đây chỉ cần chú ý đến hàm bindData() trong ViewHolder. Để dễ nhìn thì các phần tử có position là chẵn sẽ có background màu xanh, còn là lẻ sẽ có background là màu đỏ
Tạo dữ liệu giả và đưa vào recycler view
Mở MainActivity.java chúng ta sẽ tạo 30 số từ 0 đến 29 và hiển thị lên recycler view
public class MainActivity extends AppCompatActivity {

    @Override
    protected void onCreate(Bundle savedInstanceState) {
        super.onCreate(savedInstanceState);
        setContentView(R.layout.activity_main);
        List<String> list = getFakeData();
        SimpleAdapter simpleAdapter = new SimpleAdapter(list);
        RecyclerView recyclerView = (RecyclerView) findViewById(R.id.recycler_view);
        recyclerView.setLayoutManager(new LinearLayoutManager(this));
        recyclerView.setHasFixedSize(true);
        recyclerView.setAdapter(simpleAdapter);
    }

    private List<String> getFakeData() {
        List<String> list = new ArrayList<>();
        for (int i = 0; i < 30; i++) {
            list.add(String.valueOf(i));
        }
        return list;
    }
}
Thử chạy app nhé
Chạy app chúng ta sẽ thu được kết quả như sau
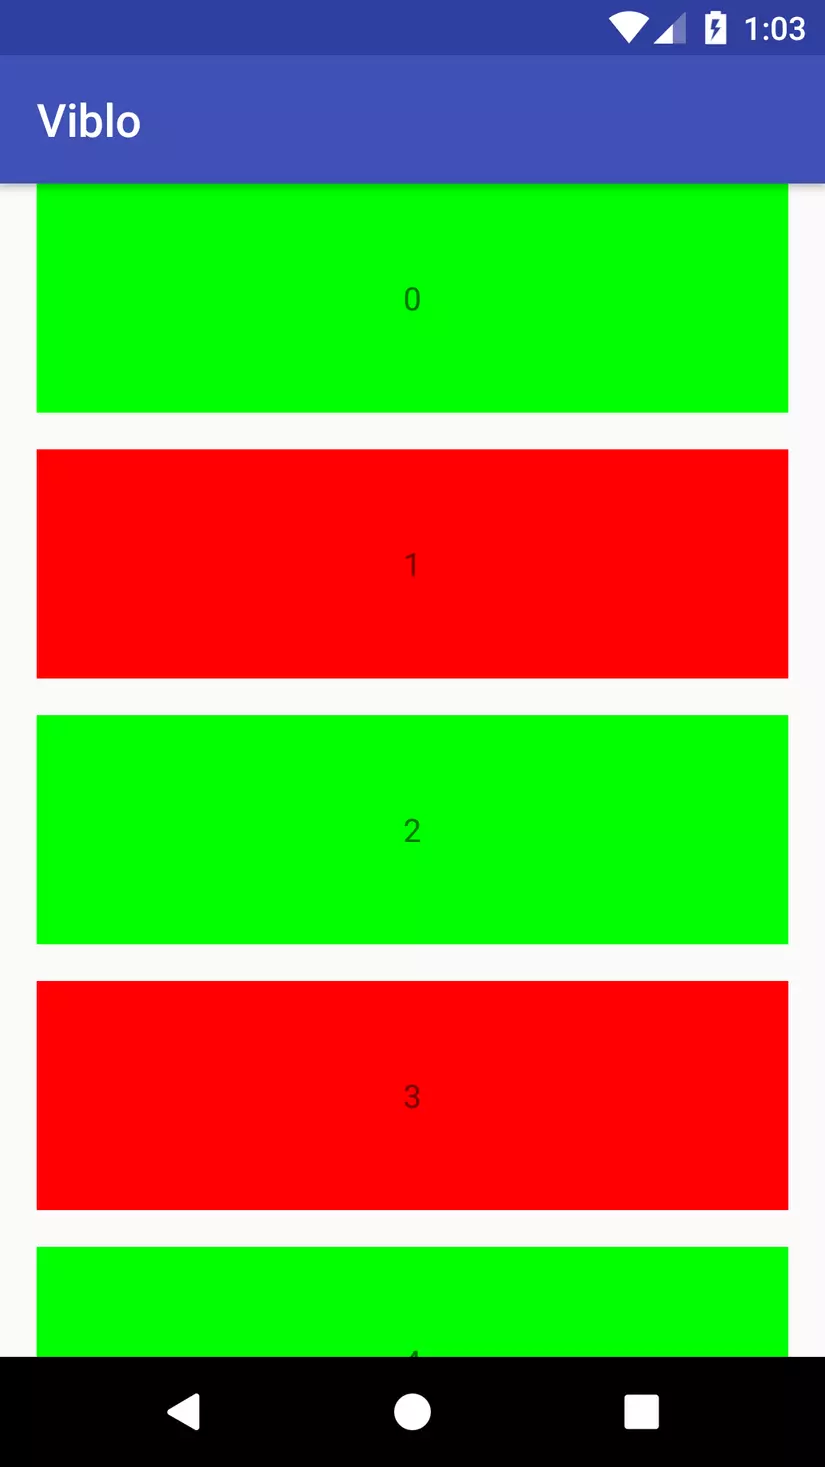
Như vậy chúng ta sẽ thấy phần tử (item) đầu tiên bị sát lên trên cùng của màn hình, nếu chúng ta để item cách item trên cũng 16dp thì khoảng cách giữa 2 item sẽ là 32dp chứ không phải 16dp như mong muốn nữa. Do đó, việc cần giải quyết chính là chỉ cần item đầu tiên cách phía trên 16dp thôi
Tiến hành tạo khoảng cách trên cho item đầu tiên
Quay lại SimpleAdapter, chúng ta sẽ xử lý trong hàm bindData() như sau
void bindData(String s) {
            mTextView.setText(s);
            if (getAdapterPosition() % 2 == 0) {
                itemView.setBackgroundColor(Color.GREEN);
            } else {
                itemView.setBackgroundColor(Color.RED);
            }
            RecyclerView.LayoutParams params =
                    (RecyclerView.LayoutParams) itemView.getLayoutParams();
            if (getAdapterPosition() == 0) {
                params.topMargin = itemView.getResources().getDimensionPixelOffset(R.dimen.dp_16);
            } else {
                params.topMargin = 0;
            }
            itemView.setLayoutParams(params);
        }
Vì Item nằm trong RecyclerView nên chúng ta cần sử dụng RecyclerView.LayoutParams, nếu không run app sẽ bị crash vì sai kiểu. Vì chỉ cần item đầu tiên cách trên 16dp nên các phần tử khác sẽ cách trên 0dp. Cuối cùng set lại param cho Item. Như vậy là xong
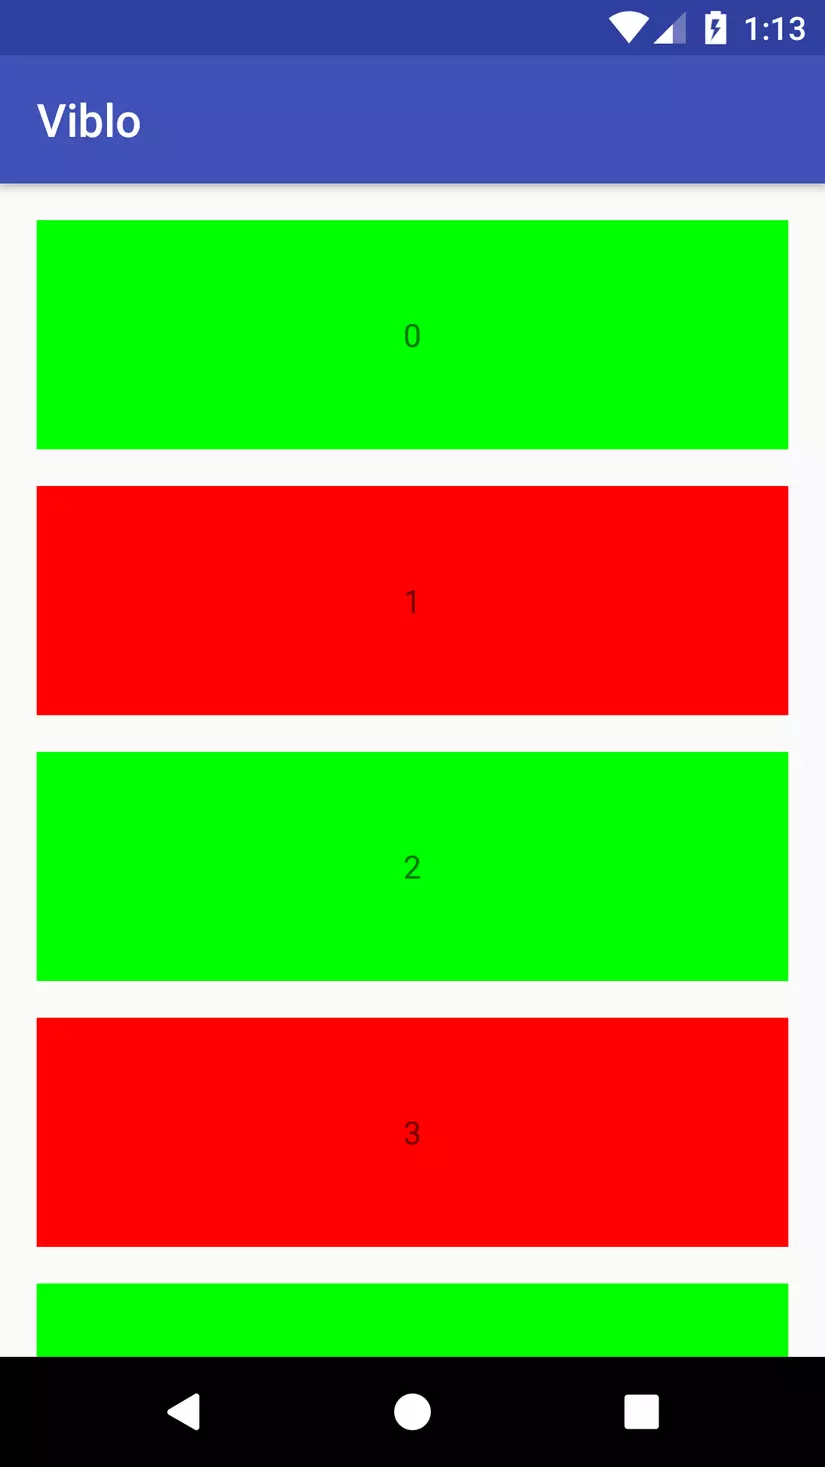
Chạy app lần nữa chúng ta sẽ thu được kết quả như mong muốn
Thank you for reading!
All rights reserved
