Hướng dẫn lập trình Android TV (phần 8) - GuidedStepFragment
Bài đăng này đã không được cập nhật trong 7 năm
Giới thiệu
Màn hình setting là một component không thể thiếu trong mọi ứng dụng Android TV và tất nhiên thư viện Leanback cũng hỗ trợ chúng ta tạo ra các màn hình setting với component GuidedStepSupportFragment. Ngày hôm nay mình sẽ hướng dẫ cách implement component này trong một ứng dụng Android TV
Create GuidedStepActivity
Tạo một GuidedStepActivity, Nhiệm vụ của activity này là chứa component GuidedStepSupportFragment
class GuidedStepActivity : FragmentActivity() {

    override fun onCreate(savedInstanceState: Bundle?) {
        super.onCreate(savedInstanceState)
        setContentView(R.layout.activity_guided_step)
    }
}
Create SettingFragment
Tạo một fragment extend từ GuidedStepSupportFragment. Ở đây mình sẽ đặt tên là SettingFragment cho đơn giản
class SettingFragment : GuidedStepSupportFragment(){
    override fun onViewCreated(view: View, savedInstanceState: Bundle?) {
        super.onViewCreated(view, savedInstanceState)
    }
}
Add fragment này vào trong GuidedStepActivity thông qua file xml của GuidedStepActivity
<?xml version="1.0" encoding="utf-8"?>
<fragment xmlns:android="http://schemas.android.com/apk/res/android"
          android:id="@+id/main_browse_fragment"
          android:name="com.example.demoandroidtv.SettingFragment"
          android:layout_width="match_parent"
          android:layout_height="match_parent"/>
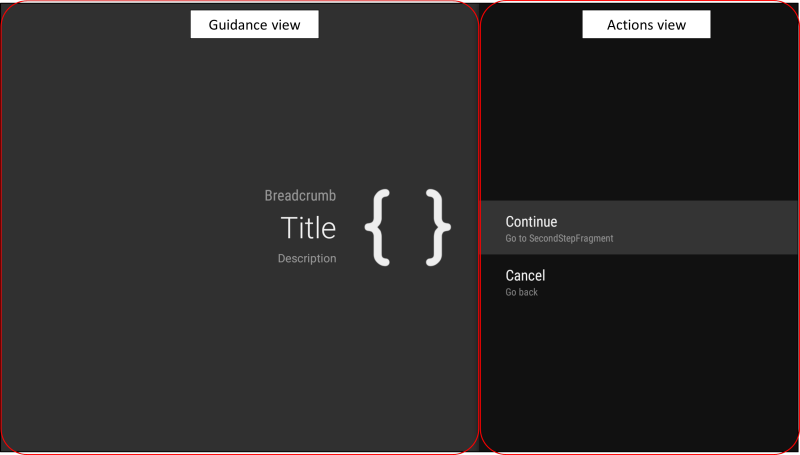
Chạy thử: đây là giao diện cơ bản của GuidedStepSupportFragment

Cấu trúc của một GuidedStepSupportFragment
Overriding Method
Để sử dụng GuidedStepSupportFragment thì ít nhất phải overriding 3 method chính của component này
class SettingFragment : GuidedStepSupportFragment(){
    override fun onViewCreated(view: View, savedInstanceState: Bundle?) {
        super.onViewCreated(view, savedInstanceState)
    }

    override fun onCreateGuidance(savedInstanceState: Bundle?): GuidanceStylist.Guidance {
        return super.onCreateGuidance(savedInstanceState)
    }

    override fun onCreateActions(actions: MutableList<GuidedAction>, savedInstanceState: Bundle?) {
        super.onCreateActions(actions, savedInstanceState)
    }

    override fun onGuidedActionClicked(action: GuidedAction?) {
        super.onGuidedActionClicked(action)
    }
}
1. onCreateGuidance(Bundle) – To create guidance view (left side). – Attributes of guidance (title, description etc) are specified here.
2. onCreateActions(List, Bundle) – To define list of possible actions (right side). – Attributes of action are specified here.
3. onGuidedActionClicked(GuidedAction) – This is onClick listener. – Behaviors after clicking action buttons can be specified here.
Chỉ với 3 method trên bạn đã có thể tạo được một màn hình setting đầy đủ với UI mặc định, tuy nhiên với những bạn muốn custom giao diện thì có thể sử dụng “Theme” & “Stylist”
Minimum Implementation (Overriding method)
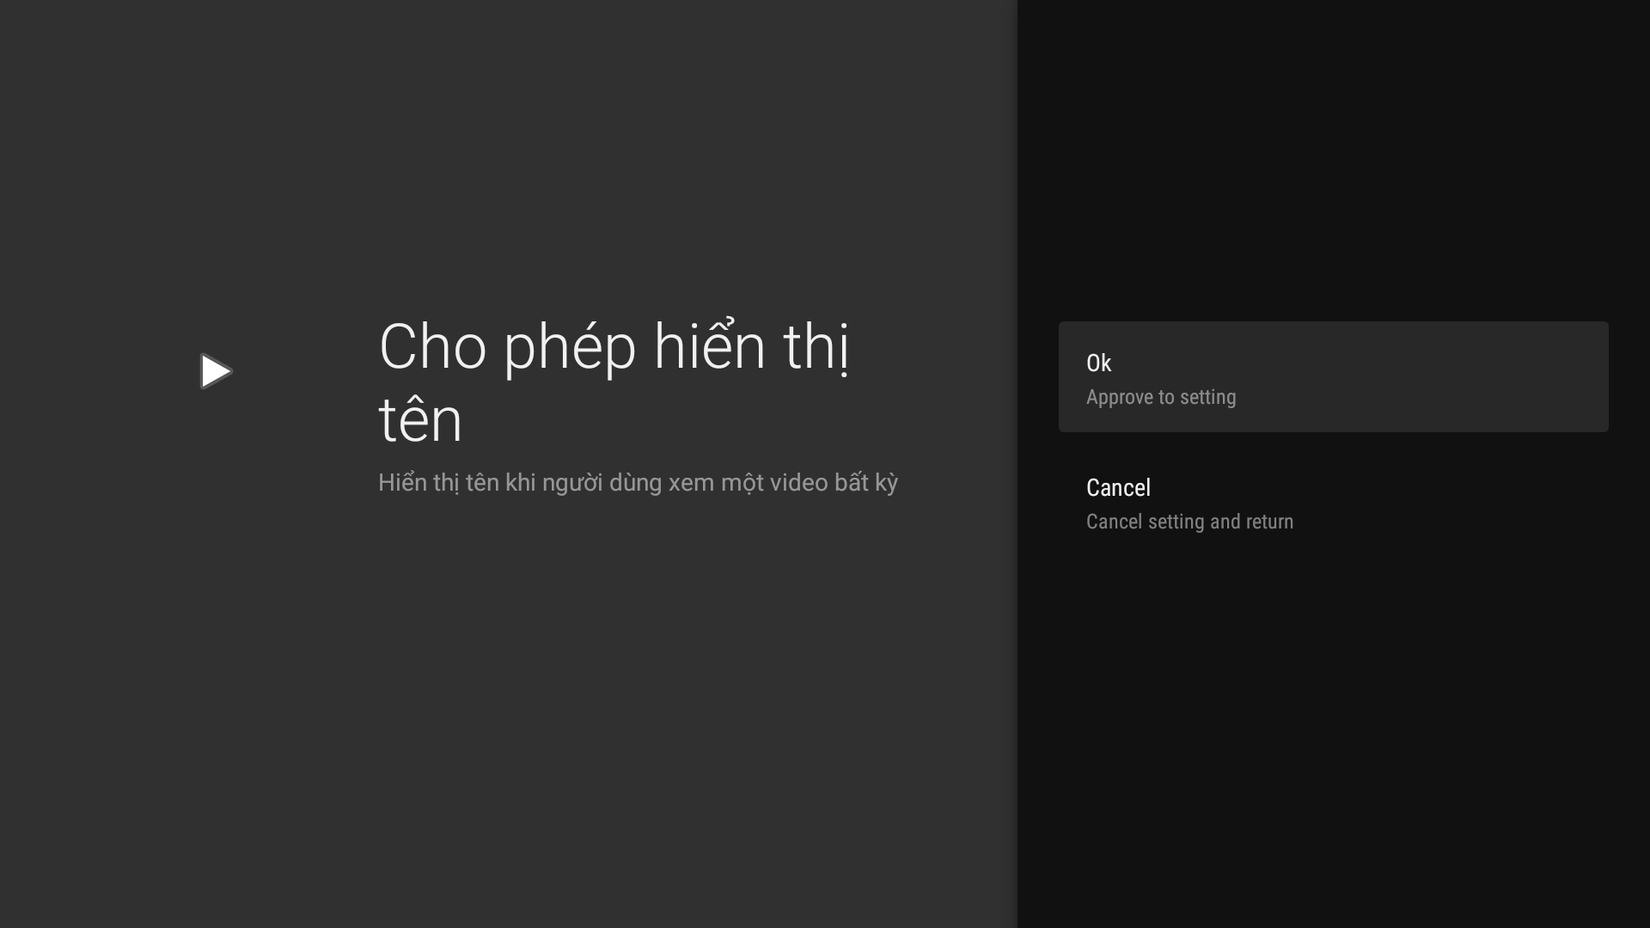
Tạo một giao diện setting đơn giản
class SettingFragment : GuidedStepSupportFragment() {
    override fun onViewCreated(view: View, savedInstanceState: Bundle?) {
        super.onViewCreated(view, savedInstanceState)
    }

    override fun onCreateGuidance(savedInstanceState: Bundle?): GuidanceStylist.Guidance {
        val title = "Cho phép hiển thị tên"
        val description = "Hiển thị tên khi người dùng xem một video bất kỳ"
        val icon = activity?.getDrawable(R.drawable.ic_media_play)
        return GuidanceStylist.Guidance(title, description, "", icon)
    }

    override fun onCreateActions(actions: MutableList<GuidedAction>, savedInstanceState: Bundle?) {
        addAction(actions, ACTION_OK, "Ok", "Approve to setting")
        addAction(actions, ACTION_CANCEL, "Cancel", "Cancel setting and return")
    }

    override fun onGuidedActionClicked(action: GuidedAction?) {
        when (action?.id) {
            ACTION_OK -> {
                // todo
            }

            ACTION_CANCEL -> {
                // todo
            }
        }
    }

    private fun addAction(actions: MutableList<GuidedAction>, id: Long, title: String, desc: String) {
        actions.add(
            GuidedAction.Builder(requireContext())
                .id(id)
                .title(title)
                .description(desc)
                .build()
        )
    }

    companion object {
        private const val ACTION_OK = 1000L
        private const val ACTION_CANCEL = 2000L
    }
}
Chạy thử
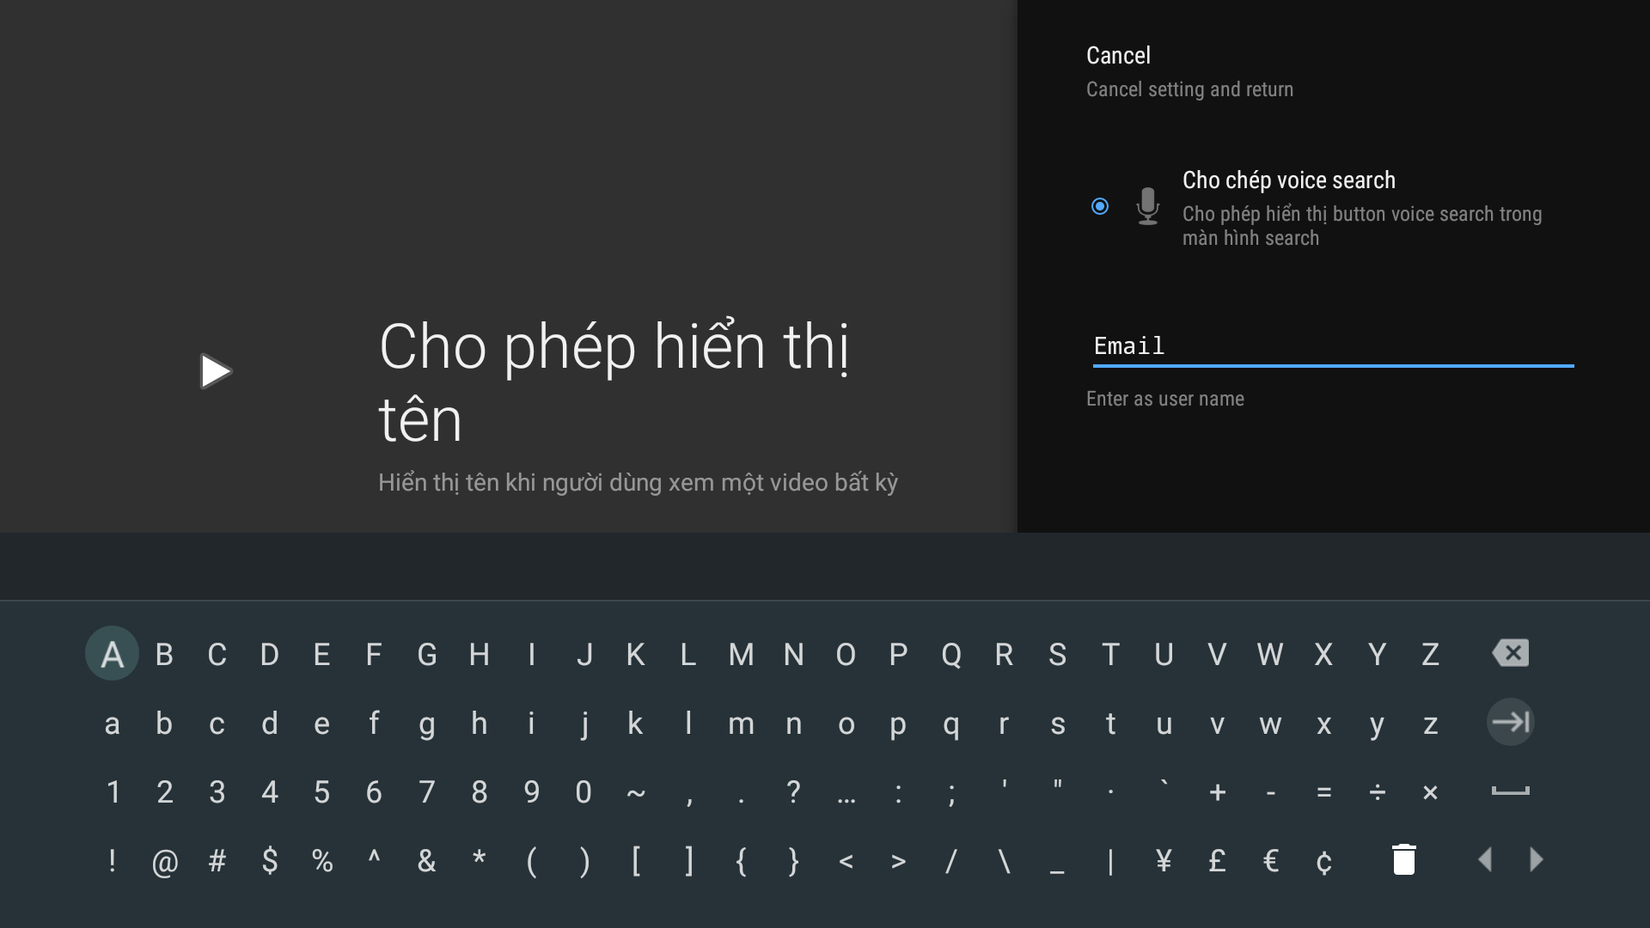
Bạn cũng có thể add một checkbox, hay một inputtext vào trong màn hình này như một actions bình thường
private fun addCheckedAction(actions: MutableList<GuidedAction>, id: Int, iconResId: Int,
        title: String, desc: String, checked: Boolean) {
        actions.add(GuidedAction.Builder(requireContext())
            .title(title)
            .description(desc)
            .checked(checked)
            .checkSetId(id)
            .icon(iconResId)
            .build())
    }

    private fun addInputAction(actions: MutableList<GuidedAction>, id: Long, title: String,
        desc: String) {
        actions.add(GuidedAction.Builder(requireContext())
            .id(id)
            .title(title)
            .editInputType(
                InputType.TYPE_CLASS_TEXT or InputType.TYPE_TEXT_VARIATION_VISIBLE_PASSWORD)
            .editable(true)
            .description(desc)
            .build())
    }
Cảm ơn các bạn đã theo dõi
Nguồn tham khảo: http://corochann.com/android-tv-application-hands-on-tutorial-10-236.html#GuidedStepFragment_to_show_Settings_display
All rights reserved
