How to do Image Verification with Squish
Bài đăng này đã không được cập nhật trong 7 năm
Squish
Squish is a cross-platform UI and regression-testing tool that can test applications based on a variety of GUI technologies. Froglogic developed this tool. It has various pricing options and provide a free trial to try out its features. Squish has been the first choice for several software testing Services Company to automate functional regression tests.
Verification Types In Squish
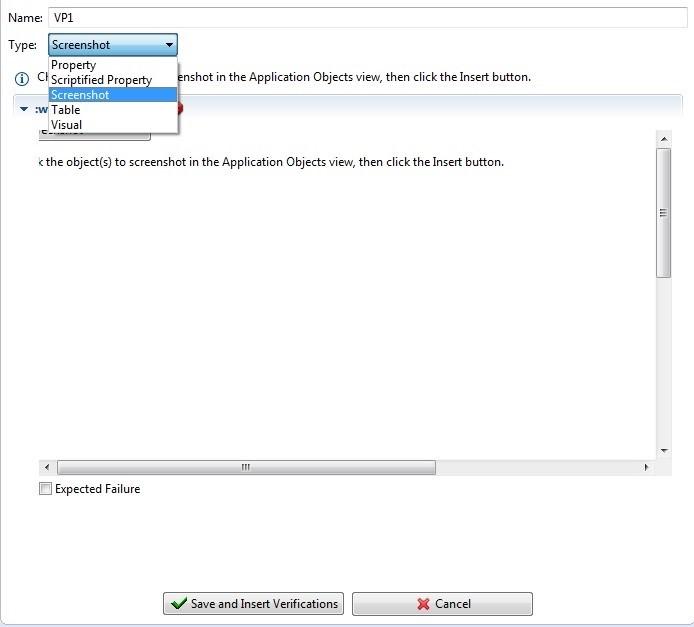
Squish has different verifications for object assertions
• Property • Scriptified Property • Screenshot • Table • Visual
Need for Image verification:
On comparing screenshots manually, a human eye cannot see them also modern monitors are not able to display the differences of Screenshot captured. Certainly, these differences are with just a few pixel differences and the individual pixel values typically only change by a very lesser amount.
Failures in Verification:
Possible reasons of failures:
- Changes of UI.(by Updates)
- Constant changing stuffs(Dynamic changes in App)
- Graphic drivers in general
- Jagging
- Color settings of the GPU driver
- Sensors in Machines (Auto Enhancements).
- Monitor Color configurations.
In Next, Will see how to overcome these failures
Succeeding Screenshot Failures
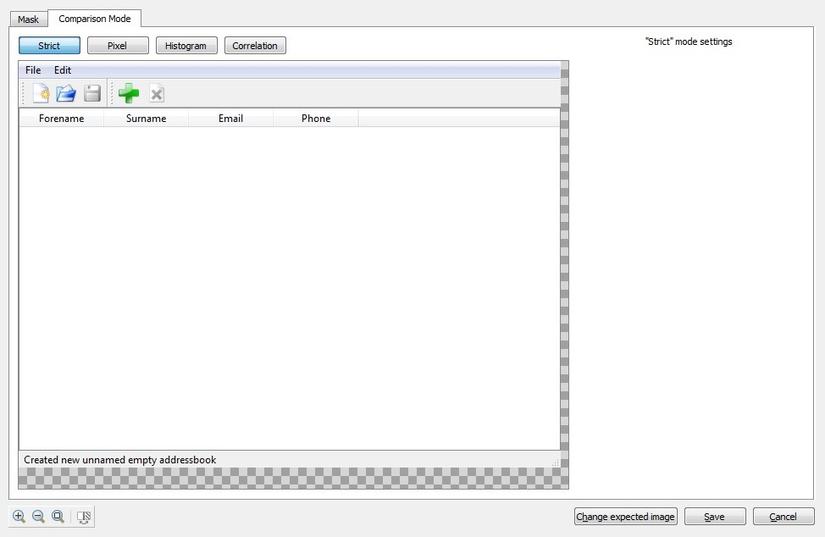
- Squish supports multiple methods for Image verifications (“Histogram”, “Strict”, “Correlation “and “Pixel").
- To remove particular section from the Picture ,squish uses a Mask function
- After
- Image verification can be done with squish using its verification creator.(After Creation VP)
- The default mode used in squish is "Strict" mode (default setting).
Verification Types in Squish:
Squish has five verifications for object assertions
- Property
- Scriptified Property
- Screenshot
- Table
- Visual
From this type, we are going look on Screenshot verification functionality.
Steps in Creating an Image Verification Point (VP)
In Squish, Images created using Record & Playback mode or Debugging mode.
Demonstrate of VP creation using Address Book Application.
Create Verification Point Via Debugging Mode
- Set break point in scripts to take Screenshot Verification Point.
- Run the scripts in debugging mode.
- When execution reaches the break point, make sure the application is visible.
- Inspect the Image element locator and check the checkbox of element locator in Application Object on Squish Tool.
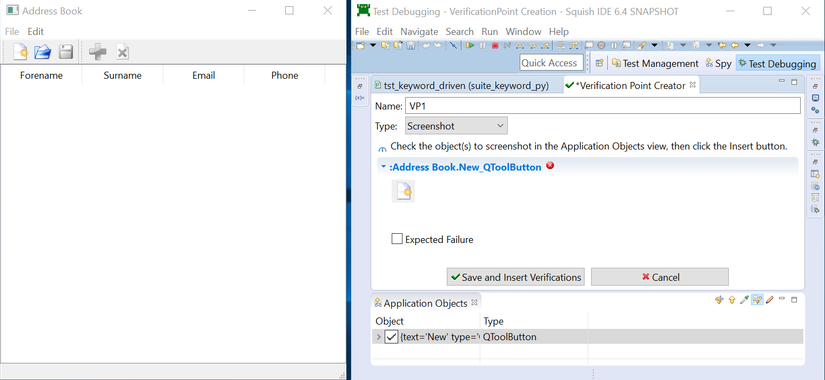
- Screenshot Verification Point for inspected image is taken and define the Verification Point name and click Save and Insert Verification button.
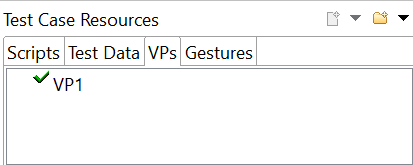
- Stored Verification Point is shown in Test Case resource – VPs section in Squish Tool.

- Use the stored Verification Point in scripts and execute it.
Create Verification Point Via Record & Playback Mode
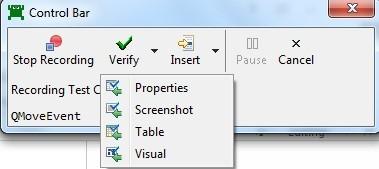
- Select Record Snippet option in Squish Tool, it opens the Control Bar Window.
- Select Screenshot option in Verify Dropdown on Control Bar Window and make sure application is visible.
- Inspect the Image element locator and check the checkbox of element locator in Application Object.
- Screenshot Verification Point for inspected image is taken and define the Verification Point name and click Save and Insert Verification button.
- Stored Verification Point is shown in Test Case resource – VPs section in Squish Tool.
Use the stored Verification Point in scripts and execute it.
Verification Point comparison result shown in Test Case report.
- If comparison pass, got message as”<verification_point_name>: Screenshot comparison of '<:image_object_locator>' passed Images match (different pixels: 0.0000%, max. color difference: 1.7321)”.
- If comparison fails, got message as “Images differ (different pixels: 20.8390%, max. color difference: 441.6730). Differing screenshot saved as <failedImages\failed_1.png>'”.
- Reason for failure is that images vary in pixel comparison or difference in screen resolution.
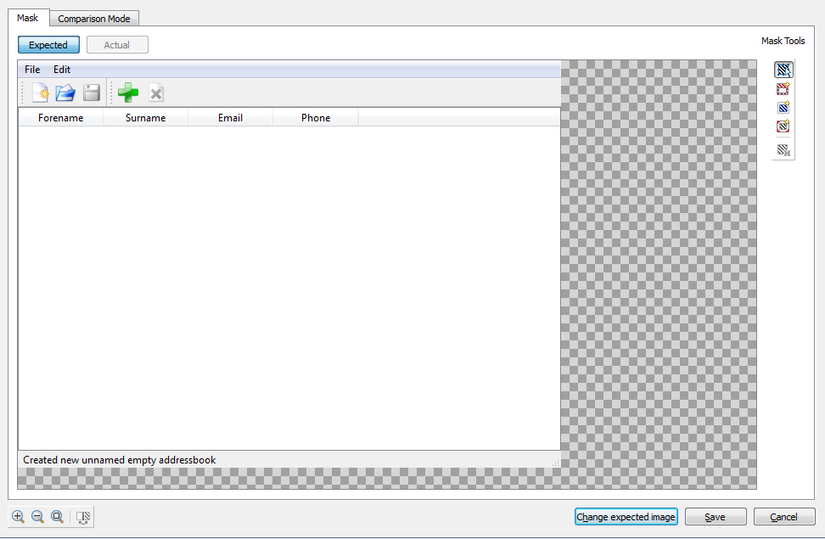
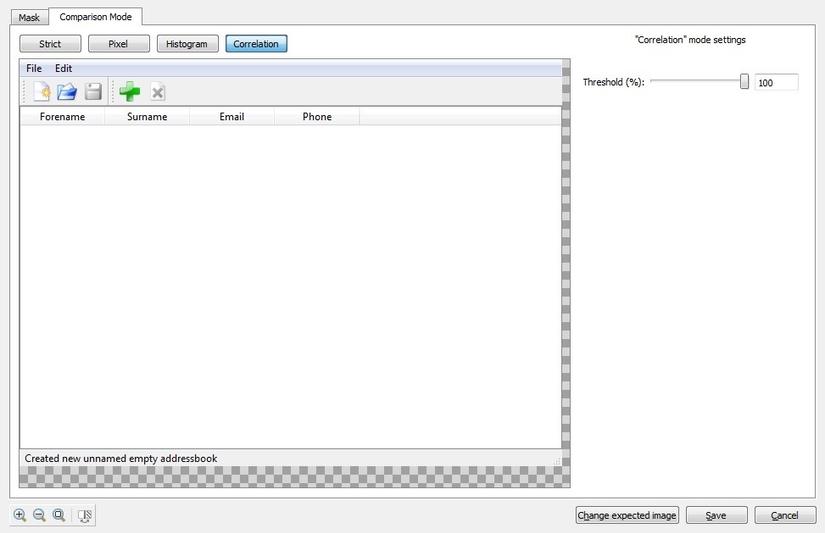
Mask & Comparison Mode:
Squish supports Mask mode and Comparison modes to configure failure exceptions for image comparison.
Comparisons
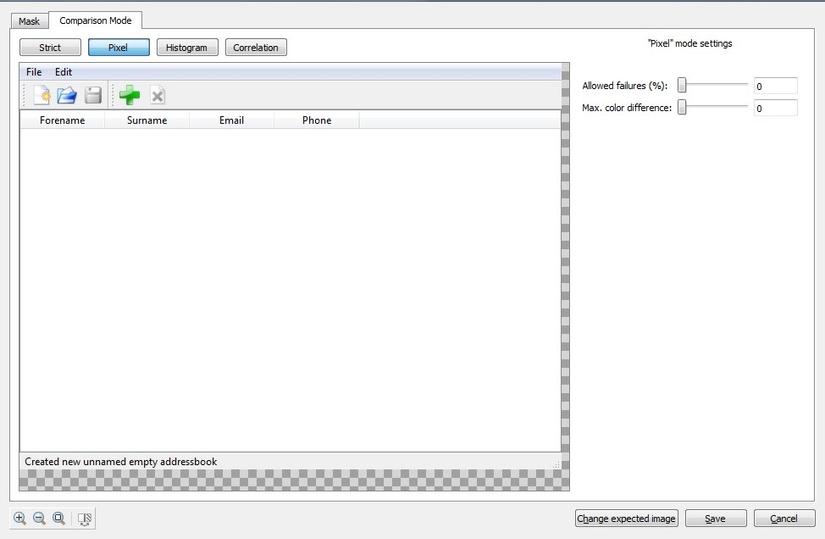
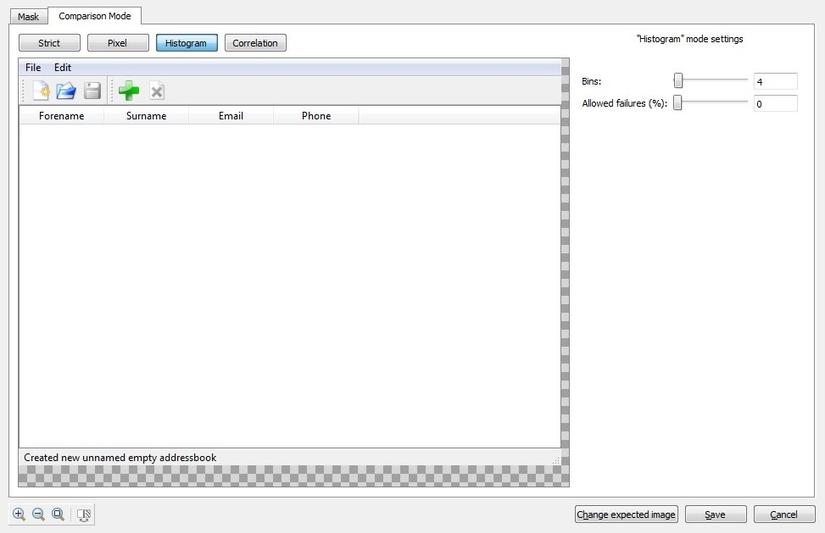
- Comparison have four types of modes are Strict, Pixel, Histogram and Correlation.
- In Strict mode, Image comparison follows as Pixel by Pixel comparison. There is no configuration option in it.
- In Pixel mode, Image comparison follows compares corresponding Pixel colour. It configuration properties are Difference, Allow failure and Maximum colour difference. By using this property we can make some liberty on Image comparison.
- In Histogram mode, Image comparison follows comparing image colour histogram. Useful in-case of image is rotated or scaled/resized condition. It configuration properties are Difference, Bins and Threshold.
- In Correlation mode, Image comparison follows image similarity compares. Similarity is depends on Threshold percentage value. It can compare the screenshot of an application which run on different screen resolutions.
Mask Mode
- Mask mode have two types masks are Positive Mask and Negative Mask.
- Positive Mask on image section only taken for image comparison.
- Negative Mask on image section only omitted for image comparison.
Masking Images :
When comparing images it has possible circumstances with expected image to contain more information than what we going to need in our verification. For eliminating the extra sources in the image, it can mask sections of the image by either positioning a Mask. The masking changes has to be made before moving to comparison..
Different Modes
Strict mode
It offers no configuration options.
Pixel differences occurs that is unnoticeable by the human eye due to many factors such as GPU, system OS, anti-aliasing, etc. In such situation this mode unsuitable.
Pixel
It compares the two images with in-depth changes made in pixel by pixel.
The image changes are shown in percentage values.
Histogram
As the name suggest this based on principle of image history (Changes made in Image at early creation)
It is much helpful for cases when images are Crop/Compressed or Edited, filtered, so that their colors remain same.
Threshold parameter defines the measures of equality in images.10% of different in pixels equals threshold of 11% that would have equal in comparison.
Correlation
In Correlation mode measures the likeness of two images as a static correlation coefficient based on functions originally restricting from the signal processing domain. Common pixels will display 0% could roughly be labelled as "no similarity" and 100% as "perfect similarity".
Comparison is done based on grey values (color) after mapping images of different sizes to the same scale.
Unlike the Strict Comparison mode, this mode is potentially able to cope with screenshots of applications running on systems with different screen resolutions.
Not every time it suits with same requirements.
Color Difference Parameter
- It comes under use; When Images are of different shades that are unnoticed by human eye.
- It occurs to screenshots that have been taken on different machines with different GPU.
- The Images are very similar and need to ignore tiny differences as they have in comparison.
The differences be calculated as follows: diff = sqrt((r2 - r1)^2 + (g2 - g1)^2 + (b2 - b1)^2) Note: Difference from white and black is approximately 441.6. When Comparing solid images, better to set with Max Color Difference = 441.67
Visual Verification
The main criteria for visual are a pixel-by-pixel comparison of the appearance as displayed on the screen. Several factors can lead to deviations from pixel accuracy:
- Screen size and resolution
- User settings like fonts and system themes
- Platform (operating system, Web browser)
- Display of dynamic data (time of day, etc.)
- UI style changes
All rights reserved
