How To Deploy a Cassandra Cluster in AWS Part 2
Bài đăng này đã không được cập nhật trong 4 năm
In Part 1 of this tutorial, I wrote about how to deploy a cassandra cluster in AWS . In Part 2, I’ll discuss about installing and configuring cassandra on the new cluster.
Log onto Virtual Machines
Now that I have these three instances running, I have to log onto them and start using them.
From the EC2 Dashboard, you can select the Instances tab on the left side to give you an overview of all the instances you have running.
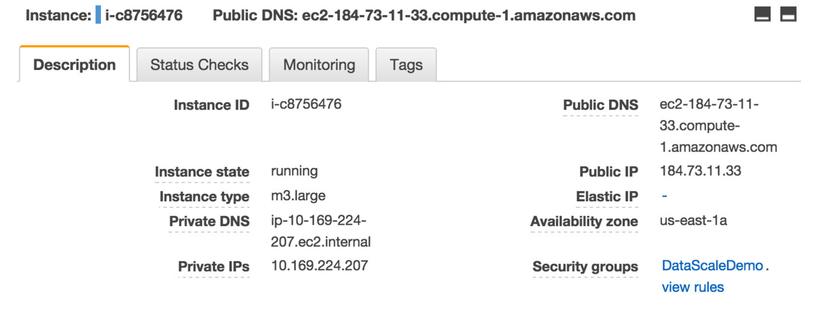
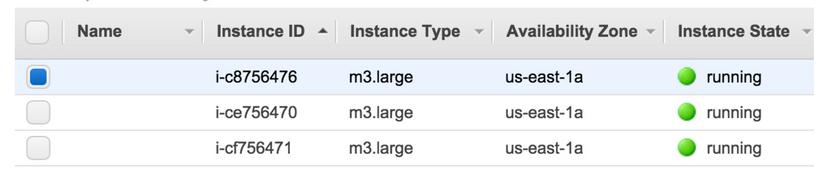 You can choose any of the instances from the grid and view all the properties about the selected instance. The most important detail for us here is the public IP address of these machines. Once you have that, you can SSH into the machine.
 From your local machine, you’ll need to open a terminal. I’m currently running on a Ubuntu, so my terminal will do. If you’re on a Windows machine, you’ll need something like PuTTy or cmder. I’ve used both, but prefer the latter.
From your terminal, run the following command. Note, the path to your pem file and your IP will differ.
$ ssh -i ~/demo.pem ubuntu@184.73.11.33
Using the public IP of your three instances, you can access them via variations of the above command.
Cassandra Installation Ways
There are couple of ways to install Cassandra. One option is via a tarball that you download, unpack, and run. The second is as a package that will install itself as a service on the Linux box. The third is to download the source code and compile it. I will cover the first two methods, as I believe they are the most common. If you can compile source code, then you’re probably above this tutorial.
Prerequisite
Before we can start, we need to make sure that the machines have the latest version of Java 7 or 8 installed.
$ java -version
Conveniently, my machines don’t have any java installed, so I’ll get to download and install them. My preference is to use the full Oracle JDK 8 for Cassandra.
$ sudo add-apt-repository ppa:webupd8team/java
$ sudo apt-get update
$ sudo apt-get install oracle-java8-installer
Method 1: Install Cassandra from binary
We are looking to install the tarball of Cassandra from the Apache website.
First we go get the latest tarball.
$ curl -OL http://www.apache.org/dist/cassandra/3.0.0/apache-cassandra-3.0.0-bin.tar.gz
Next we un-compress the tarball.
$ tar xzf apache-cassandra-3.0.0-bin.tar.gz
Change directory into the newly created cassandra folder.
$ cd apache-cassandra-3.0.0/
Now we will start the cassandra process in the foreground.
$ bin/cassandra -f
Now I can see the log output to the screen of what is going on while Cassandra starts up. Soon it will stop printing output and have line indicating that it is “listening for thrift clients” or “listening for cql clients” (depending on version). This is your indicator that Cassandra is now ready to take reads/writes. At this point, we’ve got a single instance of Cassandra running in the foreground. Now open another terminal window and log into the same IP that you just started Cassandra on.
$ bin/cqlsh
The output log will be like
Connected to Test Cluster at 127.0.0.1:9042. [cqlsh 5.0.1 | Cassandra 3.0.0 | CQL spec 3.3.1 | Native protocol v4] Use HELP for help. cqlsh>
This will start the interactive Cassandra Query Language shell. Voila, you officially have started cassandra running from a tarball. Now to try this again as a service.
From the terminal window that you had the cassandra process running in the foreground, press Control-C to kill the foreground process. If you happen to have lost that window, you can run the following to get the pid that Cassandra is running under and can kill it.
$ ps aux | grep cassandra
Method 2: Install Cassandra as a Service
This second method installs Cassandra as a service on the linux machine. For this we will need a debian packaged version of Cassandra. We can either get this from the Apache Dist, or from Datastax. I like to use DataStax’s repo.
$ echo “deb http://debian.datastax.com/community stable main” | sudo tee -a /etc/apt/sources.list.d/cassandra.sources.list
If you were to update apt-get now, you’d get an error that you don’t have the public key for the repo you just referenced. So we need to add DataStax’s public repo key.
$ curl -L http://debian.datastax.com/debian/repo_key | sudo apt-key add –
Now we can update apt-get
$ sudo apt-get update
Now the actual install of Cassandra 3.0
$ sudo apt-get install cassandra=3.0.0
Once that is done, Cassandra will be installed as a service and will already be running. Check the status of the Cassandra service
$ sudo service cassandra status
- Cassandra is running
And now we can open up the CQLSH to begin querying.
$ cqlshThe output trace will be like following:
Connected to Test Cluster at 127.0.0.1:9042. [cqlsh 5.0.1 | Cassandra 3.0.0 | CQL spec 3.3.1 | Native protocol v4] Use HELP for help. cqlsh> Or run run nodetool status to see what the cluster looks like.
$ nodetool status
Datacenter: datacenter1
Status=Up/Down |/ State=Normal/Leaving/Joining/Moving — Address Load Tokens Owns Host ID Rack UN 127.0.0.1 107.04 KB 256 ? df7ad22b-6ae6-44b7-b50a-7e3a4dc07405 rack1 From here, we see that we only have a single node in our cluster that is named Test Cluster running in datacenter1.
Configure the Cluster
So let’s repeat the steps to install Cassandra as a service on the other two instances. Once we have that done. Let’s run nodetool status again.
Datacenter: datacenter1
Status=Up/Down |/ State=Normal/Leaving/Joining/Moving — Address Load Tokens Owns Host ID Rack UN 127.0.0.1 107.04 KB 256 ? df7ad22b-6ae6-44b7-b50a-7e3a4dc07405 rack1 None of them are talking, let’s make the changes necessary to get them communicating.
On each of the instances, open the cassandra.yaml file for editing.
$ sudo vim /etc/cassandra/conf/cassandra.yaml
We need to make the following changes to the yaml. Update the cluster_name to what you want your cluster to be called. Update the seeds with 2 of your public IPs, use these 2 for every yaml file. Update the broadcast_address with the public IP of each machine. Blank out the listen_address.
cluster_name: ‘Demo Cluster’ seeds: “184.73.11.33,54.161.140.152” broadcast_address: 184.73.11.33 listen_address: Now that we have the yaml file configured. You’ll need to stop the cassandra service, clear out the system keyspace data files, and then start the service up.
$ sudo service cassandra stop$ sudo rm -rf /var/lib/cassandra/data/system/*$ sudo service cassandra start
I like to tail the Cassandra log to verify that everything is happening as expected. When you receive a line with “listening for thrift clients” or “listening for cql clients” (depending on version), you know it’s back up and ready for action.
$ tail -f /var/log/cassandra/system.log
Once you have all of this done on all of your instances, you can re-run the nodetool status to get a feel for what your new cluster looks like the following output traces.
$ nodetool status
Datacenter: datacenter1
Status=Up/Down |/ State=Normal/Leaving/Joining/Moving — Address Load Tokens Owns Host ID Rack UN 184.73.11.33 113.46 KB 256 ? 690b17cb-aae2-4385-921a-629085c2af88 rack1 UN 54.161.140.152 113.43 KB 256 ? 581c0e46-66dd-4de6-8cfb-67661f75c472 rack1 UN 54.211.210.156 169.07 KB 256 ? 322ac86f-5340-4854-a84a-7a4a1c05870b rack1 Note: Non-system keyspaces don’t have the same replication settings, effective ownership information is meaningless
Notice that you now have three entries in the output and that they are listed by their Public IPs now.
Summary
This tutorial has walked you through the deployment of three Amazon EC2 instances. It has shown you few different ways to install Cassandra. Also, the key configuration changes and ports to be opened have been pointed out. You can now follow all of this information provided above and create your own Cassandra cluster in AWS.
P.S. : The privateIP and DNS addresses in the screenshots are not actual information of any live project. These are taken from a public blog
All rights reserved
