How To Deploy a Cassandra Cluster in AWS Part 1
Bài đăng này đã không được cập nhật trong 4 năm
In this post, I’ll write about creating a Cassandra cluster in Amazon’s Web Services. The first thing you’ll need to do is sign in to your Amazon Console. If you don’t have one, create an account. Once you’re logged in, from the dashboard, click on the EC2 logo, under the Compute section.
 This is Amazon’s Elastic Compute Cloud where you can launch virtual servers, known as an Amazon EC2 instance. From the EC2 Dashboard, you will notice that you have multiple regions to choose from in the upper right corner of the dashboard. You have to choose appropriate data center based on your location and prices of the types of instances each region offer. Striking the sweet spot is the key here on which you have to spend some time to know further details. Now we’re going to start the Launch Instance wizard. Right in the middle of the screen, you should see a large “Launch Instance” button under the Create Instance section.
Create the Virtual Machines
Step 1
There are many ways to select an Operating System for your virtual server. Some are provided via an Amazon Machine Image (AMI), others are provided from the Community, or you can even provide your own Image. For this tutorial, I’m looking to run Ubuntu on an instance with a small local SSD. An EBS-backed general SSD volume will also work just fine. For that I’ll select the Quick Start menu, and choose the Ubuntu Server option.
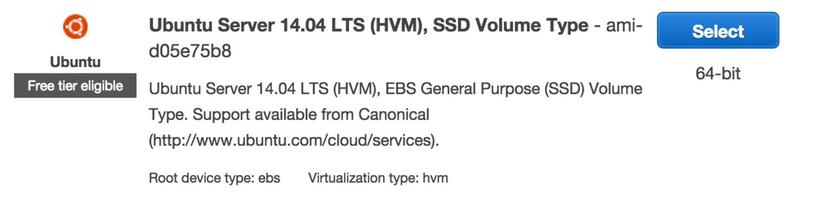
Step 2
The next step is to select an instance size. I’m wanting something that uses local SSDs and not EBS. I could try to use the free tier and get a super tiny instance, but it doesn’t really demonstrate anything that you’d actually do in the real world. From the available instance sizes, I’m looking for something not too expensive or beefy, since this is just a tutorial. I’ve decided that an m3.large is small enough to demonstrate what I need and still big enough to run without any issues. I'll choose the m3.large instance type. This virtual server has 2 cores, 7.5G RAM & a 32G SSD with moderate network performance.
Step 3
Now is the step where you can decide how many of this these instances you wish to create and which availability zone, if you want a VPC, etc. For this tutorial, I think a three node cluster will suffice. I’ve changed the Number of Instances input from 1 to 3 and left the rest as the defaults.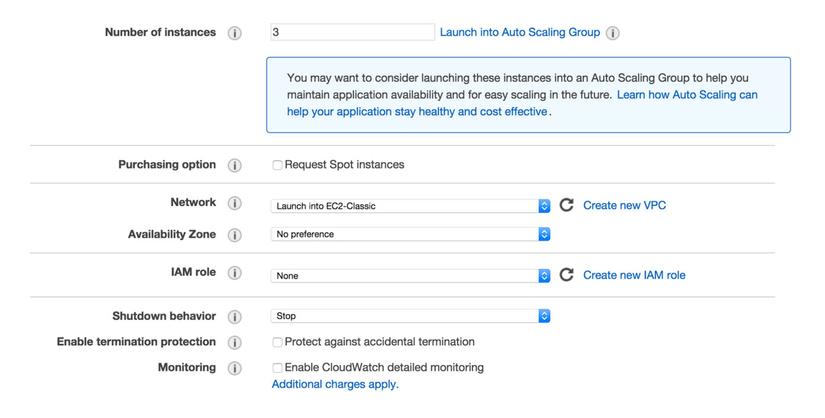
Step 4
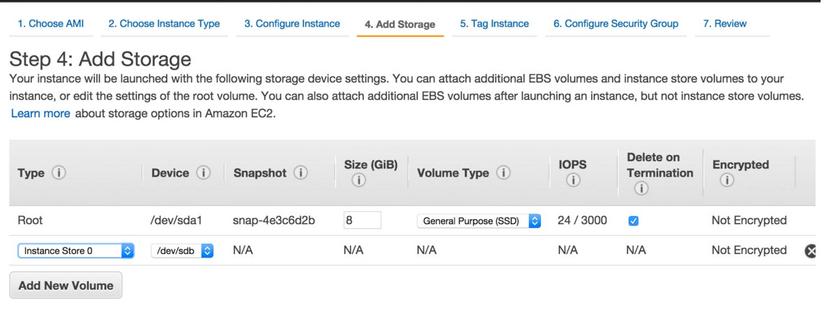
This is the step for adding any additional storage. This tutorial doesn’t really have any need for additional storage, so I’m going to pass over this selection, leaving it all as the defaults.
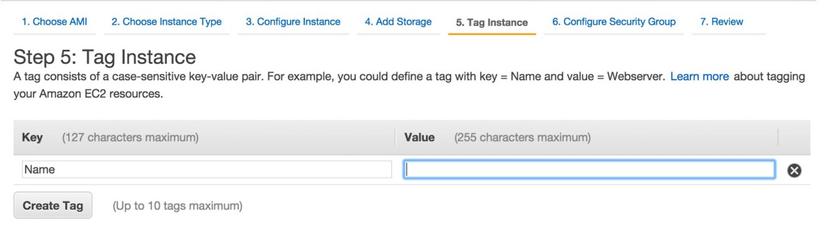
Step 5
This is the step for adding tags to your instance. We can use this feature to sort and find different groupings of instances quite easily. But again, for this tutorial, there’s really not much of a need for it.
Step 6
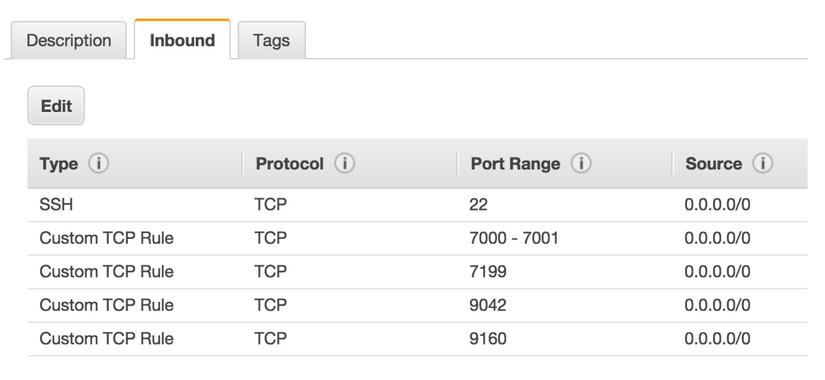
This step is for adding a Security Group around your instances. I will update Security Group name & description to reflect what I’m doing. I also added four basic inbound rules for the ports that Cassandra requires.
Step 7
This step allows us to review all the choices we’ve made and make any changes. If we’re satisfied with what we’ve selected, then we can press the Launch button and watch our virtual servers get created.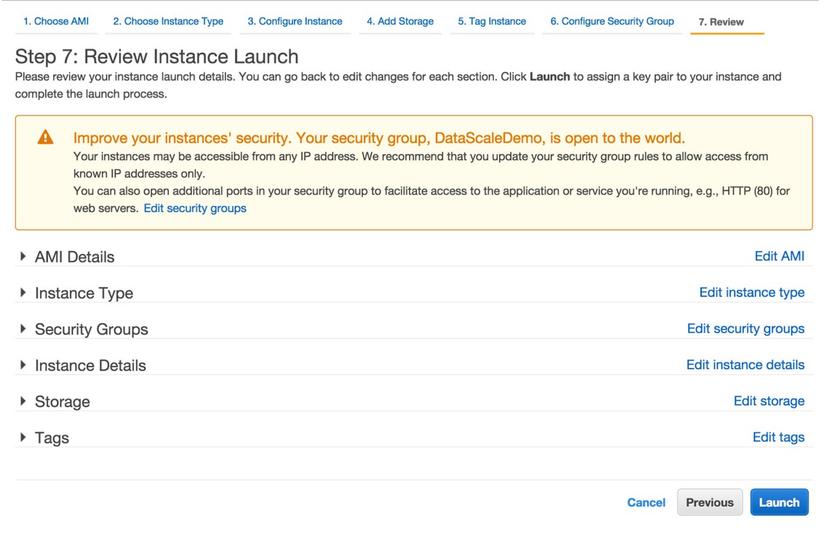 After you press the Launch button, AWS will prompt you to add a key pair to be used when you want to log into your new instances.
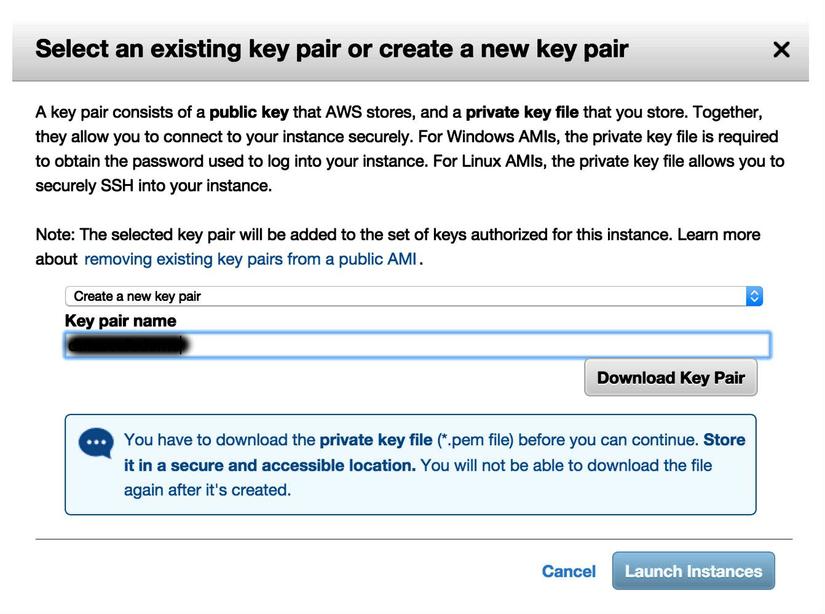
For the sake of the tutorial, I’ll create a new key pair and download the private key file. If you lose this private key, you’ll never be able to access these instances and will need to terminate them and start over. So don’t forget to click the Download Key Pair button and keep that .pem file someplace safe. Now I’ve pressed the Launch Instances button and my machines are being created.
So now we're on the clock and being charged by Amazon for use of these 3 instances.
In part 2 of this two-part tutorial, We will install & configure Cassandra on our cluster and learn about how to keep options open for cluster expansion step by step.
All rights reserved
