Học React Native từ cơ bản đến nâng cao - Phần 5: Sử dụng React Navigation 3.x và 1 số chia sẻ cá nhân
Bài đăng này đã không được cập nhật trong 7 năm

I. Giới thiệu
1 trong những điều lập trình mobile phải học và quan tâm khi phát triển ứng dụng là điều hướng app. Nếu ứng dụng điều hướng app quá rắc rối thì sẽ gây khó hiểu cho người dùng và bản thân dev cũng tốn công trong việc maintain app.
Trong bài biết này tôi xin giới thiệu với các bạn React Navigation 3.x để phục vụ mục đích điều hướng màn hình trong react native.
React Navigation được sinh ra để dễ dàng điều hướng app khi được viết bằng Javascript và với performance tốt nhất có thể.
II. Cách sử dụng
1. Cài đặt
Trước khi tiến hành cài react-navigation tôi xin lưu ý 1 số vấn đề sau để dễ dàng thống nhất môi trường giữa tôi và bạn:
+ Tôi đang sử dụng: react-native-cli
+ Node: 10.15.0
+ React: 16.8.3
+ React Native: 0.59.9
+ Xcode: 10.2.1
+ Android Studio: 3.3.2
Trong bài viết này tôi dùng chủ yếu yarn nên bạn phải cài theo hướng dẫn trong https://yarnpkg.com/en/ nhé.
Cài đặt react-navigation
yarn add react-navigation
#or with npm
#npm install react-navigation
Cài react-native-gesture-handler
yarn add react-native-gesture-handler
#or with npm
#npm install react-native-gesture-handler
Trong React Native >= 0.60 sẽ được link react-native-gesture-handler tự động. Nhưng nếu bạn dùng React Native cũ hơn thì sẽ phải link theo lệnh sau:
react-native link react-native-gesture-handler
Cấu hình riêng cho Android
Để hoàn tất cài đặt cho Android thì bạn cần phải thêm đoạn code sau:
package com.demoreactnavigation;

import com.facebook.react.ReactActivity;
import com.facebook.react.ReactActivityDelegate;
import com.facebook.react.ReactRootView;
import com.swmansion.gesturehandler.react.RNGestureHandlerEnabledRootView;

public class MainActivity extends ReactActivity {

    /**
     * Returns the name of the main component registered from JavaScript.
     * This is used to schedule rendering of the component.
     */
    @Override
    protected String getMainComponentName() {
        return "DemoReactNavigation";
    }

+     @Override
+     protected ReactActivityDelegate createReactActivityDelegate() {
+         return new ReactActivityDelegate(this, getMainComponentName()) {
+             @Override
+             protected ReactRootView createRootView() {
+                 return new RNGestureHandlerEnabledRootView(MainActivity.this);
+             }
+         };
+     }
}
2. Coding
Để dễ theo dõi các bạn có thể pull ví dụ tôi đã làm sẵn :
git clone -b bottom_tab_navigator https://github.com/oTranThanhNghia/DemoReactNavigation.git
Để đơn giản ta sẽ tạo 2 tab màn hình và 1 nút để đi tới màn hình khác:

OK, chúng ta cùng tạo màn hình Home đầu tiên nhé
HomeScreen.js
import React, { Component } from "react";
import { StyleSheet, Text, View, Button } from "react-native";

export default class HomeScreen extends Component {
  render() {
    return (
      <View style={styles.container}>
        <Text>Home</Text>
        <Button
          title="Go to Details"
          onPress={() => this.props.navigation.navigate("Details")}
        />
      </View>
    );
  }
}

const styles = StyleSheet.create({
  container: {
    flex: 1,
    backgroundColor: "#fff",
    alignItems: "center",
    justifyContent: "center"
  }
});
Trong đó: this.props.navigation.navigate("Details") thì
navigationlà prop chứa toàn bộ screen component được khai báo trong stack navigatornavigate("Details")là function để gọi điều hướng màn hình
Tương tự như vậy chúng ta sẽ tạo DetailsScreen.js và SettingsScreen.js
Đối với DetailsScreen.js
import React, { Component } from "react";
import { StyleSheet, Text, View } from "react-native";

export default class DetailsScreen extends Component {
  render() {
    return (
      <View style={styles.container}>
        <Text>Details</Text>
      </View>
    );
  }
}

const styles = StyleSheet.create({
  container: {
    flex: 1,
    backgroundColor: "#fff",
    alignItems: "center",
    justifyContent: "center"
  }
});
và SettingsScreen.js
import React, { Component } from "react";
import { StyleSheet, View, Text } from "react-native";

export default class SettingsScreen extends Component {
  render() {
    return (
      <View style={styles.container}>
        <Text>Setting</Text>
      </View>
    );
  }
}

const styles = StyleSheet.create({
  container: {
    flex: 1,
    backgroundColor: "#fff",
    alignItems: "center",
    justifyContent: "center"
  }
});
Sau đây là phần quan trọng nhất:
Các bạn tạo AppNavigator.js để tạo danh sách screen có thể điều hướng được
import {
  createAppContainer,
  createBottomTabNavigator,
  createStackNavigator
} from "react-navigation";
import HomeScreen from "app/HomeScreen";
import DetailsScreen from "app/DetailsScreen";
import SettingsScreen from "app/SettingsScreen";

const HomeStack = createStackNavigator({
  Home: { screen: HomeScreen },
  Details: { screen: DetailsScreen }
});

const SettingsStack = createStackNavigator({
  Settings: { screen: SettingsScreen },
  Details: { screen: DetailsScreen }
});

const AppNavigator = createBottomTabNavigator(
  {
    Home: {
      screen: HomeStack,
      navigationOptions: {
        title: "Home"
      }
    },
    Setting: {
      screen: SettingsStack,
      navigationOptions: {
        title: "Setting"
      }
    }
  }
);

export default createAppContainer(AppNavigator);
Trong đó:
Details: { screen: DetailsScreen }thìDetailslà key để điều hướng cònDetailsScreenlà screen componet để hiển thị.createStackNavigatorcung cấp cách để điều hướng các màn hình mà màn hình mới được hiển thị nằm trên đỉnh StackcreateBottomTabNavigatorlà tab bar đơn giản nằm phía dưới màn hình và cho phép điều hướng màn hình thông qua các nút tab đócreateAppContainersẽ chứa toàn bộ screen component và giúp quản lý state và điều hướng app dễ dàng.
Chia sẻ kinh nghiệm khi run-ios/run-android
Có 1 thực tế rằng chạy lệnh react-native run-ios hay run-android có khá nhiều lỗi xảy ra. Vậy nên các đơn giản hơn để chạy app mà ít lỗi nhất là mở Xcode hay Android Studio để build trước
Các bước như sau:
- Bước 1: Chạy Metro Bundler trước
$ react-native start
 https://images.viblo.asia/ada5e5de-064f-4858-94d2-bca67ea49449.png
Đối với riêng Android thêm bước sau:
$ adb reverse tcp:8081 tcp:8081
- Bước 2: Mở
XcodehayAndroid Studiođể đồng bộ project rồi tiến hành RUN app
Chia sẻ cách loại bỏ link gián tiếp "../" thành trực tiếp "app/' ở import
Bạn nhìn kiểu code này quen chứ ?
import SomeExample from '../../../some/example.js';
const OtherExample = require('../../../other/example.js');
Có rất nhiều cách để bạn loại bỏ link gián tiếp ví dụ như dùng:
Nhưng cách này config khá nhiều và sau đây tôi xin giới thiệu cách ngắn gọn và đơn giản hơn nhiều
- Bước 1: Tạo file
package.jsondưới folder code js của bạn
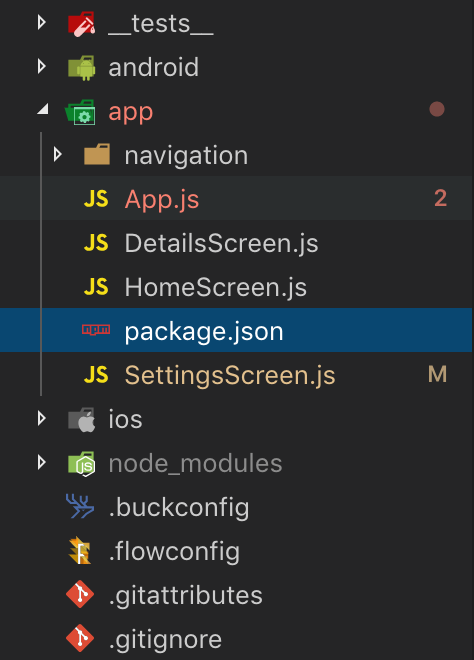
Bên trong package.json như sau:
{
  "name": "app"
}
- Bước 2: Tạo file
jsconfig.jsonđể config vscode của bạn
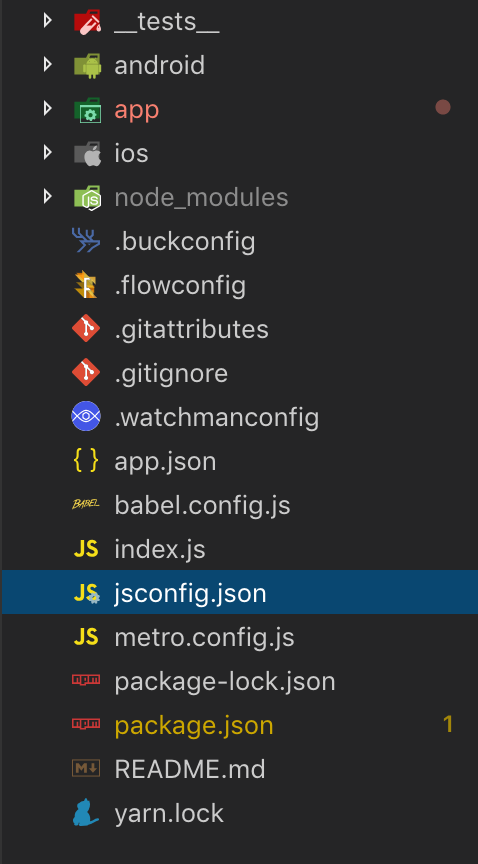
Bên trong jsconfig.json như sau:
{
  "allowJs": true,
  "compilerOptions": {
    "target": "es6",
    "module": "commonjs",
    "allowSyntheticDefaultImports": true,
    "baseUrl": ".",
    "paths": {
      "app/*": ["app/*"]
    }
  },
  "exclude": ["node_modules", "**/node_modules/*"]
}
Trong đó :
"paths": {
      "app/*": ["app/*"]
    }
để VsCode biết code nằm ở đâu
Chi tiết hơn bạn có thể xem trong link dưới đây:
https://code.visualstudio.com/docs/nodejs/working-with-javascript
III. Demo
1. Android

2. iOS

IV. Tài liệu tham khảo
All rights reserved
