Heroku: PHP Laravel, Nginx and Socket.IO in same Dyno
Bài đăng này đã không được cập nhật trong 6 năm
Lại một bài hướng dẫn Heroku nữa??
Hầu hết các hướng dẫn deploy Laravel lên Heroku đều sử dụng Apache để làm web server. Mặc định Laravel đi kèm với 1 file .htaccess được dùng bởi Apache để rewrite tất cả dynamic url về file public/index.php để xử lý routing bằng Laravel. Apache trên Heroku cũng hỗ trợ override config bằng file .htaccess nên việc setup bằng Apache rất dễ dàng.
https://devcenter.heroku.com/articles/custom-php-settings#apache-defaults
Apache uses a Virtual Host that responds to all hostnames. The document root is set up as a <Directory> reachable without access limitations and
AllowOverride Allset to enable the use of.htaccessfiles. Any request to a URL ending on.phpwill be rewritten to PHP-FPM using a proxy endpoint namedfcgi://heroku-fcgiviamod_proxy_fcgi. The DirectoryIndex directive is set toindex.php index.html index.html.
Nhưng nếu trường hợp bạn muốn sử dụng Nginx thì sao? Và một ứng dụng Laravel không chỉ chạy PHP đơn thuần mà thường có cả queue, schedule, database, redis, socketio... vậy xử lý thế nào đây?
Trong bài này mình sẽ đi qua một số khái niệm liên quan đến Heroku và hướng dẫn thực hành deploy Laravel, Socket.IO và Nginx.
Để thực hành bạn cần một tài khoản Heroku Free và cài đặt heroku-cli ở local.
Deploy Laravel App
Tạo project Laravel với composer:
composer create-project --prefer-dist laravel/laravel:6 heroku-laravel-nginx-socketio
git init
git add .
git commit -m 'Init Laravel 6'
Tạo heroku app:
cd heroku-laravel-nginx-socketio
heroku apps:create heroku-laravel-nginx-socketio
Khi tạo xong app, heroku cli sẽ tự động add thêm 1 git remote repository, bạn có thể kiểm tra bằng lệnh:
$ git remote -v
heroku	https://git.heroku.com/heroku-laravel-nginx-socketio.git (fetch)
heroku	https://git.heroku.com/heroku-laravel-nginx-socketio.git (push)
Nếu không có heroku remote thì bạn tự thêm vào bằng lệnh git remote add heroku <heroku git url>
Ok, thử push lên heroku repo:
$ git push heroku master
Counting objects: 113, done.
Delta compression using up to 4 threads.
Compressing objects: 100% (95/95), done.
Writing objects: 100% (113/113), 56.69 KiB | 3.54 MiB/s, done.
Total 113 (delta 10), reused 0 (delta 0)
remote: Compressing source files... done.
remote: Building source:
remote:
remote:  !     Warning: Multiple default buildpacks reported the ability to handle this app. The first buildpack in the list below will be used.
remote: 			Detected buildpacks: PHP,Node.js
remote: 			See https://devcenter.heroku.com/articles/buildpacks#buildpack-detect-order
remote: -----> PHP app detected
...
Khác với git push thông thường như khi push lên Github chẳng hạn, thì sau khi push lên heroku, Heroku sẽ thực hiện build và deploy.
Buildpacks
Do Khi chưa thêm buildpacks cho heroku app, Heroku sẽ tự động detect buildpack phù hợp để build (có lẽ Heroku dựa vào các file composer.json và package.json để detect buidpack?).
Buildpack là gì? => Hiểu nôm na, buildpacks là tập hợp các scripts thường dùng để build, compile ứng dụng tùy thuộc vào ngôn ngữ lập trình của từng ứng dụng. Ví dụ ở đây, app của chúng ta là PHP Laravel thì sẽ có các bước:
composer installđể cài các packages,npm installđể cài JS packages,npm run devđể compile và generate assets như Sass, CSS, Javascript...Các buildpacks được support chính chủ bởi Heroku là: Ruby, Node.js, Clojure, Python, Java, Gradle, JVM, Grails 3.x, Scala, Play 2.x, PHP, Go
Ở đây chúng ta cần 2 buildpacks là heroku-buildpack-php để chạy composer và heroku-buildpack-nodejs để chạy npm. Add vào Heroku App bằng lệnh sau:
heroku buildpacks:add heroku/php
heroku buildpacks:add heroku/nodejs
Heroku sẽ chạy lần lượt các buildpack theo thứ tự được thêm.
Push lại và xem kết quả:
$ git commit --amend --no-edit
$ git push heroku master -f
...
remote: Building source:
remote:
remote: -----> Node.js app detected
remote:
remote: -----> Creating runtime environment
remote:
remote:        NPM_CONFIG_LOGLEVEL=error
remote:        NODE_ENV=production
remote:        NODE_MODULES_CACHE=true
remote:        NODE_VERBOSE=false
remote:
remote: -----> Installing binaries
remote:        engines.node (package.json):  unspecified
remote:        engines.npm (package.json):   unspecified (use default)
remote:
remote:        Resolving node version 10.x...
remote:        Downloading and installing node 10.16.3...
remote:        Using default npm version: 6.9.0
remote:
remote: -----> Installing dependencies
remote:        Installing node modules (package.json)
remote:        added 1005 packages from 481 contributors in 31.347s
remote:
remote: -----> Build
...
Bây giờ thì command npm install đã được chạy bằng Nodejs Buildpack với NODE_ENV là production. Nhưng chúng ta vẫn còn thiếu bước chạy npm run dev hoặc npm run prod, vậy làm sao để chạy?
Theo tài liệu https://devcenter.heroku.com/articles/nodejs-support#customizing-the-build-process thì chúng ta cần định nghĩa thêm 1 npm scripts để hướng dẫn Heroku run build, khai báo trong file package.json hoặc là build hoặc heroku-postbuild, trong đó heroku-postbuild sẽ được ưu tiên hơn.
remote: -----> Build
remote:        Detected both "build" and "heroku-postbuild" scripts
remote:        Running heroku-postbuild
Vậy file package.json sẽ như thế này:
    "scripts": {
        "prod": "npm run production",
        ...
        "heroku-postbuild": "npm run prod"
    }
Procfile
Mở app bằng lệnh: heroku open, một tab trình duyệt mới được mở: https://heroku-laravel-nginx-socketio.herokuapp.com/ và bạn sẽ thấy lỗi 403 Forbidden??
Trong log khi push lên heroku có đoạn:
remote: -----> Preparing runtime environment...
remote:        NOTICE: No Procfile, using 'web: heroku-php-apache2'.
remote: -----> Checking for additional extensions to install...
remote: -----> Discovering process types
remote:        Procfile declares types -> web
=> NOTICE: No Procfile, using 'web: heroku-php-apache2'
Procfile? => Mỗi app sẽ có file file có tên
Procfileđể khai báo các command được chạy khi app khởi động, ví dụ:
- Chạy web server
- Chạy queue worker
- ...
Cú pháp file Procfile:
<process type>: <command>
Trong đó:
<process type>là tên của command hay còn gọi là Process Type, ví dụweb,worker...<command>là lệnh được chạy khi app start, ví dụheroku-php-apache2,php artisan queue:work...
Có 2 process type đặc biệt, trong đó web là process type duy nhật có thể handle HTTP requests. Nếu app của bạn cần web server thì bạn cần khai báo lệnh chạy web server ở process type này.
Mỗi dòng sẽ là một process type, mỗi process type được chạy trên một dyno hoàn toàn độc lập.
 Một trong những ưu điểm của Heroku là nó có thể scale dễ dàng bằng cách tăng thêm số lượng dyno ở mỗi process type. Nhưng việc này sẽ bàn sau khi chúng ta có tiền và có nhu cầu chạy 1 app production trên Heroku vì với Free plan Heroku chỉ cho phép chúng ta tạo 1 web process và 1 worker process, tối đa 1 dyno cho mỗi process.
Quay trở lại app Laravel của chúng ta, nếu sử dụng Apache chúng ta sẽ có file Procfile như sau:
web: vendor/bin/heroku-php-apache2 public/
Mặc định heroku-php-apache2 sử dụng folder hiện tại làm document root nhưng với Laravel thì cần set document root là public để điều hướng đến file public/index.php.
Muốn sử dụng Nginx thay cho Apache chúng ta sẽ sử dụng command vendor/bin/heroku-php-nginx thay cho vendor/bin/heroku-php-apache2 và cần phải custom Nginx config, do Nginx không hỗ trợ file .htaccess như Apache, theo hướng dẫn:
location / {
    # try to serve file directly, fallback to rewrite
    try_files $uri @rewriteapp;
}

location @rewriteapp {
    # rewrite all to index.php
    rewrite ^(.*)$ /index.php/$1 last;
}

location ~ ^/index\.php(/|$) {
    try_files @heroku-fcgi @heroku-fcgi;
    # ensure that /index.php isn't accessible directly, but only through a rewrite
    internal;
}
web: vendor/bin/heroku-php-nginx -C heroku-nginx.conf public/
Deploy lại và mở lại xem sao và lần này đã ra đúng trang Laravel nhưng lại là trang 500 error?? À tất tiên là do chưa có file .env.
Environment variable
Do filesystem trên Heroku đặc biệt ở chỗ là các thay đổi trên filesystem (không thông qua git) sẽ chỉ được giữ lại cho đến khi dyno shutdown hoặc khởi động lại, hay mỗi lần deploy hoặc restart tất cả các file thay đổi hay thêm mới trong quá trình chạy (ví dụ file laravel.log) sẽ bị xóa, chỉ có những file có trên git được keep lại.
Nên ở đây chúng ta sẽ không dùng file .env vì file này thường không được add vào git. Thay vào đó các biến môi trường sẽ được set trong setting của app trên heroku (gọi là Config Vars) hoặc có thể thông qua heroku cli.
Biến môi trường quan trọng nhất với Laravel đó là APP_KEY, chúng ta sẽ generate key và dùng heroku cli để set biến môi trường cho app:
Generate key bằng artisan command:
php artisan key:generate --show
Sau đó set biến môi trường cho heroku app bằng heroku cli:
heroku config:set APP_KEY=key_generated_above
Ngoài ra ta cần config lại log để có thể xem log qua lệnh heroku logs do nếu dùng log vào file thì file log sẽ bị xóa đi sau mỗi lần restart => https://devcenter.heroku.com/articles/getting-started-with-laravel#changing-the-log-destination-for-production
heroku config:set LOG_CHANNEL=errorlog
Deploy Socket.io
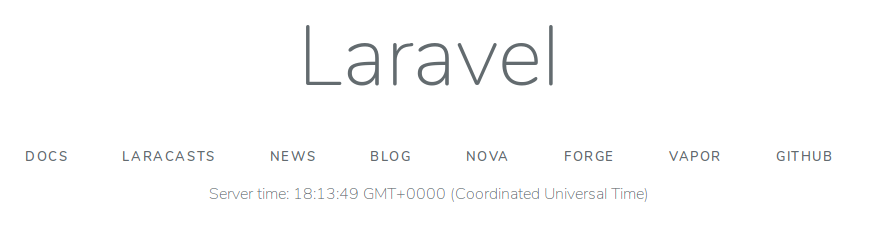
Để bắt đầu chúng ta sẽ tham khảo code socketio đơn giản ở repo: https://github.com/heroku-examples/node-socket.io, có chức năng hiển thị server time realtime thông qua socketio:
mkdir socketio-server
{
  "name": "socketio-server",
  "version": "1.0.0",
  "description": "",
  "main": "index.js",
  "scripts": {
    "test": "echo \"Error: no test specified\" && exit 1"
  },
  "keywords": [],
  "author": "",
  "license": "ISC",
  "dependencies": {
    "express": "^4.17.1",
    "socket.io": "^2.3.0"
  }
}
const express = require('express');
const socketIO = require('socket.io');

const PORT = 3000;

const server = express()
  .listen(PORT, () => console.log(`Listening on ${ PORT }`));

const io = socketIO(server);

io.on('connection', (socket) => {
  console.log('Client connected');
  socket.on('disconnect', () => console.log('Client disconnected'));
});

setInterval(() => io.emit('time', new Date().toTimeString()), 1000);
Bây giờ làm sao để chạy cả Laravel và Node socketio ở cổng 3000. Ta có các hướng giải quyết:
- Thêm 1 process type mới => Không khả thi vì process type chạy trên dyno độc lập nên không thể kết nối giữa Laravel (web) với Socket.IO server
- Thêm 1 app mới chỉ để chạy Socket.IO => Tốn thêm app (Free plan chỉ tạo được tối đa 5 App), hoặc nếu plan trả phí thì sẽ mất thêm $

- Chạy trên cùng dyno với Laravel (
webprocesss type) => Có vẻ ổn cho demo, nhưng cấu hình của dyno chỉ là 512MB nên nếu ứng dụng lớn hơn chút sẽ không ổn. Vì mục đích là free demo nên chúng ta sẽ tìm cách chạy trên cùng dyno vóiweb
Thật may mắn là Heroku cũng có 1 chủ đề về vấn đề này => https://help.heroku.com/CTFS2TJK/how-do-i-run-multiple-processes-on-a-dyno. Cách làm là sử dụng background jobs của Shell để chạy nhiều command cùng lúc bằng cách thêm ký tự & ở cuối mỗi câu lệnh.
web: vendor/bin/heroku-php-nginx -C heroku-nginx.conf public/ & (cd public/socketio-server && node server.js) & wait -n
wait -n là command của Shell, nó sẽ exit khi có ít nhất 1 command exit và do đó sẽ trigger restart lại dyno.
Cần sửa lại build step trong package.json, để instal dependency trong thư mục socketio-server:
{
    "scripts": {
        "heroku-postbuild": "(cd socketio-server && npm install) && npm run prod"
    }
}
Client (Browser) cần kết nối đến socketio server, nhưng do Heroku chỉ open 1 cổng duy nhất cho web process nên không thể connect đến cổng 3000 trên client. Vì vậy chúng ta cần tạo 1 reverse proxy bằng nginx để proxy request đến localhost:3000, thêm vào file config nginx:
location /socket.io/ {
    proxy_pass http://localhost:3000;
    proxy_http_version 1.1;
    proxy_set_header Upgrade $http_upgrade;
    proxy_set_header Connection "Upgrade";
}
Khi có request đến url /socketio/ thì Nginx sẽ request đến http://localhost:3000/socket.io/.
Sử dụng socketio trên client:
                     <a href="https://vapor.laravel.com">Vapor</a>
                     <a href="https://github.com/laravel/laravel">GitHub</a>
                 </div>
+                <p id="server-time"></p>
             </div>
         </div>
+    <script src="/socket.io/socket.io.js"></script>
+    <script>
+    var socket = io();
+    var el = document.getElementById('server-time');
+    socket.on('time', function(timeString) {
+        el.innerHTML = 'Server time: ' + timeString;
+    });
+    </script>
Deploy và demo đã thành công =))
All rights reserved
