Hệ thống phát gạo nhận diện khuôn mặt(Phần 2)
Bài đăng này đã không được cập nhật trong 6 năm
Trong phần 1, ta đã xây dựng hệ thống AI cho server. Trong phần 2, ta sẽ xây dựng server cho bài toán. Hãy tạo các file:
config.pyutils.pymain.pyDockerfile
Trước khi đi vào coding cụ thể, mình muốn giải thích qua các giải quyết logic của mình ở server. Mỗi ngày, khi khởi động hệ thống sẽ tạo ra 1 folder của ngày hôm đó, bên trong là các folder từng quận để lưu trữ mặt người đến lấy gạo. Lí do mà mình không sử dụng database là vì trong này chúng ta chỉ cần lưu trữ ảnh thôi. Nếu bạn muốn "fancy" hơn có thể cân nhắc đến các storage như Minio, ...
Coding
Đầu tiên, ta hãy viết file config.py. Trong file này chúng ta sẽ có các giá trị cần thiết cho server thay vì mỗi nơi bạn config 1 tí.
# Face
detect_config = {'image_size': 160, 'keep_all': False}
search_config = {'threshold': 0.5, 'dim': 512, 'threshold': 0.7}


# Geometry
district = 'Tây Hồ'
wards = ['Bưởi', 'Nhật Tân', 'Phú Thượng', 'Quảng An',
         'Thụy Khuê', 'Tú Liên', 'Xuân La', 'Yên Phụ', ]

#Data save path
data_path = 'data'
Trên cùng là ta config các tham số cho 2 class mà ta đã viết ở phần 1. Tiếp theo là về các địa điểm địa lý như Quận và các phường. Việc lưu dữ liệu riêng biệt như thế này có thể giúp bạn triển khai thêm cả ví dụ một hệ thống thống kê người đi mua gọa các phương ra sao, ...
Còn data_path: vị trí root cảu nơi lưu trữ ảnh.
Tiếp theo là, file utils.py:
import sys
sys.path.append('./backend')  # nopep8
import os
import csv
from datetime import date
import config as cfg


def init_folder(root, wards):
    today = date.today()
    # dd/mm/YY
    d1 = today.strftime("%d-%m-%Y")
    os.makedirs(root, exist_ok=True)
    new_root = os.path.join(root, d1)
    os.makedirs(new_root, exist_ok=True)
    ward_path = [os.path.join(new_root, ward) for ward in wards]
    for wp in ward_path:
        os.makedirs(wp, exist_ok=True)
        os.makedirs(wp+'/false', exist_ok=True)
        os.makedirs(wp+'/true', exist_ok=True)
    return new_root
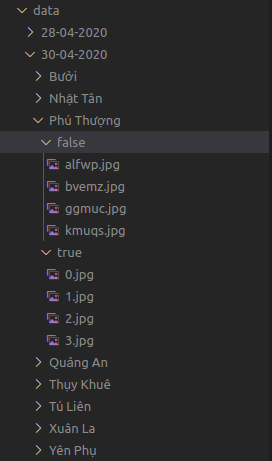
Hàm trên có tác dụng tạo ra các folder của ngày hôm đó theo dạng như dưới đây:
Giờ thì chúng ta sẽ xây dựng server FLASK ở trên main.py:
- Khởi tạo app Flask và các biến:
# initialize our Flask application
app = Flask(__name__)
fd = None
fs = None
today_dir = None
index = 0
img_path_map = list()


def init():
    # Init all variable
    global fs, fd, today_dir, index, img_path_map

    fs = FaceSearcher(**cfg.search_config)
    fd = FaceDetector(**cfg.detect_config)
    # Make folder
    today_dir = init_folder(cfg.data_path, cfg.wards)
    # If data exist ==> add them to graph
    w_paths = [os.path.join(today_dir, w, 'true') for w in cfg.wards]
    features = []
    for w_path in w_paths:
        for image_name in os.listdir(w_path):
            image_path = os.path.join(w_path, image_name)
            # Add path to path map
            img_path_map.append(image_path)
            # convert image to pytorch tensor
            image = pil_loader(image_path)
            image = ToTensor()(image)

            # extract all
            tensor = fd.extract_feature(image)
            # print(tensor.shape)

            features.append(tensor)
            index += 1
    # Add to graph
    print('Getting {} images'.format(index))
    if index > 0:
        features = np.array(features)
        # print(features.shape)
        fs.add_faces(features, np.arange(index))
Ta sẽ khởi tạo các biến như mô hình nhận diện mặt và đồ thị tìm kiếm, ... Tất cả đượ khởi tọa trong hàm init. Sau khi khởi tạo, ta sẽ thêm tất cả các ảnh đúng cảu ngày hôm đó vào đồ thị , trừng hợp server tắt giữa chừng và khởi động lại.
Các hàm phụ, mọi người nhìn cũng biết tác dụng rồi phải không 
@app.route("/wards", methods=["GET"])
def get_wards():
    return jsonify({'wards': cfg.wards})


@app.route("/district", methods=["GET"])
def get_district():
    return jsonify({'district': cfg.district})
Và API hàm xử lý ảnh:
def random_string(stringLength=5):
    letters = string.ascii_lowercase
    return ''.join(random.choice(letters) for i in range(stringLength))


@app.route("/face", methods=["POST"])
def analyze_face():
    global index, img_path_map
    data = {"success": False}
    if request.form and request.files:
        ward = request.form.get('ward')
        image_data = request.files['image'].read()
        # REformat image
        image = Image.open(io.BytesIO(image_data)).convert('RGB')

        # Set image path
        false_path = os.path.join(
            today_dir, ward, 'false', random_string())+'.jpg'

        face = fd.extract_face(image, false_path)
        s_idx = fs.query_faces(face)

        print('\nQuery result: {}\n')

        if s_idx is None:
            data['permission'] = True
            data['success'] = True
            face = np.expand_dims(face, axis=0)
            fs.add_faces(face, np.array([index]))
            # TODO: Save them
            true_path = os.path.join(
                today_dir, ward, 'true', str(index))+'.jpg'
            os.rename(false_path, true_path)
            index += 1
            img_path_map.append(true_path)
            print('Saved ', true_path)

        else:
            data['permission'] = False
            data['success'] = True
            print('Saved ', false_path)

    return jsonify(data)
Ở đây mình sẽ lưu toàn bộ ảnh được query đến. Nếu chính xác sẽ ở thư mục true, sai thì sẽ là nằm ở thwu mục false. Mình nghĩ đây là một thói quen tốt để lưu toàn bộ dữ liệu lại cho dù có sai, vì dữ liệu có thể chuyển đội sang các bài toán khác nữa. (Hoặc là bán  )
)
Giờ thì khởi tạo và chạy nào:
if __name__ == "__main__":
    init()
    app.run(host='0.0.0.0', debug=True, port=3500)
Các bạn có thể sử dụng flask thay thế cho việc viết main để chạy python như vậy. Nhưng mình chỉ lưu ý các bạn để host là 0.0.0.0 thay vì mặc định nhé, vì mặc định localhost thì khi sử dụng docker sẽ không expose được cổng ra ngoài đâu.
Viết Dockerfile:
- Hãy cài đặt pipreqs để tạo ra file reuirements.txt gồm các thư viện cần thiết, sau đó chạy lệnh pipreqs .
- Viết nội dung Dockerfile như dưới đây
FROM python:3.6.9
WORKDIR /app/backend
COPY ./requirements.txt ./requirements.txt

RUN pip install -r requirements.txt

COPY . .

# start app
CMD ["python", "main.py"]
Kết quả
Đây là vài kết quả mà bạn có sau khi xây dụng xong server:

api /district

api /wards

api /face
Vậy là ta đã hoàn thiện phần server, phần cuối cùng chúng ta sẽ xây dựng hệ thống Frontend bằng ReactJS.
All rights reserved
