Handle Configuration Change trong android
Bài đăng này đã không được cập nhật trong 6 năm
Một số cấu hình của thiết bị có thể thay đổi khi ứng dụng đang chạy (ví dụ: hướng màn hình). Khi có sự thay đổi này, Android sẽ khởi động lại Activity (onDestroy() sẽ được gọi, sau đó là onCreate()) để điều chỉnh phù hợp với cấu hình mới.
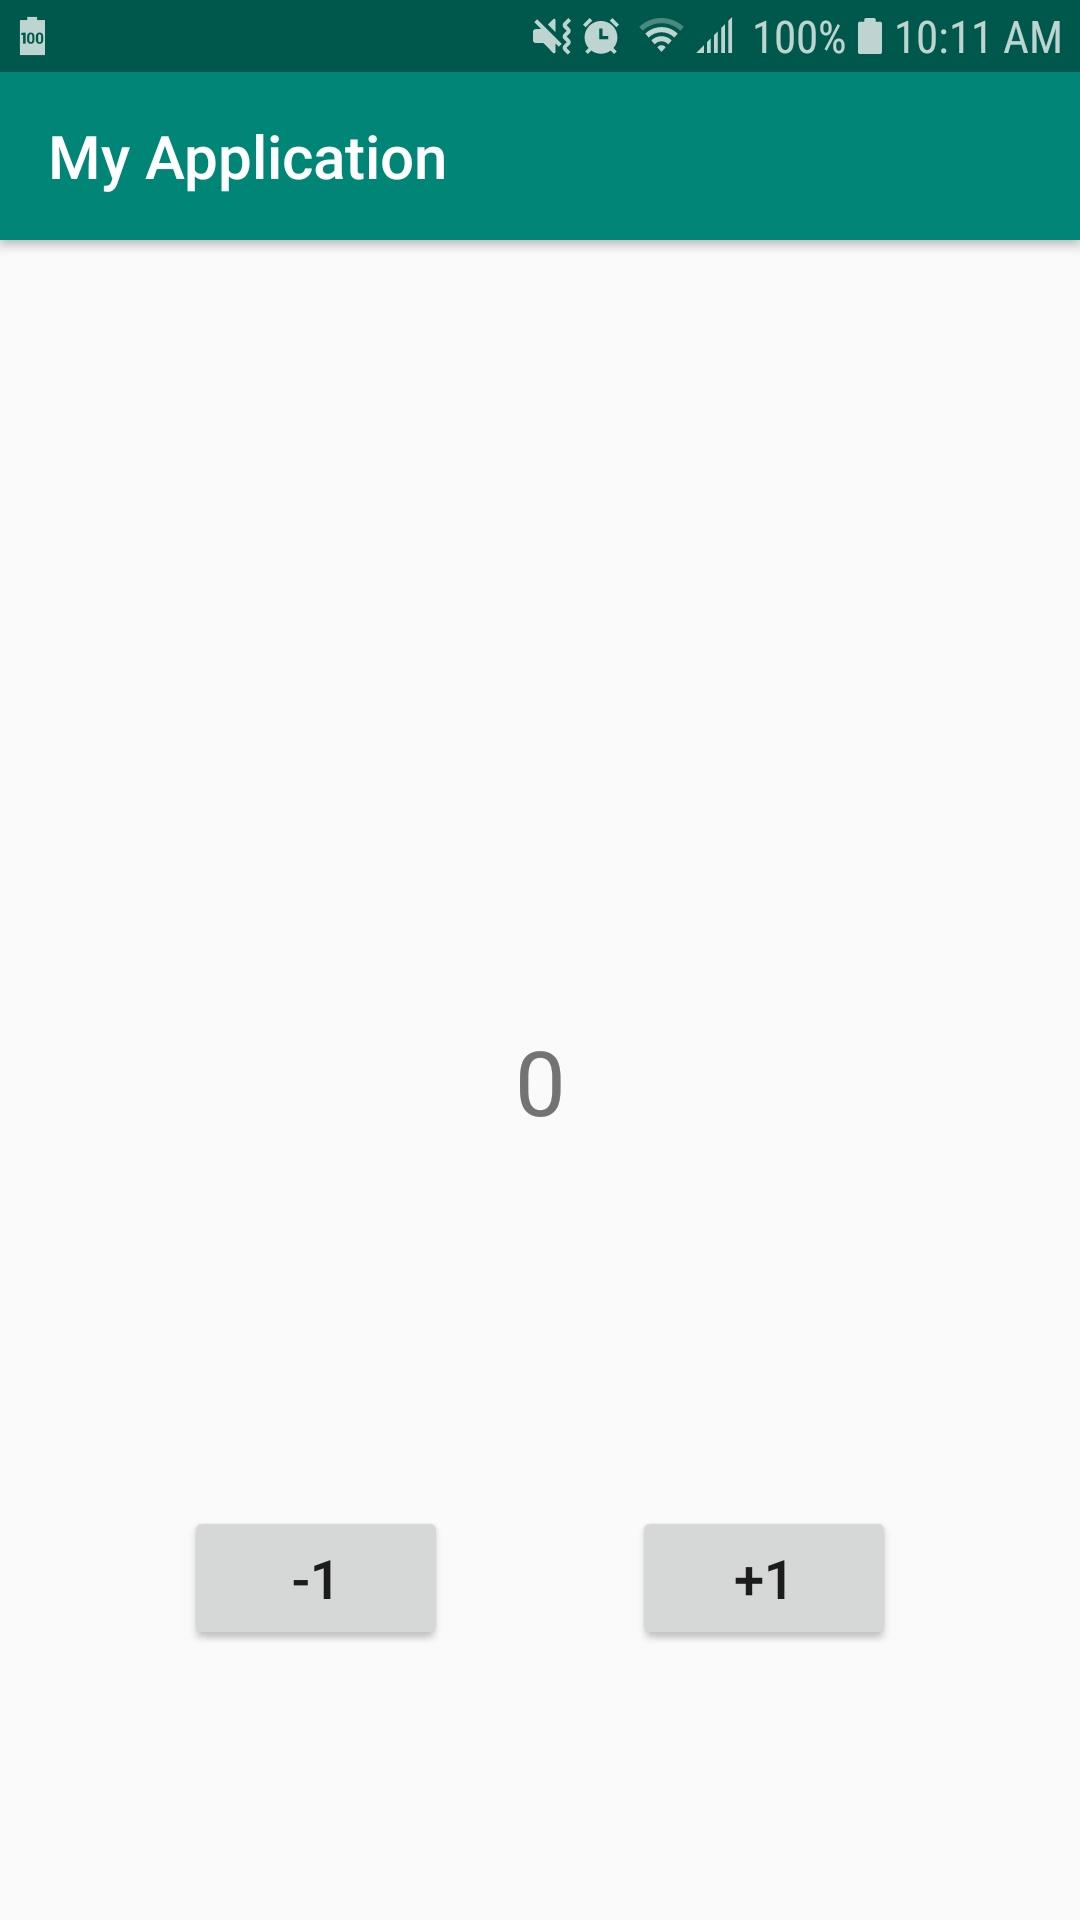
Để nâng cao trải nghiệm của người dùng, bạn cần phải xử lý trước và sau khi Configuration Change. Ví dụ: Ở màn hình sau:

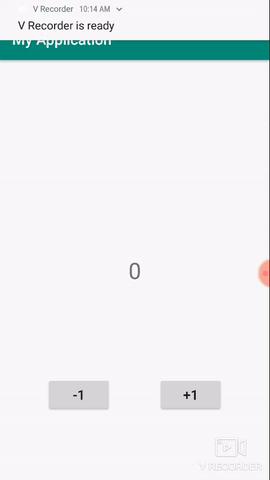
Khi bạn click vào +1 hay -1, giá trị chính giữa sẽ được tăng hoặc giảm 1 đơn vị. Nếu như chúng ta không xử lý, giá trị này sẽ bị đưa về giá trị ban đầu:

1. Cố định activity theo một hướng nhất định.
Nếu ứng dụng không cần thiết (hay cụ thể hơn là khách hàng, thầy giáo, cô giáo... không yêu cầu :v) thì bạn có thể cố định activity theo 1 hướng nhất đinh PORTRAIT(dọc) hoặc LANDSCAPE (ngang) Với cách này, bạn chỉ cần định nghĩa thuộc tính android:screenOrientation cho activity trong file Manifest. vd:
    <activity
        android:name="MainActivity"
        android:screenOrientation="portrait"/>
Như vậy bạn đã cài đặt activity chỉ xem ở chế độ màn hình dọc. Hướng của màn hình ứng dụng sẽ không bị xoay ngay cả khi người dùng bật chế độ xoay màn hình trên thiết bị
2. Xử lý qua vòng đời của Activity
Khi có Configuration Change, trước khi activity gọi onDestroy() thì hàm onSaveInstanceState() sẽ được gọi, hàm này có tham số 1 Bundle, bạn sẽ lưu lại dữ liệu của activity hiện tại vào trong Bundle này. Và sau khi onCreate() được gọi, activity sẽ gọi hàm onRestoreInstanceState(), hàm này cũng có tham số là 1 Bundle chứa các dữ liệu mà bạn đã lưu lại ở hàm onSaveInstanceState().
Ví dụ: activity_main.xml:
<layout>
    <androidx.constraintlayout.widget.ConstraintLayout xmlns:android="http://schemas.android.com/apk/res/android"
        xmlns:app="http://schemas.android.com/apk/res-auto"
        xmlns:tools="http://schemas.android.com/tools"
        android:layout_width="match_parent"
        android:layout_height="match_parent"
        tools:context=".MainActivity">

        <Button
            android:id="@+id/button_sub"
            android:layout_width="wrap_content"
            android:layout_height="wrap_content"
            android:text="-1"
            android:textSize="18sp"
            app:layout_constraintBottom_toBottomOf="parent"
            app:layout_constraintEnd_toStartOf="@+id/button_add"
            app:layout_constraintHorizontal_bias="0.5"
            app:layout_constraintStart_toStartOf="parent"
            app:layout_constraintTop_toBottomOf="@+id/text_number" />

        <TextView
            android:id="@+id/text_number"
            android:layout_width="wrap_content"
            android:layout_height="wrap_content"
            android:padding="32dp"
            android:text="0"
            android:textSize="30sp"
            app:layout_constraintBottom_toBottomOf="parent"
            app:layout_constraintEnd_toEndOf="parent"
            app:layout_constraintStart_toStartOf="parent"
            app:layout_constraintTop_toTopOf="parent" />

        <Button
            android:id="@+id/button_add"
            android:layout_width="wrap_content"
            android:layout_height="wrap_content"
            android:text="+1"
            android:textSize="18sp"
            app:layout_constraintBottom_toBottomOf="parent"
            app:layout_constraintEnd_toEndOf="parent"
            app:layout_constraintHorizontal_bias="0.5"
            app:layout_constraintStart_toEndOf="@+id/button_sub"
            app:layout_constraintTop_toBottomOf="@+id/text_number" />
    </androidx.constraintlayout.widget.ConstraintLayout>
</layout>
MainActivity.java
public class MainActivity extends AppCompatActivity implements OnClickListener {

    private static final String CURRENT_NUMBER = "CURRENT_NUMBER";

    private ActivityMainBinding mBinding;

    @Override
    protected void onCreate(Bundle savedInstanceState) {
        super.onCreate(savedInstanceState);
        mBinding = DataBindingUtil.setContentView(this, R.layout.activity_main);
        mBinding.buttonAdd.setOnClickListener(this);
        mBinding.buttonSub.setOnClickListener(this);
    }

    @Override
    public void onClick(final View v) {
        int currentValue = Integer.parseInt(mBinding.textNumber.getText().toString());
        switch (v.getId()){
            case R.id.button_add:
                currentValue++;
                break;
            case R.id.button_sub:
                currentValue--;
                break;
        }

        mBinding.textNumber.setText(String.valueOf(currentValue));
    }

    @Override
    protected void onSaveInstanceState(final Bundle outState) {
        super.onSaveInstanceState(outState);
        outState.putString(CURRENT_NUMBER, mBinding.textNumber.getText().toString());
    }

    @Override
    protected void onRestoreInstanceState(@NonNull final Bundle savedInstanceState) {
        super.onRestoreInstanceState(savedInstanceState);

        if (savedInstanceState == null){
            return;
        }

        String currentNumber = savedInstanceState.getString(CURRENT_NUMBER);
        mBinding.textNumber.setText(String.valueOf(currentNumber));
    }
}
Và đây là kết quả:

3. Sử dụng ViewModel.
ViewModel là 1 component được thiết kế để lưu trữ và quản lý các dữ liệu trong 1 lifecycle riêng. Nó cho phép dữ liệu được bảo toàn ngay cả khi Configuration Change xảy ra. Để hiểu sâu hơn về ViewModel, bạn hãy truy cập link sau: https://developer.android.com/topic/libraries/architecture/viewmodel. Ví dụ về sử dụng ViewModel: activity_main.xml
    <layout>

    <androidx.constraintlayout.widget.ConstraintLayout xmlns:android="http://schemas.android.com/apk/res/android"
        xmlns:app="http://schemas.android.com/apk/res-auto"
        xmlns:tools="http://schemas.android.com/tools"
        android:layout_width="match_parent"
        android:layout_height="match_parent"
        tools:context=".MainActivity">

        <Button
            android:id="@+id/button_sub"
            android:layout_width="wrap_content"
            android:layout_height="wrap_content"
            android:text="-1"
            android:textSize="18sp"
            app:layout_constraintBottom_toBottomOf="parent"
            app:layout_constraintEnd_toStartOf="@+id/button_add"
            app:layout_constraintHorizontal_bias="0.5"
            app:layout_constraintStart_toStartOf="parent"
            app:layout_constraintTop_toBottomOf="@+id/text_number" />

        <TextView
            android:id="@+id/text_number"
            android:layout_width="wrap_content"
            android:layout_height="wrap_content"
            android:padding="32dp"
            android:text="0"
            android:textSize="30sp"
            app:layout_constraintBottom_toBottomOf="parent"
            app:layout_constraintEnd_toEndOf="parent"
            app:layout_constraintStart_toStartOf="parent"
            app:layout_constraintTop_toTopOf="parent" />

        <Button
            android:id="@+id/button_add"
            android:layout_width="wrap_content"
            android:layout_height="wrap_content"
            android:text="+1"
            android:textSize="18sp"
            app:layout_constraintBottom_toBottomOf="parent"
            app:layout_constraintEnd_toEndOf="parent"
            app:layout_constraintHorizontal_bias="0.5"
            app:layout_constraintStart_toEndOf="@+id/button_sub"
            app:layout_constraintTop_toBottomOf="@+id/text_number" />
    </androidx.constraintlayout.widget.ConstraintLayout>
</layout>
MainViewModel.java
public class MainViewModel extends ViewModel {
    private int mCurrentNumber = 0;

    public int getCurrentNumber() {
        return mCurrentNumber;
    }

    public void setCurrentNumber(final int currentNumber) {
        mCurrentNumber = currentNumber;
    }
}
MainActivity.java
public class MainActivity extends AppCompatActivity implements OnClickListener {

    private static final String CURRENT_NUMBER = "CURRENT_NUMBER";

    private ActivityMainBinding mBinding;
    private MainViewModel mViewModel;

    @Override
    protected void onCreate(Bundle savedInstanceState) {
        super.onCreate(savedInstanceState);
        mBinding = DataBindingUtil.setContentView(this, R.layout.activity_main);
        mViewModel = ViewModelProviders.of(this).get(MainViewModel.class);
        mBinding.textNumber.setText(String.valueOf(mViewModel.getCurrentNumber()));
        mBinding.buttonAdd.setOnClickListener(this);
        mBinding.buttonSub.setOnClickListener(this);
    }

    @Override
    public void onClick(final View v) {
        int currentValue = mViewModel.getCurrentNumber();
        switch (v.getId()){
            case R.id.button_add:
                currentValue++;
                break;
            case R.id.button_sub:
                currentValue--;
                break;
        }
        mViewModel.setCurrentNumber(currentValue);
        mBinding.textNumber.setText(String.valueOf(currentValue));
    }
Kết quả cũng tương tự khi xử lý theo vòng đời của Activity.
4. Tự mình xử lý Configuration Change
Nếu Activity không cần cập nhật lại resource (UI màn hình dọc và ngang có cấu trúc khác nhau) hoặc bạn không muốn việc khởi tạo lại Activity xảy ra. Để có thể tự xử lý Configuration Change, bạn hãy khai báo thuộc tính android:configChanges cho Activity trong Manifest với một giá trị có chức năng biểu diễn cấu hình mà bạn muốn xử lý (thường được sử dụng là "orientation" để ngăn khởi động lại activity khi hướng thay đổi, các tham số khác bạn có thể xem tại đây)
Khi được khai báo tự xử lý Configuration Change, mỗi khi có sự thay đổi, Activity sẽ gọi hàm onConfiguationChanged() và bạn có thể cập nhật một số tài nguyên thay đổi trong hàm này (ví dụ như ngôn ngữ).
Lưu ý: Kể từ API 13, kích thước màn hình cũng thay đổi khi có Configuration Change, vì vậy bạn cần phải thêm cả giá trị screenSize vào thuộc tính android:configChanges.
Ví dụ: Trong ứng dụng mà bạn đang cần load các dữ liệu từ server, Nếu theo như cách thông thường, Activity sẽ khởi tạo lại và gọi lại hàm load dữ liệu của bạn khi Configuration Change xảy ra. Điều này có vẻ không tốt đúng không? Trong trường hợp này bạn nên khai báo tự mình xử lý và Activity không cần khởi tạo lại nữa và dữ liệu cũng không bị load lại và bạn sẽ xử lý một số cập nhật trong hàm onConfigurationChanged() (ví dụ như chuyển từ hiển thị danh sách dữ liệu từ 1 cột sang 2 cột và ngược lại. Nếu như không cần cập nhật gì, bạn không cần override lại hàm onConfigurationChange(). Vẫn với ví dụ trên, bạn hãy thêm 1 thuộc tính cho MainActivity trong file Manifest
<manifest package="com.example.myapplication"
    xmlns:android="http://schemas.android.com/apk/res/android">

    <application
        android:allowBackup="true"
        android:icon="@mipmap/ic_launcher"
        android:label="@string/app_name"
        android:roundIcon="@mipmap/ic_launcher_round"
        android:supportsRtl="true"
        android:theme="@style/AppTheme">
        <activity
            android:name=".MainActivity"
            android:configChanges="orientation|screenSize">
            <intent-filter>
                <action android:name="android.intent.action.MAIN" />

                <category android:name="android.intent.category.LAUNCHER" />
            </intent-filter>
        </activity>
    </application>

</manifest>
Khi đó, MainActivity sẽ không khởi tạo lại khi hướng màn hình thay đổi, vì vậy trong MainActivity.java bạn không cần thực hiện bất cứ điều gì.
All rights reserved